Understanding the Physics Behind the Project
Before we start building, we must understand the science. A mousetrap car is a perfect example of energy transformation. It starts with potential energy. This energy is stored in the spring of the mousetrap. When you set the trap, you wind a string around an axle. This creates tension. Consequently, the spring wants to return to its resting state. When you release the trap, the spring snaps shut. This action pulls the string. The string then spins the axle. Therefore, the wheels turn.
- Potential Energy: This is stored energy. The mousetrap spring holds this energy when loaded. It waits to be released.
- Kinetic Energy: This is the energy of motion. When the trap snaps, potential energy becomes kinetic energy. The car moves forward.
- Friction: This is the enemy of motion. Friction occurs between the wheels and the floor. It also happens between the axle and the car body. You must reduce friction to make the car go far.
- Torque: This is a rotational force. The lever arm pulls the string. This creates torque on the axle. Torque turns the wheels.
Furthermore, Newton’s Third Law applies here. For every action, there is an equal and opposite reaction. The spring moves one way. The car moves the other way. Understanding these concepts makes the building process easier. You will know why certain designs work better. Consequently, you can make adjustments based on science. This educational aspect makes the project valuable. It turns a craft activity into a physics lesson. Therefore, take time to explain these ideas to your kids. It enriches the experience significantly.
Gathering the Necessary Materials
The first step in how to make a mousetrap car is gathering materials. You do not need expensive kits. Most items are readily available. First, you need a standard mousetrap. Do not use a rat trap; it is too powerful. It can be dangerous for children. Next, you need a base. Balsa wood or light plywood works best. It should be lightweight but sturdy. Heavier cars require more energy to move. Therefore, choose light materials.
- The Power Source: One standard mousetrap.
- The Frame: Balsa wood, foam board, or light pine. It acts as the chassis.
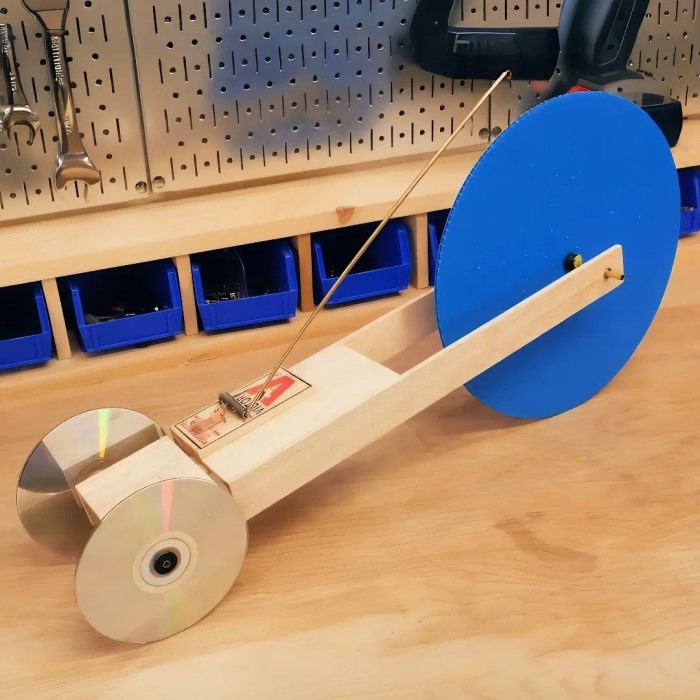
- The Wheels: You can use CDs, DVDs, or vinyl records. Alternatively, you can cut circles from cardboard or foam board. Larger wheels cover more distance per rotation.
- The Axles: Wooden dowels or metal coat hangers work well. They must be straight. They should spin freely.
- The Lever Arm: A wooden paint stirrer or a sturdy piece of plastic. This extends the reach of the trap’s arm.
- String: Fishing line or strong thread. It connects the lever arm to the axle.
- Tools: You will need a hot glue gun, a drill, and a saw. Safety glasses are also recommended.
Additionally, you need lubricant. Graphite powder or vegetable oil reduces friction. You will also need rubber bands or balloons. These provide traction for the wheels. Without traction, the wheels will spin in place. Consequently, the car will not move. Make a checklist before you start. It saves time later. Having everything prepared makes the assembly process smooth. Therefore, spend a day collecting these items. It is a crucial part of the preparation.
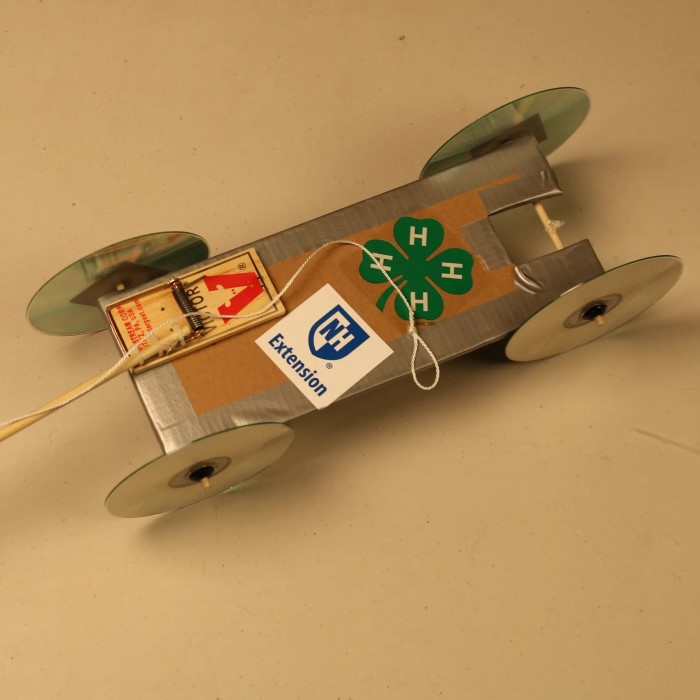
Constructing the Chassis and Axle Assembly
The chassis is the backbone of your car. It holds everything together. First, take your chosen base material. If you are using wood, sand the edges. This prevents splinters. Then, you need to attach the axles. The axles must be parallel to each other. If they are crooked, the car will turn. It will not drive straight. Therefore, measure carefully.
- Mounting the Trap: Screw the mousetrap onto the chassis. It should be near the front. Leave space for the lever arm to move. Ensure it is securely fastened.
- Axle Holders: You can use eye hooks or drinking straws. Eye hooks hold the axle above the frame. Straws allow the axle to slide through. Glue these supports firmly to the bottom of the chassis.
- Wheel Alignment: Slide the axles through the holders. Check for clearance. The wheels should not rub against the chassis. They must spin freely. If they stick, sand them down.
- Front vs. Rear Drive: Decide which wheels are the drive wheels. Usually, the rear wheels are driven by the string. This provides better traction.
Furthermore, stability is key. The chassis should not bend or twist. A rigid frame ensures the energy transfers efficiently. If the frame flexes, you lose power. Consequently, the car slows down. Test the axles by spinning them. They should rotate easily without wobbling. If you use metal axles, smooth them with sandpaper. This reduces friction at the contact points. Consequently, your car will travel further. This step requires patience. Precision here leads to success on the track.
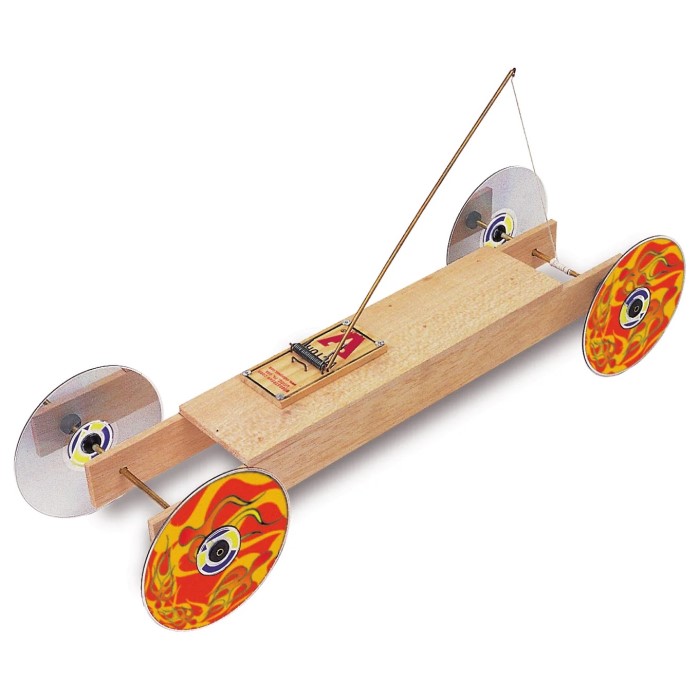
Attaching the Lever Arm and String
This is the most critical mechanism. The lever arm extends the trap’s power. A longer lever arm pulls more string. This turns the axle more times. Consequently, the car travels further. However, a longer arm also pulls with less force. You must find a balance. To attach the lever arm, use zip ties or strong tape. Secure it to the trap’s existing bar. You can also glue it for extra strength.
- Extending the Arm: Use a paint stirrer. Drill a small hole at the end. This is where the string attaches. The arm should sweep through the air cleanly.
- String Attachment: Tie one end of the string to the hole in the lever arm. Tie the other end to the drive axle. Some people use a paper clip on the axle. This provides a hook for the string.
- Winding: Wind the string around the axle. This pulls the lever arm back. The trap is now set. Do not overwind it. You might break the string.
- Release Mechanism: When you release the trap, the arm snaps forward. It pulls the string. The string spins the axle. This motion drives the car.
Moreover, the length of the string matters. It acts as a fuse. Once the string runs out, the car coasts. If the string is too long, it might tangle. If it is too short, the car stops abruptly. Therefore, experiment with different lengths. The string should be thin and strong. Fishing line works great because it does not stretch. Elastic string reduces efficiency. Consequently, avoid elastic materials. This mechanical advantage is what powers the vehicle. It is a simple machine in action. Understanding this linkage teaches mechanical engineering basics.
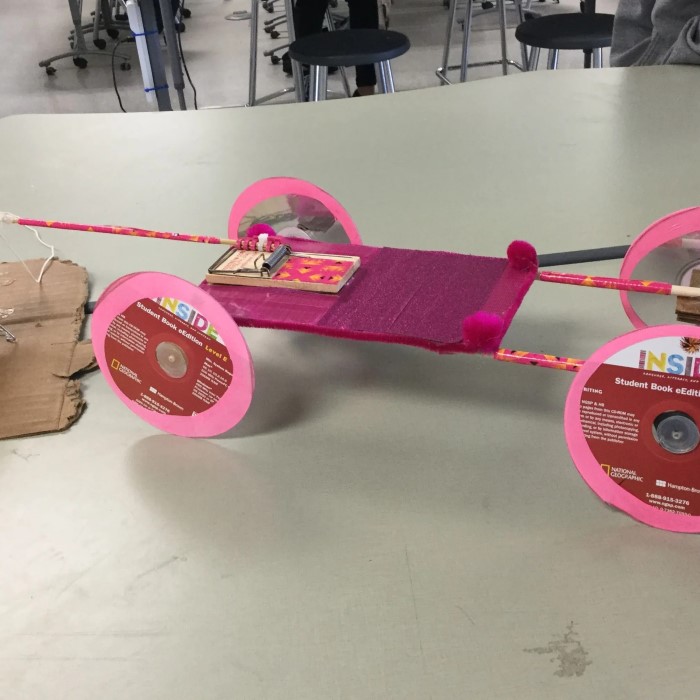
Wheel and Traction Optimization
Wheels define the performance of your vehicle. In how to make a mousetrap car, wheel choice is vital. Large wheels are great for distance. They cover more ground per rotation. Small wheels are better for speed. They spin faster but cover less distance. CDs are a popular choice. They are lightweight and readily available. However, they are slippery. Consequently, they need traction.
- Adding Traction: Wrap rubber bands around the edge of the CDs. You can also cut the neck off a balloon. Stretch it over the CD. This creates a rubber tire. It grips the floor.
- Weight Distribution: Heavier wheels are harder to start. They have more rotational inertia. Therefore, keep the wheels light. Avoid using heavy wood or metal for wheels.
- Alignment: The wheels must be perfectly straight. If they wobble, they create friction. This slows the car. Glue the wheels to the axle securely. Ensure they are perpendicular to the axle.
- Axle-to-Wheel Connection: The wheel must turn with the axle. If the wheel slips on the axle, you lose power. Use a strong adhesive like hot glue or epoxy.
Furthermore, consider the surface. A smooth floor requires less traction. A rough carpet requires more. You might need different tires for different surfaces. Therefore, test your car in the environment where it will run. Watch how the wheels behave. If they spin without moving the car, add more traction. If the car struggles to start, the wheels might be too heavy. Adjustments are part of the process. Fine-tuning the wheels can make a huge difference. It often separates the winning cars from the rest.
Troubleshooting Common Issues
Things rarely work perfectly on the first try. This is normal in engineering. You might encounter several problems. One common issue is the car not moving. This usually means the wheels are slipping. Or, there is too much friction. First, check the string. Is it pulling the axle correctly? Is it getting stuck? If so, adjust the alignment.
- The Car Pulls to One Side: This is an alignment issue. Check the axles. Are they parallel? If one wheel is angled, the car turns. Re-glue the axle holders. Make sure the chassis is straight.
- The Car Jumps: The release might be too violent. The trap snaps too fast. This causes the wheels to hop. Try adding weight to the car. This keeps it grounded. You can also shorten the lever arm slightly. This reduces the speed of the snap.
- The String Snaps: Your string is too weak. Or the knot is too tight. Use a stronger string. Reinforce the attachment points. A smooth winding path prevents stress points.
- The Car Stops Quickly: This is a friction problem. Check where the axle rubs against the chassis. Lubricate these points. Ensure the wheels spin freely by hand.
Moreover, patience is essential. Troubleshooting teaches problem-solving skills. Encourage your child to guess the problem. Then, test their hypothesis. This is the scientific method in action. For example, “I think the wheels are slipping.” Then, add rubber bands. Did it help? This iterative process is valuable. It builds resilience. It also makes the final success sweeter. Therefore, do not get discouraged by failure. It is just a step towards success.
Advanced Modifications for Speed and Distance
Once you master the basic design, try upgrades. You can optimize for speed or distance. A car built for distance has large wheels. It also has a long lever arm. It releases energy slowly. This allows it to crawl across the floor. Conversely, a car built for speed has small wheels. It has a short, powerful lever arm. It releases energy quickly. This launches the car forward fast.
- Gearing Ratio: You can simulate gears using different axle diameters. A thicker axle pulls more string per rotation. This changes the torque ratio.
- Multiple Traps: Some advanced designs use two mousetraps. This doubles the potential energy. However, it also doubles the weight. You must balance the power-to-weight ratio.
- Aerodynamics: While not crucial for slow cars, it matters for speed. A sleek body cuts through the air. Remove unnecessary parts. Streamline the chassis.
- Bearing Systems: Use drinking straws as bearings. They reduce friction significantly compared to wood. The axle spins inside the straw.
Furthermore, think about weight placement. Put the weight over the drive wheels. This increases traction. It prevents wheel spin. These advanced tips take your project to the next level. They are great for science competitions. Judges look for understanding of these principles. Therefore, discuss why you made certain changes. Explain the trade-offs. For instance, a faster car might not go as far. A car that goes far might be slow. These choices define the engineering process. It is a fun way to explore physics deeper.
The Educational Value of STEM Projects
Building a mousetrap car is more than a hobby. It is a powerful educational tool. It integrates Science, Technology, Engineering, and Math (STEM). Kids learn by doing. They see abstract concepts become reality. For example, they calculate circumference. They measure distance. They estimate force. These are practical math skills.
- Critical Thinking: Kids must solve problems. Why did it break? How do I fix it? This sharpens their mind.
- Creativity: Designing the car allows for artistic expression. They can paint the chassis. They can choose unique materials.
- Collaboration: This is a great group activity. Kids work together. They share ideas. They learn teamwork.
- Confidence: Seeing the car run is a huge confidence booster. They built something that works. This encourages them to tackle harder projects.
Moreover, in 2026, hands-on skills are vital. We live in a digital world. Physical projects ground us in reality. They teach us how things work mechanically. Consequently, children become better innovators. They understand the physical constraints of the world. This project is affordable and accessible. It levels the playing field. Every child can participate. Therefore, it is a favorite among teachers and parents.
FAQ: Your Questions Answered
What do I need to make a mousetrap car?
You need a mousetrap, a light frame (balsa wood), four wheels (CDs or cardboard), two axles (dowel rods), string, and glue. These basic items are enough to build a functioning vehicle.
Is 3 or 4 wheels better for a mousetrap car?
Four wheels offer better stability. They balance the car evenly. Three wheels can work, but they are harder to balance. Most successful designs use four wheels for straight tracking.
How to make a mousetrap car go really far?
Use large diameter wheels for distance. Extend the lever arm to pull more string. Reduce friction everywhere. Make the car lightweight. These changes maximize the energy efficiency.
How much string is needed for a mousetrap car?
The string should be long enough to wrap around the axle multiple times. Usually, about 12 to 18 inches is sufficient. It should fully extend the lever arm when the car starts.
Conclusion
Learning how to make a mousetrap car is a rewarding journey. It blends physics, engineering, and creativity. We have covered the materials needed. We have discussed the physics of energy conversion. Furthermore, we have explored construction and troubleshooting steps. This project is perfect for kids in 2026. It fosters critical thinking and problem-solving skills. It is affordable, educational, and incredibly fun. Whether you build it for a science fair or a rainy day activity, the lessons learned are invaluable. So, gather your materials. Clear a workspace. Start building today. Watch science come to life right in your living room. Enjoy the process of discovery and innovation.