Engaging children in educational play is a priority for many parents. Consequently, finding projects that are both fun and instructive is essential. A homemade catapult serves as a perfect example of this blend. It combines engineering, physics, and outdoor excitement seamlessly. In 2026, the focus on STEM education continues to grow. Therefore, building a homemade catapult offers a hands-on learning experience. Children not only learn about levers and force but also enjoy the thrill of launching objects. This activity suits various age groups effectively. Furthermore, it encourages creativity and problem-solving skills. You can build these devices from simple household items. Thus, it is an accessible project for everyone. This article explores the benefits, construction methods, and exciting challenges associated with catapults. Get ready to launch into a world of educational fun.
The Science Behind the Launch: Understanding Physics
A catapult is not just a toy; it is a physics lesson in action. Therefore, understanding the science behind it enhances the experience. At its core, a catapult demonstrates energy conversion. It converts stored potential energy into kinetic energy. This process happens rapidly. When you pull back the arm of the catapult, you store potential energy. This energy comes from the tension in the rubber band or the bending of the material. Consequently, the object sits ready for launch. Once you release the arm, the stored energy transfers to the projectile. This is kinetic energy. The projectile flies through the air.
Furthermore, several key concepts govern the flight. Gravity acts on the projectile immediately. It pulls the object toward the ground. Additionally, air resistance plays a role. It slows the object down. Therefore, the shape and weight of the projectile matter. Heavier objects might travel shorter distances but hit harder. Conversely, lighter objects might fly further but lose momentum quickly. You can discuss trajectory with your children as well. The launch angle determines the distance. A 45-degree angle usually yields the longest throw. Therefore, experimenting with angles is crucial. This turns play into a scientific experiment. You can measure distances and record results. Thus, children learn the scientific method naturally. They observe, hypothesize, test, and conclude. This practical application solidifies abstract concepts.
Gathering Materials: Simple Items for Big Fun
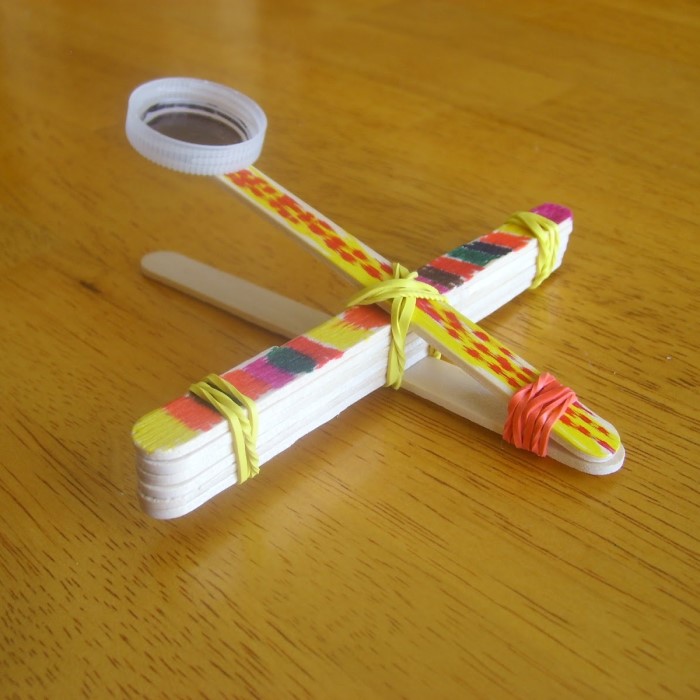
Building a catapult does not require expensive equipment. In fact, you likely have the necessary materials at home. Therefore, this project is budget-friendly. The most popular materials are craft sticks and rubber bands. These items form the base structure. Craft sticks provide the frame. They are sturdy enough to withstand tension. Additionally, rubber bands provide the necessary force. They are flexible and easy to replace. You will also need a spoon or a small cup. This acts as the launching basket. Furthermore, glue or tape helps secure the structure.
Moreover, you can explore recyclable materials. Cardboard tubes from paper towels work well. They serve as excellent fulcrums. Old plastic spoons can replace wooden ones. This promotes recycling. Consequently, you teach children about sustainability. You can also use plastic bottles or mousetraps for more advanced designs. The key is to be resourceful. Look around your house for inspiration. However, ensure the materials are safe. Avoid sharp edges or toxic glues. Safety is always paramount. Therefore, choose materials that are easy to handle. Scissors should be child-safe. If you need to cut wood, an adult should perform the task. Gathering materials is the first step of the engineering process. It teaches preparation and planning.
Step-by-Step Construction: Building a Basic Model
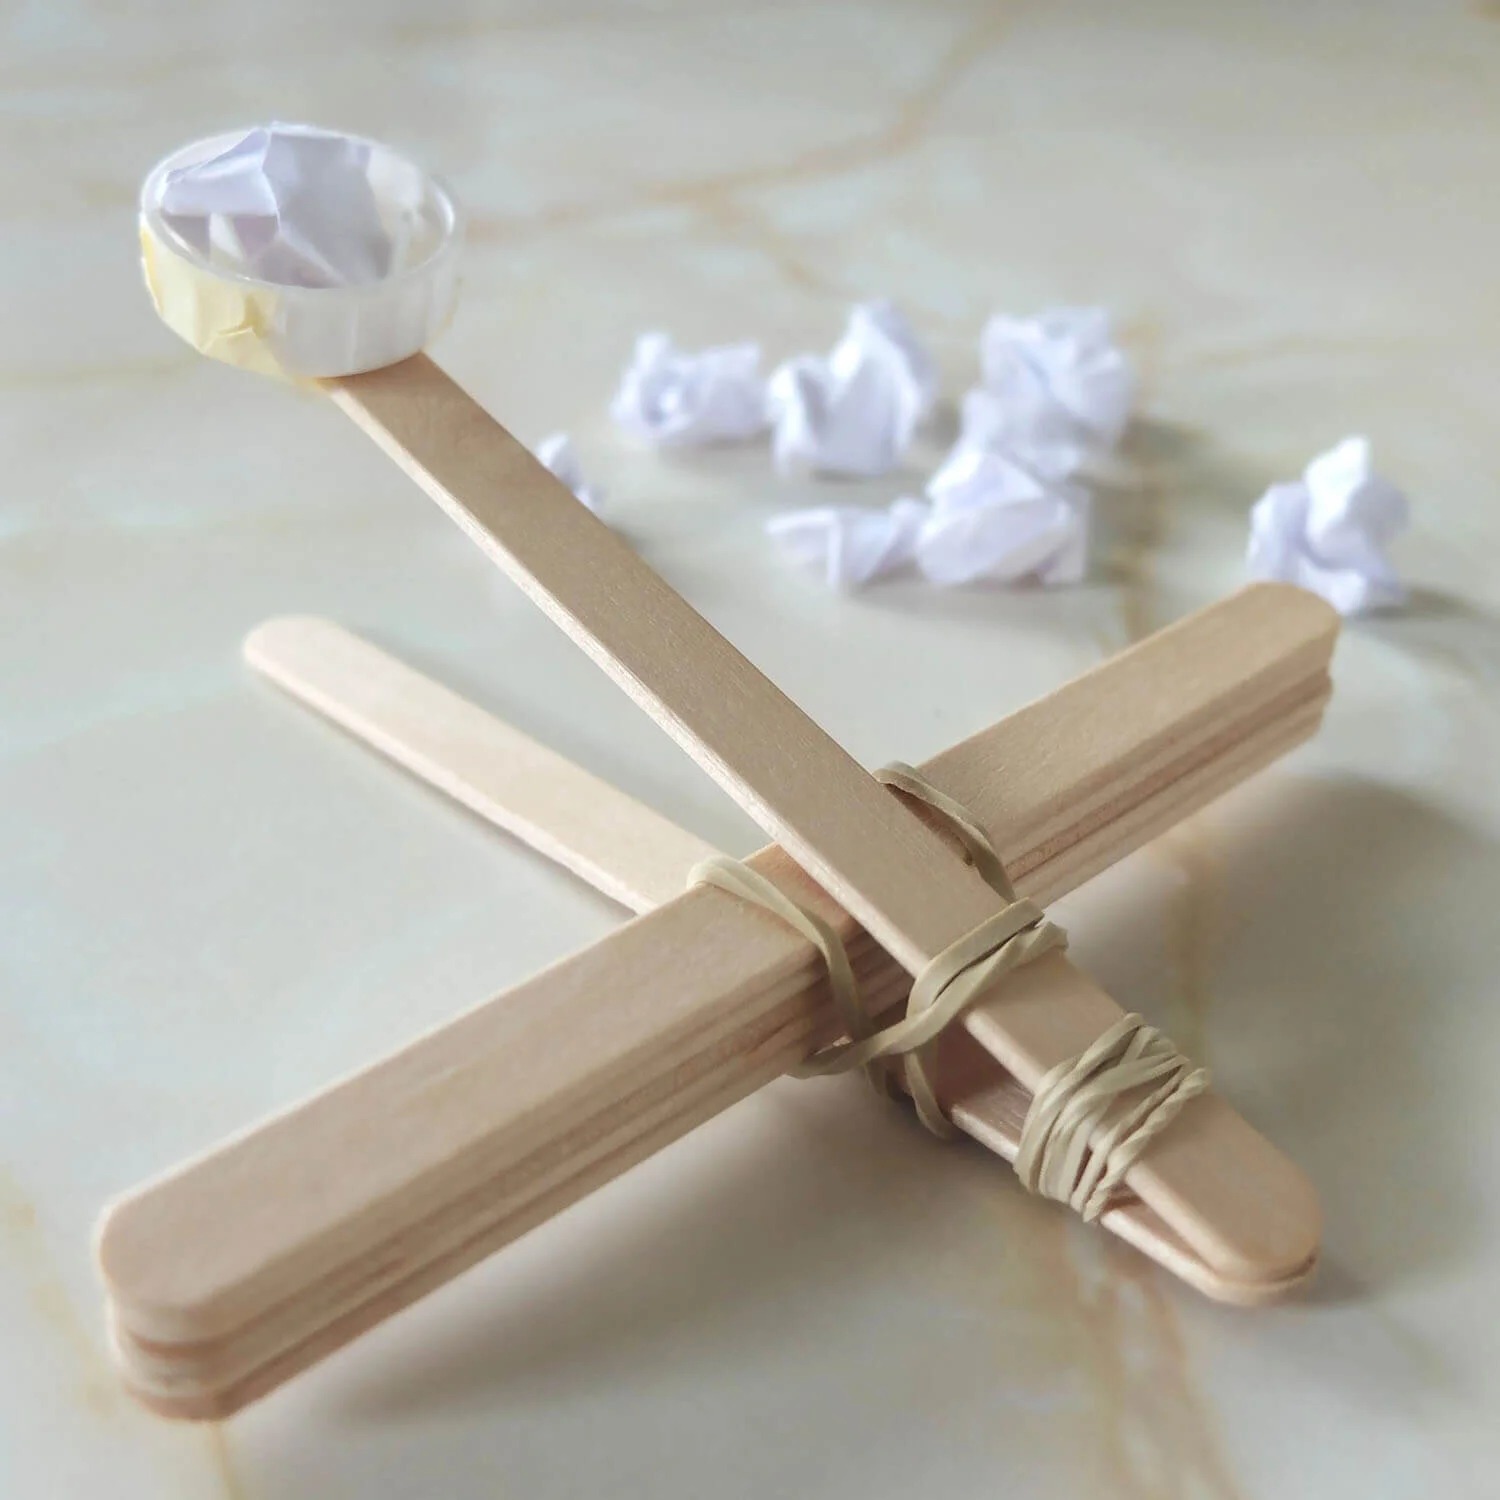
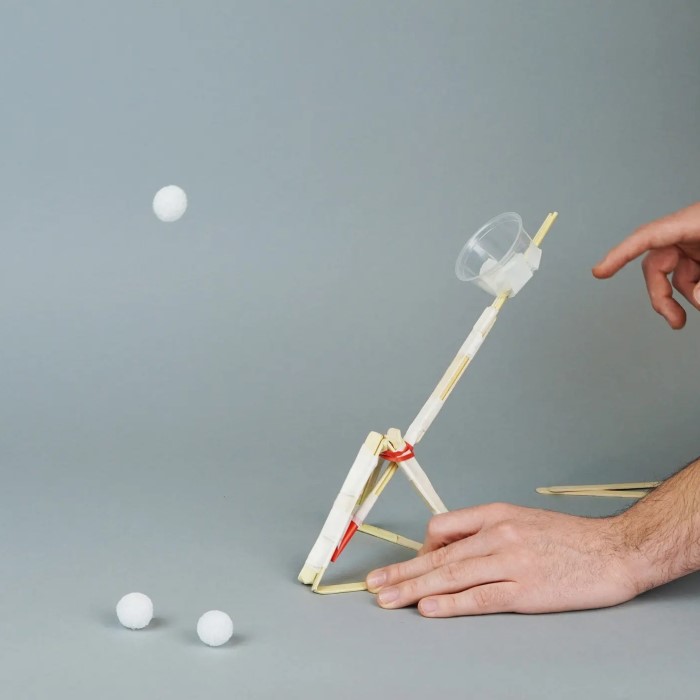
The construction process is where the magic happens. You should start with a simple design. This ensures early success. First, create the base. Take about eight craft sticks. Stack them on top of each other. Then, wrap rubber bands around both ends. This creates a sturdy block. This block serves as the fulcrum. Consequently, the lever arm will rest on this.
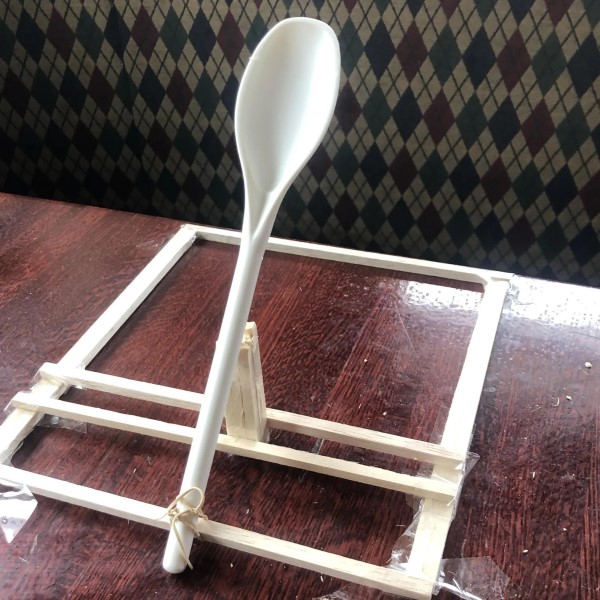
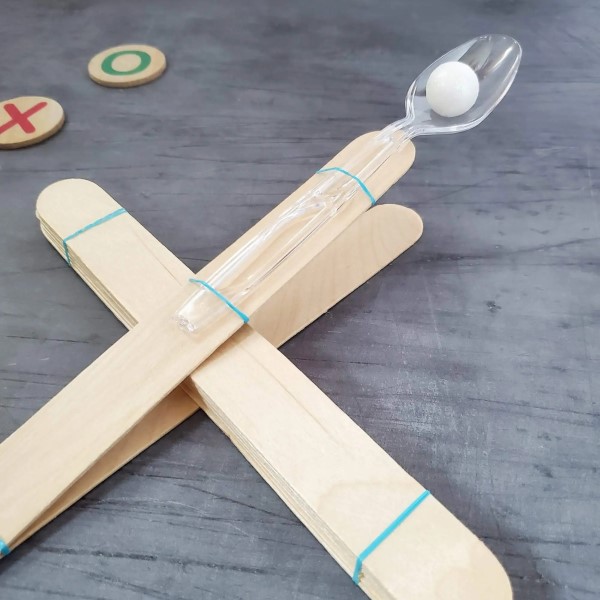
Next, take two more craft sticks. Stack them together. Wrap a rubber band around one end. Make it tight. This forms the lever arm. It needs to be flexible. Insert the stack of eight sticks between these two sticks. Push it close to the rubber band. This creates a hinge. Now, attach the spoon. Place the spoon handle along the top stick of the lever arm. Secure it with rubber bands. Ensure the scoop faces upward. It will hold the projectile. Finally, you need a firing mechanism. Wrap a rubber band around the base. Then, pull it over the top of the spoon handle. This creates the tension needed to launch. Your catapult is now ready. Test it gently. Adjust the rubber bands if necessary. This basic model is easy to modify. Therefore, children can improve upon it.
Safety First: Guidelines for Responsible Play
Safety must remain a top priority during these activities. Catapults launch objects at speed. Consequently, they can cause injury if misused. You must establish clear rules before starting. First, never aim the catapult at a person or animal. This is the most important rule. An accidental hit can damage an eye. Therefore, safety glasses are highly recommended. They protect the eyes from ricochets. Second, choose the projectiles wisely. Use soft items like marshmallows or pom-poms. These are less likely to cause harm. Avoid using rocks or marbles.
Furthermore, define a safe launch zone. Clear the area of obstacles. Ensure bystanders stand behind the operator. This prevents accidental hits. Additionally, inspect the catapult before use. Check for loose parts. A snapping rubber band can sting. Therefore, replace worn bands immediately. Adults should supervise the construction and play. This ensures children follow the rules. If you use a mousetrap catapult, be extra careful. The spring is powerful. It can pinch fingers. Therefore, guide younger children closely. Teaching safety is part of the educational process. It instills responsibility. Children learn to respect tools and boundaries. Thus, they can enjoy the activity without risks.
Exciting Challenges and Games for Kids
Once the catapult is built, the real fun begins. You can organize various challenges. These activities keep children engaged. Furthermore, they add a competitive element. A popular challenge is the “Distance Derby.” Mark lines on the ground with tape. See who can launch a projectile the farthest. Consequently, children will tweak their designs. They will want more power. Another fun game is “Target Practice.” Set up empty cans or cups. Players earn points for knocking them down. This tests accuracy. It is not just about power.
Moreover, you can organize “Siege the Castle.” Build a tower of blocks or boxes. The goal is to knock it down. This requires strategy. Players must aim carefully. You can also incorporate math skills. Measure the distance of each shot. Create a graph of the results. This integrates math into physical play. Additionally, try a “Golf Course.” Set up hoops or buckets around the yard. Players must land their projectile in the target. Count the number of shots. The lowest score wins. These games encourage social interaction. Children learn to take turns. They learn to win and lose gracefully. Therefore, the benefits extend beyond engineering. It builds character and sportsmanship.
Troubleshooting Common Performance Issues
Sometimes, the catapult will not work as planned. This is a normal part of engineering. Therefore, do not get discouraged. Instead, use it as a learning opportunity. A common issue is a lack of power. The projectile might fall short. This usually results from weak tension. Try using thicker rubber bands. Or double up the bands. Consequently, the tension increases. Another issue is instability. The homemade catapult might tip over during launch. This ruins the shot. To fix this, secure the base. Tape it to a table or the floor. A stable base is crucial for accuracy.
Furthermore, the projectile might fly erratically. It could veer to the left or right. This suggests the arm is twisting. Check the hinges. Ensure the arm moves smoothly in a straight line. The spoon might also be misaligned. Adjust it until it points straight. Sometimes, the projectile falls out too early. This means the basket is too shallow. Or the launch angle is too steep. Experiment with the angle. You can adjust the fulcrum position. Move it closer to the arm to change the trajectory. These adjustments require patience. Children learn through trial and error. They develop problem-solving skills. They learn that failure is just a step toward success. Thus, troubleshooting is a valuable educational phase.
Exploring Different Types of Catapults
The basic craft stick model is just the beginning. There are several other types to explore. Each type uses a different mechanism. Consequently, they offer unique challenges. The trebuchet is a famous medieval design. It uses a counterweight instead of rubber bands. This allows for heavier projectiles. Building a trebuchet requires more materials. You need a long arm and a heavy weight. It demonstrates leverage effectively. Another type is the mangonel. This design uses twisted ropes for tension. It was common in ancient Rome. It is more complex to build.
Additionally, the ballista resembles a large crossbow. It shoots bolts or arrows. It works through torsion. You can make a mini-ballista with pencils and rubber bands. Exploring these different designs teaches history. You can discuss how ancient armies used these machines. They were tools of war. Today, we use them for fun and learning. Therefore, the context changes. However, the mechanics remain fascinating. You can challenge older children to research these types. Then, they can try to replicate them. This encourages independent learning. It also connects engineering with history. Each design has its pros and cons. Comparing them deepens the understanding of mechanical advantage. It shows that there are many solutions to one problem.
The Educational Benefits of Hands-On Engineering
Building a homemade catapult offers profound educational benefits. It goes beyond simple physics. This activity fosters a growth mindset. Children start with a pile of sticks. Then, they create a functional machine. This process builds confidence. They realize they can build things. Consequently, they become makers rather than just consumers. Furthermore, the activity enhances fine motor skills. Tying rubber bands and gluing small parts require precision. These actions strengthen hand muscles. They improve hand-eye coordination.
Moreover, this project encourages critical thinking. Children must analyze why a design fails. They must hypothesize solutions. Then, they must implement changes. This cycle is the foundation of engineering. It applies to all problem-solving. Additionally, it promotes teamwork. If children work in groups, they must communicate. They share ideas and negotiate roles. This builds social skills. The STEM concepts learned are invaluable. Physics and math become tangible. They are no longer abstract numbers on a page. Therefore, the knowledge sticks. Children retain information better when they apply it. Hands-on learning is effective. It engages multiple senses. It turns a lesson into an adventure. This creates lifelong learners.
FAQ
What are the 4 types of catapults?
The four main types are the trebuchet, mangonel, onager, and ballista. The trebuchet uses a counterweight. The mangonel and onager use torsion or twisted ropes. The ballista functions like a large crossbow. Each design served different military purposes in history.
How does a homemade catapult work?
A homemade catapult works by storing energy. When you pull back the arm, you stretch a rubber band. This creates potential energy. Releasing the arm allows the energy to snap back. This motion transfers kinetic energy to the projectile. Gravity then takes over the flight path.
How to make a catapult with 2 popsicle sticks?
You need a lever arm and a fulcrum. Stack several sticks for the base fulcrum. Use two sticks for the arm. Wedge the fulcrum between them. Add a spoon for the basket. Use rubber bands to hold everything together. This creates a simple but effective lever mechanism.
What simple machines make a catapult?
A catapult typically uses two simple machines. The first is a lever. The arm of the catapult is a lever. It pivots on a fulcrum. The second is a wheel and axle in some designs. However, the lever is the primary component. It multiplies the force applied by the user.
Conclusion
The journey of building a homemade catapult is rewarding. It provides endless entertainment and education. From gathering materials to launching projectiles, every step teaches valuable lessons. Children learn physics, engineering, and safety. Furthermore, they develop patience and problem-solving skills. A homemade catapult is more than a toy. It is a gateway to understanding the world. It sparks curiosity about mechanics. Therefore, gather your craft sticks and rubber bands today. Embark on this exciting project with your family. You will create memories that last a lifetime. The sky is the limit for your imagination.


