Creating a character from scratch is a magical experience. It allows you to bring inanimate objects to life. Consequently, many hobbyists are searching for the best methods on how to make a puppet. The art of puppetry has evolved significantly over the years. In 2026, technology and traditional craftsmanship blend seamlessly. You do not need to be a professional to start. Beginners can easily learn DIY puppet tutorial basics. Furthermore, understanding puppet making materials is essential for success. This guide will explore everything from simple hand puppets to complex designs. We will discuss hand puppet patterns and construction techniques. Therefore, get your scissors and glue ready. You are about to embark on a creative journey. Ultimately, a handmade puppet offers endless possibilities for expression and storytelling. This article serves as your ultimate puppet building guide for the modern era.

The Essential Materials for Your Puppet Project
How to make a puppet? Every great project begins with the right supplies. Therefore, gathering your materials is the first logical step. You cannot build a durable puppet with flimsy supplies. Consequently, you must choose wisely. The most critical component is usually the foam. Reticulated foam is the industry standard. It is durable and breathable. Furthermore, it holds shapes very well. You can find this foam in upholstery shops. Alternatively, high-density upholstery foam works for beginners. It is cheaper and readily available. However, it may degrade faster. Thus, consider your budget and usage frequency.
Additionally, you need a strong adhesive. Contact cement is a favorite among professionals. It creates an instant, permanent bond. This is vital for securing foam pieces. Nevertheless, it has strong fumes. You must work in a well-ventilated area. Conversely, hot glue guns are popular for quick fixes. They are easy to use. But they can melt sensitive foams. Therefore, test the glue first. Fabric is another major consideration. Fleece is the go-to choice for “Muppet-style” puppets. Antron fleece is the gold standard. It hides seams beautifully. Consequently, your puppet looks seamless and professional. You will also need scissors, markers, and patterns. These tools ensure precision. In short, quality materials lead to a quality puppet. Do not skimp on the basics.
Designing Your Character: From Concept to Pattern
How to make a puppet? Before you cut any fabric, you need a plan. The design phase is arguably the most exciting part. You must decide on your puppet’s personality. Is it a grumpy old man? Or perhaps a cheerful monster? Consequently, the character dictates the design. You should sketch your ideas on paper first. This visual guide keeps you focused. Furthermore, it helps you determine the scale. A puppet that is too large is hard to operate. Conversely, one that is too small lacks expression. Therefore, aim for a manageable size. Typically, a hand puppet fits an adult hand comfortably.
Moreover, you need to create or buy a pattern. Patterns act as the blueprint for your puppet. There are many free resources online. However, paid patterns often offer better instructions. They provide detailed step-by-step guides. If you are adventurous, you can draft your own. You would need to understand pattern drafting. This involves creating a “skin” that fits over the foam structure. It requires some mathematical estimation. Therefore, beginners should stick to existing patterns initially. Once you understand the geometry, you can experiment. The color palette is also part of the design. Bright colors convey energy. Muted tones suggest seriousness. Thus, choose colors that reflect the character’s soul. The design process brings your vision to reality.
Building the Core: The Foam Head and Body Structure
How to make a puppet? The structure gives your puppet its shape. Most professional puppets use a “foam and fabric” technique. This method creates a lightweight but sturdy figure. You start with the head. The head is usually made from sheets of foam. You cut them into specific shapes. Then, you glue them together. Consequently, a three-dimensional form emerges. There are several ways to build the head. The “bowl method” is common. It involves gluing foam around a spherical core. Another method is the “sheet foam method.” This involves cutting a pattern from a flat sheet. You then join the edges. This creates a hollow shape.
Furthermore, the body must be proportional. A big head needs a body to support it. The body is often a simple foam cylinder. Or it can be a more complex, posable shape. You must leave an opening for your hand. This is called the “gripper.” It allows you to control the head and mouth. Additionally, you might want to add arm rods. These require a different structural approach. You need to embed channels in the foam. This allows for wire or rods to pass through. Therefore, planning the mechanics is crucial. The foam structure is the skeleton of your puppet. It must be durable enough to withstand squeezing. However, it must remain soft to the touch. This balance is the key to a professional feel.
The Mechanics of Speech: Creating a Moving Mouth
How to make a puppet? A speaking puppet is much more engaging. The mouth movement synchronizes with the voice. This illusion brings the character to life. Therefore, a functional mouth mechanism is vital. The most basic method is the “mitt” design. Your hand forms the mouth. Your thumb controls the lower jaw. Your fingers control the upper jaw. Consequently, the mouth opens and closes naturally. This is the easiest method to master. It requires no complex hardware. However, it offers limited expression. The mouth may look flat.
For more advanced puppets, you need a hinged jaw. This involves creating a rigid plate system. Plastic or cardboard works well for this. You attach these plates inside the foam head. Then, you connect them with a fabric hinge. A spring can be added for resistance. This gives the puppet a “snap” when it closes. Consequently, the movement looks sharper. This is often called a “mech” or mechanism. You can even install a trigger control. This allows for blinking eyes or raising eyebrows. These small details add immense personality. However, they require engineering skills. Therefore, start simple. Master the basic mouth movement first. Then, progress to complex animatronics later.
Skinning and Finishing: The Fabric Stage
Once the foam structure is complete, you add the skin. This step transforms a lump of foam into a character. Fleece is the most common material for this stage. You trace your pattern onto the fabric. Be sure to account for seam allowances. Then, you cut the pieces out carefully. Consequently, you have a collection of fabric shapes. You sew these pieces together. You can use a sewing machine or sew by hand. Hand sewing offers more control. It allows for precise adjustments. Therefore, it is often preferred for details.
Furthermore, fitting the skin requires patience. You pull the fabric over the foam structure. It should fit snugly without wrinkles. You secure it with glue or stitching. The face requires the most attention. You need to ensure the fabric does not obstruct the mouth mechanism. Additionally, this is when you add features. The eyes are the most important feature. They give the puppet a focus point. You can use store-bought eyes. Or you can make them from foam spheres. The nose and ears are also added now. These features define the character’s look. Therefore, take your time. A well-finished skin looks professional. It hides all the messy glue and foam underneath. The result is a polished and appealing character.
Adding Personality: Features, Hair, and Costume
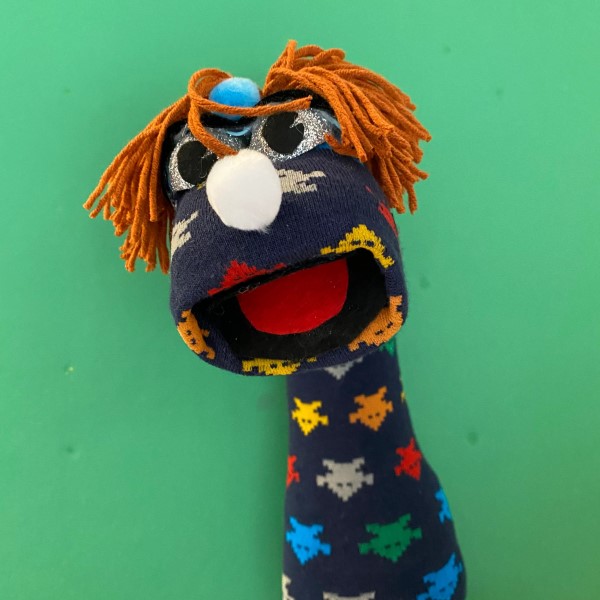
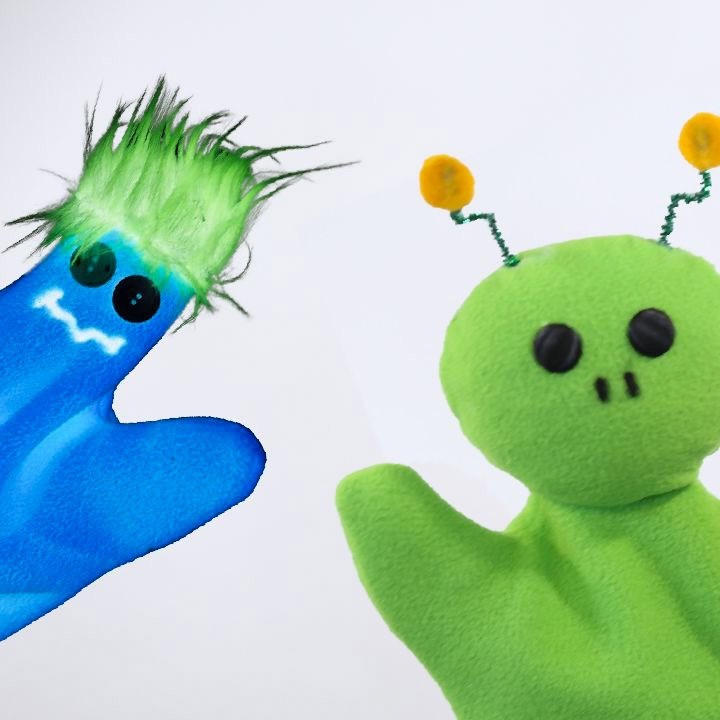
A naked puppet looks incomplete. It needs clothing and hair to define its identity. These elements tell the audience who the character is. For example, a puppet with wild hair seems energetic. Conversely, a puppet with a hat might look distinguished. Therefore, styling is crucial. Hair can be made from many things. Yarn is a classic choice. It is cheap and comes in many colors. You can glue rows of yarn to the head. Alternatively, fake fur works well for monsters. It adds texture and volume. Furthermore, feathers can create a unique look. The options are limitless.
Moreover, the costume is the final touch. The clothes should match the character’s personality. You can buy doll clothes. However, making your own ensures a perfect fit. You can use fabric scraps. Or you can buy specific costume fabric. Additionally, accessories add flair. Glasses, bow ties, or jewelry make the character unique. These small props help tell a story. For instance, a lab coat implies a doctor. Consequently, the audience understands the role immediately. You should also consider the puppet’s hands. Hands are expressive tools. You can make simple mitt hands. Or you can build posable fingers. Wire armatures allow the fingers to bend. This lets the puppet hold props. Thus, the character can interact with the world. These details elevate a simple toy into a performer.
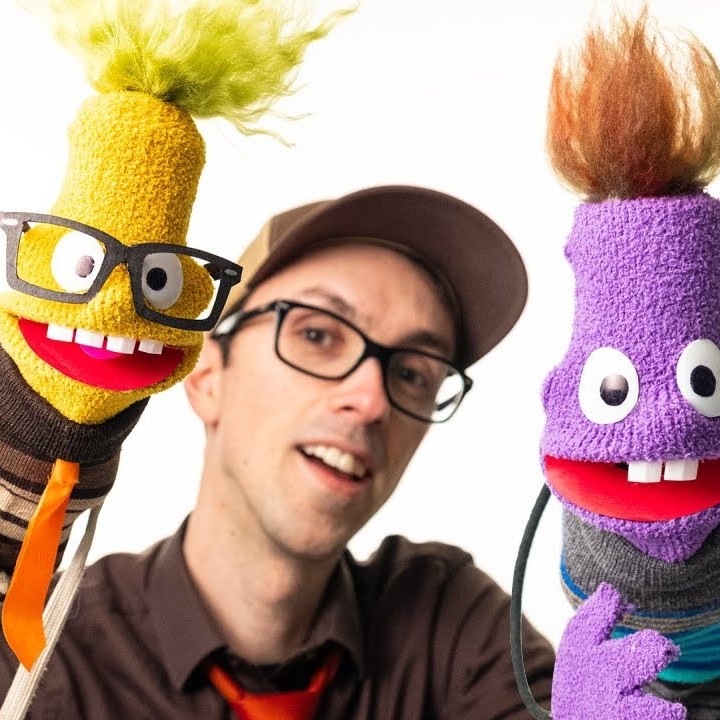
Performing Basics: How to Bring Your Puppet to Life
Making the puppet is only half the battle. The other half is performance. A well-made puppet looks dead without a performer. Therefore, you must learn the basics of manipulation. The most important rule is “eye focus.” The puppet must look at the audience. Or it must look at other characters. It should not stare blankly into space. This creates a connection. Consequently, the audience engages with the puppet. You need to practice moving the head. Smooth movements are essential. Jerky motions break the illusion.
Furthermore, lip-sync is a critical skill. You must open the puppet’s mouth on every syllable. This matches the words you speak. It looks like the puppet is actually talking. However, you must avoid “flapping.” This is when the mouth moves constantly. It looks unnatural. Instead, close the mouth fully on certain sounds. This creates a more realistic effect. Additionally, body language matters. The puppet should breathe. It should shift its weight. It should react to what is happening. If the puppet is sad, it should droop. Consequently, the audience empathizes with it. Voice acting is the final layer. You need a distinct voice for your character. It should be different from your own. Practice in front of a mirror. Watch your movements. Refine your timing. Performance turns a craft project into art.
Troubleshooting Common Puppet Making Mistakes
Every beginner makes mistakes. This is a natural part of learning. However, knowing common pitfalls can save you time. One frequent issue is a stiff neck. The puppet’s head does not turn smoothly. This is usually due to tight fabric or excess glue. Therefore, ensure the neck mechanism is loose enough. Another problem is heavy features. Large noses or ears can weigh the head down. This makes the puppet tiring to operate. Consequently, you should use lightweight materials. Foam is lighter than solid plastic.
Additionally, seam visibility can be an issue. You do not want to see ugly stitching lines. This ruins the illusion. Using the correct fleece helps. You can also “pickle” the fabric. This involves stretching the wet glued fabric. It helps hide the seams. Furthermore, durability is a concern. Puppets take a beating. Weak glue joints fail quickly. Therefore, always reinforce high-stress areas. The mouth hinge is a stress point. Use strong contact cement there. Finally, ventilation is often overlooked. A hot, stuffy puppet is uncomfortable. The operator’s hand sweats. This degrades the foam. Therefore, design airflow into the head. Leave space for air to circulate. These small considerations improve the final product. Do not be discouraged by errors. They are valuable lessons.
FAQ
Are puppets hard to make?
Making a basic puppet is not hard. Simple hand puppets require minimal sewing and glue. However, professional-quality puppets require skill. They involve complex patterns and mechanics. Therefore, start with easy projects. Your skills will improve with practice.
Do 7 year olds like puppets?
Yes, seven-year-olds generally love puppets. They are at an age where imagination thrives. Puppets allow them to create stories. Furthermore, they enjoy the interactive nature of puppet shows. Consequently, puppets are excellent educational and entertainment tools for this age group.
What do you need to build a puppet?
You need foam, fabric, and adhesive. Scissors and patterns are also necessary. For a basic puppet, you need fleece, foam sheets, and hot glue. More complex puppets require specific materials like contact cement, armature wire, and performance mechanisms.

Conclusion
The journey of creating a puppet is rewarding. It combines art, engineering, and performance. We have explored the entire process. You now understand the materials and techniques. Furthermore, you know the basics of performance. The search for how to make a puppet ends here. You have the knowledge to start. In 2026, DIY creativity is more accessible than ever. You can build a character that truly speaks volumes. Remember to use high-quality puppet making materials. Refer to hand puppet patterns for guidance. Practice your lip-sync skills. Whether you are a hobbyist or an aspiring professional, puppetry offers joy. It brings stories to life in a unique way. Therefore, start building today. Your audience awaits your creation. Let your imagination run wild. The world needs your characters.


