Introduction to the World of Mold Making
The world of crafting is vast and exciting. Many people enjoy creating unique items. Consequently, mold making has become a popular hobby. It allows you to replicate favorite objects. You can create custom jewelry, soap, or candles. The process is surprisingly accessible. You might think it requires expensive equipment. However, you can start with simple tools. The key is understanding the material. Silicone is the gold standard for molds. It is flexible, durable, and heat-resistant. Therefore, it captures incredible detail. Learning how to make a silicone mold opens up a new world of creativity. You can preserve delicate details of an original object. Furthermore, you can produce hundreds of copies.
This skill is valuable for artists and hobbyists alike. It saves money in the long run. Instead of buying new molds, you make your own. This guide will walk you through the entire process. We will discuss materials and techniques. We will also explore creative ideas. By the end, you will feel confident to start your first project. The journey from a simple object to a perfect replica is rewarding. So, let’s dive into the art of mold making.
Understanding the Properties of Silicone
Before you begin, you must understand the material. Silicone is a synthetic polymer. It is distinct from other rubbers. Its unique properties make it ideal for molding. First, it is incredibly flexible. This means you can remove complex shapes easily. The mold stretches to release the object. Consequently, it returns to its original shape. This is called “memory.” Second, silicone is non-stick. Most materials do not adhere to it. Therefore, you rarely need a release agent. This saves time and money. However, there are different types of silicone.
- Tin-Cure Silicone: This is often cheaper. It is great for simple projects. However, it shrinks slightly over time. It also has a shorter library life. The mold may degrade after a few years.
- Platinum-Cure Silicone: This is the professional choice. It does not shrink. It lasts for decades. Consequently, it is more expensive. It is also sensitive to contamination. Certain clays can inhibit its cure.
- Food-Grade Silicone: This is safe for culinary use. You can make molds for chocolate or candy. Always check the label for safety certifications.
Understanding these differences is crucial. You must choose the right type for your project. For instance, do not use tin-cure silicone for food. Always read the manufacturer’s instructions. Furthermore, consider the viscosity. Thicker silicone is better for vertical surfaces. Thinner silicone captures finer details. Therefore, choose wisely.
Essential Materials and Tools Needed
How to make a silicone mold? Success depends on preparation. You need the right tools before starting. Gathering everything beforehand makes the process smooth. You do not want to search for items while the silicone cures. Here is a list of essentials.
- The Original Object: This is your “master.” It can be anything. Plastic figures, seashells, or buttons work well. Ensure the object is clean. It should also be dry.
- Mold Box: You need a container to hold the liquid silicone. You can buy reusable plastic cups. Alternatively, you can build a box from foam board or Lego bricks. The box must be watertight.
- Mixing Tools: You need cups and stir sticks. Plastic is best. Use separate cups for measuring and mixing. Accurate measurement is vital for the silicone to cure.
- Scale: Most silicones require a specific mix ratio by weight. A digital kitchen scale is perfect. It ensures precision.
- Gloves and Safety Gear: Silicone is generally safe. However, it can be messy. Wear disposable gloves. Safety glasses are also a good idea. Work in a well-ventilated area.
- Release Agent: This is optional for silicone. However, it helps with certain objects. It ensures the master releases easily. Use a spray designed for mold making.
Having these items ready prevents stress. Organization is the key to a successful pour. Therefore, set up a clean workspace. Cover your table with paper or a mat. This protects the surface from spills.
Preparing Your Master Object
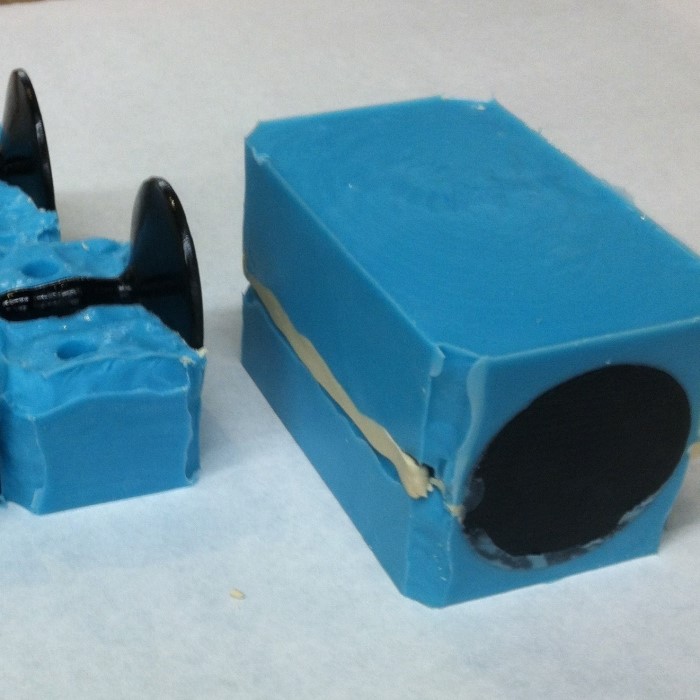
The master object is the most important part. The mold will only be as good as the master. Therefore, you must prepare it carefully. First, clean the object. Remove any dust or grease. A clean surface ensures perfect detail. Next, consider the shape. Does it have undercuts? Undercuts are recessed areas. They can lock the object in the mold. If the object is complex, you might need a two-part mold. However, for beginners, start with a simple shape.
- Securing the Object: You must suspend the object in the mold box. It should not touch the sides or bottom. You can use a small dab of hot glue. This holds the object in place. Make sure the bottom of the object faces up. This allows the silicone to cover the visible part.
- Sealing Porous Objects: Some materials are porous. Wood or unglazed clay can trap air. This causes bubbles in the mold. Therefore, seal these objects first. A coat of spray shellac works well. It creates a smooth barrier.
- Checking for Floaters: If the object is light, it may float. Silicone is heavy. The liquid will push the object up. You must secure it firmly. Use a stick or string to hold it down.
Take your time with this step. A loose object ruins the mold. Furthermore, air bubbles can ruin the surface detail. Proper preparation prevents these issues. Consequently, the final result will be much better.
The Mixing and Pouring Process
How to make a silicone mold? Now comes the exciting part. You are ready to mix the silicone. This step requires focus. Read the instructions on your silicone kit. Different brands have different ratios. Most use a 1:1 or 10:1 ratio. Measure carefully into your mixing cup.
- Mixing Technique: Pour the two parts together. Use a stir stick to mix. Scrape the sides and bottom of the cup. You must mix thoroughly. Unmixed silicone will not cure. However, do not mix too fast. Fast mixing traps air bubbles. Mix slowly and deliberately. The mixture should be uniform in color.
- Degassing (Optional): Professionals use a vacuum chamber. This removes all air bubbles. It is not strictly necessary for simple molds. However, if you have one, use it. It ensures a crystal-clear mold surface.
- Pouring: Pour the silicone slowly. Pick a low spot in the mold box. Let the silicone rise naturally. It should flow over the object. This method pushes air out ahead of the liquid. Pouring from a high height can trap bubbles. Therefore, pour close to the surface.
Fill the box until the object is covered. You need at least half an inch of silicone above the highest point. This ensures the mold is strong. Once poured, tap the box gently. This dislodges any remaining bubbles. Then, leave it alone. Do not move it while it cures.

Curing and Demolding Your Creation
Curing takes time. You must be patient. Most silicones cure within 24 hours. Some fast-setting types cure in a few hours. Check the product label. Do not touch the silicone while it sets. Fingerprints can ruin the surface. The curing process generates heat. This is normal. It is an exothermic reaction.
- Checking the Cure: After the recommended time, touch the silicone. It should feel firm. It should not be sticky. If it is soft or tacky, something went wrong. Usually, this means inaccurate measuring. Or, the temperature was too cold. Silicone cures best at room temperature.
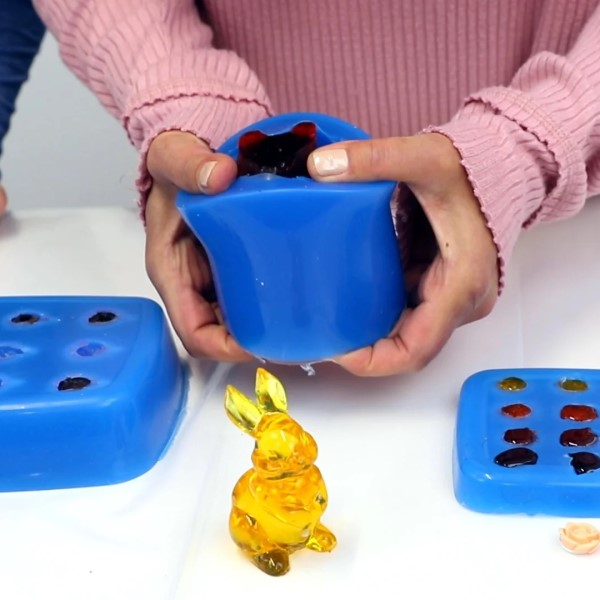
- Demolding: Once cured, remove the mold from the box. Peel away the container walls. Now, you can remove the master object. Gently pull the silicone away. The flexibility of silicone allows the object to pop out. Take your time. You do not want to tear the mold.
- Post-Curing: Some silicones benefit from additional curing time. This maximizes the durability. Let the mold sit for another day before using it.
The moment of demolding is exciting. You will see the perfect impression. Every detail of the master object is captured. You now have a custom tool for crafting. Wash the mold with warm soapy water. It is now ready for casting.
Creative Applications for Your Molds
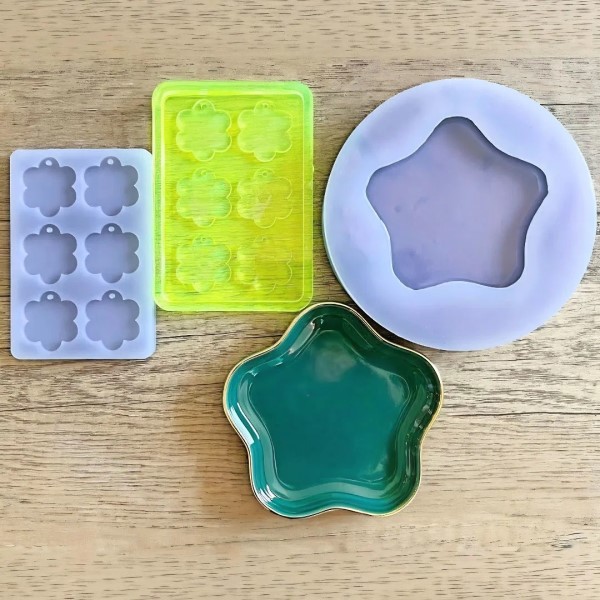
How to make a silicone mold? Now that you have a mold, what can you make? The possibilities are endless. This is where the fun begins. You can use various casting materials. Each material creates a unique product.
- Resin Jewelry: Resin is very popular. You can create pendants, earrings, and rings. Add color pigments or glitter. The result is stunning, professional-looking jewelry.
- Soap Making: Silicone molds are perfect for soap. They release the soap easily. You can make intricate soap bars. These make great gifts. Use melt-and-pour soap bases for easy crafting.
- Candles: You can make custom-shaped candles. Silicone withstands the heat of melted wax. Create unique pillar candles or tea lights.
- Chocolate and Candy: If you used food-grade silicone, you can make treats. Pour melted chocolate into the mold. Create custom chocolates for parties. This is a hit with children.
- Concrete Planters: Concrete is trendy. You can make small planters. The silicone releases the concrete easily. These look great in modern homes.
Experiment with different materials. You might discover a new passion. Furthermore, you can combine materials. For example, embed a photo in resin. The mold is your gateway to creativity.
Troubleshooting Common Issues
Things do not always go perfectly. Beginners often face challenges. Do not get discouraged. Most problems have simple solutions. Here are common issues and how to fix them.
- Sticky Mold: If the mold is sticky, it did not cure fully. This is usually a mixing error. You might have used the wrong ratio. Unfortunately, you cannot fix a sticky mold. You must start over. Measure more carefully next time.
- Bubbles on the Surface: Bubbles ruin the detail. This happens when you pour too fast. To fix this, pour slower next time. Also, tap the mold box firmly after pouring.
- Tears in the Mold: Thin sections of silicone can tear. This happens if the mold is too thin. Ensure you have enough silicone thickness. Also, be gentle when demolding.
- Inhibition: Sometimes, the silicone touches a contaminant. It leaves a gooey patch. Certain clays or adhesives cause this. Always test your materials. Use a barrier spray if needed.
Mistakes are part of the learning process. Keep a notebook of your projects. Record your ratios and pour times. This helps you improve. Every mold you make will be better than the last.
Frequently Asked Questions About Mold Making
Many beginners have questions. Here are answers to the most common queries.
How can I make silicone molds at home?
You can easily make molds at home. You need a silicone kit, a master object, and a container. Mix the silicone, pour it over the object, and let it cure. It is a simple process that requires patience and precision.
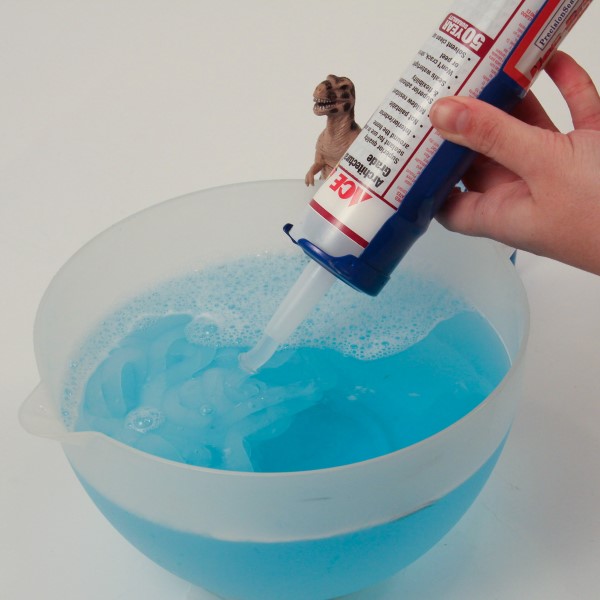
Is there a way to make silicone molds?
Yes, there are many ways. You can use 100% silicone caulk and cornstarch for a cheap method. However, commercial two-part silicone kits are better. They are more durable and easier to use.
What material to make a mold for silicone?
You can use almost any solid object. Plastic, wood, metal, and clay work well. Avoid objects that contain sulfur. Sulfur prevents silicone from curing. Always seal porous materials like wood before molding.
Can a 3D printer make a silicone mold?
Yes, 3D printers are excellent for this. You can print a custom master object. PLA and PETG filaments work well. Print with high resolution for a smooth finish. You can even print the mold box itself.
Conclusion: Unleash Your Creativity
Learning how to make a silicone mold is a valuable skill. It empowers you to create. You are no longer limited by store-bought options. You can replicate any object you desire. The process is scientific yet artistic. It requires patience and attention to detail. However, the results are worth the effort. You can produce professional-quality crafts from your home. Whether you make jewelry, soap, or chocolate, the possibilities are vast. Furthermore, the skills you learn will improve with practice. You will understand materials better. You will develop your own techniques. So, gather your supplies. Choose a favorite object. Start your mold-making journey today. The world of DIY crafts is waiting for your unique touch. Enjoy the process of creation.


