Introduction
Crafting enthusiasts everywhere are constantly looking for new ways to express their creativity. One of the most versatile tools in any crafter’s arsenal is decorative tape. However, store-bought options can be expensive or lack the specific design you need. This is where the concept of diy washi tape becomes incredibly valuable. By creating your own designs, you gain complete control over patterns, colors, and widths. Consequently, you can tailor every piece of tape to match your specific project needs. This process is not only simple but also incredibly rewarding. Furthermore, making your own supplies allows you to save money while reducing waste. You can use materials that you likely already have at home.

Therefore, this guide will walk you through everything you need to know. We will cover materials, techniques, and creative applications. Ultimately, mastering this skill will transform how you approach scrapbooking, journaling, and gift wrapping. You will no longer be limited by what is available in stores. Instead, you will have the freedom to invent your own unique style. So, let us dive into the colorful world of custom tape creation.
Understanding the Basics of Washi Tape
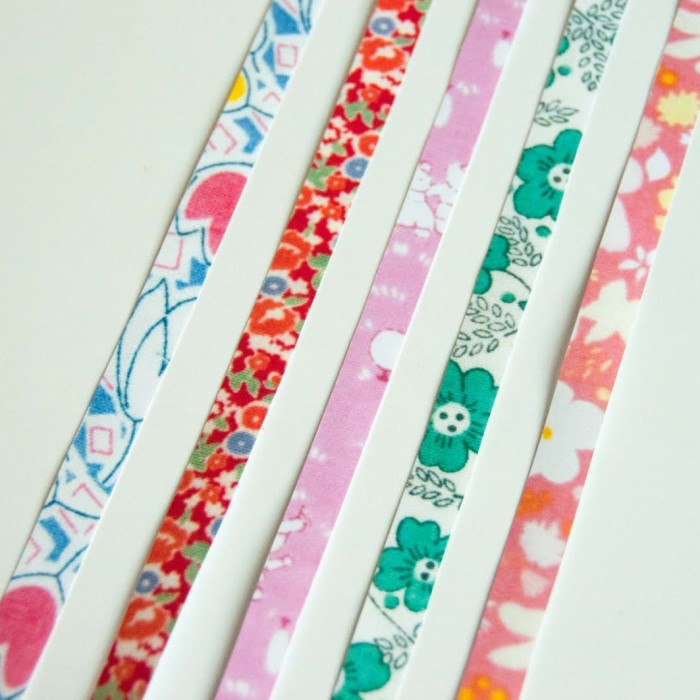
To master the art of making tape, you must first understand what it is. Traditionally, this product originates from Japan. It is made from natural fibers like hemp or bark from trees. Specifically, the “Wa” means Japanese, and “shi” means paper. Therefore, it is essentially a type of Japanese paper tape. Its popularity stems from its unique texture. It is translucent, strong, and easy to tear by hand. Moreover, it features a low-tack adhesive. This means you can stick it down and peel it off without damaging surfaces.
When you undertake a diy washi tape project, you aim to replicate these qualities. However, you might use different materials. For instance, tissue paper or rice paper are excellent bases. They mimic the lightweight and translucent nature of the original product. Understanding these core characteristics is crucial. If your homemade version is too thick, it will not curve well on paper. If the glue is too strong, it might tear your journal pages. Thus, balancing the paper weight and adhesive strength is the key to success. By grasping these fundamentals, you ensure your final product behaves just like the store-bought version.
Essential Materials for Your Project
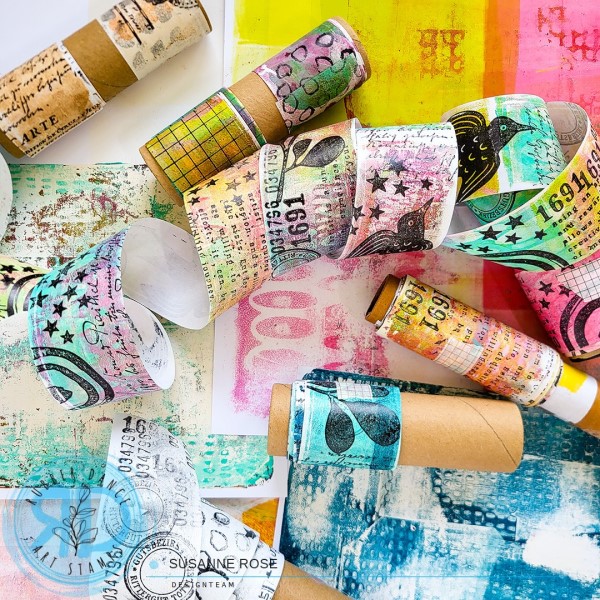
Before you begin the creative process, you must gather the necessary supplies. Fortunately, the materials for diy washi tape are accessible and affordable. First, you need a base material. Tissue paper, rice paper, or even plain masking tape work best. Tissue paper is particularly popular because it is thin and semi-transparent. Next, you require an adhesive. A glue stick or double-sided tape is sufficient for basic projects. However, for a more authentic feel, you might use repositionable glue.
This special glue allows the tape to be moved after application. Additionally, you will need something to add color and pattern. Markers, stamps, ink pads, and acrylic paints are perfect for this. You will also need scissors or a cutting mat and rotary cutter. These tools help you achieve clean, straight edges. Finally, consider using a ruler to measure your widths accurately. Having all these items ready before you start will streamline your workflow. Consequently, you can focus entirely on the design process without interruptions. Preparation is the first step toward a successful crafting session.
Step-by-Step Guide to Making Your Own Tape
Creating your own tape is a straightforward process that yields beautiful results. First, select your base paper. If you are using tissue paper, cut it into long, manageable strips. Ideally, these strips should be the width you desire for your final tape. Next, it is time to decorate the paper. You can stamp patterns using ink pads. Alternatively, you can draw freehand designs using markers or paint. Let the ink or paint dry completely before moving to the next step. Once the design is dry, apply the adhesive.
If you are using double-sided tape, simply stick it to the back of your decorated paper. Then, peel off the backing and roll your tape onto an empty spool. On the other hand, if you are using glue, apply a thin, even layer. You must be careful not to saturate the paper. After applying the glue, let it dry until it becomes tacky. This step is vital for achieving the repositionable quality of diy washi tape. Finally, roll your creation onto a used tape roll or a piece of wax paper for storage. Now, your custom tape is ready for use.
Innovative Design Ideas for 2026
Trends in the crafting world are constantly evolving. As we look toward 2026, several exciting design trends are emerging for diy washi tape. First, sustainability is a major theme. Crafters are increasingly using recycled materials to create their tapes. For example, you can use old sheet music or book pages as your base. This gives your tape a vintage, eco-friendly aesthetic. Secondly, minimalist geometric patterns are gaining popularity. Think of simple lines, dots, and triangles in monochromatic color schemes.
These designs are versatile and fit well in modern planners. Another rising trend is the use of metallic accents. Gold and silver markers can transform a simple strip of paper into a luxurious embellishment. Furthermore, botanical prints remain a timeless favorite. You can press small flowers or leaves onto your tape using clear contact paper. This technique brings a touch of nature to your crafts. By staying ahead of these trends, your homemade creations will look fresh and contemporary. Experimenting with these styles will keep your projects exciting and unique.
Practical Applications in Daily Life
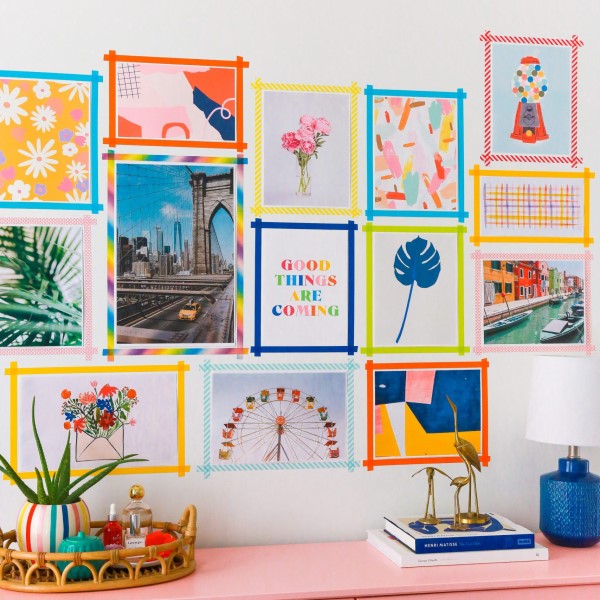
Once you have a collection of handmade tape, the possibilities for use are endless. Of course, diy washi tape is a staple in scrapbooking and bullet journaling. It adds color and personality to pages instantly. You can use it to border photos, create headers, or divide sections. However, its utility extends far beyond paper crafts. For instance, you can use it to organize your home. Wrap a piece of tape around charging cables to label them. This solves the mystery of which cord belongs to which device.
In the kitchen, use your tape to label spice jars or leftover containers. Because the adhesive is low-tack, you can remove the labels easily when you are done. Additionally, this tape is perfect for gift wrapping. A plain brown paper package looks stunning when adorned with a strip of custom, colorful tape. It adds a personal touch that store-bought bows cannot match. Even teachers find it useful for color-coding books or marking reading levels. Thus, your DIY project becomes a practical tool for everyday organization and decoration.
Tips for Achieving the Best Adhesion
One of the most common challenges with homemade tape is getting the stickiness right. You want your diy washi tape to hold firm but remain removable. To achieve this balance, the choice of adhesive is paramount. Re-positionable glue sticks are often the best option. They are designed to provide a temporary bond. When applying the glue, use a light hand. If you apply too much, the paper might wrinkle or become too wet. Consequently, the tape could tear when you try to remove it later.
If you find that your tape is not sticking well enough, try pressing it down firmly for a few seconds. The heat from your fingers can help activate the adhesive. Another useful tip involves the surface you are sticking to. Smooth, clean surfaces work best. Dust or oil can prevent the tape from adhering properly. If you are using double-sided tape as your adhesive, look for one with a “removable” label. These are specifically engineered to peel off cleanly. By paying attention to these details, you can ensure your tape performs exactly as intended.
Troubleshooting Common DIY Mistakes
Even experienced crafters encounter issues when making their own supplies. Identifying these problems early can save you time and frustration. One frequent issue is the paper tearing when you cut it. This usually happens if the paper is too thin or your scissors are dull. To fix this, use a sharp rotary cutter against a metal ruler. This method produces a clean edge without dragging the paper. Another problem involves the ink smudging when you apply the adhesive. This occurs if the ink is not fully waterproof.
To prevent this, use pigment-based markers or allow ample drying time. You can also spray a light coat of fixative over your design before gluing. Sometimes, your diy washi tape might curl up at the edges. This is often caused by humidity or too much glue. Store your finished tape rolls in a dry place. Also, ensure the glue layer is thin and even. If the tape is too sticky, try sticking it to your shirt a few times. This reduces the tackiness slightly, making it safer for delicate papers. Learning these troubleshooting tricks will improve the quality of your final product significantly.
FAQ: Answering Your Most Pressing Questions
Can I make washi tape at home?
Yes, you absolutely can make washi tape at home. You simply need a thin paper base like tissue paper or rice paper. You also need a low-tack adhesive and your choice of decorating tools. This process allows for complete customization of patterns and sizes.
What to use if you don’t have washi tape?
If you do not have washi tape, you have several alternatives. Masking tape is the most common substitute because it shares similar properties. You can also use decorative duct tape for stronger projects. Alternatively, strips of pretty scrapbook paper with glue stick work well.
What material is washi tape made of?
Authentic washi tape is made of Japanese paper, known as “washi.” This paper comes from natural plant fibers. Common sources include the bark of the gampi tree, the mitsumata shrub, or paper mulberry. These materials give the tape its strength and translucency.
Is washi tape actually sticky?
Yes, washi tape is sticky, but it uses a specific type of adhesive. It features a low-tack acrylic adhesive. This makes it repositionable. It sticks to surfaces securely but peels off cleanly without leaving residue or damaging the material underneath.

Conclusion: Embrace Your Creative Journey
The journey of creating your own stationery is both fulfilling and practical. Through the process of making diy washi tape, you unlock a new level of artistic freedom. You no longer need to rely on mass-produced designs that everyone else owns. Instead, you can produce unique embellishments that reflect your personal style. This guide has provided you with the foundational knowledge to start. From selecting the right materials to troubleshooting common issues, you are now equipped for success.
Remember that practice makes perfect. Your first attempt might not be flawless, but you will improve with time. Furthermore, the skills you learn here can apply to other paper crafts. You will find yourself looking at ordinary materials in a new light. So, gather your supplies and let your imagination run wild. There is no limit to what you can create. Start designing your custom tape today and watch your projects transform. Your creativity is your only boundary.


