Introduction
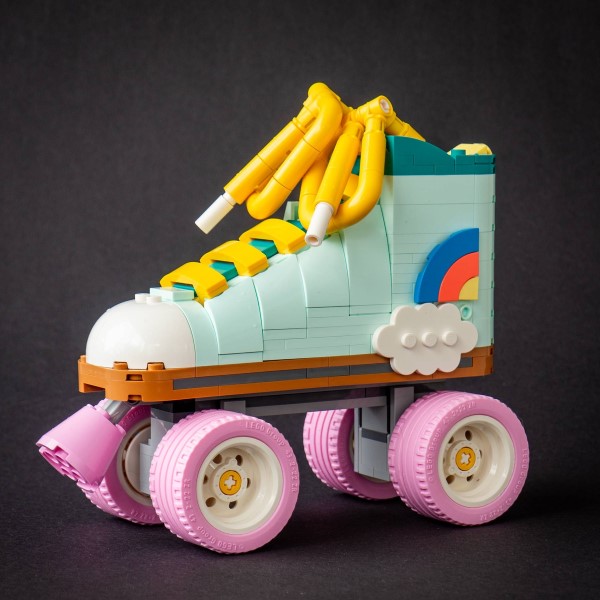
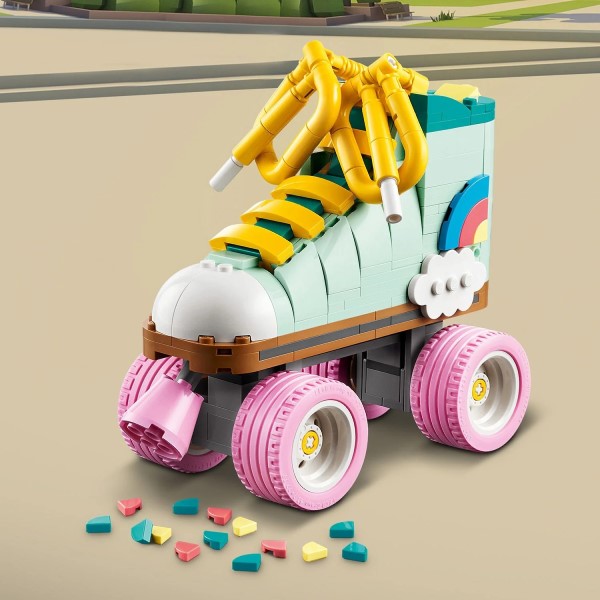
LEGO projects provide endless creativity and fun. A LEGO roller skate project adds excitement to your build. Constructing a roller skate with LEGO bricks lets you combine design, mechanics, and decoration.
These projects encourage problem-solving while offering a playful challenge. They make great activities for kids and adults alike. You can customize your LEGO roller skate entirely based on your vision. This project is perfect for learning new building techniques and exploring imaginative ideas.
Building a LEGO roller skate helps you understand the importance of structural balance and stability. It highlights how small details enhance functionality and aesthetics. By designing your own LEGO roller skate, you create a unique piece with your personal touch.
Working on this project develops skills like hand-eye coordination and creativity. Sharing your finished creation can inspire others to try similar projects. Whether for fun or as a display piece, LEGO roller skates turn creativity into something tangible.
By tackling this project, you join a vibrant community of LEGO builders. Exchange ideas, tips, and designs with fellow enthusiasts. Dive into the world of LEGO roller skate building today and bring your visions to life.
Required Materials and LEGO Pieces
Before starting your LEGO roller skate project, gather the essential materials and pieces. Having everything ready simplifies the building process.
Basic LEGO Bricks
You’ll need classic LEGO bricks as the foundation. These bricks provide structure to the roller skate design.
Special LEGO Pieces
Include pieces like axles, wheels, and connectors. These ensure functionality and proper movement of the skate.
Baseplate or Large Bricks
Use a sturdy baseplate or large bricks for stability. This keeps your roller skate balanced.

Decorative Pieces
Gather colorful tiles, plates, and unique accessories. These enhance the visual appeal of your creation.
Optional Features
Consider using mini-figures, stickers, or printed LEGO bricks. These add personality to your roller skate.
Tools for Assembly
Although LEGO does not require extra tools, having separators can help with disassembly or adjustments.
By collecting the right materials, you ensure smooth progress throughout your project. The right LEGO pieces bring your roller skate design to life with creativity and stability.
Step-by-Step Guide to Building a LEGO Roller Skate
Designing the Roller Skate Frame
Start by planning the structure of your LEGO roller skate. This frame provides the base. Use sturdy LEGO bricks to create a strong, durable frame. Begin with a rectangular base as it ensures stability. Build layers by interlocking bricks for added strength and balance.
Next, design the sides of the skate. Add vertical supports to hold the wheels in place. Ensure equal spacing on both sides to maintain balance. Use connectors to secure these parts firmly.
Create a top surface for the skate to place decorative elements later. Focus on symmetry to ensure a functional and aesthetic design.
Assembling the Wheels for Stability
Importance of Wheels
-
- Understand that wheels are a crucial component of your LEGO roller skate, as they directly affect the skate’s performance and stability.
Choosing the Right Wheels
-
- Select high-quality LEGO wheels that are designed to roll smoothly. Look for wheels that are not only visually appealing but also function well for a better skating experience.
Attaching the Wheels
-
- Use axles and connectors to attach the wheels to the frame securely. Make sure that the wheels are fastened properly to prevent any disconnections during use.
Ensuring Secure Axle Fit
-
- Double-check that the axles fit securely into the frame. A snug fit will ensure that the wheels remain stable while in motion, preventing any unwanted movement or detachment.
Proper Wheel Alignment
-
- Align the wheels accurately to avoid any wobbling or instability while skating. Proper alignment is essential for smooth operation and can improve overall performance.
Testing for Smooth Rotation
-
- After placing each wheel, test them individually to ensure they rotate smoothly without any hindrance. This step is vital for identifying any issues that may need adjustment.
Reinforcing the Wheelbase
-
- Consider adding reinforcements to the wheelbase to enhance its strength and durability. This additional support contributes significantly to the overall stability of your roller skate.
Supporting Stability and Practicality
-
- By following these steps, you can ensure that your LEGO roller skate is not only visually appealing but also practical and stable. A well-assembled wheel system will provide a better skating experience and longevity for your creation.
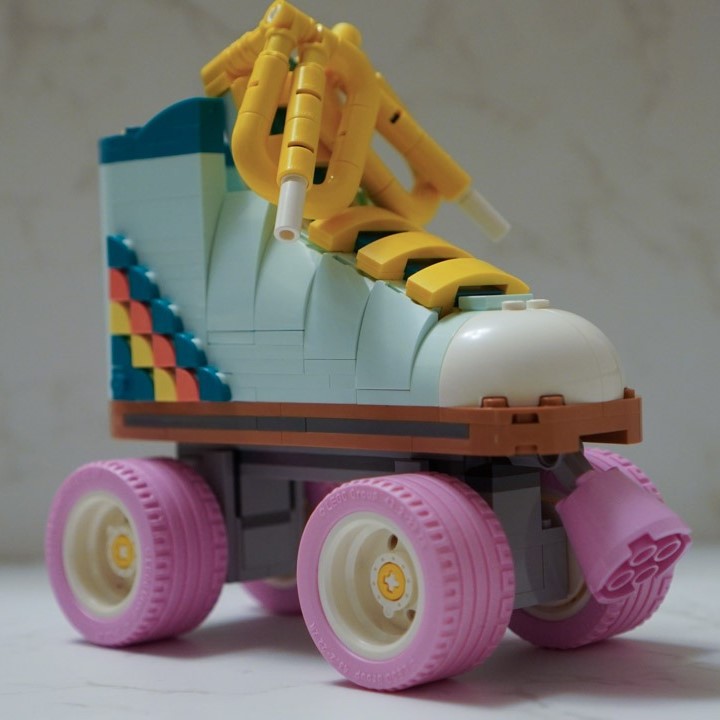
Adding Decorative Elements to Your Roller Skate
Complete the Frame and Wheels
-
- Ensure that the fundamental structure of your roller skate, including the frame and wheels, is fully assembled before moving on to decoration.
Select Colorful LEGO Tiles and Plates
-
- Choose a variety of colorful LEGO tiles and plates to create vibrant and eye-catching designs. Mixing different colors can help you achieve a playful and unique look.
Positioning Decorative Accessories
-
- Carefully place decorative accessories on the top and sides of the skate. Consider various angles and placements to enhance the overall aesthetic without compromising the functionality of the skate.
Add LEGO Mini-Figures
-
- Incorporate LEGO mini-figures into your design for added character and personality. Choose figures that resonate with your theme or style to create a cohesive look.
Utilize Printed Bricks or Stickers
-
- Personalize your roller skate further by using printed bricks or stickers. This allows you to add custom designs, logos, or details that reflect your individual taste.
Achieve Balance in Decoration
-
- Ensure that your decorations are balanced in terms of size, color, and placement to maintain the skate’s function and design harmony. Over-ornamentation can detract from usability.
Experiment and Innovate
-
- Don’t be afraid to experiment with various ideas and combinations. Test out different designs and configurations to create something truly unique and visually appealing.
Finalizing Your LEGO Roller Skate
-
- By following these steps, you’ll be able to create an impressive and customized LEGO roller skate that showcases your creativity. Enjoy the building process and let your artistic flair shine!
Tips and Tricks for a Better Build
Building a LEGO roller skate can be challenging but exciting. Following these tips makes it easier and more enjoyable:
Plan Before Starting
Sketch a rough design before assembling. This helps you organize pieces more effectively.
Use Color Coordination
Select a color theme for your LEGO roller skate. Matching colors enhances its visual appeal.
Double-Check Connections
Ensure each brick is securely attached. Tight connections maintain strength and stability during play.
Test Wheel Movement
After attaching wheels, test their rotation. Smooth rolling ensures the skate’s functionality.
Start with Strong Base
Build a sturdy base first. This supports the remaining structure and prevents imbalance.
Add Details Gradually
Decorate your creation step-by-step. Gradual additions prevent overcrowding and maintain balance.
Use LEGO Brick Separator
Use a separator tool for quick adjustments. It helps fix mistakes without damaging pieces.
Follow Symmetry
Maintain symmetry in your build. Balanced designs improve functionality and aesthetics.
Experiment with Accessories
Incorporate mini-figures or specialized bricks. Fun accessories personalize your roller skate.
Take Breaks
Work on small sections at a time. Breaks keep your focus sharp and reduce errors.
Apply these tricks for an efficient and fun building process. Create a roller skate that stands out!
Common Mistakes to Avoid While Building
Building a LEGO roller skate is fun but challenging. Mistakes can affect its functionality and design quality. Avoid these common errors to ensure a successful build.
Poor Planning Before Starting
Rushing into the project without a plan often leads to issues. Create a basic sketch first. This keeps your design organized and makes the process smoother.
Weak Connections Between Pieces
Loose LEGO connections lead to instability. Ensure all bricks are securely attached. Double-check connections as you go to maintain a strong structure.
Uneven Wheel Alignment
Misaligned wheels cause uneven movement. Carefully align each wheel using axles and connectors. Test their rotation to confirm smooth movement.
Skipping a Sturdy Base
A weak base can ruin your entire roller skate. Build a strong, stable foundation before moving to the details. This prevents imbalances and keeps the structure solid.
Overcrowding the Design
Adding too many decorations affects the functionality. Keep the design balanced and avoid overloading. Focus on blending aesthetics with performance.
Ignoring Symmetry in the Build
Unbalanced designs impact both the look and functionality. Maintain symmetry throughout your build. Symmetry ensures stability and visual appeal.
Overlooking Wheel Reinforcements
Weak wheelbases make the roller skate fragile. Reinforce the area holding the wheels for extra support. This keeps your roller skate durable.
Forgetting to Test Movements Frequently
Skipping movement tests leads to unnoticed issues. Test the functionality of your design regularly. Correct problems instantly for better results.
Using the Wrong LEGO Pieces
Incorrect pieces may not work well with your design. Use compatible bricks, axles, and wheels for a smoother build. This avoids frustration during assembly.
Ignoring Safety While Adjusting Pieces
Overforcing LEGO pieces can damage them. Use a LEGO separator tool for safe adjustments. This protects both your design and the bricks.
Being aware of these mistakes helps you build effectively. Pay attention to details and enjoy creating your best LEGO roller skate design!
Showcasing Your LEGO Roller Skate Creations
Displaying your LEGO roller skate creations is an exciting part of the project. It’s your chance to share your hard work and creativity with others. Showcase your build proudly to inspire fellow LEGO enthusiasts and receive valuable feedback.
Choose the Best Display Spot
Select a secure and visible area to display your roller skate. Avoid places prone to accidents. Shelves, desks, or showcases work well.
Create a Mini Scene
Design a small LEGO environment for your roller skate. Include mini-figures or themed decorations. Adding a story around your creation makes it more engaging.
Take High-Quality Photos
Capture detailed images of your LEGO roller skate to share online. Use good lighting and focus on the important details.
Use Social Media
Post your LEGO roller skate on social platforms. Tag LEGO communities and use popular hashtags to reach more people.
Join LEGO Exhibitions
Participate in LEGO showcases or events near you. Share your creation with fellow builders and inspire them.
Write About Your Build
Document your design process and creativity in a blog or article. Explain your ideas and how you built it.
Encourage Feedback
Ask friends or community members for opinions. Constructive feedback helps you improve your future designs.
Collaborate with Other Builders
Work with others to create larger displays. It’s fun and helps develop new ideas.
By showcasing your LEGO roller skate, you highlight your hard work and creativity. Share your passion with others and inspire new projects!
Ideas for Expanding LEGO Roller Skate Designs
Take your LEGO roller skate projects to the next level with creative ideas. These suggestions can enhance both the design and functionality of your creations.
Add More Wheels
Add extra wheels to your roller skate for a unique look and better balance. Experiment with different wheel sizes and arrangements to discover innovative designs. You might try a single-row or double-row wheel setup depending on your style.
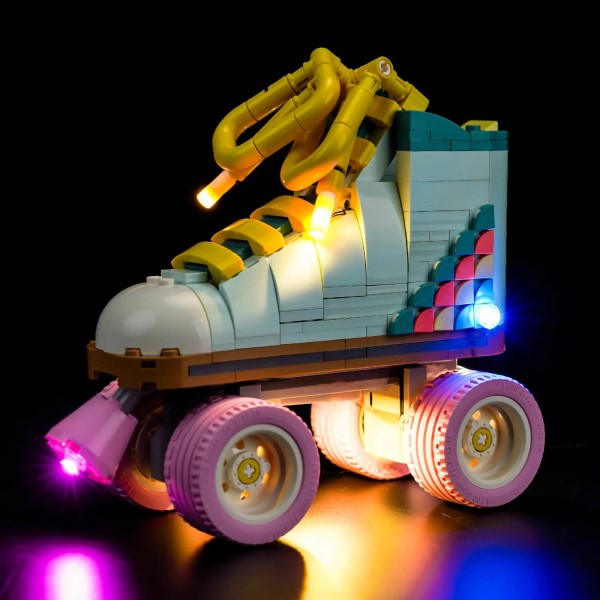
Incorporate Lights
Install small LEGO-compatible lights for a glowing effect. Use bright colors to make the skate stand out in low light.
Build a Motorized Version
Create a motor-powered LEGO roller skate. Use LEGO Power Functions or similar motor sets for movement. Test your motor configuration to ensure smooth operation.
Explore Themed Designs
Design roller skates to match specific themes. For example, a sports theme or a futuristic look. Use different colors, accessories, and printed bricks to support your theme.
Create Adjustable Sizes
Build a scalable design that allows you to modify the skate size. This makes it versatile and customizable for different LEGO mini-figure sizes.
Build Matching Accessories
Create additional LEGO pieces to complement your roller skate. These could include mini helmets, ramps, or even a backdrop scene.
Animate the Roller Skate
Pair your skate with a LEGO mini-robot. Program it to drag the skate for added excitement. Use LEGO robotics kits for an even more interactive model.
Combine with Other LEGO Builds
Attach your roller skate to other builds like LEGO cars or skate parks. This expands the functionality and fun of your project.
Experiment with Different Brick Types
Use transparent or textured LEGO bricks for creative designs. Mix regular bricks with special ones for a distinct, artistic effect.
Add Technological Features
Integrate sensors, like motion detectors or sound features, for an interactive build. Let the skate respond to touch or sound to create a fun experience.
With these ideas, your LEGO roller skate can go beyond simple designs. Combine creativity, craftsmanship, and functionality to make exceptional builds.
Conclusion: Enjoying the Fun of LEGO
In conclusion, learning how to build a LEGO roller skate is an enjoyable and fulfilling experience that encourages creativity and innovation. By understanding the basics, following a structured building process, and embracing customization, you can create a functional and visually appealing roller skate.
With the insights provided in this guide, embark on your wonderful journey of LEGO building. Enjoy the fun, appreciate the process, and don’t forget to invite friends to share in the experience. After all, the magic of LEGO lies not only in the final creation but also in the joy of building together! Happy building!