Benefits of Making Your Own Soap
Making soap at home offers many benefits. It’s a creative and enjoyable hobby. It also allows you to control the ingredients, ensuring your soap is natural and free of harmful chemicals. This is especially helpful for those with sensitive skin or specific skin conditions. Homemade soap can be tailored to suit individual needs.
One of the key benefits is cost-saving. Store-bought specialty soaps can be expensive. Making your own soap is often more affordable and yields larger quantities. Additionally, you can choose high-quality ingredients without exceeding your budget.
Another advantage is environmental friendliness. Homemade soap eliminates unnecessary packaging and minimizes waste. If you choose natural and eco-friendly ingredients, your soap will have less impact on the environment.
Making soap at home also provides room for personalization. You can experiment with different essential oils, natural colors, and additives. This allows you to create unique soaps that suit your preferences.
Finally, homemade soap makes thoughtful gifts. Personalized, fragrant bars of soap are perfect for friends, family, or holiday presents. It’s a heartfelt, handmade item that shows you care.
Tools and Ingredients Needed to Make Soap
Making soap at home requires specific tools and ingredients. Having the right ones ensures success and safety.
Essential Tools for Soap-Making
- Heatproof Containers: Use glass or stainless steel bowls for mixing oils and lye.
- Measuring Tools: Digital scales for accurate ingredient measurement and measuring cups for liquids.
- Stirring Utensils: Silicone or stainless steel spatulas and spoons to mix ingredients.
- Thermometer: Check temperatures of oils and lye solution accurately.
- Stick Blender: Blend ingredients efficiently without air bubbles.
- Soap Molds: Choose silicone molds for easy removal of finished soap.
- Rubber Gloves and Safety Goggles: Protect your hands and eyes from lye.
- Mask: Prevent inhaling lye fumes during mixing.
- Old Towels: Insulate soap molds as the soap hardens.
- Knife or Soap Cutter: Cut the soap into bars after it sets.
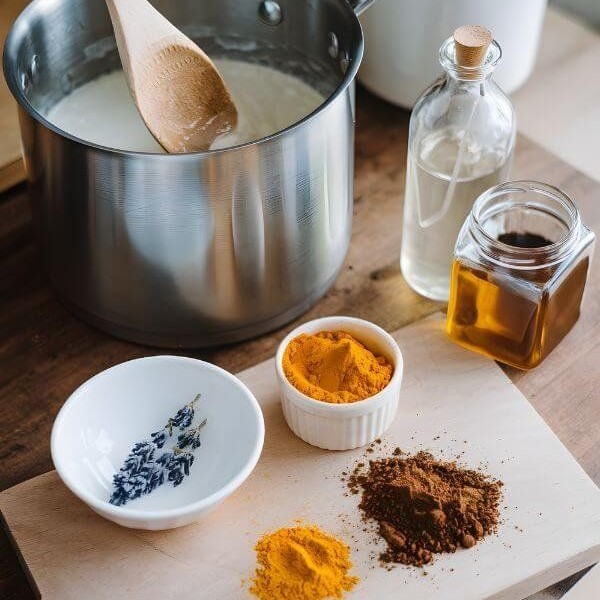
Key Ingredients for Soap-Making
- Oils and Fats: Olive, coconut, palm, or shea butter are common bases.
- Lye (Sodium Hydroxide): Needed for the chemical reaction called saponification.
- Distilled Water: Avoid impurities found in tap water.
- Essential Oils: Add fragrance with scents like lavender, mint, or citrus.
- Natural Colorants: Use activated charcoal, turmeric, or clay for a unique appearance.
- Additives: Herbs, oatmeal, or honey can add texture and skin benefits.
Gather these tools and ingredients before making soap. Always prioritize safety during the soap-making process.
Understanding Different Types of Soap-Making Methods
There are several methods for making soap at home. Each method has its own advantages and challenges. It’s important to understand the differences to choose the right one for your needs.
Cold Process Soap-Making
Cold process soap-making is a traditional and popular method. It uses oils, lye, and water to create soap.
- Process: Oils and lye solution are mixed, then poured into molds to set. Saponification happens as the soap cures over 4 to 6 weeks.
- Benefits: It allows full control over ingredients, uses natural additives, and creates long-lasting bars.
- Challenges: Requires precision, safety precautions, and patience due to the curing time.
Melt and Pour Soap Method
Melt and pour is the easiest soap-making method. It’s great for beginners.
- Process: Pre-made soap base is melted, customized with additives, and poured into molds to solidify.
- Benefits: Safe, quick, and does not involve handling lye. Soap is ready in hours.
- Challenges: Limited control over the ingredients and sometimes less natural than other methods.
Hot Process Soap-Making
Hot process soap-making is faster but slightly more complex.
- Process: Similar to the cold process but uses heat during mixing to accelerate saponification.
- Benefits: Soap is ready for use sooner than the cold process. Texture is more rustic.
- Challenges: The thick consistency can make it harder to pour into molds evenly.
These methods provide options for making soap at home. Beginners may like the melt and pour method, while experienced crafters may prefer cold or hot process methods for more control and customization.
Safety Considerations When Making Soap
Making soap at home requires careful handling to ensure safety. It’s important to follow specific precautions.
- Handle Lye with Care: Lye is a caustic substance that can cause burns. Always wear rubber gloves and safety goggles when working with lye.
- Work in a Well-Ventilated Area: Lye fumes can be harmful if inhaled. Mix lye in a space with good airflow.
- Avoid Using Aluminum Tools: Aluminum reacts with lye, causing dangerous chemical reactions. Use glass, stainless steel, or silicone tools instead.
- Protect Your Skin and Eyes: Wear long sleeves, pants, gloves, and goggles to keep lye from coming into contact with your skin or eyes.
- Mix Lye into Water Slowly: Always add lye to water, not the reverse. Pour it slowly and carefully to prevent splashing.
- Keep Children and Pets Away: Soap-making tools and materials can be hazardous. Ensure children and pets are not near your workspace.
- Prepare for Spills: Have vinegar ready to neutralize lye spills immediately.
- Use Accurate Measurements: Incorrect proportions of lye and oils can lead to unsafe or unusable soap.
- Monitor Heat Levels: Lye and water mixing causes heat. Use a thermometer to check temperatures, ensuring safety.
- Label Materials Clearly: Label your lye and other ingredients to avoid accidents or confusion.
By observing these safety measures, you can make soap at home with confidence, protecting yourself and others.
Step-by-Step Guide
Making soap at home involves simple, clear steps. Follow this guide to create your own soap easily.
Choosing Your Recipe and Ingredients
- Decide Your Soap-Making Method: Choose between cold process, hot process, or melt and pour methods based on your skill level.
- Select a Recipe: Start with a beginner-friendly recipe that matches your chosen method.
- Choose Oils and Fats: Use oils like olive, coconut, or palm, and consider adding butters like shea or cocoa.
- Pick Additives: Select fragrances, colors, and natural additives like oatmeal, herbs, or activated charcoal.
- Gather Supplies: Ensure you have all ingredients and tools needed before starting.
How to Measure and Mix Ingredients
- Measure Oils and Fats: Weigh oils using a digital scale for precision.
- Prepare Lye Solution: Slowly mix lye into distilled water, never the reverse, while stirring gently.
- Check Temperatures: Use a thermometer to ensure lye solution and oils are within the correct range (around 110°F).
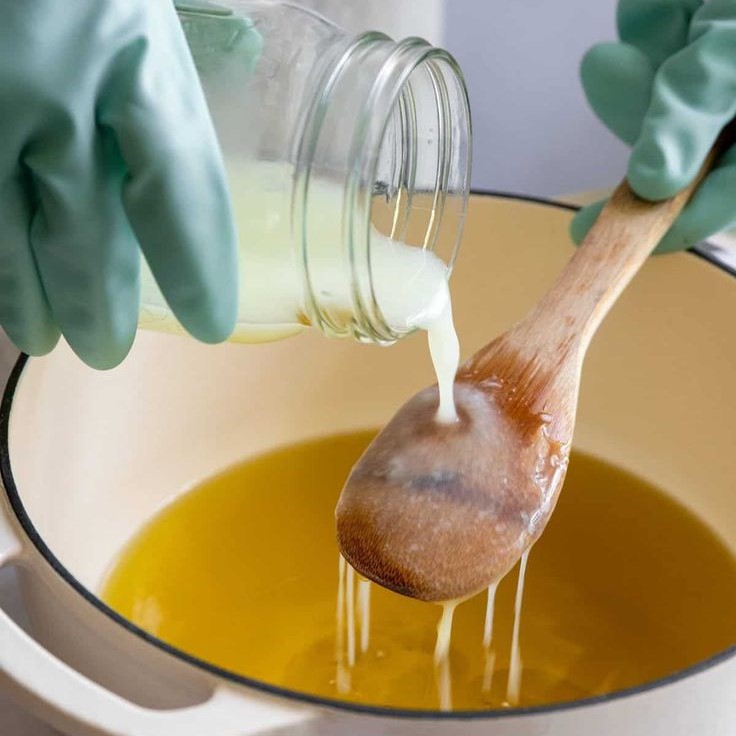
- Combine Ingredients: Pour the lye solution into the oils gradually. Stir gently until it emulsifies.
- Blend with a Stick Blender: Use small bursts to thicken the mixture until “trace” is achieved, where it resembles pudding.
Pouring and Setting the Soap
- Prepare Soap Molds: Line molds if required and ensure they are clean and ready to use.
- Pour Mixture Into Molds: Pour the soap batter evenly into the molds. Smooth the tops if necessary.
- Insulate Molds: Cover the molds with towels to retain heat and aid saponification.
- Allow to Set: Let the soap sit undisturbed for 24-48 hours until firm.
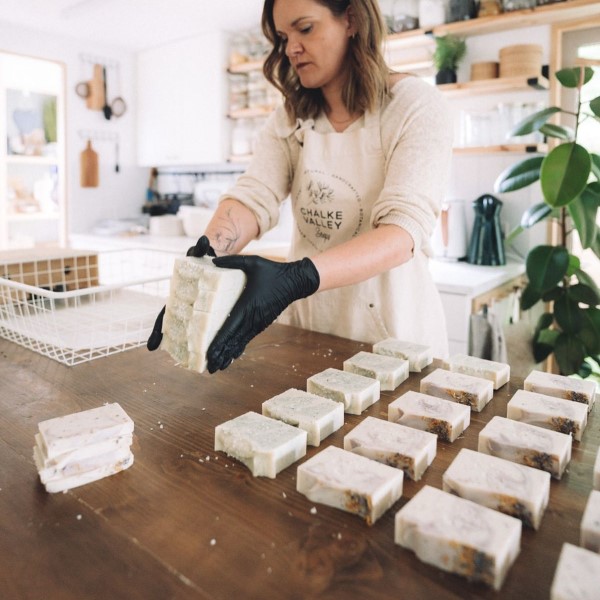
- Remove and Cut Soap: Once hardened, remove the soap from the molds and use a knife or cutter to slice into bars.
- Cure Your Soap: For cold process soap, store the bars in a cool, dry place for 4-6 weeks to cure fully.
By following these steps, you can make soap safely and successfully at home. Adjust recipes and methods to suit your preferences or skill level.
Tips for Customizing Your Homemade Soap
Customizing your homemade soap makes it unique and personal. You can create soaps suited to your needs. Adding colors, fragrances, and natural additives enhances the appeal and benefits of your soap.
Adding Colors and Fragrances
- Choosing Safe and Natural Colors: Use natural colorants like turmeric, activated charcoal, or clay. These options are safe for skin.
- Usage of Essential Oils: Mix essential oils for fragrance, such as lavender, citrus, or peppermint. Avoid synthetic perfumes.
- Test Colors and Scents: Add small amounts first to check the effect. Adjust for intensity as needed.
- Combining Scents: Blend complementary oils, like vanilla and orange, for a balanced aroma.
- Avoid Overpowering Smells: Use moderate quantities to keep scents subtle and pleasant.
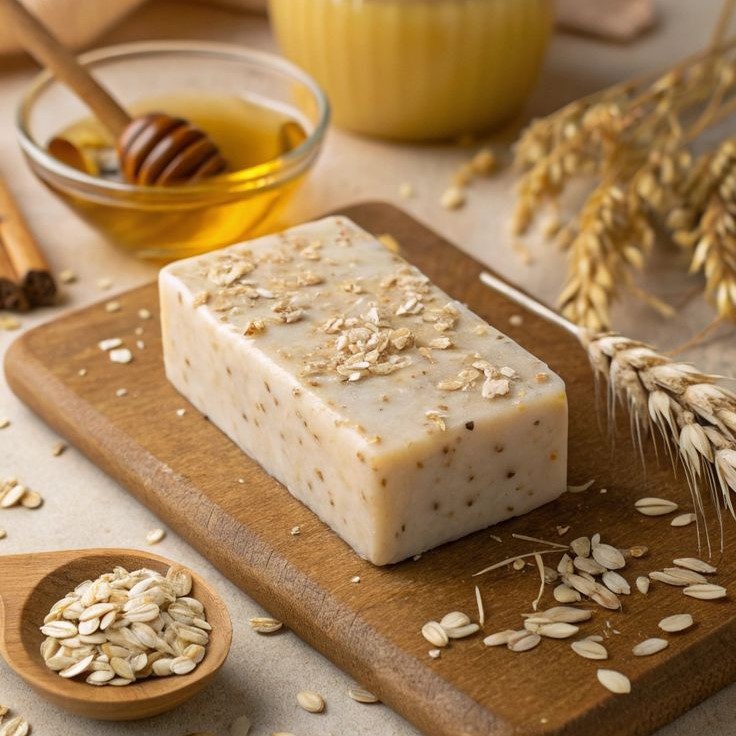
Using Natural Herbs and Additives
- Incorporating Herbs: Add dried rosemary, chamomile, or calendula for natural benefits and texture.
- Adding Skin-Friendly Additives: Use oatmeal, honey, or aloe vera for moisturizing and soothing properties.
- Creating Textures: Experiment with items like poppy seeds for gentle exfoliation.
- Testing Allergens: Avoid additives that might cause allergies or irritate sensitive skin.
- Balancing Quantity: Add herbs and extras in moderation to avoid clogging molds.
Customizing soap lets you blend creativity with functionality. Experiment with combinations to find your perfect soap recipe.
Common Mistakes to Avoid in Soap-Making
When making soap at home, even small mistakes can impact the final product. Awareness of common pitfalls can help you create high-quality soap with ease and confidence. Here are the most common mistakes to avoid:
- Using the Wrong Measurements:
- Incorrect measurements of lye, oils, or water can ruin your soap.
- Always use a digital scale for accuracy.
- Follow the recipe closely to maintain the right balance.
- Not Checking Temperatures:
- Mixing lye and oils at incorrect temperatures may result in separation or improper saponification.
- Use a thermometer to ensure oils and lye are at the right range (usually around 110°F).
- Skipping Safety Precautions:
- Failing to wear gloves, goggles, or long sleeves can result in burns or injuries.
- Always handle lye with care and work in a well-ventilated area.
- Inadequate Mixing:
- Under-mixing can lead to incomplete saponification, leaving lye present in the soap.
- Use a stick blender in short bursts to achieve “trace” uniformly.
- Pouring Lye into Liquids Incorrectly:
- Adding water to lye instead of lye to water can cause dangerous splashes.
- Always pour lye into water slowly while stirring carefully.
- Using Improper Ingredients:
- Ensure all ingredients are suitable for soap-making.
- Avoid substituting oils without checking their effect on the end product.
- Neglecting to Cure Soap Fully:
- Using soap before it cures can cause skin irritation.
- Let cold process soap cure for 4 to 6 weeks for the best results.
- Skipping Mold Preparation:
- Forgetting to prepare molds can make it difficult to remove the soap later.
- Use silicone molds or line other molds with parchment paper for easy release.
By avoiding these common soap-making pitfalls, you’ll improve your results and enjoy the process more. Start with simple recipes and focus on the basics to refine your craft.
Storing and Caring for Your Homemade Soap
Proper storage ensures your handmade soap remains fresh and effective. Caring for it can extend its life.
Tips for Storing Soap
- Keep in a Cool, Dry Place:
- Store finished soap away from moisture and direct sunlight.
- Avoid humid areas to prevent softening or melting.
- Use Airtight Containers:
- Seal soaps individually to maintain fragrance and prevent contamination.
- Separate scented soaps to avoid mixing aromas.
- Allow Proper Airflow During Curing:
- For cold process soap, stack or arrange bars to allow air circulation.
- Store on racks or open shelves until fully cured.
- Avoid Refrigeration:
- Don’t store soaps in the fridge. Cold temperatures may affect texture and scent.
- Room temperature is best for maintaining soap quality.
- Line Soap with Paper:
- For long-term storage, wrap soaps in wax or parchment paper.
- This protects soap from dust and keeps it dry.
Extending the Life of Your Soap
- Use a Draining Soap Dish:
- A dish with holes allows water to drain after use.
- Avoid leaving soap sitting in water, as this causes softening.
- Rotate with Multiple Bars:
- Alternate bars to let some dry between uses.
- This prevents constant exposure to water and extends their life.
- Handle Soap Gently:
- Avoid dropping or rubbing the soap excessively.
- Treat bars gently to retain their shape and texture.
- Minimize Excessive Heat During Use:
- Don’t use soap in overly hot water as it reduces consistency.
- Moderate temperatures preserve quality longer.
Proper storage and care keep homemade soap in perfect condition. Follow these tips for lasting quality.
Creative Ideas for Packaging and Gifting Your Soap
Packaging and gifting handmade soap can make your creations more appealing. Thoughtful designs and creativity enhance presentation.
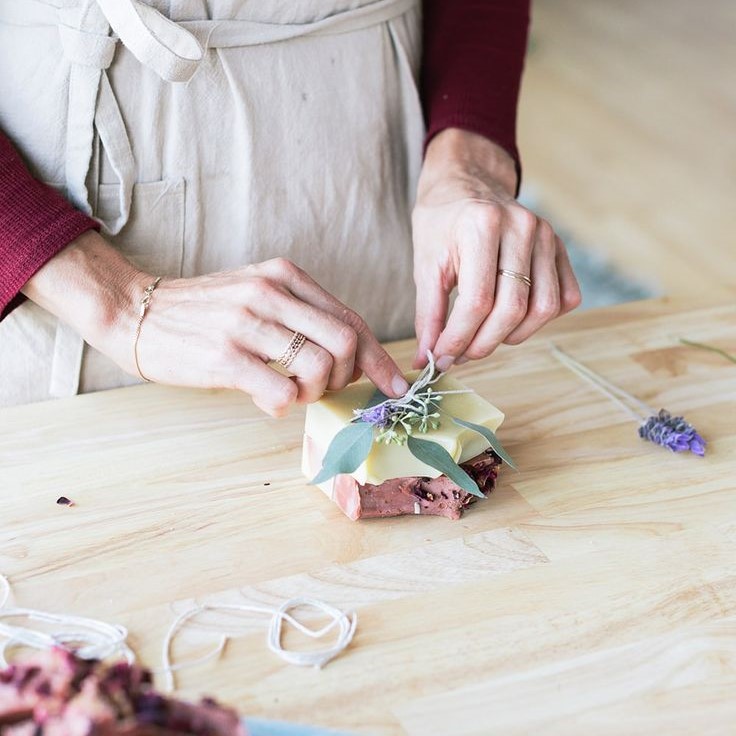
Simple and Elegant Packaging Ideas
- Use Kraft Paper: Wrap soaps individually with kraft paper for a rustic, organic look.
- Tie with Twine or Ribbon: Secure packaging with twine or decorative ribbon to add visual interest.
- Label Your Soap: Include ingredient details and fragrance notes on custom-made labels for a professional finish.
- Add Stamps or Stickers: Decorate the packaging with stamps, stickers, or small embellishments for extra charm.
- Shrink Wrap: Protect soaps with shrink wrap to maintain freshness and cleanliness during storage.
Creative Gifting Ideas
- Soap Gift Sets: Combine different soaps in gift boxes or baskets for variety.
- Theme-Based Bundles: Match soaps to themes, like floral scents for spring or citrus for summer.
- Use Vintage Items: Place soaps in teacups, tins, or wooden crates for a unique presentation.
- Personalized Messages: Include handwritten notes to make each gift feel special and heartfelt.
- Add Small Extras: Pair soaps with small items like washcloths or candles for added value.
Eco-Friendly Packaging
- Reusable Bags: Package soaps in cotton or burlap bags that recipients can reuse.
- Recycled Materials: Opt for recycled paper, cardboard, or biodegradable wrap to minimize waste.
- Minimalist Design: Keep the design simple and clean to reduce packaging materials.
Gifting and packaging are opportunities to showcase your creativity. These ideas can make your soap stand out and bring joy to recipients.
Conclusion: Start Making Soap at Home Today
Making soap at home is a rewarding craft that allows you to unleash your creativity while enjoying the numerous benefits of personal care products. With the right materials and knowledge outlined in this guide, you are well-equipped to begin your soap-making journey today.
As you experiment with different recipes and designs, you will find that the process itself is a source of joy. You will not only have lovely homemade soaps to enjoy and gift but also a new skill that delights your creative pursuits. So gather your materials, follow the steps, and start making soap at home—it’s time to create beautiful and functional art!


