
Introduction: The Allure of Glazed Air Dry Clay Jewelry
Creating jewelry from air dry clay offers a unique opportunity for personal expression and creativity. However, many crafters wonder how to glaze air dry clay to enhance the final product’s appearance. Glazing is a finishing technique that adds shine, protects the surface, and intensifies colors. In this guide, we will delve into the art of glazing air dry clay jewelry, providing you with essential tips, methods, and insights to achieve that perfect glossy finish.
Whether you’re making earrings, pendants, or bracelets, learning to glaze will elevate your artwork, making it look professional and polished. Let’s explore the items you’ll need, various techniques for glazing, and answers to common questions about completing your air dry clay jewelry.
Understanding the Basics of Air Dry Clay
Before we dive into glazing techniques, it’s important to understand the properties of air dry clay.
- Material Properties:
Air dry clay is a versatile medium that hardens when exposed to air, making it ideal for crafting without the need for a kiln. Unlike traditional clay, which requires heating, air dry clay can be manipulated and shaped easily, allowing for a wide range of creative applications. - Variety of Finishes:
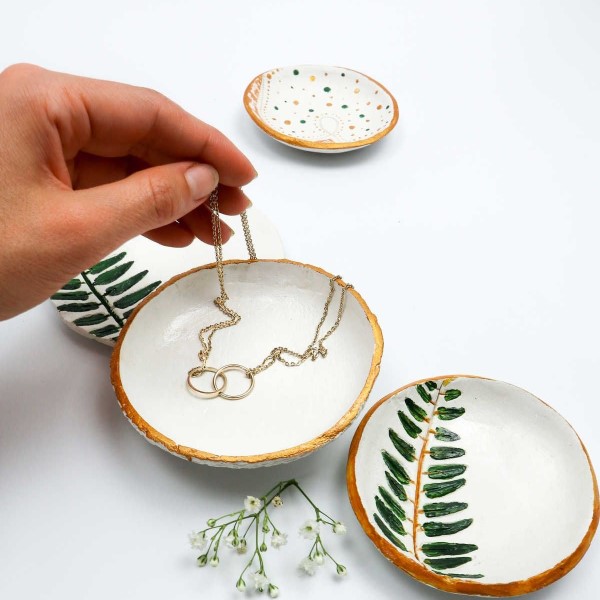
Once dried, air dry clay can be painted, decorated, and glossed to achieve different textures and finishes. Glazing enhances the visual appeal, protecting the clay and bringing out its colors. - Uses in Jewelry:
Crafters often prefer air dry clay for jewelry due to its lightweight nature. It’s perfect for creating statement pieces without bulky weight. Furthermore, air dry clay can be transformed into endless shapes and designs, appealing to both beginners and experienced artists alike.
Materials Needed for Glazing Your Clay Jewelry
How to glaze air dry clay? To successfully glaze your air dry clay jewelry, gather the following materials:
Air Dry Clay
- Choosing Quality Clay:
When selecting air dry clay for jewelry-making, prioritize high-quality options. High-quality clay is more pliable and versatile, making it easier to work with and ensuring a better final product. - Recommended Brands:
There are several trusted brands that specialize in air dry clay suitable for jewelry. Popular brands include:- Sculpey: Known for its wide range of colors and easy-to-mold texture, perfect for crafting detailed pieces.
- DAS: Offers a strong yet lightweight clay that dries to a smooth finish, ideal for jewelry.
- Crayola: Provides non-toxic options, which are safe for kids and accessible for beginners.
- Color Variety:
Consider choosing clay in various colors to create unique and bright designs for your jewelry. Additionally, you can mix colors to create custom shades. - Pre-Conditioning:
Before using, remember to knead the clay to ensure it has a consistent texture. This process will make it easier to shape and mold.
Glazing Medium
- Importance of Glaze:
A proper glazing medium is essential for enhancing the aesthetic of your air dry clay creations. Glazes add shine, depth, and protection to your pieces. - Types of Glazing Mediums:
Consider different options for glazing:- Water-Based Glaze: Easy to apply, and suitable for most projects, ensuring compatibility with air dry clay.
- Acrylic Sealant: Provides a clear protective finish while adding a glossy sheen to your jewelry.
- Specific Varnish: Designed for air dry clay, these varnishes adhere well to the surface and offer excellent durability.
- Choosing the Right Finish:
Decide whether you want a matte or glossy finish before selecting your glazing medium. Each type offers a unique look; matte provides a subtle finish, while glossy adds vibrancy.
Application Tools
- Necessary Brushes:
Acquire brushes specifically designed for applying glaze. A variety of brush sizes is recommended to help you reach intricate areas and achieve even coverage. - Smoothing Sponges:
Sponges can be handy for smoothing out your pieces after applying glaze. They can also be used to create unique textures on the surface of your clay. - Spray Bottle Option:
If you opt for a spray-on glaze, a spray bottle can deliver an even coat to your clay pieces. This method can reduce brush strokes and provide a consistent finish. - Tool Maintenance:
Remember to clean your brushes and sponges thoroughly after each use. Proper maintenance extends the life of your tools and ensures optimal application on future projects.
Sealing Products
- Purpose of Sealants:
Using sealing products helps provide an additional layer of protection to your clay pieces. They guard against moisture and wear, extending the life of your jewelry. - Types of Sealants:
Look for various sealing options to suit your needs:- Matte Sprays: These provide a non-reflective finish that maintains the original colors without added gloss.
- Glossy Sprays: For a shiny appearance, glossy sprays enhance colors and protect against fading.
- Submersible Sealers: These are suitable for clay pieces that may get wet or come in contact with food or beverages.
- Application Technique:
Apply sealers in thin, even coats. Follow the manufacturer’s instructions for drying times to ensure the best results.
Protective Work Surface
- Setting Up Your Workspace:
Creating a clean area for your project not only helps you stay organized but also protects your surfaces from potential damage. - Materials to Use:
- Newspapers: An easy and cost-effective way to protect your table, as they can be disposed of after use.
- Craft Mats: Reusable and washable, craft mats provide an excellent surface for crafting.
- Disposable Table Covers: Ideal for temporary projects, these can be spread out over your work area for quick clean-up.
- Organizing Your Space:
Keep all your materials organized and within reach. This ensures a smooth crafting process and minimizes interruptions while you work. -
Cleaning After Crafting:
Once you’ve completed your project, be sure to clean your workspace thoroughly. Properly dispose of any waste materials, and store unused clay and tools for future use.
Step-by-Step Guide: How to Glaze Air Dry Clay Jewelry
How to glaze air dry clay? Now that you have your materials, follow these steps to glaze your air dry clay jewelry expertly:
Step 1: Prepare Your Clay Beads or Pieces
Before applying any glaze, ensure your clay piece is fully dried and solidified. Here’s how to prepare:
- Drying Time:
Allow your air dry clay jewelry to dry for at least 24-48 hours, depending on the thickness. Ensure there is complete dryness to avoid issues when glazing. - Sanding:
If desired, lightly sand any rough edges or surfaces using fine-grit sandpaper. This helps create a smoother surface for glazing, ensuring a professional look.
Step 2: Choose Your Glazing Method
There are various glazing techniques you can employ; select one that suits your style:
- Brush-On Glaze:
- Application: Use a clean brush to apply the glaze evenly over the surface of your clay piece. Use long, even strokes to avoid brush marks.
- Layering: For a deeper shine, consider applying multiple layers. Allow each layer to dry completely before adding the next one.
- Spray-On Glaze:
- Distance: Hold the spray can about 6-12 inches away from the piece. This helps to avoid drips and ensures an even coverage.
- Multiple Coats: Similar to the brush-on method, multiple thin coats can achieve a desired glossy effect. Allow sufficient drying time between coatings.
- Dipping:
- Technique: If your piece is small enough, consider dipping it directly into the glaze. This method can give a more consistent finish.
- Drain Excess: Allow excess glaze to drip off before placing the piece on a drying rack or parchment paper.
Step 3: Drying and Curing
After glazing, it’s essential to let your jewelry cure properly:
- Drying Time:
Depending on the type of glaze used, drying times can vary. Generally, allow 2-4 hours for the glaze to dry completely. - Curing Process:
Some glazes may require additional curing times to achieve the best durability and shine. Check the product specifications for any extra curing instructions.
Step 4: Final Touches and Polishing
Once your clay bead jewelry is fully dry, consider the following steps for a refined look:
- Inspect the Finish:
Check for any spots that may have missed glaze application. Spot-treat any areas that require extra coverage. - Polish for Extra Shine:
You can use a soft cloth or sponge to gently buff the surface for added shine. This step will enhance the overall appearance of your piece. - Check for Imperfections:
If you notice any imperfections once the glaze is dry, you can carefully sand them down and reapply glaze if necessary.
Color Combinations and Creative Ideas
One of the most exciting aspects of making clay bead jewelry is the ability to play with color. Here are some ideas on combining colors to create unique pieces:
- Monochromatic Themes:
Use varying shades of one color family. For example, creating a bracelet using different shades of blue can produce a soothing and elegant look. - Contrasting Colors:
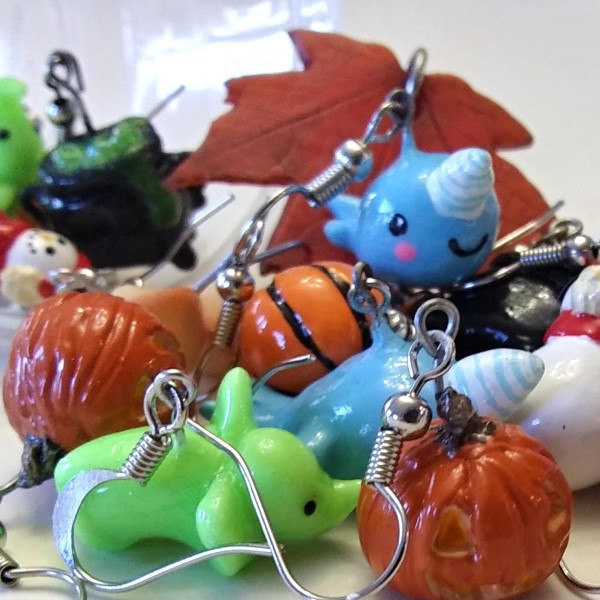
Experiment with contrasting colors to create striking designs. For instance, pairing bright orange beads with deep blue can make a bold statement. - Seasonal Inspiration:
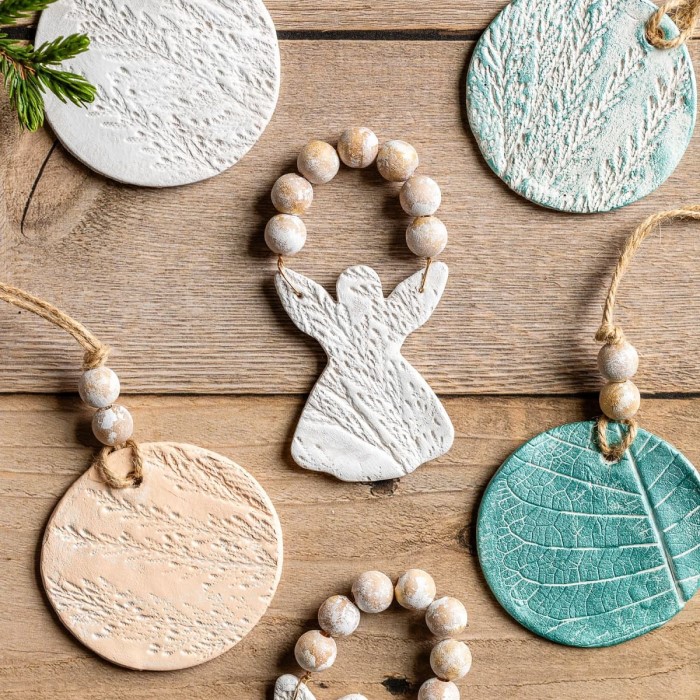
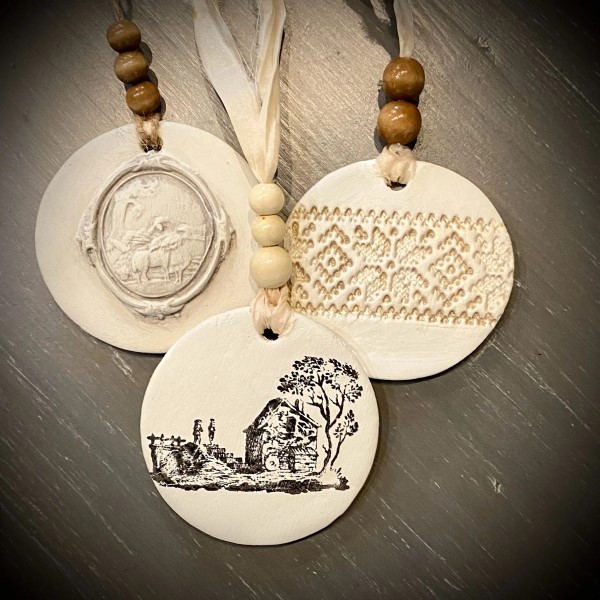
Draw inspiration from seasons. Create fall-themed jewelry using warm oranges and deep reds, or springtime pieces with pastels. - Textural Play:
Combine beads made from different materials, such as wood or metal, to add diversity to your designs. Mixing materials not only enhances visual interest but also creates an engaging tactile experience. - Themed Collections:
Consider creating themed jewelry collections tied to holidays or events. For example, make a spooky Halloween collection in black and orange, or a beachy summer collection in blues and greens.
Frequently Asked Questions
To clarify common inquiries regarding the glazing process and materials, here are some frequently asked questions:
What do I use to glaze air dry clay?
You can use a variety of glazing mediums such as water-based glaze, acrylic sealers, or specific polymer clay varnishes designed for air-dry clay.
What do you put on air dry clay to make it glossy?
For a glossy finish, consider using a clear gloss varnish or a water-based glaze. You can also choose a spray-on sealant for ease of use.
Is there a way to glaze clay without a kiln?
Yes, with air dry clay, you can directly apply glaze without needing a kiln. The glaze will harden upon air drying along with the clay.
Can you glaze air dry clay to make it food safe?
Most standard air dry clay is not food safe after glazing. If food safety is your goal, choose polymer clay designed for food contact, or consider using food-safe finishes specifically manufactured for that purpose.
Conclusion: Mastering the Art of Clay Bead Jewelry
In summary, learning how to glaze air dry clay opens up a world of creative possibilities for making beautiful jewelry. From selecting the right materials to experimenting with color combinations, every step allows you to add your personal touch.
Whether you’re crafting a piece for yourself or creating a heartfelt gift, the joy of making clay bead jewelry is immense. Embrace the creativity and functionality of your designs, ensuring that each bracelet or necklace not only looks stunning but reflects your individual style.
With the knowledge gained from this article, you can confidently tackle your next jewelry project. So gather your materials, unleash your artistic flair, and enjoy making dazzling clay bead creations that shine!


