Introduction: The Artistic Appeal of Clay Bead Bracelets
Crafting your own jewelry is not only a fun activity but also a highly rewarding way to express your creativity. Among the popular DIY projects, learning how to make clay bead bracelets stands out for its accessibility and versatility. Clay bead bracelets have become a fashionable choice due to their vibrant colors and endless design possibilities. Whether you are preparing for a costume party, seeking gifts for loved ones, or looking to start a new hobby, clay bead bracelets offer a wonderful creative outlet.
This article explores various aspects of making clay bead bracelets, including essential techniques, color combinations, and unique design ideas. By the end, you will be equipped with the knowledge to create stunning clay bead jewelry that reflects your personal style. Let’s dive into the exciting world of clay bead bracelet making!
Materials Needed to Make Clay Bead Bracelets
How to make clay bead bracelets? Before getting started, it’s essential to gather all required tools and materials. This ensures a smooth crafting experience and allows you to focus on creativity on your project. Here’s a comprehensive list of what you’ll need:
- Polymer Clay:
The foundation of your beads. Choose a selection of vibrant colors or classic shades. Popular brands include Sculpey and Fimo, known for easy molding and durability. - Bead-Making Tools:
Invest in basic tools such as a rolling pin, cutting blade, and various modeling tools. A toothpick works well for making holes in the beads, and a craft knife is useful for cutting shapes. - Beading String or Cord:
Decide whether you want a flexible bracelet using elastic cord or a sturdier design using nylon thread. Elastic is popular for ease of wear, while nylon thread allows for intricate patterns. - Bead Spacers and Clasps:
These components are optional but can enhance your bracelet’s durability and visual appeal. Choose spacers that fit your design taste. - Baking Supplies:
Once you’ve shaped your beads, you’ll need to bake them. A baking sheet lined with parchment paper will prevent the beads from sticking during the baking process. - Finishing Supplies:
Consider using sanding tools or fine-grit sandpaper to smooth the beads after baking. This adds a polished look to finished pieces.
Step-by-Step Guide to Making Clay Bead Bracelets
How to make clay bead bracelets? Now that you have all your materials, let’s break down the steps involved in creating your clay bead bracelets:
Step 1: Preparing the Clay
The first step is to condition the polymer clay:
- Kneading: Take a small portion of your chosen clay and roll it into a ball. Knead until it becomes soft and pliable. This process ensures even coloring and makes shaping easier.
- Color Mixing (Optional): If desired, mix different colored clays to create unique shades. For example, combining blue and white will give you a pastel hue.
Step 2: Shaping Your Beads
Once your clay is conditioned, you can start shaping your beads:
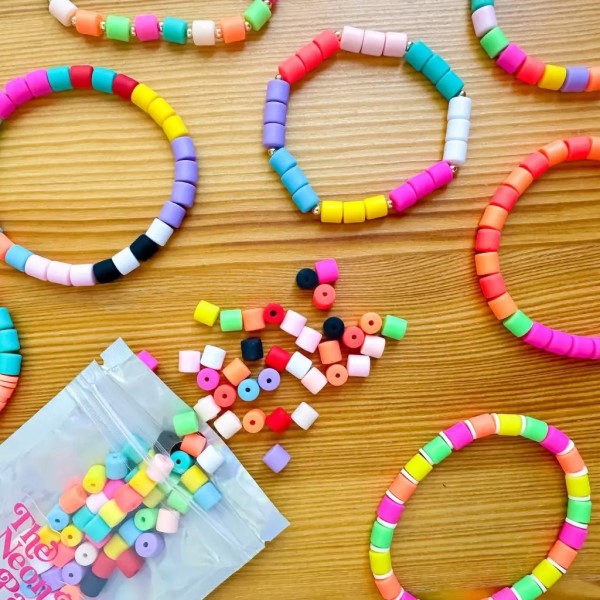
- Forming Beads:
Roll portions of conditioned clay into small balls or your desired shapes. The size can vary from tiny accent pieces to larger focal beads. - Creating Holes:
Use a toothpick to create holes in each bead. Ensure the holes are wide enough to accommodate your chosen string or cord. - Experimenting with Shapes:
Beyond round beads, you can create unique shapes like stars, hearts, or even geometric designs. This adds character to your overall bracelet.
Step 3: Baking the Beads
After shaping the beads, they need to be hardened:
- Preheat the Oven:
Follow the manufacturer’s instructions for the appropriate temperature, typically between 230°F and 275°F (110°C to 135°C). - Baking the Beads:
Place the shaped beads on the parchment-lined baking sheet. Bake them according to the recommended time, usually 15-30 minutes based on the size and thickness of the beads. - Cooling:
Allow the beads to cool completely after baking. Be cautious, as they can be hot straight out of the oven.
Step 4: Assembling the Bracelet
Now it’s time to put your creation together:
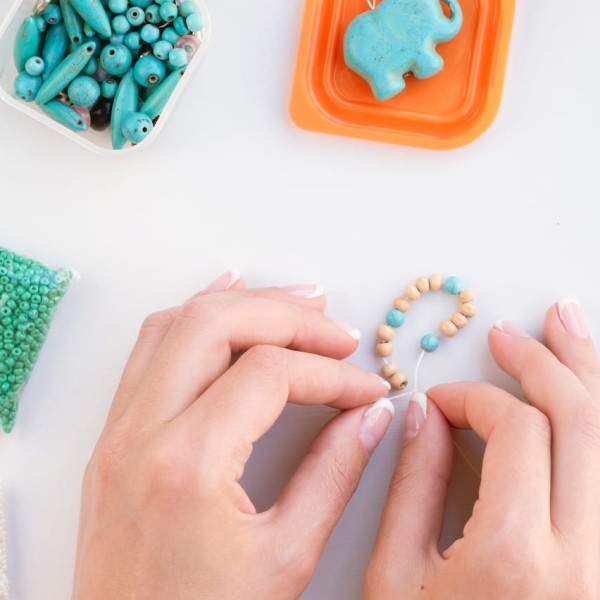
- Stringing the Beads:
Start strung through your chosen cord. Begin with a pattern, alternating colors and shapes, or create a random design. Adjust the number of beads based on your wrist size. - Securing the Ends:
If using elastic cord, tie a secure knot when finished, leaving enough stretch to slip the bracelet on and off easily. - Using a Clasp:
For nylon or other types, attach a clasp at each end. Follow the manufacturer’s guidelines to ensure a secure and attractive finish to the bracelet.
Color Combinations and Design Inspiration
One of the exciting aspects of making clay bead bracelets is the freedom to choose color combinations that resonate with you. Here are some popular ideas for color schemes to inspire you:
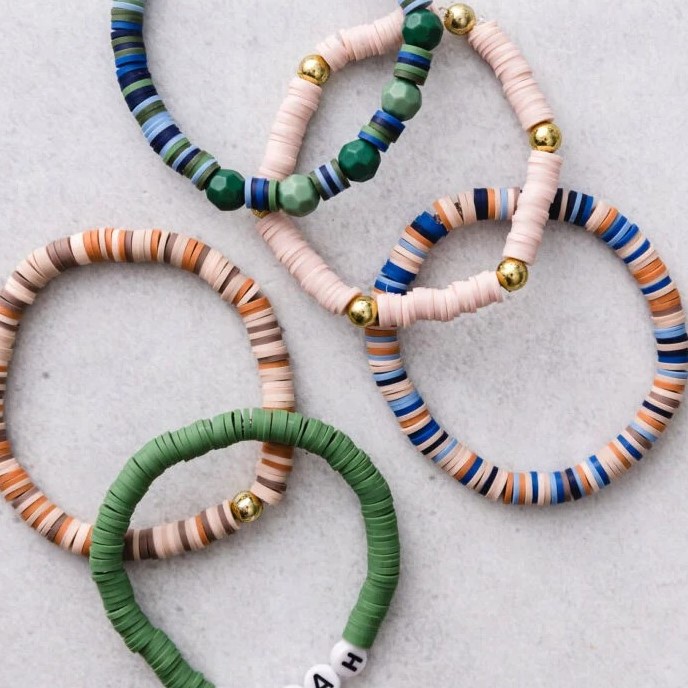
- Monochromatic Schemes:
Pick shades of one color family and incorporate different beads to create depth. For example, various blues ranging from pastel to navy create a calming ocean vibe. - Contrasting Colors:
Use color theory to create striking contrasts. For instance, pairing orange beads with blue helps create an eye-catching look, while red and green can invoke a festive spirit. - Seasonal Themes:
Tailor your color scheme to reflect the seasons. Use warm reds, oranges, and yellows for fall, while soft pastels are great for spring. - Themed Bracelets:
You can create themed bracelets representing favorite holidays, hobbies, or interests. For example, a beach theme could incorporate aqua, sandy beige, and seashell colors. - Incorporating Patterns:
Use marbling techniques by blending two or more colors together to create a unique swirling effect within each bead. This adds an artistic touch.
Personalization and Unique Touches
To make your clay bead bracelets truly unique, consider these personalization ideas:
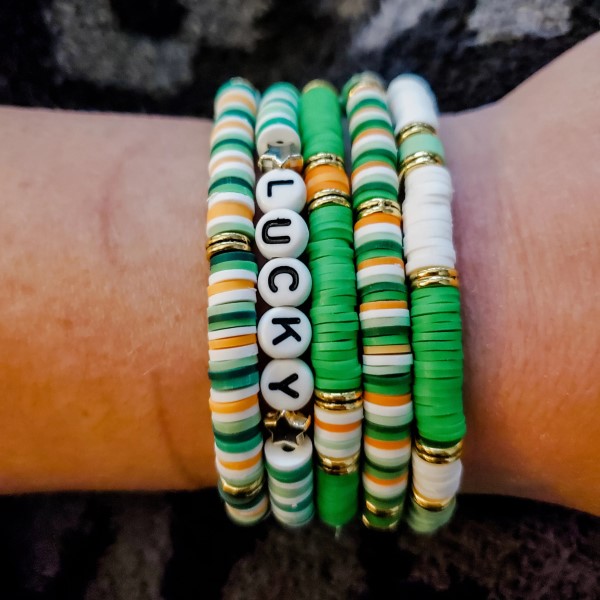
Custom Text or Shapes
- Imprinting Techniques:
Use rubber stamps or custom-made stamps to imprint initials, symbols, or designs directly onto your clay beads. This method allows for personal expression and adds a unique touch to each piece. - Choosing Designs:
Select symbols or shapes that resonate with the wearer or the occasion. For instance, you could use hearts for a romantic gift, stars for a whimsical feel, or personalized initials for a more intimate approach. - Application Before Baking:
Ensure that you apply these stamps before baking the beads. The heat will set the imprint, making it permanent and allowing the design to stand out once cured. - Meaningful Touch:
Incorporating custom text or shapes elevates the bracelet from a simple accessory to a meaningful keepsake. It personalizes the jewelry, making it more special and memorable.
Mixing Materials
- Variety of Components:
Introduce different materials such as wooden beads, metal spacers, or gemstones to complement your clay creations. This variety enhances the sensory experience of the bracelet and increases visual appeal. - Textural Contrast:
Mixing materials provides texture contrast, which can make the bracelet more visually stimulating. The smoothness of clay can harmoniously blend with the graininess of wood or the cool feel of metal. - Creative Combinations:
Experiment with combinations by pairing brightly colored clay beads with natural wooden beads or metallic elements. This approach can create eye-catching designs that stand out and express unique styles. - Diverse Color Palettes:
Mixing materials also allows for diverse color palettes, offering new opportunities to play with color schemes. You can match or contrast the hues for a distinctive effect.
Layering Bracelets
- Creating Stacked Designs:
Making multiple clay bead bracelets gives you the opportunity to create layered designs that draw attention. Stacked bracelets allow wearers to express their personality and sense of style. - Mixing and Matching Styles:
Incorporate different styles, colors, and profiles in your layered bracelets. For example, combine a chunky clay bead bracelet with a delicate chain bracelet to create a visually interesting contrast. - Seasonal Themes:
Layering can also reflect seasonal themes. Use warmer colors for autumn bracelets and lighter hues for spring and summer. This practice keeps your jewelry fresh and relevant throughout the year. - Expressing Personality:
Layering showcases individuality and creativity. Each person can create a unique combination that reflects their tastes, making every bracelet stack personal and one-of-a-kind.
Gift-Worthy Creations
- Thoughtful Gifts:
Handmade clay bead bracelets make for meaningful gifts that show care and effort. A personalized touch can often convey feelings more than commercially made items. - Custom Designs:
When crafting bracelets for friends or family, consider their favorite colors, hobbies, or symbols. A custom design tailored to their preferences can make your gift stand out. - Occasion-Specific Gifts:
Consider the occasion when designing the bracelet. Create festive designs for holidays, or special pieces for birthdays or anniversaries, keeping themes in mind. - Presentation Matters:
Don’t forget to present your handmade creations thoughtfully. Use decorative boxes or wrapping to enhance the gifting experience, adding an extra layer of excitement for the recipient.
Frequently Asked Questions
To enhance your understanding further, let’s address some common questions related to making clay bead bracelets:
What do you need to make clay bead bracelets?
To create clay bead bracelets, you need polymer clay, bead-making tools, beading string or cord, spacers, clasps, baking supplies, and finishing tools.
What kind of string do you use for clay bead bracelets?
You can use elastic cord, nylon thread, leather, or any sturdy string. Elastic cord is popular because it offers easy wearing, while nylon allows for intricate designs.
How to secure clay bead bracelets?
To secure the bracelet, tie strong knots if using elastic or attach clasps if using threaded materials. Ensure the closure is secure yet comfortable for the wearer.
How to make beads with clay?
To create beads from clay, simply condition the clay, shape it into desired forms, create holes for threading, bake to harden, and finally string them to make bracelets.
Conclusion: Embrace Your Creativity with Clay Bead Bracelets
How to make clay bead bracelets? In conclusion, making clay bead bracelets is not only a delightful crafting activity but also a wonderful way to express creativity. By focusing on the right techniques and getting inspired by color combinations, you can create beautiful DIY jewelry pieces that reflect your unique style.
With the knowledge gained from this guide, you can confidently embark on your journey of creating these stunning accessories. Whether crafting for yourself or as gifts, clay bead bracelets are sure to bring joy and satisfaction. So gather your materials, unleash your creativity, and enjoy the enchanting world of clay jewelry making!


