Introduction
Crafting is an excellent way for kids to express their creativity while developing fine motor skills. One fun and engaging craft you can try is the turtle paper plate craft. Thisactivity not only captures children’s imagination but also serves as a fantastic learning experience. In this article, we will explore a step-by-step guide to making a turtle out of a paper plate. So gather your supplies and let’s dive into this creative project that kids will love to make and display!
Why Choose a Turtle Paper Plate Craft?
When considering crafts for kids, it’s essential to select projects that are enjoyable yet instructional. The turtle paper plate craft checks all the boxes! Here’s why it’s a great choice:
- Simple Materials: The materials required for this craft are minimal and often found around the house. All you need are paper plates, paint, and basic crafting supplies.
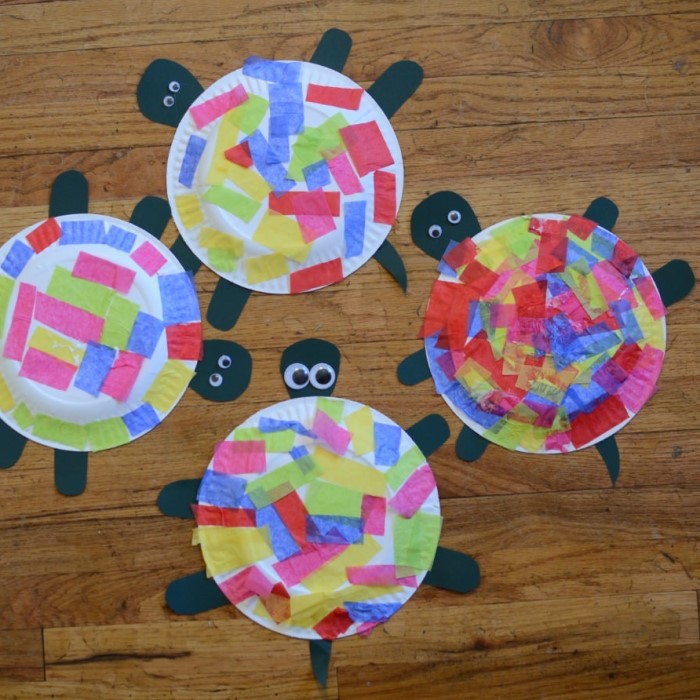
- Encourages Creativity: Kids can personalize their turtles in various ways, using different colors and designs. This flexibility fosters creativity and self-expression.
- Educational Value: Through this craft, children can learn about turtles, their habitat, and their importance in nature. Integrating a lesson about wildlife helps enhance the overall learning experience.
- Fun and Interactive: This craft is not only engaging but also allows for hands-on learning. Kids can work individually or in groups, making it a perfect classroom activity.

Materials Needed
Before starting the craft, gather all your materials. Here’s a comprehensive list:
- Paper Plates: Use standard-sized paper plates for the turtle’s shell.
- Acrylic or Tempera Paint: Green and brown shades are ideal.
- Paintbrushes: Use various sizes for different painting areas.
- Scissors: For cutting out shapes if necessary.
- Glue: A strong adhesive for attaching elements.
- Construction Paper: Additional colors for details like the turtle’s eyes and feet.
- Markers or Crayons: For adding personal touches.
- Googly Eyes: Optional, but these add fun character!
- Paper Towels: Good for cleaning up spills or messes.
Step-by-Step Instructions
Now, let’s get started with the step-by-step process of making the turtle paper plate craft:
Step 1: Preparing Your Work Area
Begin by setting up a clean workspace. Make sure you have ample room to work without distractions. This is crucial when working on creative projects with kids, as it makes the process smoother and more enjoyable.
- Cover Your Surface: Place newspapers or a plastic sheet to protect the working surface from paint and glue.
- Organize Materials: Lay out all your supplies so everything is easily accessible.
Step 2: Painting the Turtle’s Shell
Start by painting the paper plate to create the turtle’s shell:
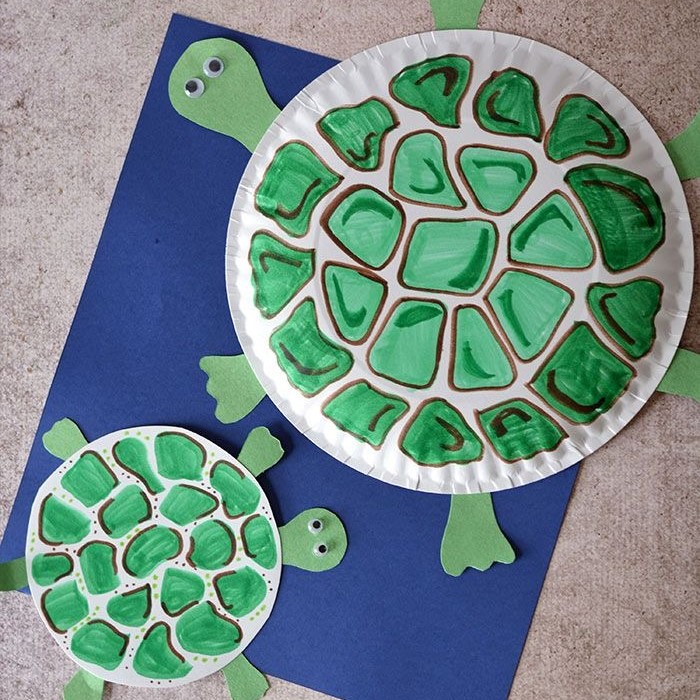
- Choose Your Colors: Use green paint for the shell base. You can also mix in some brown for added texture.
- Apply Paint Evenly: Let kids use their paintbrushes to apply the paint evenly across the plate. Encourage them to get creative by layering different colors.
- Let It Dry: Allow the shell to dry completely before moving on to the next steps. This prevents smudging and ensures a cleaner design.
Step 3: Adding Details to the Shell
Once the shell is dry, it’s time to add some details:
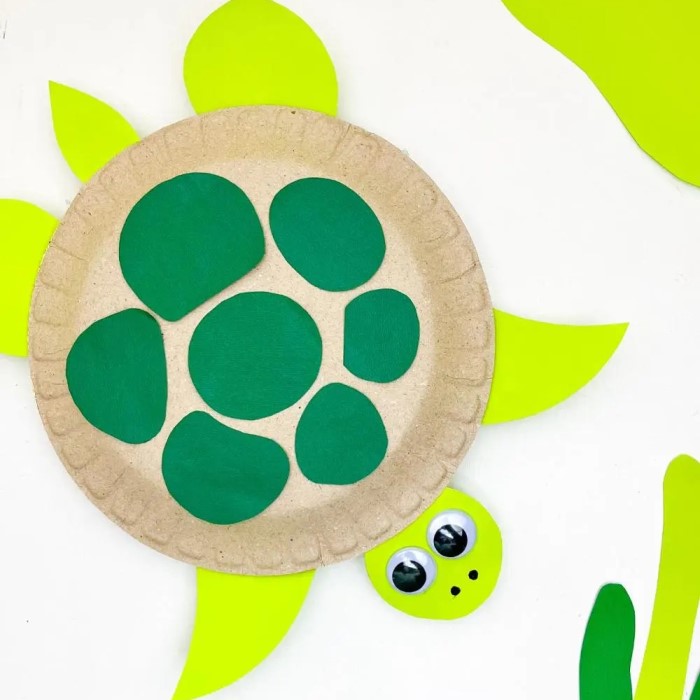
- Create Patterns: Kids can use darker shades of green or even black paint to create patterns on the shell. Consider shapes like circles or spirals.
- Texture Additions: Drawing texture with the back of a brush or a sponge can add an interesting layer to the design.
Step 4: Crafting Legs, Tail, and Head
Next, it’s time to craft the legs, tail, and head of the turtle:
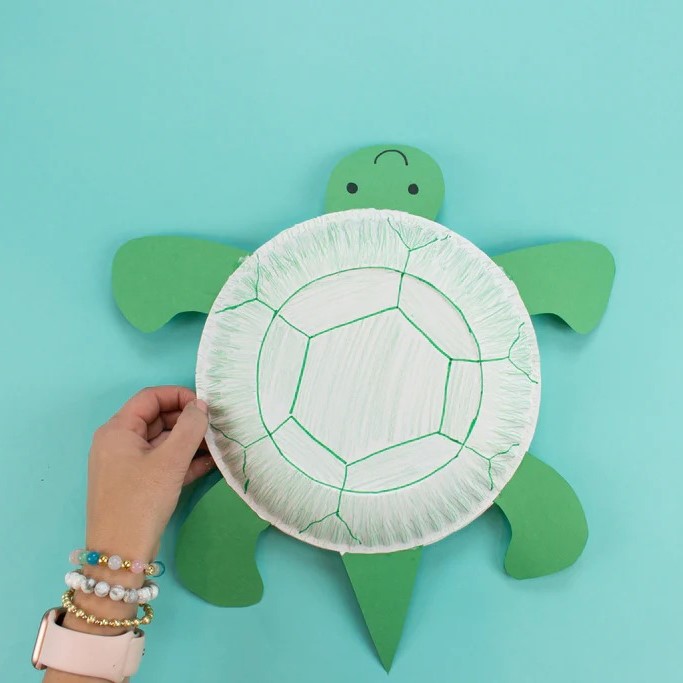
- Legs and Tail: Use construction paper to cut out four legs and a tail. A simple oval shape works well for both.
- Attach the Pieces: Glue these cutouts to the underside of the painted paper plate. Position them appropriately so the turtle sits flat.
Step 5: Creating the Turtle’s Face
Now comes the fun part: designing the turtle’s face!
- Head Creation: Cut an additional piece of construction paper for the turtle’s head. Ensure it’s proportional to the shell.
- Facial Features: Use markers or googly eyes to add eyes, a smile, and any other features. This personalized touch gives the turtle character and fun expression!
Step 6: Final Touches
Once the turtle is assembled, encourage kids to add final touches:
- Decorative Elements: Add flowers, seaweed, or other features on the turtle’s shell. This can involve drawing or additional cutouts.
- Share Their Work: Allow time for each child to share their creation and talk about the unique features they added.
Educational Component: Learning About Turtles
Incorporating an educational aspect into craft time provides significant benefits:
Discuss Turtle Habitats
- Introduce Turtle Species: Begin by introducing various species of turtles to the children. Explain that there are many different types, such as sea turtles, freshwater turtles, and tortoises. Each species has its own unique habitats and characteristics.
- Explain Habitats: Discuss the specific environments where each species lives. For example, sea turtles reside in oceans and are known for their long migrations. Freshwater turtles can be found in rivers, ponds, and lakes, while tortoises primarily live on land.
- Describe Unique Characteristics: Highlight the distinctive features of different turtle species. For example, discuss how sea turtles have flippers that allow them to swim efficiently, whereas tortoises have sturdy, dome-shaped shells and thick legs adapted for terrestrial life.
- Encourage Questions: Foster engagement by encouraging children to ask questions about turtles and their habitats. This inquiry-based approach helps deepen their understanding and keeps them invested in the discussion.
- Connect to the Craft: Relate back to the turtle paper plate craft by explaining how their art can reflect the different habitats and characteristics of the turtles they created. This connection reinforces learning while being creative.
Highlight Conservation
- Discuss the Importance of Conservation: Explain why turtle conservation is vital for maintaining ecological balance. Talk about the role turtles play in their environments, such as helping to maintain healthy seagrass beds or controlling jellyfish populations.
- Introduce Threats to Turtles: Explain the various threats that turtles face, such as habitat destruction, pollution, climate change, and poaching. Use age-appropriate language to ensure that children grasp these concepts without becoming overly frightened.
- Empower Kids to Take Action: Share simple actions that children can take to help protect turtles. These might include practices like not littering, picking up trash at the beach, and spreading awareness among their peers about the importance of turtle conservation.
- Incorporate Interactive Activities: Consider organizing a related activity, such as a “turtle-friendly pledge” where kids can promise to adopt eco-friendly habits. This makes the conservation message more personal and impactful.
- Use Success Stories: Share positive stories about successful conservation efforts, such as the increase in certain turtle populations due to protective legislation or community involvement. This can motivate children by showing them that their actions, no matter how small, can have a positive impact.
Use Visual Aids
- Incorporate Pictures of Turtles: Use pictures to showcase different species of turtles in their natural habitats. Highlight the unique colors, shapes, and features that make each species special. This visual representation can captivate the children’s attention and aid in their learning.
- Utilize Videos: Consider showing short videos that depict turtles in their natural environments. These videos can illustrate behaviors, feeding habits, and interactions with their habitats and ecosystems. Seeing turtles in action can enhance understanding and retention of information.
- Create a Visual Learning Corner: Set up a corner in the crafting area with books, posters, and images of turtles and their habitats. This can serve as a resource for children to explore further information while they work on their crafts.
- Use Infographics: Present infographics that summarize key facts about turtles, their habitats, and conservation efforts. Infographics can simplify complex information, making it easier for kids to understand.
- Encourage Discussions Around Visual Aids: After displaying visual aids, engage the children in discussions. Ask them what they noticed, what surprised them, and how they think they can help turtles. This dialogue reinforces the learning experience and develops critical thinking skills.
FAQs About Turtle Paper Plate Crafts
What age group is suitable for this craft?
The turtle paper plate craft is ideal for kids ages 4-10. Younger children may require more supervision, while older kids can work independently.
Can this craft be done in a classroom setting?
Absolutely! This craft is perfect for classrooms as it helps develop fine motor skills and encourages teamwork among peers.
What if I don’t have certain materials?
You can adapt this project with whatever materials are available. For example, if you lack paint, use colored paper instead.
Is this craft eco-friendly?
Yes, using paper plates and natural paint types can make this craft relatively eco-friendly. Always consider recycling any waste generated during the project.
Conclusion: Crafting Memories with Turtle Paper Plates
The turtle paper plate craft is an exciting, creative, and educational activity for kids. By following this step-by-step guide, you can provide children an opportunity to explore their artistic side while learning about turtles and their habitats. Whether done at home or in a classroom setting, this craft results in memorable creations that kids will cherish.
Getting hands-on with crafts like the turtle paper plate project fosters creativity, teamwork, and learning in a fun and engaging manner. Encourage your young artists to unleash their imagination and enjoy the process of crafting something unique. This activity serves as a fantastic way to spend quality time together while promoting both fun and education through art!


