Introduction
Paper mache is a timeless and versatile crafting technique that allows enthusiasts to create a wide range of decorative items for their homes. It invites artists of all skill levels to engage in imaginative projects that are not only beautiful but also useful. From intricate sculptures to practical home decor pieces, paper mache showcases creativity in various forms. As you explore this crafting avenue, you may be asking yourself about the best paper mache materials to use for your next project. This article dives into the trending materials and methods, providing you with all the necessary information to create stunning home decor projects successfully.
What Are the Core Ingredients of Paper Mache?
When it comes to paper mache, understanding the core ingredients is crucial. You may wonder, what are the four primary ingredients for paper mache? Typically, the fundamental components include paper, an adhesive, water, and optional additives. Let’s break these down further:
- Paper: Traditional paper mache recipes often use newspaper because it is inexpensive and readily available. However, a variety of paper types can be employed to achieve different effects. For example, brown paper bags provide a sturdy texture, while tissue paper can give your projects a delicate finish. Incorporating colored or patterned paper also allows for more creative freedom.
- Adhesives: The type of adhesive you use is essential for binding the paper strips together. Many crafters opt for PVA glue (polyvinyl acetate) due to its strong bonding capabilities. Alternatively, flour-based pastes can work just as well, particularly in traditional settings. These pastes can often be made at home, making them both accessible and economical.
- Water: Water acts as a critical component in the paste, allowing the adhesive to activate and bind the paper strips effectively. The ratio of glue to water can vary depending on the recipe, but a common starting point is mixing one part glue to two parts water. This flexibility ensures you can customize the consistency based on your project needs.
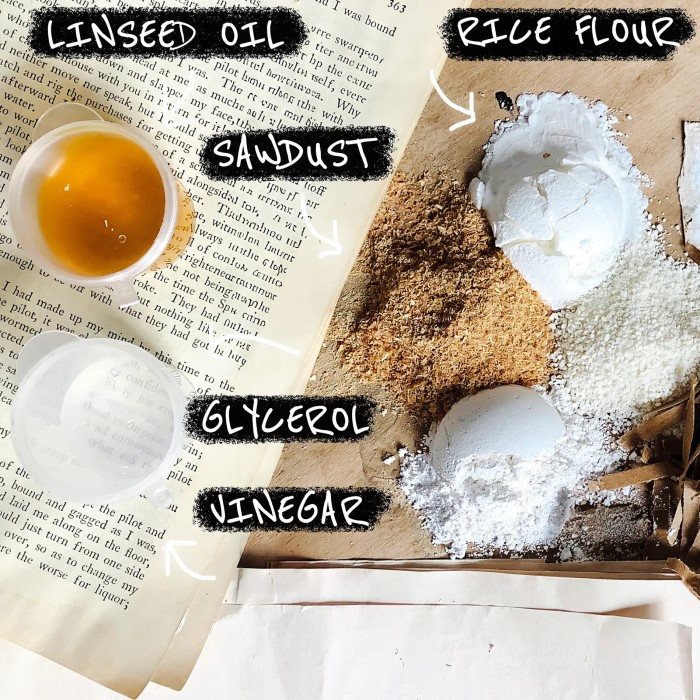
- Optional Additives: Some artisans incorporate additional materials to enhance their paste. For example, adding a teaspoon of dish soap can improve the mixture’s durability. Similarly, including powdered pigments can bring color to your paste, creating unique visual aspects in your finished project.
Discovering Essential Paper Mache Materials
To succeed in your home decor projects, you must choose the right paper mache materials. Let’s explore some essential materials that have gained popularity among crafters.
1. Variety of Paper Types
A wide range of paper options exists to help you achieve the desired texture and appearance in your projects:
- Newsprint: The go-to choice for many paper mache projects, newsprint is inexpensive and easy to manipulate. Its light weight allows for quick drying, making it a favorite among crafters.
- Tissue Paper: Known for its delicate nature, tissue paper can add a soft finish to your projects. It can be layered to produce beautiful visual effects, including translucence when light is applied.
- Brown Paper: Used for its durability and rustic appearance, brown paper bags or kraft paper can provide strength to your creations. This paper type is ideal for bowls, vases, and other functional decor pieces.
- Recycled Paper: For environmentally conscious creators, using recycled paper is a fantastic way to craft. Old magazines, wrapping paper, or even scrap paper can be torn into strips and repurposed in your projects.
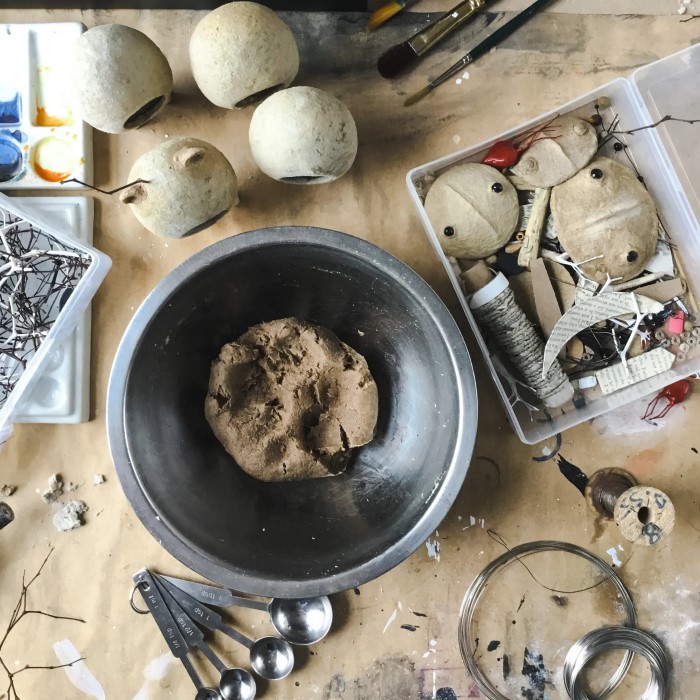
2. Evaluating Adhesives and Paste Recipes
When working on paper mache projects, it is vital to select the right adhesive. Some common paste recipes include:
- Classic Glue Paste: A mixture of PVA glue and water is the most straightforward and accessible option. Measure one part glue to two parts water and stir until you achieve a smooth consistency. This paste is widely favored for its effectiveness.
- Traditional Flour Paste: A time-honored approach, flour paste can be made by combining one part flour with three parts water. Heat the mixture gently while stirring until it thickens. The paste should be left to cool before use, creating a smooth and reliable adhesive.
- Wallpaper Paste: Another alternative for serious crafters is premixed wallpaper paste. High-quality wallpaper adhesives offer strong bonding properties and are easy to apply, making them suitable for larger projects.
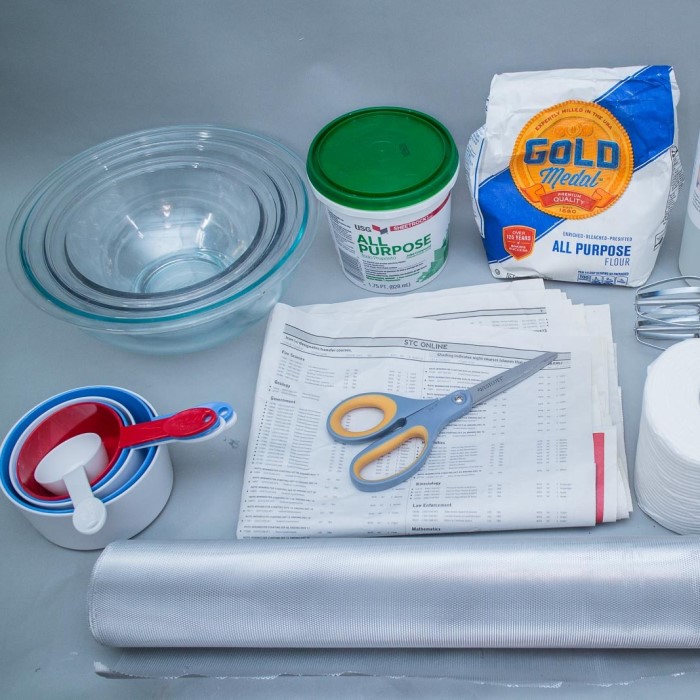
3. Necessary Tools and Supplies
When it comes to crafting with paper mache, having the right tools can make a significant difference. Here are some tools and supplies you might need:
- Mixing Bowl: A sturdy bowl is essential for blending your paste. Consider using a glass or plastic container to make cleanup easier.
- Scissors: Keep a sharp pair of scissors handy to cut your paper into strips. A clean edge allows for better adhesion and a smoother finish.
- Paintbrushes: Various sizes of brushes are essential for applying paste. A larger brush works well for spreading adhesive on surfaces, while smaller brushes can help with detailed application.
- Plastic Wrap: Cover your projects in progress with plastic wrap or a damp cloth to prevent them from drying out too quickly. This is particularly beneficial for multi-layer projects.
Mastering Creative Techniques for Paper Mache Projects
Now that you know the materials, it’s time to delve into techniques that will elevate your paper mache crafting experience. Here are some creative methods worth considering:
1. Layering Techniques
Layering is one of the most effective techniques used in paper mache, increasing the strength and durability of your projects. Here are important steps to follow when layering:
- Dry Time: Always allow each layer to dry completely before adding the next. Rushing this process can lead to structural weaknesses or unwanted moisture buildup.
- Smooth Application: Ensure each layer is applied smoothly without wrinkles or air bubbles. These imperfections can weaken your final product and detract from its overall appearance.
- Use a Smooth Surface: Working on a flat surface helps you to maintain an even application, enhancing the integrity of your layers.
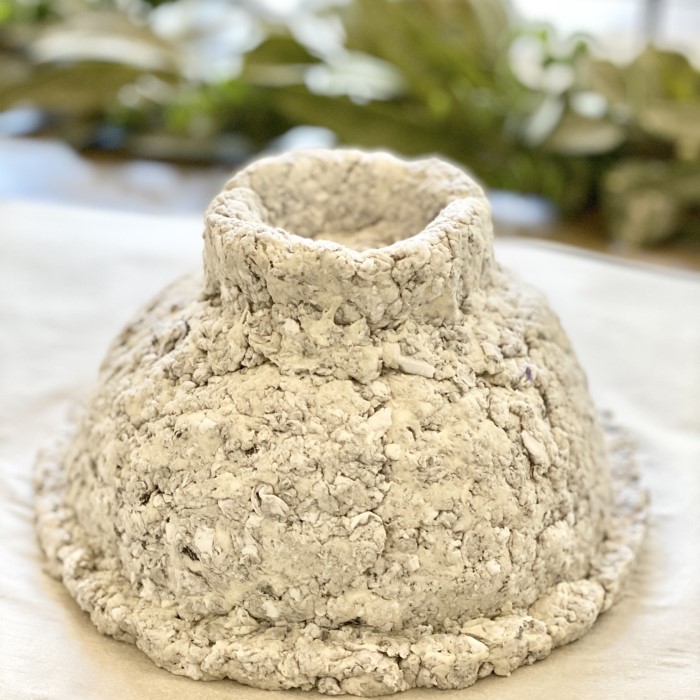
2. Utilizing Molds and Forms
Molds are great tools for shaping your projects. They can significantly influence the final outcome of your creations:
- Balloons: Inflate a balloon and cover it with several layers of paper mache to create hollow objects like bowls or decorative vases. Once dried, pop the balloon and carefully remove it.
- Cardboard Forms: Use cardboard to construct forms for more complex designs. Whether it’s an animal figure or a decorative piece, cardboard structures allow for creativity and support.
- Natural Materials: Consider using natural items like stones or leaves as forms. Cover these with paper mache to create unique textures and organic shapes.
Elevating Your Paper Mache Creations with Decoration
Once your projects are dry, it’s time to unleash your creativity in the decoration phase. Various methods can enhance the appearance of your paper mache items:
- Painting: Acrylic paints are vibrant and durable, making them a perfect choice for decorating your creations. They dry quickly and can provide a waterproof finish when properly sealed.
- Decoupage: A fun way to personalize your projects, decoupage involves applying layers of patterned paper or images onto your pieces using a glue medium. This method can infuse color and personality into your items.
- Varnishing: After decorating, consider applying a clear varnish to seal and protect your work. This step is essential for both aesthetic appeal and durability.
- Adding Accessories: Beads, ribbons, or fabric strips can be incorporated to add detail and embellishments. Personal touches make your projects one-of-a-kind.
Frequently Asked Questions About Paper Mache
As you embark on your paper mache adventure, some questions may arise. Here are answers to common queries:
- What are the four ingredients for paper mache?
The main ingredients include paper, adhesive (such as PVA glue), water, and optional additives for enhanced performance. - What materials do you need to make paper mache paste?
To make paper mache paste, you typically need adhesive, water, and sometimes flour or starch for a more traditional paste. - How do you make paper mache?
Making paper mache involves tearing paper into strips, mixing your paste, and layering the strips onto a mold or form. Allow each layer to dry completely before adding the next. - Is paper mache just glue and water?
While glue and water are key components, using various paper types and optional additives can significantly enhance the quality and creativity of your projects.
Conclusion
Navigating the world of paper mache materials offers endless creative possibilities for home decor projects. By understanding the essential ingredients and techniques outlined in this article, you are now equipped to embark on exciting crafting endeavors. Whether you choose to craft decorative bowls, personalized wall art, or intricate sculptures, the possibilities are limited only by your imagination.
Exploring various types of papers, adhesive recipes, and creative techniques ensures that your projects will stand out and bring a unique charm to your home. The art of paper mache invites everyone to unleash their creativity and transform ordinary materials into extraordinary pieces of art. So gather your supplies, tap into your creativity, and start crafting remarkable decor items that reflect your personal style!