Air dry clay is a versatile medium that allows crafters and artists to create stunning pieces without the need for a kiln. However, one common concern among creators is how to seal air dry clay effectively. Sealing not only protects your creations but also enhances their appearance. In this article, we will explore the best techniques for sealing air dry clay, types of sealers to use, and important tips to ensure your projects endure the test of time.
Why Sealing Air Dry Clay is Important
Sealing air dry clay is an essential step in preserving its quality. Air dry clay is delicate and can easily crack, chip, or degrade over time. Applying a suitable sealant protects your creations from damage and enhances their durability, allowing them to last longer and maintain their original appearance.
Preventing Cracking and Damage
Unsealed air dry clay is prone to cracking and breaking. Changes in humidity or temperature can cause the clay to expand or shrink, leading to damage. Sealing creates a protective layer, shielding the clay from moisture and environmental factors that may weaken it. A good sealant ensures your creative work remains intact during handling or accidental impacts.
Enhancing Durability and Longevity
Sealing your air dry clay significantly improves its lifespan. It adds a layer of strength to the clay, making it more resistant to wear and tear. Sealed clay maintains its colors and textures better over time, avoiding fading or surface damage. By taking this extra step, you preserve the effort you put into your artwork for years to come. Prioritizing durability ensures your finished pieces remain as beautiful as the day they were created.
Types of Sealants for Air Dry Clay
Choosing the right sealant is essential to protect and preserve air dry clay creations. Various sealants enhance durability and prevent damage. Below are three popular types of sealants used for this purpose.
Acrylic Sealers
Acrylic sealers are versatile and easy to apply. They form a transparent, glossy coating that boosts durability. These sealers protect against moisture while maintaining the original appearance of the clay. Acrylic sealers are readily available in spray or brush-on forms at craft stores.
Mod Podge
Mod Podge is a trusted option for sealing air dry clay. This water-based sealer is simple to use and comes in gloss, matte, and satin finishes. It doubles as an adhesive and sealant, preserving colors and details effectively.
Resin-Based Sealants
Resin-based sealants offer superior protection for air dry clay. Their tough and waterproof finish is ideal for intricate designs and outdoor projects. Resin sealants provide a smooth, glass-like surface, enhancing both durability and aesthetics. Proper ventilation is required when applying resin.
Understanding these sealants allows you to pick the best option for your creations. Select based on your project type and desired finish.
Preparing Air Dry Clay Before Sealing
Proper preparation of air dry clay is crucial before sealing. It ensures a smooth and durable finish. By following the right steps, you protect your creation and enhance its appearance.
Cleaning and Smoothing the Surface
Start by cleaning the surface of your clay project. Remove any dust, grease, or dirt using a soft, damp cloth or sponge. This ensures the sealant adheres properly without trapping particles. Inspect your clay for uneven areas or rough textures.
Next, gently sand the surface using fine-grit sandpaper. Focus on edges and areas that need smoothing. Sanding not only enhances the overall look but also helps the sealant spread evenly. Brush away any dust particles left after sanding for a clean surface.
Ensuring Proper Drying Time
Before sealing, allow the clay to dry completely. Air dry clay hardens by losing moisture in the air. This process may take 24 to 72 hours, depending on the thickness and size of your piece. Follow the manufacturer’s drying time recommendations for the best results.
Place your clay creation on a flat, dry surface in a well-ventilated room. Do not expose it to high humidity, as this may prolong the drying process. Flip the piece carefully for even drying on all sides. Ensure that the clay is fully hardened before proceeding to seal it. Applying sealant on wet clay could cause cracking or ruin your work.
Taking these steps will help you achieve a perfect base for sealing your air dry clay projects. Clean, smooth, and thoroughly dried clay will result in a flawless and long-lasting finish after sealing.
Step-by-Step Guide to Sealing Air Dry Clay
Sealing air dry clay correctly ensures a long-lasting and polished finish. Follow these steps to protect your creations effectively.
Applying Sealant Evenly
Choose the Right Sealant
- Identify Your Project Needs: Consider the type of project you are working on. Different sealants serve various purposes, so understanding your requirements will help you decide on the appropriate product.
- Acrylic Sealer: This water-based option is ideal for indoor projects. It dries clear and provides a durable finish that protects against dust and moisture.
- Mod Podge: Known for its versatility, Mod Podge works as both a glue and a sealer. It is available in different finishes, such as matte, gloss, and satin, allowing you to choose the look that best suits your project.
- Resin-Based Sealant: If you’re looking for maximum durability and a high-gloss finish, a resin-based sealant could be the best choice. It is particularly suitable for items that will be exposed to water or harsh conditions.
Prepare Your Workspace
- Clean the Area: Ensure your workspace is free from dust, debris, and clutter. A clean environment will help prevent any unwanted particles from settling on your project while sealing.
- Ventilation is Key: Work in a well-ventilated area, especially when using spray sealants or any materials that emit fumes. Open windows or use a fan to create airflow and maintain a safe working environment.
- Gather Your Supplies: Before starting, have all necessary tools and materials at hand. This includes your chosen sealant, brushes or sponges, paper towels, and protective gear, such as gloves and a mask if needed.
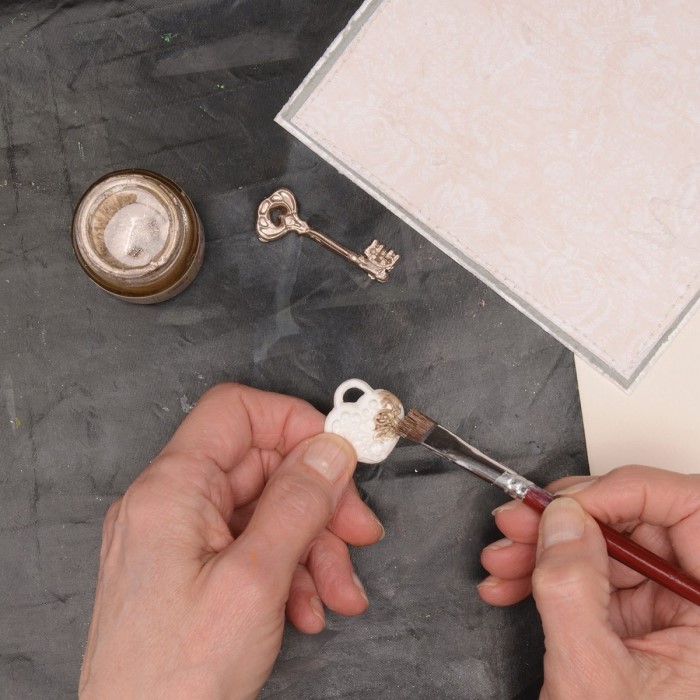
Apply the First Layer
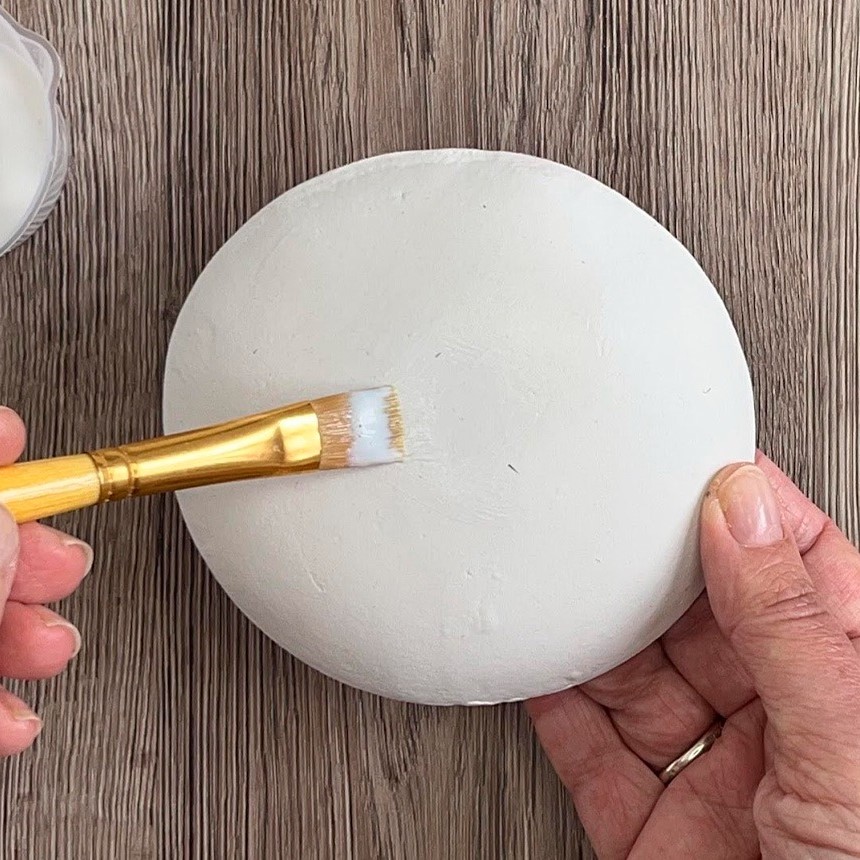
- Use the Right Tool: Choose a soft brush or sponge for applying the sealant. A soft brush will provide more control and help prevent streaks, while a sponge can offer a smooth finish.
- Thin, Even Strokes: When applying the sealant, make thin, even strokes to ensure full coverage of the surface. Start from one corner and work your way across, overlapping each stroke slightly to avoid missing spots.
- Avoid Overloading: Be cautious not to overload your brush or sponge with sealant. Applying too much product at once can lead to clumping, drips, or uneven areas, which can compromise the overall finish of your project.
Let It Settle
- Allow Time for Absorption: After applying the first coat, give it a few minutes to settle. This waiting period is crucial as it allows the sealant to soak into the surface for better adhesion and protection.
- Inspect the Layer: During this time, check for any drips or inconsistencies that may need minor adjustments before the next layer. Taking the opportunity to assess the application can lead to a smoother finish overall.
- Prepare for the Next Step: Once the first layer has settled, plan your next steps. Depending on the sealant used and the project requirements, you may need to apply additional coats for optimal protection and finish.
Multiple Coats for Better Protection
- Inspect the First Layer: Check for any missed spots or uneven areas after the initial layer dries.
- Apply Additional Coats: Add one or two more coats of sealant for extra durability. Thin layers work better than thick ones.
- Smooth Between Layers (Optional): For a flawless finish, lightly sand each dried layer before applying the next.
- Match the Finish: Choose finishes like gloss, matte, or satin to suit your preference.
Drying Period Between Coats
- Follow Manufacturer Guidelines: Check the product instructions for recommended drying times.
- Allow Proper Drying: Typically, let each coat dry for 15-30 minutes. For resin-based sealants, wait longer if suggested.
- Test Before Proceeding: Lightly touch the surface to ensure it’s completely dry before applying the next coat.
- Final Drying Time: Once all coats are applied, let the piece cure for 24-48 hours in a dust-free area.
By following this step-by-step guide on how to seal air dry clay, you can enhance the durability and appearance of your creations while ensuring they are well-protected.
Tips for Achieving a Professional Finish
Creating stunning air dry clay projects requires paying attention to detail. Here are tips to achieve a professional-grade finish for your creations.
Choosing the Right Tools and Brushes
- Select Quality Brushes: Use soft, fine brushes for smooth and even sealant application.
- Use a Foam Sponge: Opt for foam sponges for applying sealant without leaving streaks.
- Prepare Tools Before Use: Clean tools to remove dirt, dust, or residues before starting.
- Invest in Sanding Supplies: Fine-grit sandpaper helps achieve a polished surface before sealing.
- Utilize Protective Gear: Wear gloves and work in a ventilated area for safety and cleanliness.
Avoiding Common Mistakes
- Don’t Rush Drying Time: Ensure the clay is completely dry before sealing to prevent damage.
- Apply Sealant Thinly: Use thin, even coats; thick layers may result in clumps or uneven surfaces.
- Check for Missed Spots: Inspect the surface carefully and fill gaps to avoid weak protection.
- Avoid Using Wrong Sealants: Match your sealant choice with your project type for optimal results.
- Do Not Skimp on Coats: Add multiple coats for better durability, especially for outdoor or functional pieces.
These tips ensure your air dry clay projects look polished and stay durable for years.
Waterproofing Air Dry Clay
Waterproofing air dry clay is crucial for specific applications, particularly for outdoor projects. While sealing provides protection, it does not make your creations completely waterproof. Let’s explore why waterproofing is essential and the best products to achieve it.
Importance of Waterproofing for Outdoor Projects
- Protection Against Weather Elements: Outdoor air dry clay projects face rain, humidity, and sun exposure. Waterproofing ensures they withstand these elements.
- Prevention of Cracks and Damage: Prolonged exposure to moisture can weaken unprotected clay, causing cracks or structural collapse.
- Longevity of Creations: Proper waterproofing extends the life of outdoor sculptures or decorations.
- Preservation of Colors and Design: Water-resistant coatings protect painted designs and details from fading or smudging outdoors.
Without proper waterproofing, your outdoor creations might deteriorate quicker, ruining your effort and creativity.
Recommended Products for Waterproofing
- Epoxy Resin: For the strongest waterproof seal, resin is an excellent choice. It dries to a hard, glass-like finish and completely protects the clay.
- Application: Mix resin components as instructed and apply in a thin, even layer using a brush.
- Best Use: Ideal for complex designs or projects exposed to extreme outdoor conditions.
- Polyurethane Sealant: A durable and flexible sealant that offers excellent water resistance and protection.
- Application: Apply thin coats with a brush or spray and let dry between coats.
- Best Use: Perfect for functional pieces such as pots or decorative items exposed to moisture.
- Outdoor Mod Podge: This water-based product adds a protective, waterproof layer. Available in matte or glossy finish.
- Application: Use multiple thin coats for optimal results. Follow the curing time instructions.
- Best Use: Suitable for painted or decorated clay pieces kept outdoors.
- Waterproof Varnishes: Available in different finishes, varnishes add water-resistance and improve aesthetic charm.
- Application: Use a brush to apply a smooth, uniform coating. Allow proper drying.
- Best Use: Great choice for small, delicate items or sculptures.
Choosing the right waterproofing product ensures your air dry clay creations remain intact and beautiful, even in harsh outdoor conditions.
Caring for Sealed Air Dry Clay
Taking proper care of sealed air dry clay ensures its beauty and longevity. Here are essential tips for preserving your completed projects.
Maintenance Tips to Preserve Sealed Pieces
- Keep Items Clean: Gently clean your sealed clay with a soft, damp cloth to remove dust or dirt. Avoid using harsh chemicals or abrasive materials that may damage the sealant.
- Protect from Direct Sunlight: Prolonged exposure to sunlight can fade colors and weaken the sealant. Display your creations in shaded areas.
- Avoid Heavy Impact: Handle your sealed pieces with care to avoid chipping, cracking, or breaking.
- Limit Water Exposure: Sealing provides some protection against moisture, but prolonged contact with water might still harm the clay. Keep items dry whenever possible.
- Reapply Sealant if Needed: Over time, the protective coat might wear off. Inspect your pieces regularly and apply a fresh layer of sealant when necessary.
Storing and Displaying Finished Creations
- Store Properly: Place sealed air dry clay items in a cool, dry area. Avoid high humidity or temperature fluctuations to prevent potential damage.
- Use Display Cases: Always display delicate clay items in glass cases or covered shelves. This protects them from dust, humidity, and accidental handling.
- Avoid Piling Pieces: Stack your items carefully and avoid placing heavy objects on top of them.
- Rotate Displays: If you use your clay creations seasonally, rotate them annually and store unused items safely.
- Label Creatively: Add sentimental or creative labels to your pieces to enhance their decorative value.
By following these care tips, your sealed air dry clay projects will remain stunning and intact for years to come.
Conclusion: Elevate Your Air Dry Clay Creations
In conclusion, knowing how to seal air dry clay is essential for anyone looking to enhance their crafting projects. By selecting the right sealant and following the sealing process, you can protect your creations and ensure longevity. Sealing not only enhances appearance but also prevents damage from environmental factors, making your artwork stand out.
So, embrace the world of air dry clay, and let your creativity shine! With the right techniques and knowledge, your clay projects will be protected and beautiful for years to come. Always remember, a few thoughtful steps in sealing make all the difference in preserving your hard work and creativity.


