Introduction
Kinetic sand is a fascinating material that provides endless hours of fun, creativity, and sensory exploration. When you ask, “What is a kinetic sand recipe?” you open the door to a world of DIY activities that can enhance playtime for children and adults alike. The unique texture of kinetic sand, which feels like wet beach sand yet never dries out, makes it an irresistible medium for crafting, molding, and creating. In this article, we will provide a simple kinetic sand recipe and explore various ways to use this delightful substance in your everyday activities.

What is Kinetic Sand?
Kinetic sand is a special type of sand that feels soft and moldable. It sticks to itself, making it easy to shape and play with. Unlike regular sand, it does not dry out or make a mess. It flows smoothly through your hands, similar to wet sand at the beach.
This unique sand is made with regular sand and a binding agent, usually silicone oil or similar materials. The binding agent gives kinetic sand its stretchy and tactile qualities. Kids and adults love it for its fun texture and calming nature.
Kinetic sand is often used for sensory play and creative activities. It can be shaped into various structures like castles, animals, or simple objects. It encourages imagination and provides hours of entertainment. Additionally, some people find it relaxing and stress-relieving to handle.
Overall, kinetic sand is a fun and versatile toy that is safe and easy to use at home. By making it yourself using a kinetic sand recipe, you can customize its texture and color, making the experience even more enjoyable.
Benefits of Making Kinetic Sand at Home
Making kinetic sand at home has several advantages that make it a worthwhile activity. Here are some key benefits:
Cost Savings
Creating kinetic sand at home is cheaper than buying it from the store. With a simple kinetic sand recipe, you can save money and control the amount you make.
Customization
By making it yourself, you can choose your favorite colors and textures. Add glitter, scents, or other materials to make your homemade kinetic sand unique.
Fun Family Activity
Making kinetic sand can be a great bonding activity for families. Kids enjoy mixing and experimenting while learning new skills.
Safety Control
Homemade kinetic sand lets you oversee the ingredients. This ensures it is safe, especially for little ones.
Encourages Creativity
Creative activities with kinetic sand boost imagination and improve motor skills. You can mold it into shapes, build structures, and explore the possibilities.
Easy and Eco-friendly
Since you use minimal and natural materials, homemade kinetic sand is eco-conscious. Plus, the process is simple and mess-free.
Stress Relief
Handling kinetic sand can be relaxing and relieve stress. Its soft texture provides sensory comfort.
Overall, making kinetic sand at home is cost-effective, customizable, and enriching. It is an enjoyable way to create and play while reaping numerous benefits.
Essential Ingredients for Kinetic Sand
To make kinetic sand at home, you need just a few simple ingredients. These are easy to find and budget-friendly. Here’s what you’ll need:
Fine Sand
- Choice of Sand: For creating kinetic sand, you can use either regular play sand or craft sand. Both options are generally suitable; however, craft sand tends to have a finer texture, which can enhance the overall smoothness of the final product.
- Ensure Cleanliness: It is crucial to ensure that the sand is clean before using it. Dirty sand can introduce unwanted debris or impurities, negatively affecting the final texture and quality of the kinetic sand. Washing the sand beforehand helps eliminate any potential contaminants.
- Fine Texture: Opt for sand that is uniformly fine. The finer the sand granules, the smoother the texture will be when mixed with other ingredients. This smoothness contributes to the pleasant tactile experience that makes kinetic sand enjoyable to play with.
Binding Agent
- Purpose of the Binding Agent: The binding agent plays a vital role in making kinetic sand stretchy and moldable. It ensures that the sand holds together well while still allowing flexibility for shaping.
- Silicone Oil: One of the most common binding agents used in making kinetic sand is silicone oil. It creates a soft, pliable texture that enhances the sand’s ability to retain shapes without crumbling.
- Alternative Binding Agents: If silicone oil is not available, there are alternatives you can use. For instance, cornstarch can add a smooth texture and help the sand adhere better. Additionally, dish soap can also serve as a binding agent, although it may slightly alter the feel of the final product.
- Experimentation: Whether you choose silicone oil, cornstarch, or dish soap, experimenting with different binding agents can lead to discovering a texture that suits your preferences best.
Water
- Role of Water in the Mixture: Water is an essential component when making kinetic sand, as it helps blend all the ingredients together. Proper water integration ensures that the binding agent effectively combines with the sand, creating a cohesive mixture.
- Achieving Desired Consistency: The amount of water you add can significantly affect the final texture of your kinetic sand. Start with a small amount and gradually increase it until you achieve the consistency you desire. The goal is to create a product that is neither too dry nor too wet, allowing for optimal moldability.
- Adjusting Water Content: If you find that your mixture is too wet after adding the water, you can adjust the consistency by adding more fine sand or cornstarch. Conversely, if it’s too dry, you can add a tiny bit more water.
Optional Additives
- Customization Options: To make your kinetic sand more exciting and personalized, consider adding optional additives. These enhancements can take your project to the next level, making playtime even more enjoyable.
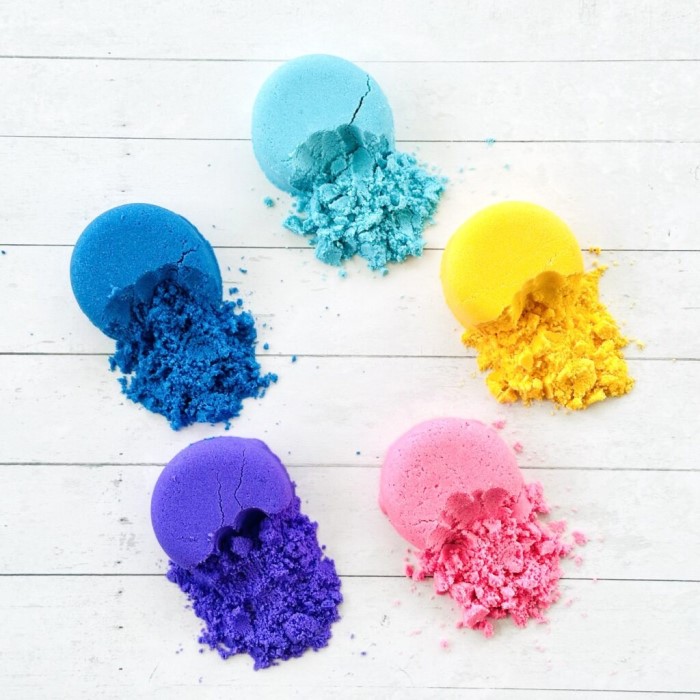
- Food Coloring: Adding food coloring is a fantastic way to infuse vibrant hues into your kinetic sand. Whether you opt for bright, bold colors or soft pastels, food coloring allows for creative expression and gives the sand its distinctive appearance.
- Glitter: Incorporating glitter can add a sparkly touch to your kinetic sand, making it visually appealing. This can be particularly fun for themed projects or special occasions. Just ensure to mix the glitter evenly for an even distribution throughout the sand.
- Essential Oils: If you’d like to incorporate a pleasing aroma, consider adding a few drops of essential oil. This addition can create a calming sensory experience, making the kinetic sand not only fun to play with but also enjoyable to smell. Popular choices include lavender or citrus oils for a fresh scent.
- Personal Touch: Ultimately, using these optional additives allows you to tailor your kinetic sand to reflect personal style and preferences. Encourage creativity by experimenting with different combinations of colors, textures, and scents!
It’s important to use high-quality ingredients for the best results. For instance, fine sand gives a smoother finish, and choosing non-toxic binders ensures the kinetic sand is safe to use. With these items, you’re ready to follow any kinetic sand recipe and create amazing, hands-on fun at home!
Step-by-Step Guide to Making Kinetic Sand
Making kinetic sand at home is simple and fun. Follow this easy guide:
What You’ll Need
- Fine Sand: Use clean, dry play or craft sand for the base.
- Binding Agent: Choose options like silicone oil, cornstarch, or dish soap.
- Water: Helps mix and adjust consistency.
- Optional Additives: Food coloring, glitter, or scents for customization.
Steps to Make Kinetic Sand
- Prepare the Sand: Ensure the sand is clean and dry for a smooth texture.
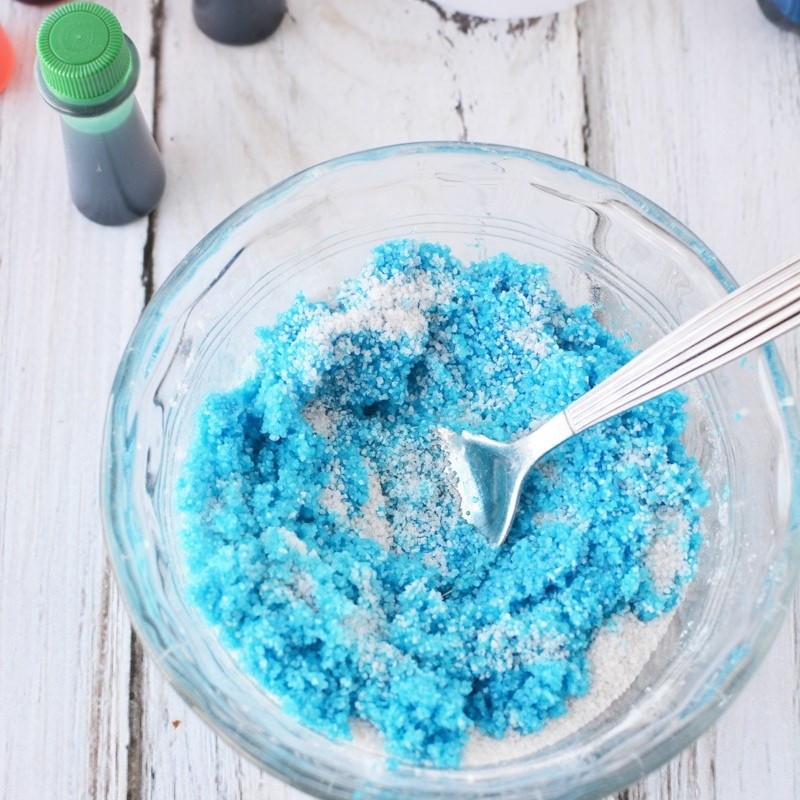
- Mix the Binding Agent: Combine your chosen binding agent with water in a bowl.
- Add Sand: Slowly mix the sand into the binding agent.
- Check the Consistency: Adjust with water or sand to make it moldable but not sticky.
- Customize: Add food coloring, glitter, or scents to make it unique.
- Knead the Mixture: Work with your hands to blend everything evenly.
Test and Adjust
- Shape the sand into a ball to test its moldability.
- Add more binding agent if it’s too crumbly.
- Add sand if it’s too sticky.
Enjoy making your homemade kinetic sand! Create your favorite designs and patterns. This kinetic sand recipe is beginner-friendly and perfect for a great DIY experience.
Alternative DIY Kinetic Sand Recipes
Creating kinetic sand doesn’t require specific ingredients. You can use alternatives for unique results. Explore these two DIY kinetic sand recipes, each offering a creative twist.
Using Cornstarch and Dish Soap
This recipe is a simple and budget-friendly option. It uses common household items. Here’s how:
Ingredients:
- 2 cups of fine sand.
- 1 cup of cornstarch.
- 1/2 cup of dish soap.
- Water (as needed).
- Optional: Food coloring or glitter for customization.
Instructions:
- Mix Dry Ingredients: Combine sand and cornstarch in a large bowl.
- Add Dish Soap: Gradually pour dish soap into the mix while stirring.
- Add Water: Slowly add water in small amounts to reach a moldable consistency.
- Check Texture: Adjust by adding more sand for firmness or water for softness.
- Customize: Mix in food coloring or glitter to your preference.
This method creates a soft, stretchable kinetic sand perfect for molding and sensory play.
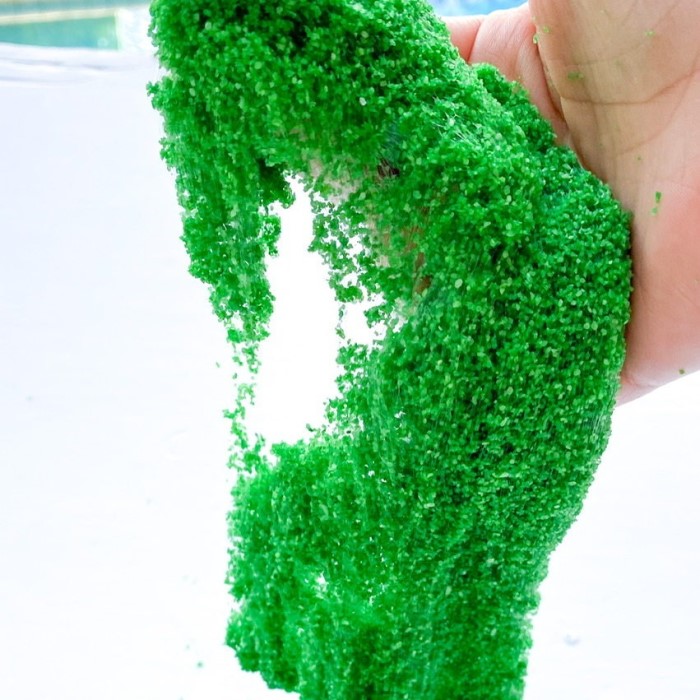
Using Conditioner and Sand
Another fun way to make kinetic sand is by using hair conditioner. It results in a smoother texture.
Ingredients:
- 2 cups of fine sand.
- 1 cup of hair conditioner.
- Optional: Food coloring, essential oils, or glitter.
Instructions:
- Prepare the Sand: Ensure the sand is clean and dry.
- Add Conditioner: Mix the conditioner and sand in a bowl.
- Blend Well: Use your hands to combine the ingredients thoroughly.
- Customize: Add food coloring, glitter, or fragrances for a personal touch.
- Test and Adjust: Add more sand if too wet or more conditioner if too dry.
This recipe produces a smoother, fragrant sand, making it enjoyable to play with.
These alternative recipes are easy and fun to try. They use different ingredients to provide unique textures and scents. Experiment with these methods to find your favorite DIY kinetic sand recipe!
Tips for Perfecting Your Kinetic Sand
Creating the perfect kinetic sand requires some attention to detail and fine-tuning. Here are key tips to ensure you get the best results:
- Start with Quality Ingredients
- Use clean, fine sand for a smooth texture.
- Opt for non-toxic binding agents like silicone oil or dish soap.
- Measure Carefully
- Follow your chosen kinetic sand recipe closely.
- Keep the correct proportions for sand, water, and binding agents.
- Mix Thoroughly
- Blend all ingredients evenly for a consistent texture.
- Knead the mixture with hands to remove lumps.
- Check Consistency Regularly
- Adjust with sand if the mixture is too wet.
- Add more binding agent if sand feels too dry.
- Add Custom Touches Wisely
- Introduce food coloring or glitter gradually, mixing well.
- Avoid overloading materials as they may affect texture.
- Experiment with Small Batches
- Test different binding agents to discover your favorite formula.
- Try new additives like scents or oils for variety.
- Keep It Clean
- Ensure tools and workspaces are clean to avoid contaminants.
- Wash hands before handling materials to maintain quality.
- Test Your Sand
- Shape the sand into molds to check its stretchability.
- Adjust ingredients as needed for a smooth, moldable finish.
Perfecting kinetic sand takes patience and creativity. Use these tips to refine your homemade creations and enjoy the process!
Storing and Maintaining Your Homemade Kinetic Sand
Proper storage and maintenance keep your kinetic sand fresh and ready for play. Follow these simple tips:
Store in an Airtight Container
- Use an airtight container to prevent the sand from drying out.
- Seal the lid tightly after each use.
- Pick a sturdy container that is easy to open and close.
Keep Away from Moisture
- Store your kinetic sand in a dry, cool place.
- Avoid areas prone to high humidity.
Clean Regularly
- Remove any debris stuck in the sand after use.
- Dispose of any contaminated or dirty sand.
Refresh the Texture
- Add a small amount of water or binding agent when the sand feels dry.
- Knead well to restore its moldability.
Ensure Hygiene
- Wash hands before and after using the sand.
- Supervise children to avoid spills or contamination.
Avoid Mixing with Regular Sand
- Mixing can affect the texture and performance of your kinetic sand.
- Keep kinetic sand separate from other substances.
Keep it Covered
- Cover your sand when not in use to protect it from dust.
- Always check for spills before closing the container.
Taking care of your homemade kinetic sand ensures longevity and repeated fun. Keep it fresh and ready to play!
Fun Activities to Enjoy with Kinetic Sand
Kinetic sand offers endless opportunities for fun and creative activities. It is perfect for people of all ages. Here are some ideas to get you started:
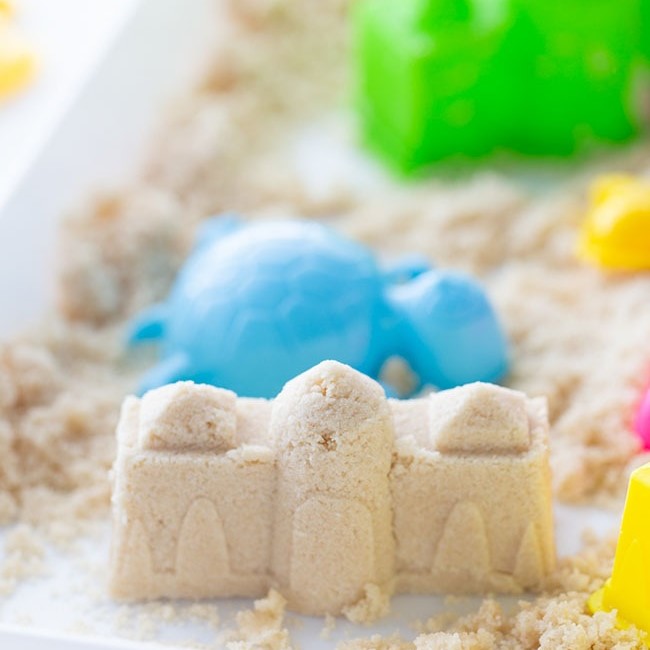
Building Structures
- Create castles, houses, and towers using molds or your hands.
- Experiment with different designs and shapes for endless creativity.
Sculpting Creations
- Shape animals, fruits, or characters from your favorite stories.
- Use tools like plastic knives or cookie cutters for detailed sculptures.
Sensory Play
- Let the soft sand flow through your fingers for a relaxing experience.
- Use it as a calming activity for stress relief or mindfulness.
Crafting Art Pieces
- Layer colorful sand in containers to make decorative art.
- Add glitter or food coloring for vibrant patterns.
Exploring Science Concepts
- Teach kids how materials like sand move and stick together.
- Create experiments to learn about textures and consistency.
Hosting Themed Play Sessions
- Organize themes like ocean adventures or jungle setting using kinetic sand.
- Children can create scenes or role-play stories with the sand.
Creating Games and Challenges
- Design obstacle courses or mazes using kinetic sand.
- Challenge friends to sculpt objects within a time limit.
Writing and Lettering
- Practice writing letters, numbers, or names in the sand.
- Perfect for young learners to develop motor and writing skills.
Kinetic sand is more than just a toy; it sparks creativity and learning. Use these activities to make playtime exciting and enjoyable for everyone!
Conclusion
In conclusion, understanding the kinetic sand recipe opens a world of creative possibilities for play and exploration. This versatile material can enhance sensory experiences for children while providing an innovative outlet for creativity.
By following the simple steps outlined in this article, you can create your own kinetic sand at home. With a bit of time and the right ingredients, you will have a fun and engaging material that can be enjoyed by kids and adults alike. Embrace the joy of kinetic sand, and let your imagination take flight!


