Introduction
Creating with homemade paper mache is a fun and rewarding crafting activity. Using simple materials, you can transform everyday items into beautiful crafts, decorations, and artwork. Paper mache allows for endless creativity, making it perfect for artists of all ages and skill levels. Whether you want to create stunning holiday decorations or unique gift items, this guide will explore easy techniques for making your own paper mache creations.
What Is Paper Mache?
- Definition: Paper mache, or papier-mâché, is a crafting technique that involves using paper strips or pulp bonded together with an adhesive to create various structures. It’s a versatile medium that can be molded into different shapes.
- Brief History: The art of paper mache dates back centuries, originating in Asia before gaining popularity in Europe. It was used for everything from lightweight sculptures to decorative objects.
- Benefits of Paper Mache: This form of crafting is not only eco-friendly, as it repurposes old paper, but it also stimulates creativity and encourages hands-on skills, making it a great option for family activities.
Importance of Homemade Paper Mache
- Accessibility: Homemade paper mache requires minimal materials, making it an accessible craft for everyone. Common household items can often be transformed into fantastic creations.
- Affordability: The ingredients for homemade paper mache are typically inexpensive. Many people have old newspapers or scrap paper already at home, reducing costs.
- Creative Expression: This medium allows artists to express their creativity freely. You can personalize every project to reflect your unique style and imagination.
Basic Materials
- Paper: You’ll need old newspapers, magazines, or any scrap paper. The type of paper impacts the final texture, so feel free to experiment.
- Adhesive Options: You can create your own adhesive solution using:
- Flour Paste: Mix one part flour with two parts water. Add a pinch of salt to prevent mold.
- Glue Mixture: Combine equal parts white school glue and water for strong adhesion.
- Balloon or Mold: Balloons can serve as a base to create spherical shapes, while other molds (like bowls or cups) can be used to form different designs.
- Paint and Brushes: After your project has dried, use acrylic paints to add color and style to your creations.
- Sealant: A clear acrylic sealant can help protect and finish your project, ensuring it lasts longer.
- Decorative Items: Incorporate embellishments such as glitter, ribbons, or stickers for personal touches.
Preparing Your Workspace
- Dedicated Area: Set up a clean, spacious workspace. Consider using a drop cloth to protect surfaces from spills.
- Gather Materials: Before starting your project, gather all your materials together. Keeping everything organized will help you work more efficiently.
- Safety Measures: If you work with children, ensure they are supervised and that safety measures, like protecting surfaces and using child-safe paints, are in place.
Step-by-Step Guide
Prepare Your Paper
- Tearing Strips: Tear your paper into strips, ideally around 1–2 inches wide. This helps them adhere better to your mold.
- Create a Pulp (Optional): For more intricate designs, you can create a paper pulp by soaking shredded paper in water, then blending it to a consistency that can be molded.
Prepare the Adhesive
- Flour Paste Preparation: In a bowl, mix the flour and water until smooth. The consistency should be similar to pancake batter.
- Glue Mixture Preparation: Alternatively, mix equal parts glue and water. Stir well to ensure the solution is uniform.
Apply Paper Strips
- Coating the Strips: Dip each strip of paper into the adhesive, making sure it is fully coated. Remove any excess by running it between your fingers.
- Layering: Place the coated strips onto your mold, smoothing them down to avoid air bubbles and wrinkles. Overlap the strips for extra strength.
- Building Layers: Continue adding strips until you achieve the desired thickness. Aim for at least three layers to ensure sturdiness.
Drying the Project
- Letting It Cure: Allow your paper mache creation to dry completely. Depending on humidity levels, this can take up to 24 hours.
- Removing the Mold: Once dry, gently remove the mold (or pop the balloon) to reveal your hollow paper mache shape.
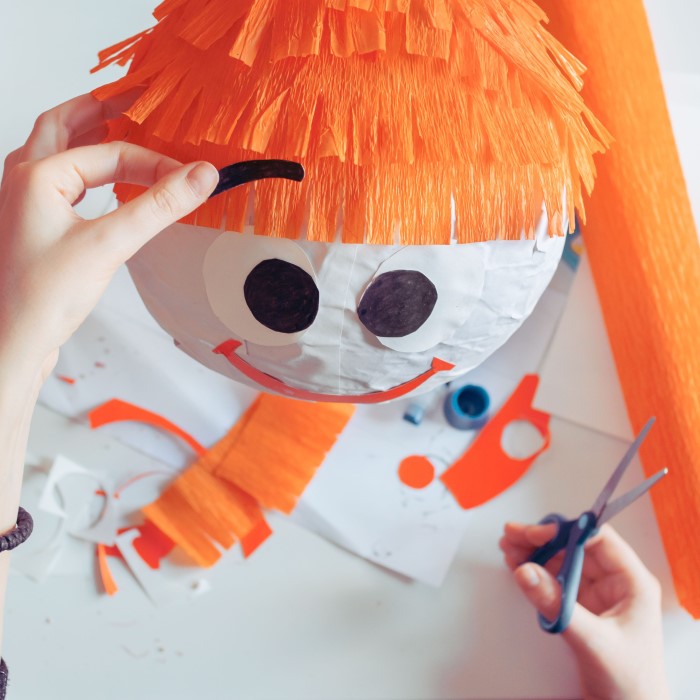
Decorating Your Creation
- Painting: Use acrylic paints to decorate your project. Get creative with colors, patterns, and designs.
- Finishing Touches: Once the paint is dry, apply a sealant to protect the paper mache. This adds durability and enhances colors.
- Adding Embellishments: Attach ribbons, glitter, or other decorative items to personalize your piece further.
Creative Project Ideas
Christmas Decorations
- Creating Ornaments: Use paper mache to craft beautiful ornaments for your Christmas tree. You can create spherical shapes using inflated balloons as molds. Once the ornaments are dry, paint them in festive colors or patterns to match your holiday theme.
- Designing Tree Toppers: Form a striking tree topper using paper mache techniques. Consider creating stars, angels, or other seasonal motifs. Use a sturdy base to support the decoration and ensure it can be securely placed atop the tree.
- Festive Figurines: Embrace the holiday spirit by making playful figurines, such as Santa Claus, snowmen, or reindeer. These can be placed around your home as decorative accents, adding a whimsical touch to your décor.
- Personalized Touches: Decorate your paper mache creations with glitter, sequins, or ribbons. These embellishments can enhance the festive look and make your decorations truly unique.
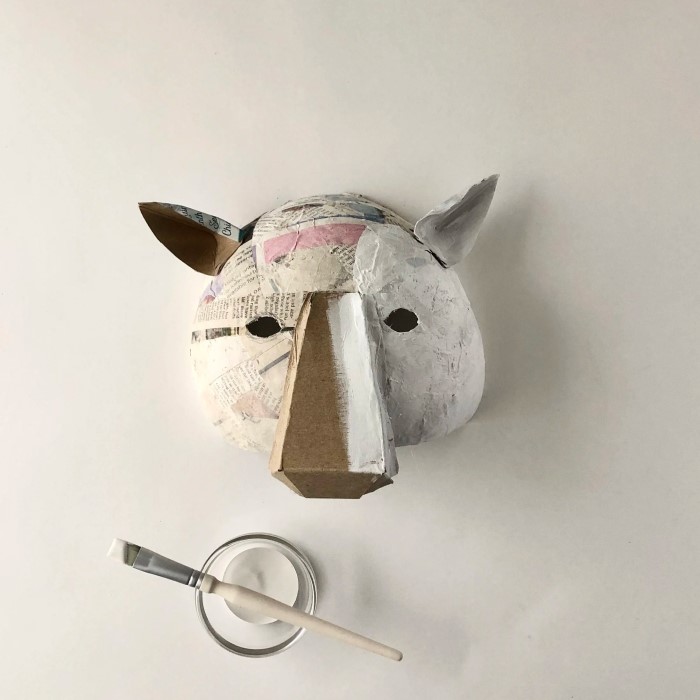
Animal Sculptures
- Forming Adorable Animals: With paper mache, you can create charming animal figures such as cats, dogs, rabbits, or even mythical creatures like unicorns and dragons. These sculptures can be fun indoor decorations or gifts for animal lovers.
- Customizing Designs: Allow yourself to be creative by customizing the colors and features of your animal sculptures. You can use paint to highlight details like fur patterns or add accessories like hats to make them more distinct.
- Playful Decorations: These animal sculptures can be displayed throughout your home, creating a playful atmosphere. Consider placing them on shelves, window sills, or even as part of a themed décor setup.
- Involving Children: Involving kids in the creation of these animal sculptures can be an engaging activity. They can choose their favorite animals and decide on their attributes, making the process more personalized and enjoyable.
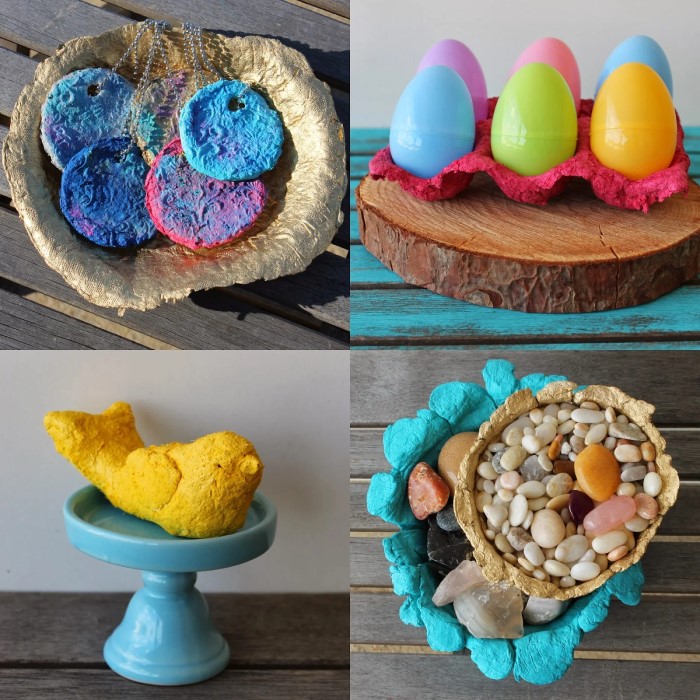
Functional Items
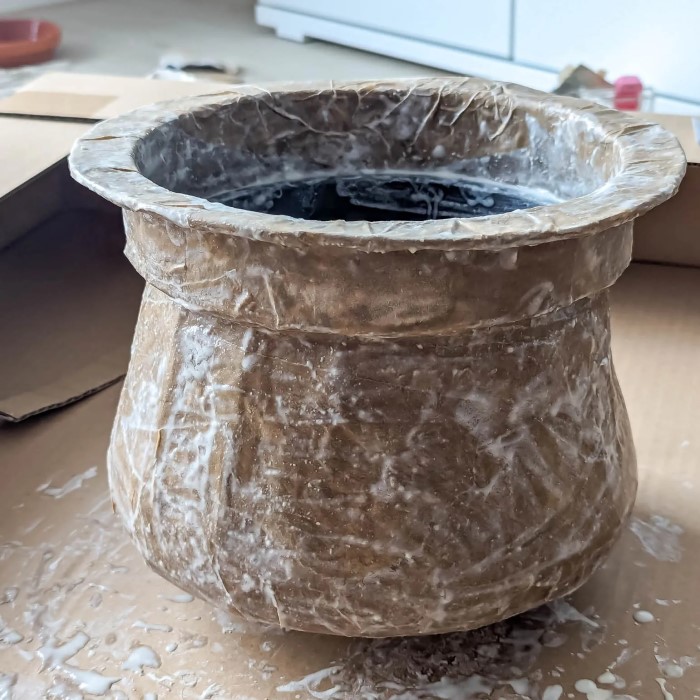
- Making Bowls and Trays: Use paper mache to craft functional items like decorative bowls or trays. These can be used for holding keys, display fruits, or organizing small household items.
- Creating Mini Planters: Transform your paper mache creations into mini plant pots. Coat the interiors with waterproof sealant to prevent moisture from damaging the paper, and then plant small succulents or herbs for a charming touch.
- Unique Home Accents: These functional items not only serve practical purposes but also act as artistic pieces within your home. Choose vibrant colors or interesting shapes to make them standout decorative elements.
- Gift Ideas: Functional paper mache items can also make thoughtful and personalized gifts. Consider creating customized bowls or trays for friends and family, tailored to their artistic tastes.
Educational Projects
- Crafting Globes: Engage children in educational activities by creating paper mache globes. They can learn about geography and map placement while crafting, making it a hands-on learning experience.
- Making Maps: Encourage creativity by allowing kids to craft a paper mache map of their local area, country, or even a fantasy world. This project can help reinforce their geographical knowledge while being fun.
- Historical Figures: Involve children in crafts where they can create busts or figures of historical characters. This can make history lessons more interactive and memorable.
- Incorporating Learning: These educational projects can seamlessly integrate lessons with creativity. Afterwards, encourage discussions about what they created, making it an enriching experience.
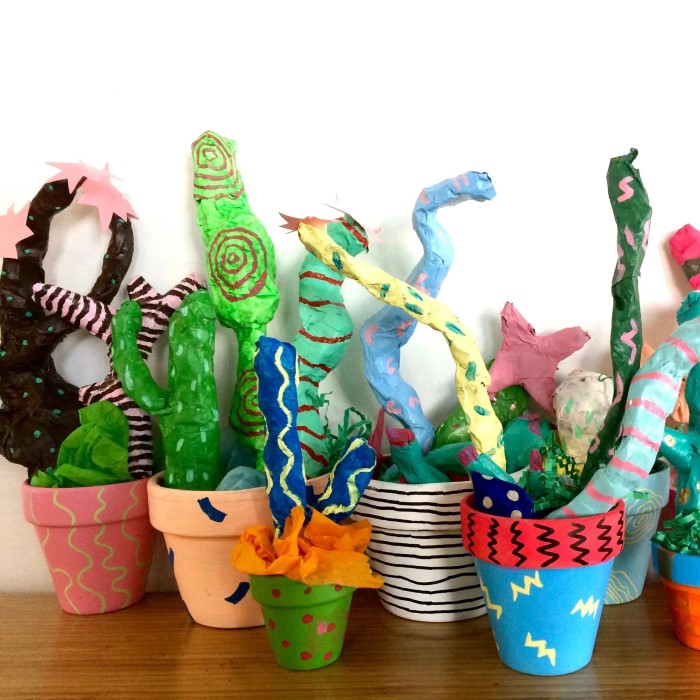
Artistic Expressions
- Exploring Abstract Designs: Encourage experimentation by using paper mache to create abstract art pieces. This can include unusual shapes or layering techniques that break away from traditional forms.
- Using Unique Textures: Paper mache allows for the incorporation of various textures. You can experiment with different papers to create bumpy, smooth, or patterned surfaces that add depth to your artwork.
- Layering Techniques: Create multi-dimensional pieces by using layering techniques. Combine different sizes and shapes to build visually striking sculptures that catch the eye.
- Personal Reflection: Each artistic project can be a reflection of the artist’s personality or experiences. Encourage freedom of expression, allowing individuals to portray what matters to them through their art.
By expanding on these points, you can better appreciate the numerous possibilities that homemade paper mache offers for creative, educational, and functional projects. These activities not only foster creativity but also provide meaningful engagement for individuals and families alike.
Frequently Asked Questions (FAQs)
How Do You Make Homemade Paper Mache?
To make homemade paper mache, tear paper into strips. Create an adhesive using flour and water or glue mixed with water. Apply the strips to a mold, layering them, and allow them to dry completely before decorating.
What Are the 4 Ingredients for Paper Mache?
The four key ingredients for homemade paper mache are:
- Paper (old newspapers or scrap paper)
- Water
- Flour (for paste) or glue
- Salt (optional, to prevent mold)
Is Glue or Flour Better for Paper Mache?
Both glue and flour can be effective for paper mache. Glue provides a stronger bond but can be more expensive. Flour paste is more affordable and eco-friendly. Choose based on your project needs and availability.
What Is the Best Formula for Paper Mache?
A commonly used formula for paper mache is:
- 1 part flour
- 2 parts water
- A pinch of salt to prevent mold
Mix together until smooth for an effective adhesive.
Conclusion
Making homemade paper mache is a rewarding and enjoyable experience for crafters of all ages. With simple techniques and readily available materials, you can unleash your creativity and make beautiful, unique projects. This versatile craft allows you to explore various artistic avenues, from holiday decorations to practical items and more. So gather your supplies, get inspired, and start creating with homemade paper mache!
By actively engaging in this fun activity, you foster a love for crafting and can cherish the memories made while creating together with family or friends. Enjoy the journey of creativity!


