Introduction
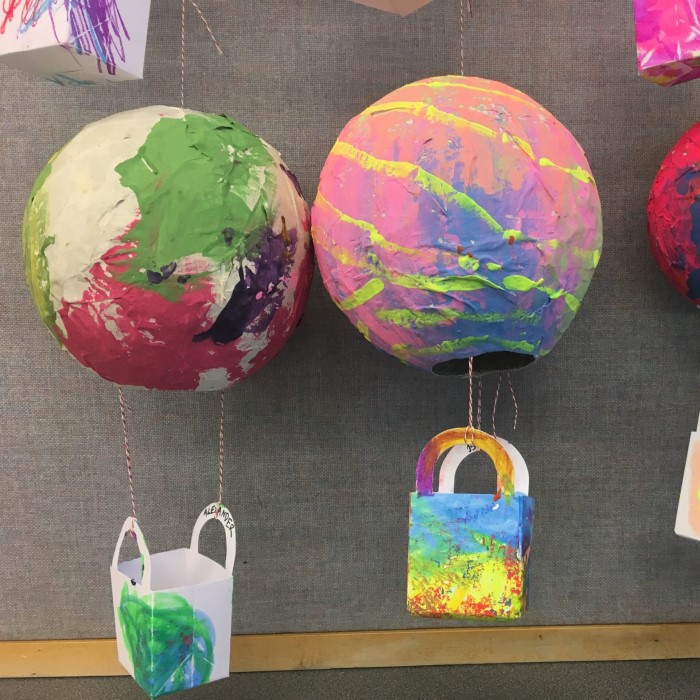
Paper mache balloon crafting is a fun and creative activity. It involves layering paper strips and paste over a balloon. Once dry, the balloon acts as a mold for the hardened structure. This craft is perfect for making decorations, piatas, or art projects.
The process is simple and doesn’t require expensive supplies. With basic materials available at home, anyone can start quickly. This activity is also ideal for kids and adults alike. It encourages recycling by using old newspapers or paper scraps.
Creating a paper mache balloon improves patience and crafting skills. It allows you to express creativity through painting or decoration. Beginners find the process rewarding because of its simplicity.
This guide will take you through the steps. From preparing your balloon to adding the final touches, you’ll learn it all. Let’s begin your paper mache balloon crafting journey!
Materials Needed
Creating a paper mache balloon requires simple, affordable materials. Most of these items are easy to find. Here’s a checklist to help you prepare:
- Balloon – Choose any size and shape based on your project.
- Newspaper or Paper Scraps – Tear into strips for layering.
- Flour or White Glue – Use as the base for the paste.
- Water – Important for mixing the paper mache paste.
- Bowl or Container – Use for mixing the paste.
- Paint and Brushes – Essential for decorating your finished project.
- Optional Decorations – Glitter, stickers, or beads for personalizing your design.
- Plastic Wrap or Drop Cloth – Protect your work area from spills.
These items form the foundation for crafting a paper mache balloon. Just gather them to begin your creative journey!
Preparing the Balloon Base
Preparing the balloon base is the first step in making a paper mache balloon. It sets the foundation for your craft and makes the layering process easier.
Step 1: Select Your Balloon
Pick a balloon that suits your project size and shape. Larger balloons are great for big projects, while smaller ones work for more detailed designs.
Step 2: Inflate the Balloon
Blow up the balloon until it reaches your desired size. Tie the end securely to prevent air leakage.
Step 3: Secure the Balloon
Place the balloon in a stable position. Use a bowl or tape to hold it in place during layering.
Optional: Protect Your Work Surface
Cover your table or workspace with plastic wrap or a drop cloth. This will catch any mess and keep your surface clean.
With the balloon base prepared, you can proceed to the next step: mixing the paper mache paste.
Mixing the Paper Mache Paste
Mixing the paper mache paste is an essential step. The paste acts as glue, holding the paper strips together as they dry. Here’s a step-by-step guide to making the perfect paper mache paste:
Option 1: Using Flour Paste
- Gather Ingredients – You need all-purpose flour and water.
- Mix Flour and Water – Combine 1 part flour with 2 parts water in a bowl.
- Stir Thoroughly – Mix until the paste is smooth, with no lumps.
- Optional: Heat for Thickness – Heat the mixture briefly to make it thicker, then let it cool.
Option 2: Using Glue Paste
- Use White Glue – Mix 1 part white glue with 1 part water.
- Stir Well – Blend until completely mixed for an even consistency.
Tips for Better Paste
- Avoid Clumps – Strain the paste if lumps remain.
- Consistency – Aim for a pancake batter-like texture.
- Storage – Store extra paste in an airtight container for a day or two.
With your paste ready, you can move on to layering and applying it to your balloon.
Layering and Applying Paper Mache
Layering and applying paper mache is the main step in creating your project. This process involves attaching paper strips soaked in paste onto the balloon base. Here’s how you can do it step by step:
Step 1: Tear Paper Strips
Tear newspaper or paper scraps into small, manageable strips. Aim for uniform sizes for even coverage.
Step 2: Dip Strips in Paste
Dip one strip into the prepared paper mache paste. Ensure it’s fully coated but not dripping.
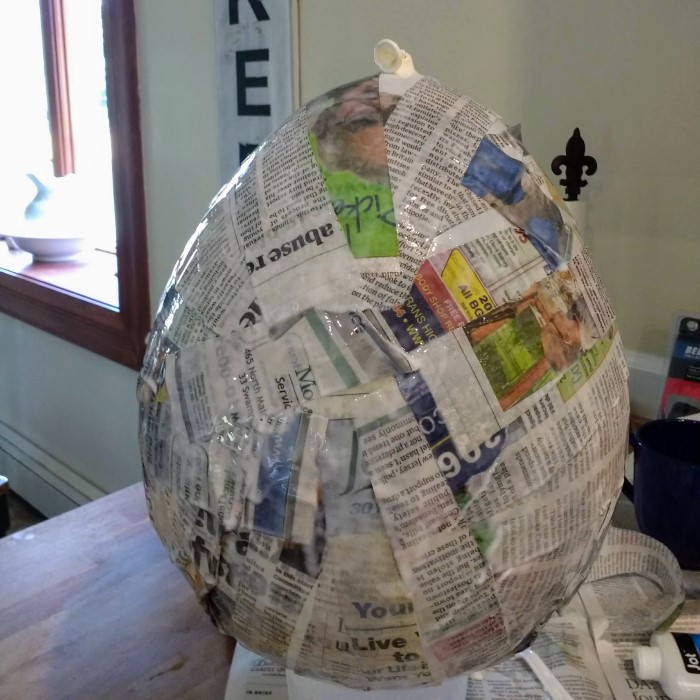
Step 3: Apply to Balloon
Place the strip gently onto the balloon. Smooth out wrinkles or bubbles with your fingers.
Step 4: Repeat Layers
Continue layering strips, slightly overlapping each piece. Cover the entire balloon evenly.
Step 5: Add Multiple Layers
Apply at least three layers for a sturdy structure. Allow each layer to set slightly before adding the next.
Step 6: Let It Dry
Once fully layered, set the balloon aside. Allow it to dry completely before proceeding to the next stage.
Tips for Success
- Use Thin Layers: Thin layers dry faster and prevent cracking.
- Keep Hands Clean: Use damp cloths to clean paste off your hands periodically.
- Monitor Drying: Place the balloon in a dry, ventilated space.
Completing these steps will result in a strong and even paper mache surface. You’re now ready to dry and shape your paper mache balloon!
Drying and Shaping the Mache Balloon
Drying and shaping are vital steps for crafting a perfect paper mache balloon. They ensure the structure is sturdy and ready for decoration. Follow these steps for the best results:
Allow Complete Drying
- Place the layered balloon in a dry, well-ventilated area.
- Avoid damp or humid spaces to prevent mold.
- Let it dry for 24-48 hours, depending on the thickness.
Test for Dryness
- Gently tap the surface to check for firmness.
- If it feels soft or cool, give it more drying time.
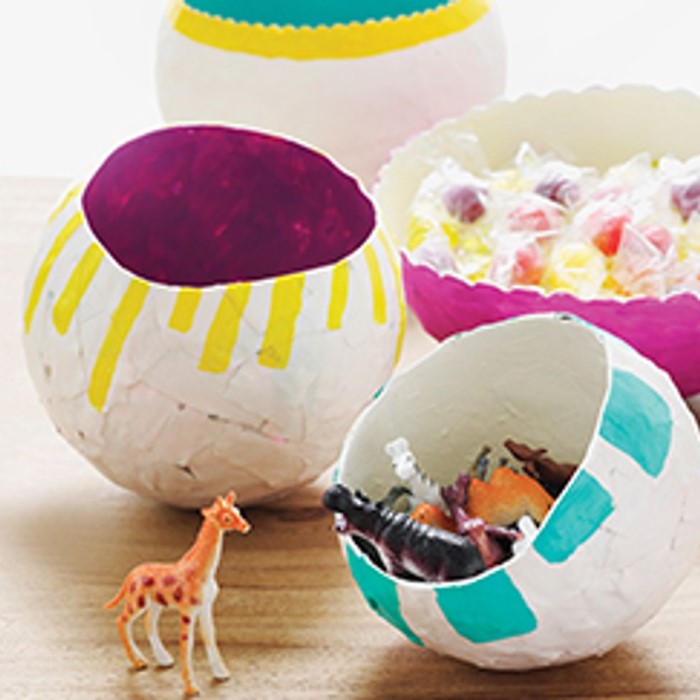
Remove the Balloon
- Once fully dry, pop the balloon carefully with a needle or pin.
- Peel out the deflated balloon and discard it.
Trim the Edges
- Use scissors to cut uneven edges for a smoother finish.
- Shape the rim according to your design, if needed.
Tips for Shaping Success
- Avoid Rushing: Ensure the mache is completely dry before shaping.
- Support the Structure: Be gentle to prevent cracking or breakage during trimming.
- Add Reinforcement: If necessary, apply more paper mache layers to weak spots and let them dry.
Proper drying and shaping prepare your paper mache balloon for the decoration stage. Move forward with a solid, well-defined base!
Decorating and Painting Techniques
Decorating and painting are the most fun steps in paper mache balloon crafting. This is where creativity comes alive. Use these techniques to personalize your designs:
Prepare Your Surface
- Ensure the paper mache balloon is completely dry.
- Smooth out rough areas with sandpaper or scissors.
- Wipe off dust to keep the surface clean for painting.
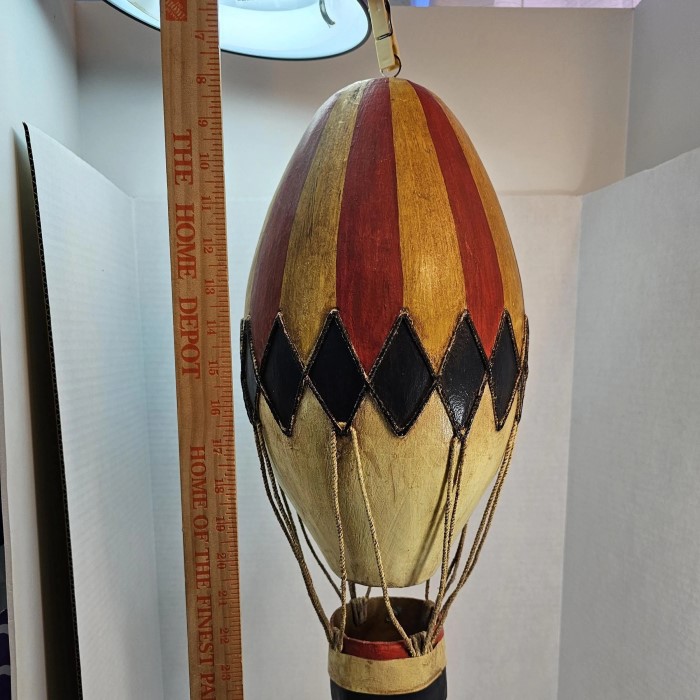
Paint the Base Layer
- Choose acrylic or tempera paints for vibrant colors.
- Apply a solid base coat to cover the surface evenly.
- Let the paint dry completely before adding more designs.
Add Patterns or Designs
- Use brushes of varying sizes for detailed work.
- Create shapes, lines, or patterns that suit your theme.
- Mix and match colors for a dynamic look.
Apply Decorative Elements
- Use glitter, beads, or stickers to enhance the design.
- Glue these decorations securely onto the surface.
- Aim for balance and symmetry in your placement.
Tips for Painting Success
Layer Paints
- Building Depth and Dimension: Layering paints involves applying multiple coats of paint to achieve greater depth and richness in color. This technique enhances the visual appeal of your project, making it more dynamic.
- Light Stroke Technique: When layering paints, use light strokes rather than heavy applications. Light strokes allow for better control and even application, reducing the risk of drips or uneven patches.
- Allowing Each Layer to Dry: It’s essential to allow each layer to dry completely before adding the next. This helps prevent smudging and ensures that the layers adhere properly to one another, resulting in a smoother finish.
- Testing Color Outcomes: Before committing to layered painting on your final project, consider doing a small test piece. This allows you to see how colors interact when layered, helping you determine the best combinations for your desired effect.
- Experiment with Transparency: Different paints have varying opacity. Experiment with transparent and opaque paints to create unique effects when layered. Transparent layers can produce a luminous quality, while opaque layers provide solid coverage.
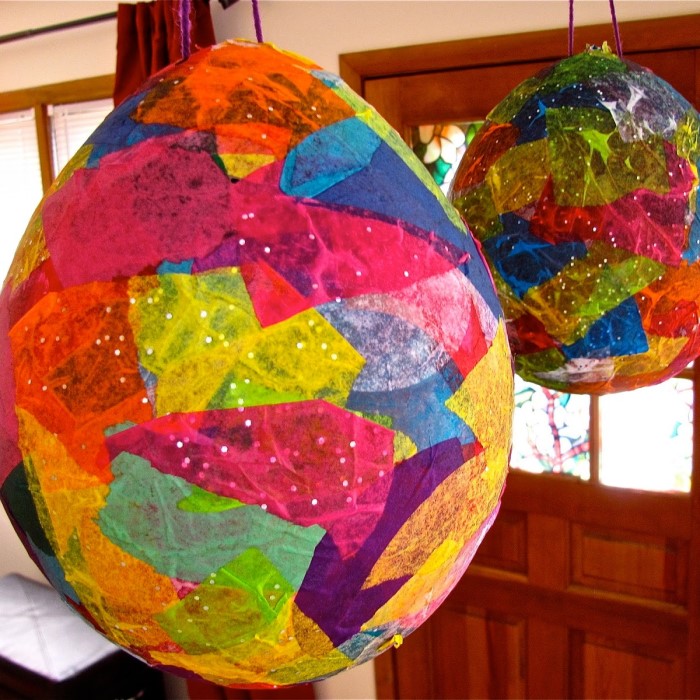
Choose Bright Colors
- Visual Appeal: Bright colors naturally draw the eye and enhance the attractiveness of your project. Choosing vibrant hues can make your artwork pop, capturing the viewer’s attention effectively.
- Emotional Impact: Bright colors can evoke specific emotions and set the mood for your project. For instance, yellows and oranges are often associated with warmth and happiness, while blues can convey calmness. Select colors that align with the message you want to express.
- Creating Focal Points: Utilize bright colors strategically to create focal points within your artwork. By incorporating bold colors in certain areas, you can guide the viewer’s gaze and emphasize key elements of your design.
- Complementing Other Elements: When selecting bright colors, consider how they will interact with other elements in your project. Use complementary colors to create contrast and enhance the overall composition, ensuring a balanced look.
- Testing Color Combinations: Before finalizing your color choices, take the time to test combinations on a separate sheet or practice canvas. This experimentation will help you see how the colors work together and allow you to make adjustments as needed.
Use Clear Sealant
- Protective Coating: Applying a clear sealant is crucial for protecting your artwork from potential damage. A sealant creates a barrier against dust, moisture, and environmental factors that could compromise your work over time.
- Understanding Sealant Types: Different types of sealants are available (e.g., spray, brush-on, or liquid). Choose one that is compatible with the type of paint you used, ensuring it provides the necessary protection without altering the color or finish.
- Enhancing Durability: A clear sealant increases the longevity of your project by adding a protective layer. This is particularly important for pieces that will be displayed in high-traffic areas or exposed to varying conditions.
- Finish Options: Sealants come in various finishes, including matte, satin, and glossy. Select a finish that complements your project’s overall aesthetic. For instance, a glossy finish may enhance the vibrancy of colors, while a matte finish provides a softer look.
- Application Technique: When applying the sealant, ensure that it is evenly distributed across the surface. Follow the manufacturer’s instructions for drying times and the number of coats needed to achieve optimal protection for your artwork.
With these decorating techniques, your paper mache balloon will stand out beautifully. Personalize it to fit your vision!
Tips for Troubleshooting Common Issues
Paper mache balloon crafting can sometimes come with challenges. Here are solutions to common problems:
Paste is Too Thin
- Solution: Add more flour or glue to thicken the mixture.
- Ensure the paste has a batter-like consistency for better adhesion.
Balloon Pops Before Drying
- Solution: Use a stronger balloon or avoid over-inflating.
- Handle the balloon gently while applying layers.
Layers Are Not Sticking
- Solution: Ensure the paper strips are fully coated in paste.
- Press strips firmly onto the balloon to remove air pockets.
Surface Cracks After Drying
- Solution: Apply thin layers to prevent cracking.
- Add extra paste to weak spots and let it dry completely.
Mold Formation
- Solution: Dry the balloon in a ventilated, low-humidity area.
- Avoid stacking items around the drying project.
Uneven Edges After Drying
- Solution: Trim uneven edges with sharp scissors.
- Sand rough spots to achieve a polished finish.
Difficulty in Painting
- Solution: Smooth the surface gently with sandpaper before painting.
- Apply a primer coat to even the surface for better paint adherence.
General Tips for Success
- Work in a clean, dry area for better results.
- Use high-quality paints or glue for stronger designs.
- Be patient and allow each layer or stage to dry entirely.
With these troubleshooting tips, you can overcome crafting issues easily. Enjoy creating stunning paper mache balloon!
Conclusion
In conclusion, learning how to make a paper mache balloon is not just a fun craft for kids; it also serves as an educational experience fostering creativity and skill development. Throughout this article, you have learned the essential steps involved in the process, the materials needed, and inspired ideas for decorating and displaying your balloon.
Engaging kids in craft projects like this not only keeps them entertained but also allows them to express their artistic side. So gather your materials, follow the steps outlined, and embark on this creative journey today. With a little patience and imagination, you’ll create a stunning paper mache balloon that can brighten any space!