Introduction: The Art of Paper Mache
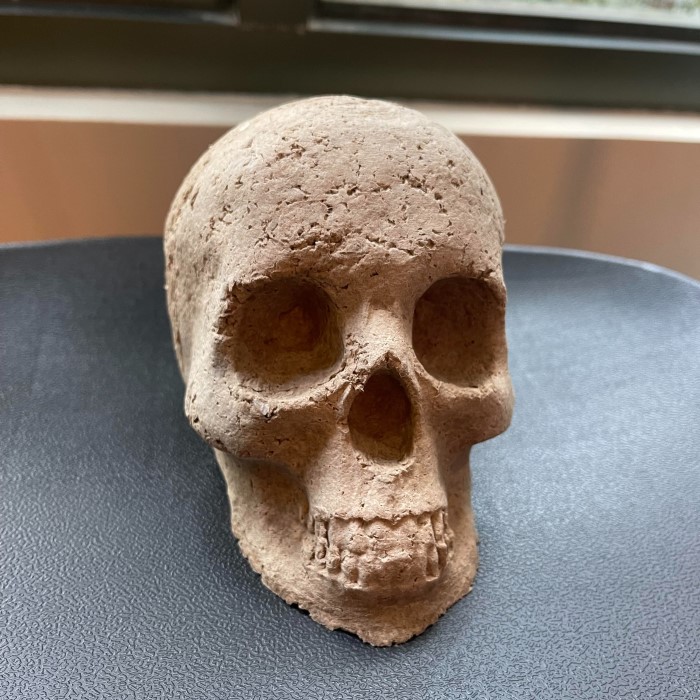
Crafting a paper mache skull is a fun, rewarding project that can add a creative touch to your home decor or special celebrations like Halloween and Día de los Muertos. Paper mache, a versatile medium, allows you to create lifelike designs that not only look incredible but also provide a fulfilling crafting experience. This guide will equip you with the knowledge and steps to create your own stunning paper mache skull from start to finish.
Creating your own decoration gives you the opportunity to express your creativity. You’ll learn about the materials needed, the step-by-step process for making your skull, and tips to enhance your crafting experience. By the end of this tutorial, you will have a beautiful paper mache skull decoration to showcase at home or present as a unique gift.
Understanding Paper Mache: The Basics
Before diving into crafting, it’s important to understand the fundamentals of paper mache. Knowing how it works will help you achieve better results.
What is Paper Mache?
Paper mache, derived from the French term meaning “chewed paper,” is a crafting technique that involves using paper pieces and an adhesive mixture to create three-dimensional objects.
- Layers and Drying: This process consists of applying wet paper strips onto a mold in multiple layers, allowing each layer to dry before adding the next. Once dried, the layers become strong and durable.
- Uses: Paper mache can be used for various projects, from sculptures and masks to piñatas and home decor items.
Why Choose a Skull as Your Project?
Creating a paper mache skull is especially popular due to its versatility. Skulls can be:
- Decorative: Skulls fit perfectly into Halloween themes or as part of a Day of the Dead celebration. They can be painted and designed in numerous styles, appealing to both children and adults.
- Educational: Crafting a skull can also be an educational experience, offering lessons about anatomy or cultural traditions, making it a great project for families or classrooms.
Materials Needed
Gathering the right materials ensures a smooth crafting experience. Below is a comprehensive list of what you will need:
Basic Supplies
- Paper:
- Newspaper: Ideal for its flexibility, inexpensive, and readily available.
- Brown Craft Paper: This can offer a different texture and appearance.
- Adhesive:
- Glue: A mixture of white school glue and water is commonly used. Alternatives include flour paste or commercial paper mache glue.
- Mold:
- Skull Mold: You can buy a plastic skull mold or create your own using materials like balloons or cardboard.
Additional Tools
Brushes
- Variety of Brushes: Having a selection of brushes is essential for efficiently applying adhesive during the paper mache process. Different brushes serve various purposes, ensuring you achieve the best results.
- Foam Brushes: Foam brushes are particularly useful for applying adhesive evenly across larger surface areas. They can gently spread the glue without tearing the paper strips, making them ideal for the initial layers of paper mache. They also allow for precise applications in areas where a larger brush may be less controlled.
- Detail Brushes: Detail brushes come in various sizes and shapes, providing the ability to work on smaller, intricate areas of your project. Use these for reaching tight corners and edges, ensuring full coverage of the mold. They are also handy when applying adhesive to small embellishments or when adding additional details later.
Mixing Bowl
- Purpose: A mixing bowl is an essential component for preparing your adhesive mixture. It provides a contained space for combining your glue or paste, ensuring a consistent texture.
- Size and Material: Choose a bowl that is appropriately sized for your project. It should be deep enough to allow easy mixing and large enough to hold sufficient adhesive for your needs. Clear bowls can be beneficial for monitoring the consistency of the mixture. Consider using a bowl made from plastic or silicone for easy cleanup.
- Mixing Process: When mixing your adhesive, carefully follow the desired proportions. If using white glue, a common mix is one part glue to two parts water. For flour paste, combine equal parts flour and water until smooth. Stir thoroughly to eliminate lumps and ensure a uniform mixture.
Plastic Wrap
- Purpose: Plastic wrap is valuable for lining molds when creating your paper mache projects. Its main function is to prevent the paper from sticking to the mold, allowing for easier removal once the paper mache has dried.
- Application: When preparing your mold—whether it’s a plastic form, balloon, or improvised shape—cover it with a layer of plastic wrap. Make sure to smooth out any wrinkles to create a consistent surface.
- Advantages: Using plastic wrap not only simplifies cleanup but also protects the mold from damage during the paper macheing process. Additionally, it helps maintain the shape of your mold, ensuring that the final product holds its structure.
Acrylic Paints
- Purpose: Acrylic paints are essential for decorating your finished paper mache skull. Their vibrant colors and quick-drying properties make them ideal for creative projects.
- Color Selection: Choose a variety of colors to bring your skull to life. Popular choices include bright, bold colors for festive designs or muted tones for a classic look.
- Application Techniques: You can use different techniques to apply the paint. Brushes, sponges, or even fingers can create unique textures and effects. Experiment with layering colors to achieve depth and interest in your design.
- Durability: After the skull has been painted, acrylic paints provide a durable finish that resists fading over time, ensuring your decoration stays vibrant.
Varnish
- Purpose: Varnish is the final touch for sealing your paper mache skull. It protects the surface and enhances the overall appearance of your creation.
- Type of Varnish: Choose a varnish that is suitable for acrylic paint. Water-based varnishes are commonly used for their ease of application and quick drying time. They also provide a clear finish without yellowing.
- Application: Once the paint has dried completely, apply the varnish using a clean brush. Ensure even coverage to avoid streaks. You can opt for a glossy or matte finish, depending on your desired look.
- Benefits: Varnish protects your decorated skull from moisture, dust, and wear while also adding a beautiful shine or soft sheen. This step enhances both the aesthetic and longevity of your paper mache project.
Step-by-Step Guide
Now that you have gathered all the necessary materials, it’s time to start creating your paper mache skull. Follow these steps to ensure a successful project:
Prepare Your Workspace
- Set Up: Choose a spacious, well-ventilated area to work. Cover your surface with newspaper or a plastic cloth to catch spills and drips.
- Organize Materials: Arrange all your supplies within reach for convenience throughout the crafting process.
Create or Prepare Your Mold
Using a Balloon
- Inflate the Balloon: Blow up a balloon to the size you want for your skull. The size should allow for easy handling and fit well within your decorating plans.
- Cover with Plastic Wrap: Wrap the balloon in plastic wrap. This prevents the paper from sticking to the balloon, making removal easier later.
Using a Plastic Skull Mold
- Line the Mold: If you are using a hard skull mold, line it with plastic wrap. This step ensures a smooth finish.
Prepare Your Paper and Adhesive
- Tear Strips of Paper: Tear strips of your chosen paper into approximately 1-inch wide pieces. Tearing helps create soft edges that adhere better during the layering process.
- Mix Your Adhesive: In a bowl, mix your adhesive solution. If using white glue, a common ratio is 1 part glue to 2 parts water. If using flour paste, mix equal parts flour and water until smooth.
Start Applying Paper Mache
- Dunk and Apply: Take each paper strip, dip it into the adhesive, and wipe off the excess glue.
- Layering: Apply the strips over your mold, overlapping them for added durability. Smoothing out bubbles and wrinkles is essential for achieving an even surface.
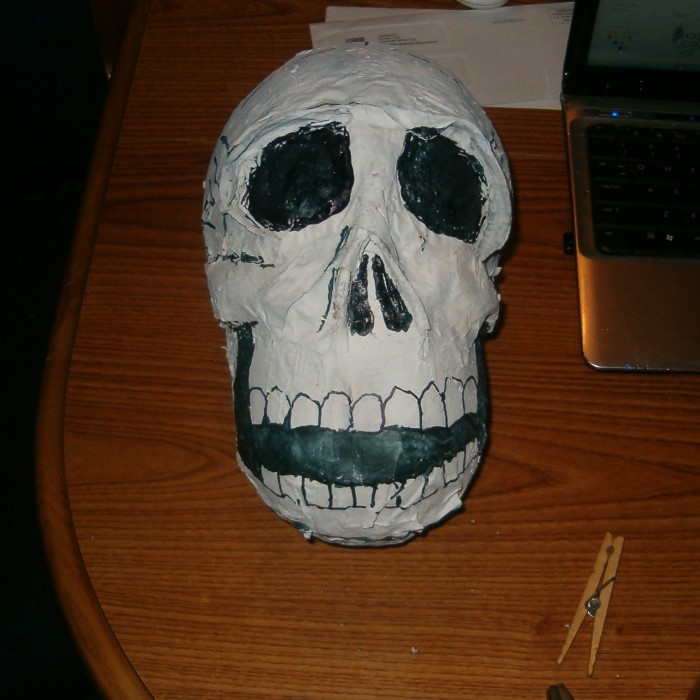
- Build Layers: Apply at least three layers of paper mache for a solid structure. Allow each layer to dry completely before adding more. Depending on humidity, this can take 24 hours or longer.
Drying Time
- Let it Dry: After the last layer, let your paper mache skull dry completely. A well-ventilated area can help speed up the drying process.
- Check Hardness: Ensure that the skull is solid and dry before attempting to remove it from the mold.
Remove the Mold
- Carefully Remove: Once fully dried, gently pull the skull away from the mold. If you used a balloon, carefully pop it and remove the remnants.
Decorating Your Paper Mache Skull
Now that your skull is ready, it’s time to decorate it according to your vision.
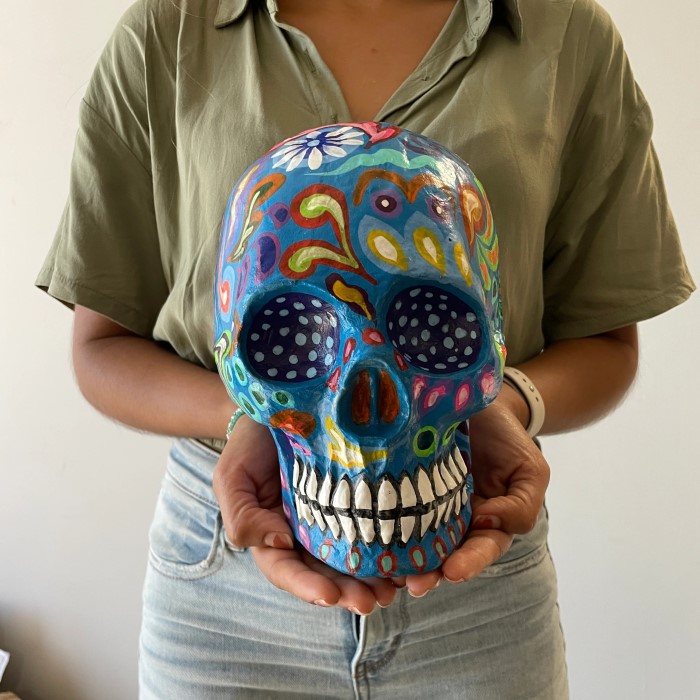
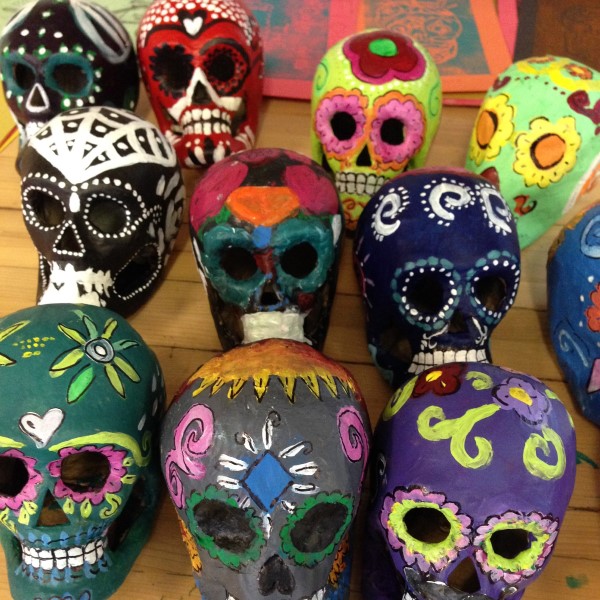
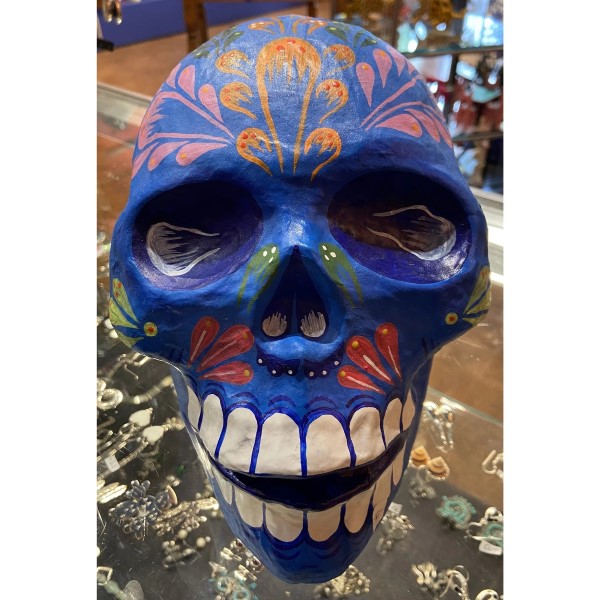
1. Painting the Skull
- Base Coat: Apply a base layer of white acrylic paint to create a neutral canvas for other colors. Allow it to dry completely.
- Design Details: Use colorful acrylic paints to add intricate patterns, designs, or symbols to your skull. Popular themes include floral designs, skull motifs, or vibrant colors for some festive flair.
2. Adding Finishing Touches
- Gems and Glitter: Adorn your skull with decorative elements like gemstones or glitter for added impact. These features can make your decoration truly stand out.
- Varnish: After the paint is dry, apply a clear varnish to seal the artwork. This layer will protect it from damage and enhance the colors.
Frequently Asked Questions
Throughout the creative process, you might have additional questions about how to create a paper mache skull. Here are some FAQs that can guide you:
How to make a skeleton paper mache?
To craft a skeleton from paper mache, start with a mold for each bone, or create individual bones using rolled strips of paper. Layer the paper and adhesive as you would for any paper mache project, ensuring a sturdy structure.
How do you make a paper mache head?
The process is similar to creating a skull. Use a larger mold, such as a balloon or a plastic head form, and apply paper strips until the desired thickness is achieved. Once dried, paint and decorate as preferred.
Why do you need Vaseline for paper mache?
Vaseline acts as a release agent, making it easier to separate your paper mache from its mold. Applying Vaseline on non-plastic surfaces can prevent the paper from sticking, ensuring a smooth removal process.
Conclusion
Creating a paper mache skull can be a delightful and rewarding artistic endeavor. With the right materials and techniques, you can craft unique decorations that stand out in any setting, whether for Halloween, celebrations, or home decor.
By following the steps outlined in this guide, you will not only learn how to bring your ideas to life but also embrace the joy of crafting. Experiment with styles, colors, and designs to create a paper mache skull that reflects your creativity. Dive into this artistic journey, and let your imagination flourish! Happy crafting!


