Introduction
Crafting is an expressive, rewarding hobby that allows you to explore your creative side. Among the various crafting techniques available, paper mache stands out for its accessibility and versatility. One delightful and meaningful project you can create is a paper mache heart. These charming decorations can brighten up your home, serve as unique gifts, or add a special touch to any event, from birthdays to weddings.
In this comprehensive guide, we will explore a variety of decoration ideas for crafting your own paper mache hearts. We’ll delve into the basic techniques for making them, provide tips for successful projects, and answer some common questions. With this information, you will be ready to embark on your paper mache journey and create stunning decorative pieces that reflect your individuality. Let’s unlock the potential of paper mache hearts together!
Understanding Paper Mache: The Basics
What is Paper Mache?
Paper mache is a crafting process that involves combining shredded or torn paper with a paste made from adhesive, flour, or glue. This technique allows you to create lightweight yet sturdy forms that can be shaped into decorative objects, sculptures, and more.
- Eco-Friendly: Since paper mache uses recycled paper, it is an environmentally friendly crafting choice. It minimizes waste by repurposing old newspapers, magazines, or cardboard.
- Cost-Efficient: The materials required for paper mache are typically affordable and easily accessible, making it an ideal project for crafters on a budget.
Why Choose Paper Mache Hearts?
1. Versatile Decoration
Paper mache hearts can be customized for various occasions, including Valentine’s Day, anniversaries, weddings, and even seasonal celebrations. They lend a heartfelt element to home décor while showcasing your artistic flair.
2. Personal Touch
Creating handmade paper mache hearts allows you to infuse your personality into the projects. You can choose colors, patterns, and designs that resonate personally, making your creations truly unique.
3. Simple and Fun
Paper mache is suitable for all age groups and crafting skill levels. Whether you’re a beginner or an experienced crafter, making paper mache hearts provides an enjoyable and fulfilling creative outlet.

Gathering Your Materials
Before you start your paper mache heart project, it’s essential to gather all the necessary materials. Here’s what you’ll need:
- Paper: Use newspapers, tissue paper, or other types of thin paper. Recycled materials work great for eco-friendly crafting.
- Adhesive: You can choose to use a traditional flour and water paste, PVA glue, or even a commercial paper mache adhesive.
- Shapes/Molds: You’ll need something to shape your heart, like inflated balloons, cardboard templates, or homemade molds formed from foil.
- Tools: Have scissors, brushes, and a mixing bowl handy for your paste. A drop cloth or newspaper to protect your work area will also be helpful.
Step-by-Step Guide
Prepare the Surface
- Clean Materials: Ensure all surfaces are clean before you start working. Remove any dirt, oil, or dust that could affect the adhesion of the paper mache.
- Choose Your Mold: If you’re using a balloon, inflate it to your desired heart size. For cardboard templates, cut out two heart shapes and glue them together along the edges to create a hollow mold.
Make the Paper Mache Paste
- Flour and Water Paste: Mix equal parts of flour and water in a bowl until you achieve a smooth, lump-free consistency.
- PVA Glue Option: If you prefer using glue, you can directly use it without dilution for a stronger hold.
Tear the Paper
- Prepare Paper Strips: Tear your paper into strips about 1 inch wide and 6-8 inches long. Tearing the paper allows for a frayed edge, which adheres better than cut edges.
Apply the Paper Mache
- Dip and Layer: Dip each strip of paper into the paste, then pull it out and gently squeeze off excess glue. Layer the strips over the mold, smoothing out wrinkles. Apply strips in various directions to ensure good coverage and strength.
Build Up Layers
- Multiple Coats: Continue applying layers until you’ve built up to about three to five layers, depending on how sturdy you want your heart to be. Allow each layer to dry before adding the next for the best results.
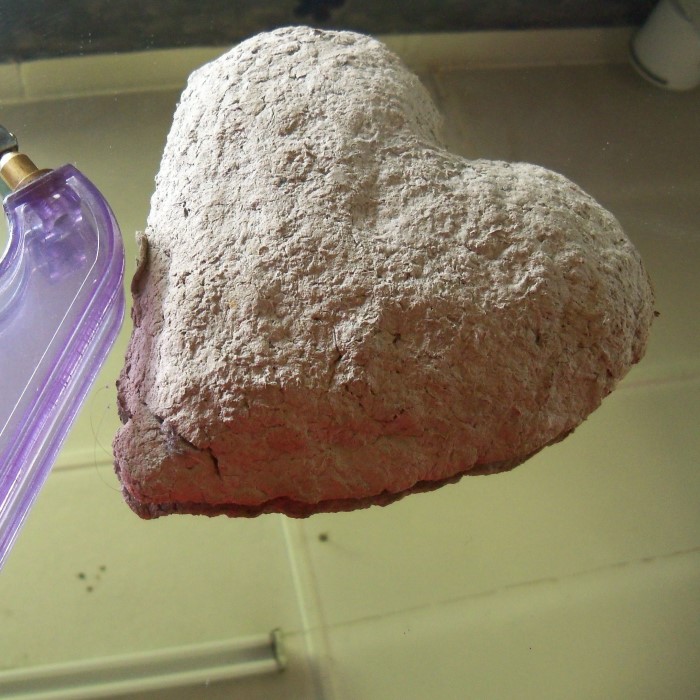
Drying the Heart
- Drying Time: Place your heart in a warm, dry area to allow it to harden completely. Depending on humidity, drying can take several hours to a full day.
Finishing Touches
- Remove From Mold:
- After allowing the heart to dry completely, carefully begin the removal process by gently pulling it away from the mold.
- If you utilized a balloon as the mold, you can easily pop it to free the heart from the shape.
- Take your time during this step to avoid damaging the heart, ensuring it retains its intended form and aesthetic.
- Smoothing Edges:
- To achieve a polished and refined finish, use sandpaper or a craft knife to address any rough edges that may have formed during the casting process.
- Start by lightly sanding the edges with fine-grit sandpaper, applying gentle pressure to avoid creating any dents or uneven surfaces.
- For more precise trimming, a craft knife can be used to carefully sculpt and smooth any irregularities, enhancing the overall appearance of the heart.
- Regularly check your progress to ensure that you achieve a smooth, professional finish that enhances the final product.
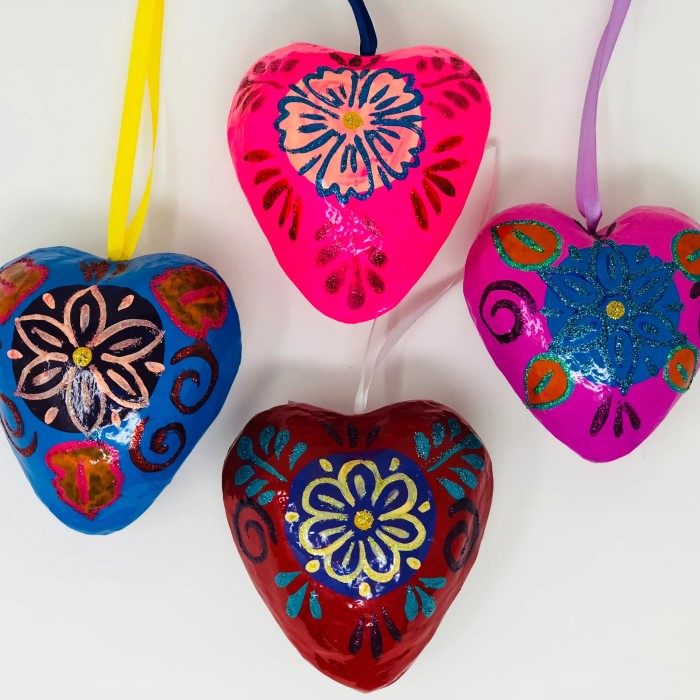
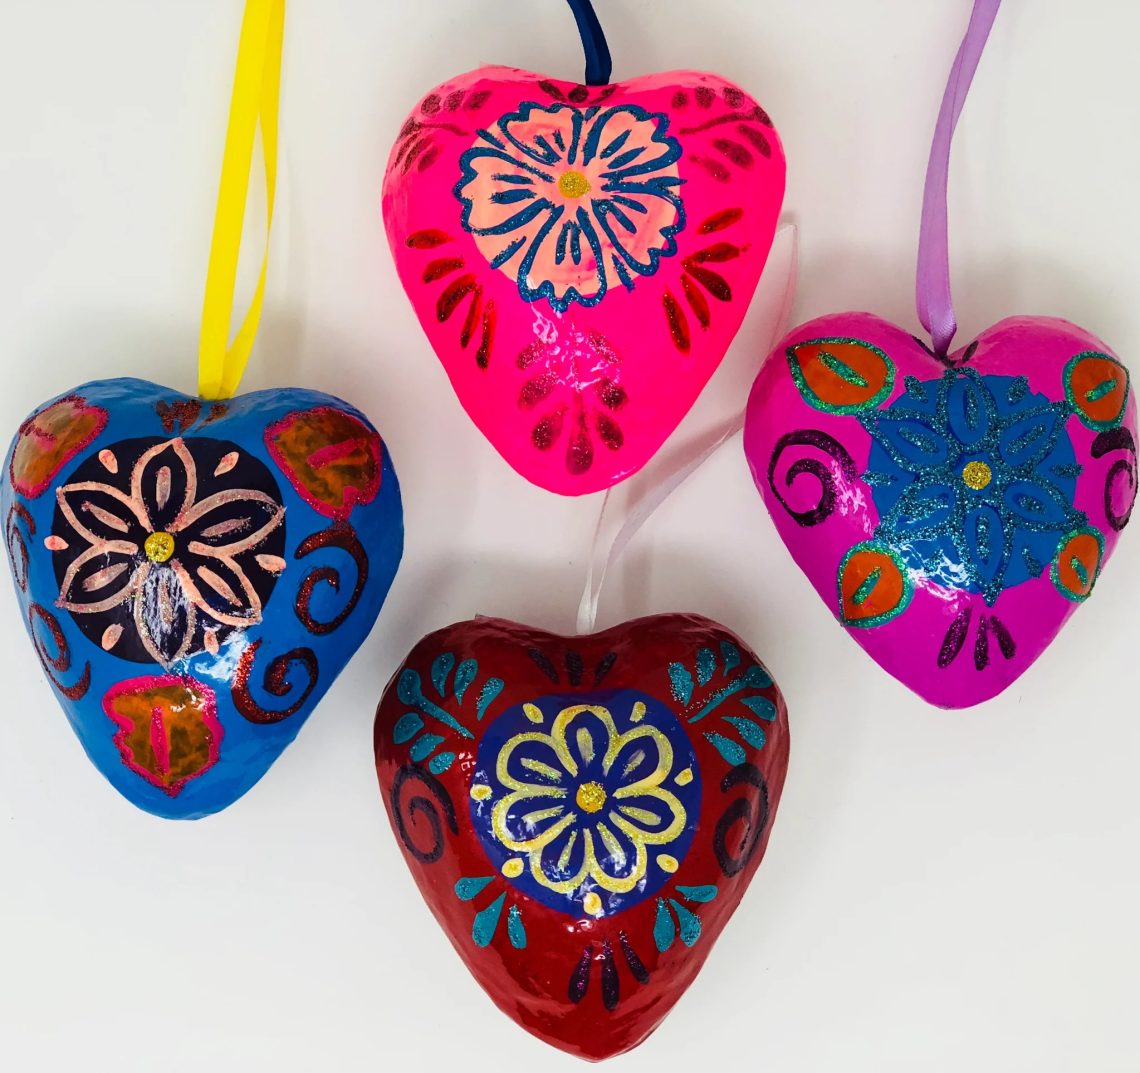
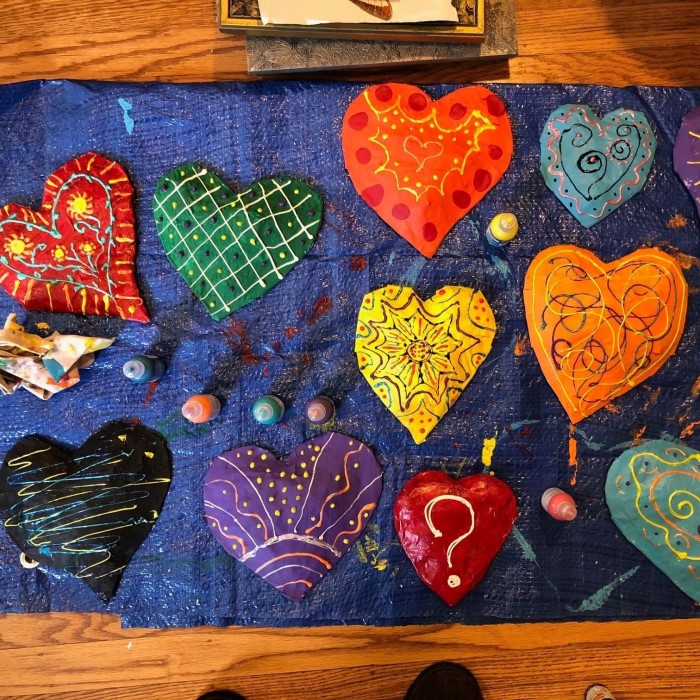
Decorating Your Paper Mache Heart
1. Painting and Color
- Use acrylic or fabric paints to bring your paper mache heart to life. Choose vibrant colors or pastel shades based on the occasion.
- Layer colors for a unique effect; try blending shades to create ombre or other artistic textures.
2. Adding Texture
- Use additional materials such as fabric, lace, or patterned paper to add texture to your heart. Mod Podge is great for adhering these textures.
- Consider using stencils or stamps for added design elements.
3. Embellishments
- Enhance your heart with decorative items like glitter, sequins, beads, or ribbons. These embellishments add visual interest and can be customized for different events.
4. Creating a Focal Point
- Choose to create a themed paper mache heart by adding symbols or letters that signify love, friendship, or seasonal motifs. This can be particularly impactful for gifting.
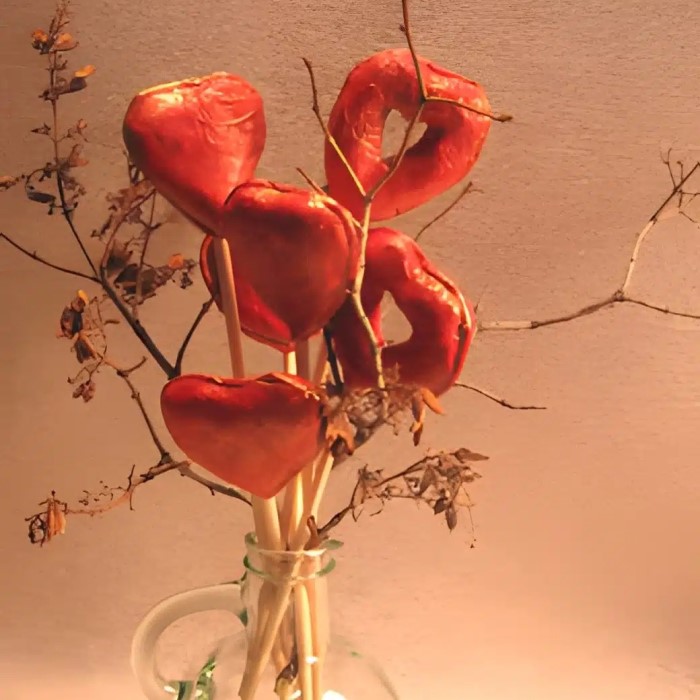
Stunning Decoration Ideas for Every Occasion
1. Romantic Accents
Transform your paper mache heart into romantic decor for Valentine’s Day or anniversaries by painting it in reds and pinks, and adding phrases like “Love” or “Forever” with decorative lettering.
2. Whimsical Home Decor
Create a collection of paper mache hearts in bright, playful colors to adorn your living space. Use them as centerpieces or wall hangers to add charm to any room.
3. Holiday Themes
Customizing paper mache hearts for various holidays brings festive cheer. Create spooky heart-shaped decorations in orange and black for Halloween or pastel-colored hearts for Easter.
4. Unique Gifts
Hand-crafted paper mache hearts make thoughtful gifts. Personalize them with names, meaningful phrases, or inside jokes for family and friends, showcasing your dedication to handmade presents.
5. Seasonal Decoration
Consider changing the decor of your paper mache hearts with the seasons. You can easily repaint and re-decorate them based on seasonal themes, ensuring they stay relevant and fresh throughout the year.
Advanced Techniques
1. Mixed Media Enhancements
- Get creative by combining mixed media elements into your design. Incorporate items like lace, beads, or twine to add depth and dimension.
2. Lighting Effects
- For a stunning twist, create hollow paper mache hearts and place LED lights inside. This will transform them into delightful lanterns, perfect for cozy evenings or special events.
3. Combining Sizes
- Mix and match heart sizes to create visually appealing displays. Hang smaller hearts from larger centerpieces or arrange them on tables to create depth and interest.
FAQs
How do I make paper mache?
To make paper mache, mix paper strips with a paste made of flour and water or use a ready-made adhesive. Layer the dipped strips over a mold, allow them to dry completely, and finish by painting or decorating as desired.
How to make an easy heart with paper?
To create an easy paper heart, shape papier mache over a mold or use thick paper to cut out heart shapes, and then layer the creations for added stability.
How to make paper mache seed hearts?
To make seed hearts, mix paper mache pulp with wildflower seeds. Shape the mixture into heart molds, let them dry, and plant them in the spring for beautiful blooms.
Conclusion
In conclusion, crafting paper mache hearts is a rewarding experience that combines creativity, functionality, and personalization. These hearts can serve as stunning decorations for any occasion, from romantic events to festive gatherings. With a few basic supplies and techniques, you can create beautiful, custom pieces that enhance your home decor and showcase your artistic flair.
Whether you’re making a heartfelt gift for someone special or creating unique decor for your home, paper mache hearts offer endless possibilities for creativity. By following the steps outlined in this guide, you’ll be well on your way to mastering this delightful craft. So gather your materials, get inspired, and let your creativity flow as you embark on your paper mache heart projects! The joy of crafting awaits you, and the results will surely impress yourself and others alike. Happy crafting!


