Introduction
Crafting can be a delightful way to express creativity and make memorable decorations for any occasion. One popular craft that has stood the test of time is creating paper mache eggs. Perfect for holidays like Easter, or simply as home decor, these eggs offer a blank canvas for artistic expression. In this article, we’ll explore the fun and engaging world of DIY paper mache eggs. From the basic techniques to creative ideas, we aim to inspire your next crafting endeavor.
What Are Paper Mache Eggs?
Understanding Paper Mache
Paper mache is a crafting technique that involves using a mixture of paper and adhesive to create various shapes and structures. The name “paper mache” comes from the French term meaning “chewed paper.”
- Materials: Typical materials for paper mache include strips of newspaper, glue or flour paste, and water. When layered and dried, the result is a sturdy yet lightweight structure.
- Versatility: This crafting method can be used to create various items, including sculptures, masks, and of course, eggs!
The Allure of Paper Mache Eggs
Making paper mache eggs is not only fun, but it also allows for endless creative possibilities.
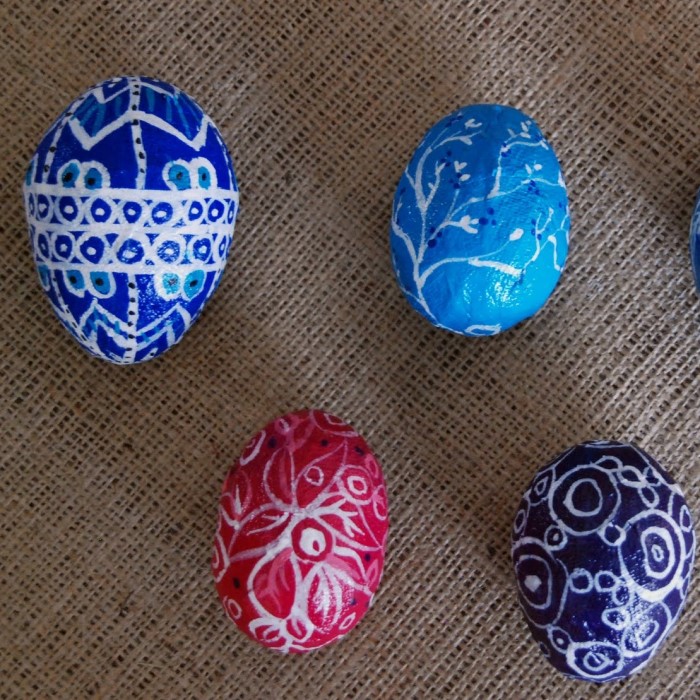
- Customizable Designs: You can paint, decorate, and shape the eggs however you like. This creative freedom makes them a fantastic project for both kids and adults.
- Family Fun: Crafting paper mache eggs can be a wonderful way to bond with family and friends. It encourages teamwork and creativity, making it an ideal group project for holidays.
Gathering Materials
Before starting your project, it’s essential to gather the necessary materials. Here’s what you typically need:
Basic Materials
Paper:
Primary Choice: Newspaper is the most commonly used type of paper for papier-mâché projects due to its availability and affordability. It tears easily, which allows for smooth layering and application.
Alternative Options:
Tissue Paper: This thin paper can create a more delicate texture and is available in various colors, making it ideal for projects that require a softer, more artistic look.
Craft Paper: Often thicker than newspaper, craft paper can be used to add strength to your creation and can also be found in many colors and patterns, enhancing the overall visual appeal of the final product.
Adhesive:
Homemade Paste: A simple mixture of flour and water can be made to create a paste for your papier-mâché. This option is economical and easy to prepare at home, and it dries clear, making it suitable for a variety of projects.
Commercial Glue: PVA (polyvinyl acetate) glue is another option that can be diluted with water to achieve the right consistency. This method provides a strong bond and dries much quicker than flour-based paste, making it convenient for larger or more intricate projects.
Balloon:
Using Balloons: A balloon is a popular choice for creating an egg-shaped mold in papier-mâché projects. It can be inflated to the desired size and shape, and once the project is complete, the balloon can be deflated and removed to reveal the hollow structure.
Alternative Molds: If you prefer, you can also use plastic eggs or other spherical objects as molds. These alternatives can provide a consistent shape and may be easier to remove once the papier-mâché has dried, allowing for a variety of creative designs.
Optional Supplies
Paints and Brushes:
After the paper mache has completely dried, it’s time to unleash your creativity by painting the eggs.
Choose vibrant colors that reflect your personal style or the theme you might be aiming for, such as bright pastels for spring or bold shades for festive occasions.
Utilize a variety of brushes to achieve different textures and techniques—fine brushes for details and larger ones for broader strokes.
Decorative Materials:
In addition to painting, you can enhance your eggs with various decorative materials to make them unique.
Consider adding glitter to create a sparkly effect that catches the light beautifully, making your eggs stand out.
Ribbons can be used to wrap around the eggs or create bows, adding a touch of elegance and whimsy.
Stickers or decals can also be incorporated, allowing for quick and easy customization that reflects your taste and creativity.
Sealant:
Once your designs are complete and fully dried, applying a clear sealant is a crucial step for preserving your work.
A sealant will protect the paint and decorative materials, ensuring your eggs remain vibrant and intact over time.
This is especially important if you plan to display your eggs as decorations or store them for future use, as the sealant adds durability and longevity to your crafts.
When choosing a sealant, look for a product that dries clear and is suitable for use on paper mache to achieve the best results.
Step-by-Step Guide
Prepare Your Paste
Start by preparing the paste for your paper mache eggs.
- Flour Paste Recipe: Mix one part flour with two parts water in a bowl. Stir until it reaches a smooth, soupy consistency.
- Glue Mixture: If using PVA glue, dilute it with a bit of water until it is easily spreadable.
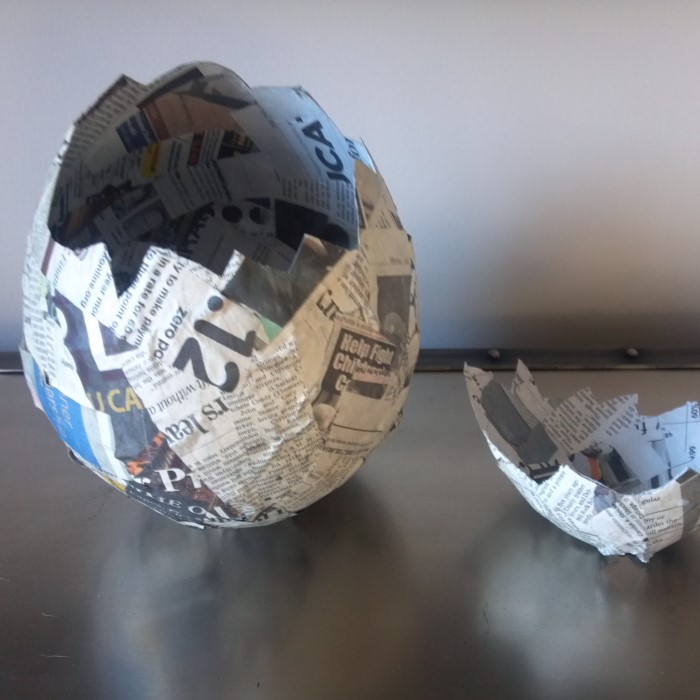
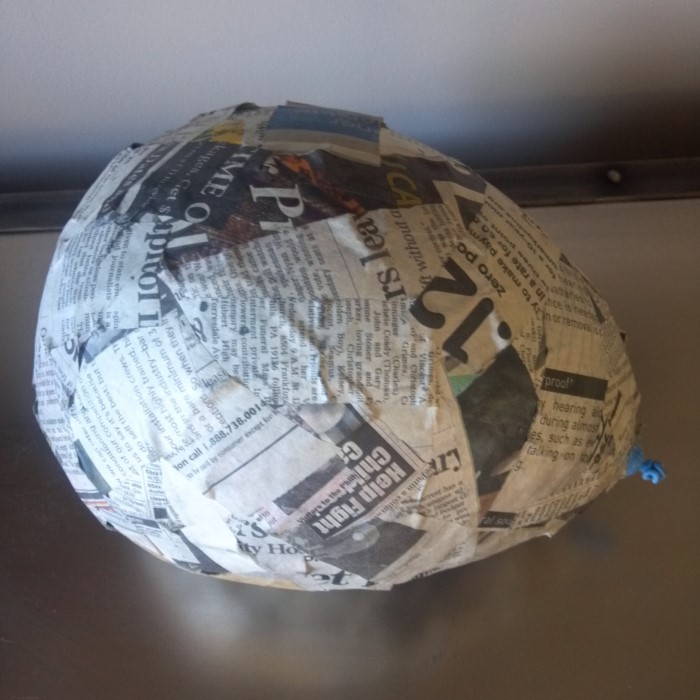
Prepare the Balloon
- Inflate and Tie: Inflate a balloon to your desired egg size and tie the end securely.
- Protect the Surface: Lay down newspaper or a plastic sheet on your workspace to catch any drips.
Apply Paper Strips
- Cut Strips: Tear or cut newspaper into strips about 1 to 2 inches wide.
- Dip and Adhere: Dip each strip into the paste, making sure to coat it thoroughly, and then apply it to the balloon. Overlap the strips to create solid coverage.
Build Layers
- Layering Technique: Continue applying strips in a crisscross pattern. This strengthens the structure. Aim for at least three to four layers.
- Drying Time: Allow the layers to dry completely. This can take several hours or overnight, depending on humidity.
Finishing Touches
- Pop the Balloon: Once the layers are dry, carefully pop the balloon and remove it from inside the egg shell.
- Trim the Edges: You may need to trim any excess paper or rough edges for a clean look.
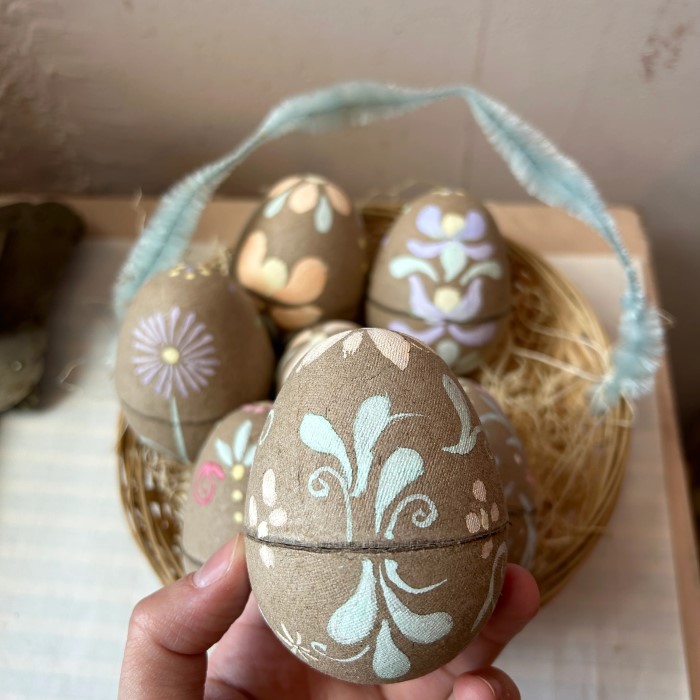
Decorating Your Paper Mache Eggs
Painting Techniques
- Acrylic Paint: Use acrylic paints to color your eggs once they’re dry. These paints provide vibrant colors and can cover well.
- Watercolor Effects: For softer designs, consider using watercolors. Spraying water on the egg before painting with watercolors allows for a beautifully blended finish.
Adding Decorative Elements
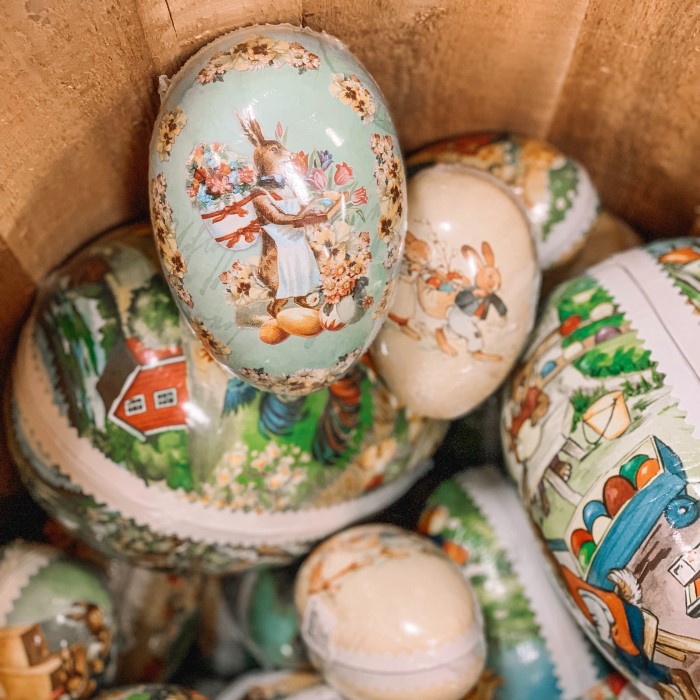
- Stickers and Decals: Custom stickers can enhance designs while making them personal. You can even create your own with printed images.
- Glitter and Gloss: Sprinkle glitter over wet paint or apply a gloss finish to add sparkle and shine.
Creative Ideas for Holiday Crafting
Easter Decorations
- Easter Egg Hunt: Fill your decorated paper mache eggs with treats or small toys for an exciting Easter egg hunt.
- Centerpiece Displays: Create a vibrant centerpiece using your paper mache eggs in a decorative bowl or basket.
Spring Theme Projects
Garden Decor
- Bright Colors: Use vibrant paints to cover your paper mache eggs, incorporating a variety of hues to create a cheerful, spring-like effect.
- Strategic Placement: Arrange these decorated eggs throughout your garden, ensuring they stand out among the flowers or in designated spring-themed displays.
- Creating a Theme: Consider organizing your garden decor by color or style, allowing the paper mache eggs to complement the existing floral arrangement.
- Seasonal Touch: Use these eggs not just as decor, but as part of a larger seasonal celebration, embracing the beauty of spring.
Gift Wrapping
- Unique Elements: Utilize smaller paper mache eggs as distinctive additions to your gift-wrapping strategy, setting your gifts apart from standard offerings.
- Creative Attachment: Attach these eggs to gift bags with twine or ribbon, adding a playful and artistic flair to any present.
- Easter Baskets: Include the smaller eggs in Easter baskets as a surprise element, enhancing the overall theme of the basket and delighting the recipient.
- Personalized Touch: Consider painting or personalizing the eggs to match the recipient’s favorite colors or interests for an extra thoughtful detail.
Troubleshooting Common Issues
Paper Mache Doesn’t Dry Properly
- Humidity: High humidity levels can slow down drying. Ensure your workspace is well-ventilated to speed up the process. You may consider placing a fan nearby to promote airflow.
Tears or Weak Spots
- Layering Technique: If you discover tears or weak spots, add another layer of paper mache to reinforce those areas. Ensure you’re using enough paste for adequate adhesion.
Conclusion
Creating paper mache eggs is a fun and rewarding craft that offers endless opportunities for creativity and personalization. Whether you are preparing for a holiday or engaging in a creative project with friends and family, the techniques outlined in this guide will help you craft stunning eggs that are sure to delight.
By gathering the necessary materials, following the step-by-step instructions, and exploring unique decoration ideas, you can immerse yourself fully in the art of paper mache crafting. Remember, every unique design not only reflects your creativity but also serves as a cherished memento of your artistic journey. So gather your supplies, unleash your imagination, and enjoy all that crafting with paper mache eggs has to offer!