Introduction to Paper Mache Clay
Creating art can be an incredibly fulfilling experience, especially when using materials that are accessible, affordable, and sustainable. One such medium that has continued to captivate artists, hobbyists, and families is paper mache clay. This versatile material allows you to mold, shape, and create stunning works of art with minimal effort and cost.
Making paper mache clay is not just about crafting; it also fosters creativity and imagination in individuals of all ages. In this article, we will explore a comprehensive paper mache clay recipe and delve into the many wonderful ways it can transform ordinary materials into extraordinary art pieces.
What is Paper Mache?
Before diving into our paper mache clay recipe, let’s clarify what paper mache is. The term paper mache, derived from French, translates to “chewed paper.” This craft technique involves combining paper or pulp with a binding agent such as glue or flour paste. Once dried, this mixture transforms into a hard, durable material suitable for a broad range of artistic applications.
Paper mache has been utilized throughout history across various cultures for artistic, decorative, and functional purposes. From intricate masks in traditional festivals to affordable DIY projects, its versatility makes it a beloved crafting choice.
Essential Ingredients for Paper Mache Clay
To craft high-quality paper mache clay, you need a few key ingredients. Here’s a brief overview of what you’ll need:
- Paper: This can be any type of paper, but newspapers or recycled paper work best. Make sure it is clean and free of toxic inks.
- Water: Water is essential for breaking down the paper into a mushy pulp.
- Glue: White school glue or PVA (polyvinyl acetate) glue is commonly recommended as it provides a strong bond.
- Flour: This is used to thicken the mixture and add structure, making the clay more durable.
- Optional Ingredients: You may also consider adding cornstarch for an even firmer texture or colorant to create differently colored clays.
Understanding these ingredients is crucial to achieving the desired consistency and strength in your paper mache clay.
Step-by-Step Paper Mache Clay Recipe
Now that you have your ingredients ready, follow these steps to create your own paper mache clay:
Step 1: Preparing the Paper
Begin by tearing the paper into small pieces. A good size would be roughly 1-inch squares. Tearing the paper instead of cutting it creates frayed edges that help the pieces bond better when mixed with other ingredients.
Step 2: Soaking the Paper
Place the torn paper into a large bowl or container and cover it with warm water. Let the paper soak for several hours or, ideally, overnight. This softens the paper and makes it easier to break down into a pulp.
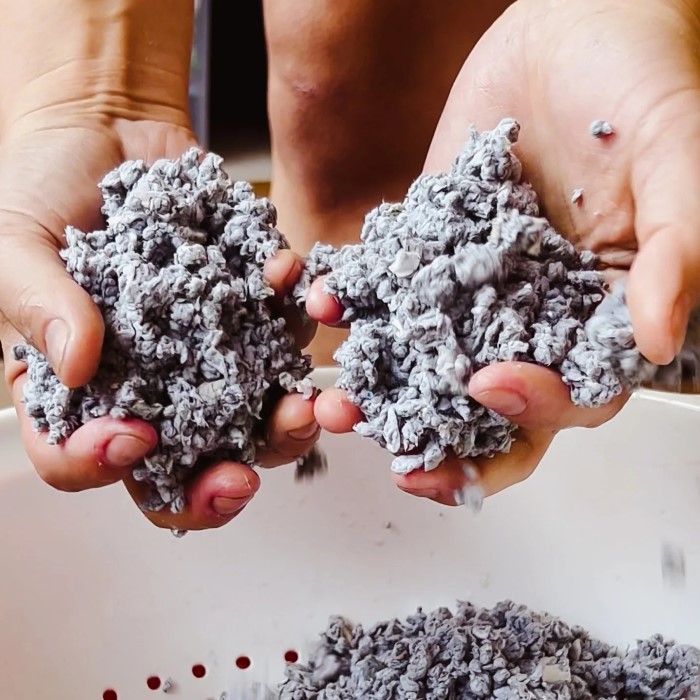
Step 3: Blending Into Pulp
After the paper has soaked, drain the excess water. Use your hands to knead and smash the paper into a pulp. You can also use a blender or food processor to achieve a finer consistency, but ensure you don’t over-blend.
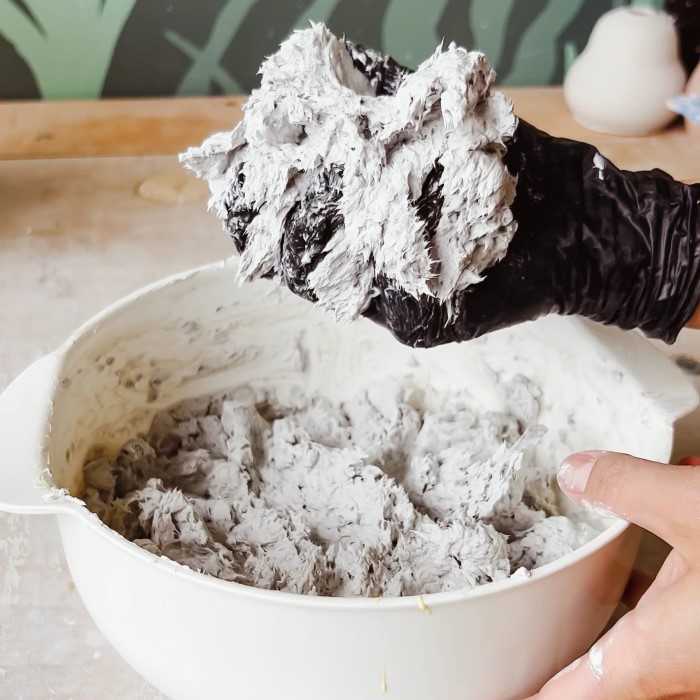
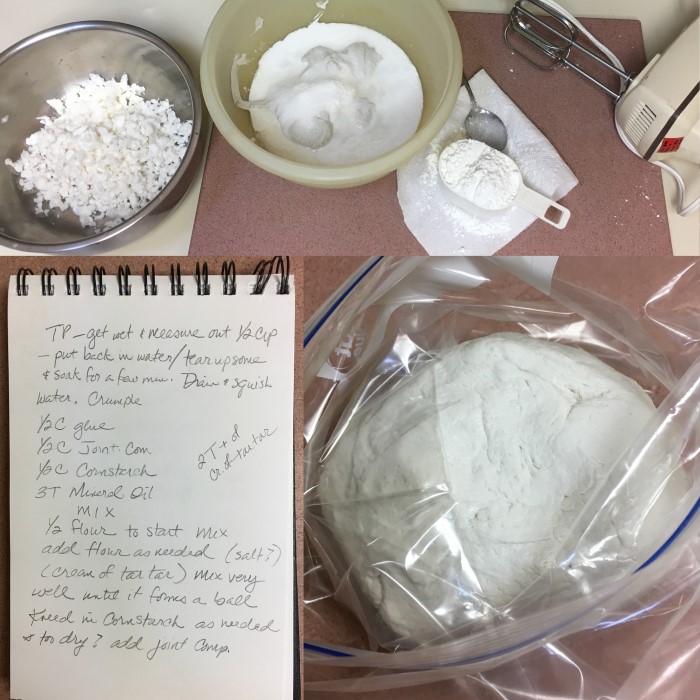
Step 4: Mixing in the Ingredients
In a separate bowl, combine one cup of glue with one cup of flour. Mix thoroughly until smooth. You can add a bit of water if needed to get the right consistency. Then add your paper pulp to this mixture and stir it well. The goal is to achieve a thick, dough-like texture that holds its shape.
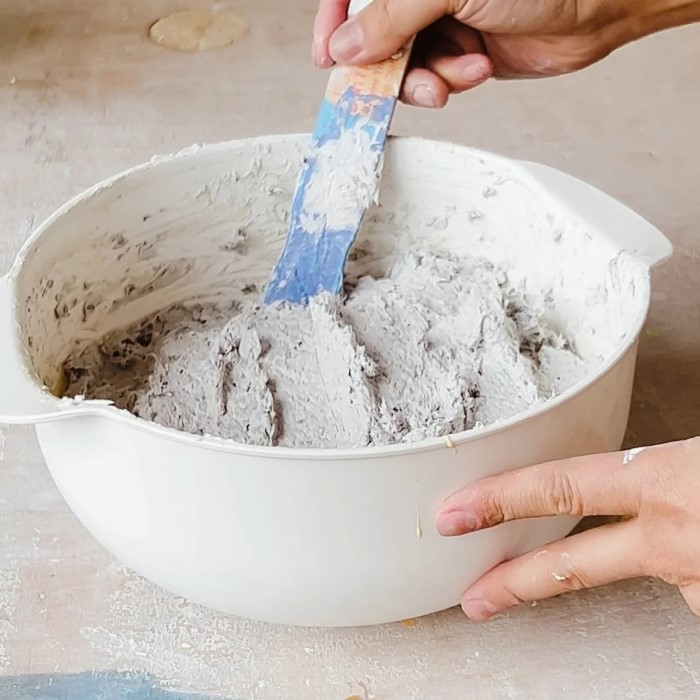
Step 5: Fine-tuning the Consistency
At this stage, feel free to adjust the texture of your clay. If it feels too wet, add a little more flour. Conversely, if it’s too dry, you can add a small amount of water or glue. The mixture should be flexible enough to mold yet firm enough to hold its shape.
Sculpting with Paper Mache Clay
Once your paper mache clay is ready, you can start creating! This medium is incredibly easy to work with, making it suitable for a variety of projects, from simple shapes to complex figures.
Creating Shapes and Structures
Use your hands to sculpt the clay into your desired shapes. For example, you could create decorative bowls, masks, animal sculptures, or themed décor items. The possibilities are endless! For more intricate designs, use sculpting tools or household items like spatulas and spoons to add details and textures.
Encouraging children to join in the crafting process makes for a fun family activity. Paper mache clay is non-toxic and safe, allowing kids to freely express their creativity in a playful and engaging way.
Ensuring Successful Paper Mache Projects
To get the best results from your projects, consider these helpful tips:
Work in Layers
- Technique for Larger Pieces: When crafting larger sculptures or items, it’s important to apply the clay in multiple layers rather than all at once. This method allows for better structural integrity.
- Layer Application: Start by applying the first layer of paper mache clay evenly over your base structure. Make sure the layer is thick enough to hold its shape but not so thick that it compromises drying time.
- Drying Between Layers: After applying each layer, leave it to dry completely. This can take anywhere from a few hours to a full day, depending on environmental conditions and the thickness of the layer.
- Benefits of Layering: Each layer contributes to the overall strength of your piece. Adding layers gradually helps prevent cracks and weak spots, resulting in a more durable final product.
- Achieving Dimension: Working in layers also allows you to create textured designs and better contouring. This can add visual interest and complexity to your finished items.
Drying Properly
- Complete Drying: It’s essential that each creation dries thoroughly before moving or handling it. The drying time can vary greatly based on the size, thickness, and humidity of the environment.
- Factors Influencing Drying Time: Larger and thicker pieces will naturally take longer to dry than smaller, thinner ones. Additionally, factors such as temperature, humidity, and ventilation will all impact the drying duration.
- Checking Dryness: To ensure a piece is fully dry, check for a hard texture and absence of any dampness. It may feel cool to the touch if it’s not dry enough.
- Importance of Proper Drying: A well-dried piece will be less prone to cracking or breaking during handling and finishing processes. It also allows for better adherence when painting or sealing later on.
Sanding and Finishing
- Smoothing the Surface: Once your project has dried thoroughly, consider sanding it to remove any imperfections. This step will help you achieve a professional-looking finish.
- Recommended Tools: Use fine-grit sandpaper (typically around 220-grit) for the best results. This type of sandpaper is gentle enough to smooth the surface without damaging the structure of your piece.
- Technique for Sanding: Work gently and in small circular motions to avoid over-sanding and creating uneven spots. Focus on rough edges and any areas where the texture feels uneven.
- Final Touches: After sanding, wipe away any dust with a damp cloth. This prepares the surface for painting, ensuring better adhesion for your chosen paint.
Painting and Sealing
- Choosing Paint: Once you’re satisfied with the shape and texture of your work, you can move on to painting. Acrylic paints are highly recommended for their bright colors and excellent adherence on paper mache clay.
- Application Techniques: Use brushes, sponges, or even spray paint to apply color to your creation. Consider applying multiple thin layers of paint for even coverage, allowing each layer to dry before adding the next.
- Enhancing Durability: After painting, consider applying a clear sealant or varnish to protect the surface. This not only adds extra durability but also enhances the vibrancy of the colors.
- Final Thoughts: Sealing your artwork also helps in resisting moisture and dirt, ensuring that it lasts longer and can be displayed or used confidently without fear of damage.
Frequently Asked Questions
Let’s tackle some common questions about making and using paper mache clay:
How to Make Papier Mache Clay?
To make papier mache clay, start by soaking torn paper in warm water. Then, blend it into a pulp and mix it with glue and flour to form a moldable consistency.
What Are the 4 Ingredients for Paper Mache?
The four essential ingredients for paper mache include paper, water, glue, and flour. Each plays a critical role in developing a viable and effective crafting material.
What is the Best Formula for Paper Mache?
The most effective formula for making durable paper mache typically follows a 1:1:1 ratio of flour, water, and glue. However, feel free to adjust these ratios based on the stiffness or softness you need for your projects.
What is the Best Glue for Paper Mache Clay?
White school glue is recommended as the best option for paper mache clay due to its strong binding properties and optimal integration with the pulp and flour mixture.
Conclusion: Unleash Your Creativity
In conclusion, using a paper mache clay recipe allows everyone—children and adults alike—to explore their creative abilities, leading to unique artistic expressions. The beauty of crafting with this DIY approach lies in its accessibility and the opportunity to repurpose materials.
Encouraging sustainability through art gives you a deeper connection to your craft, fostering both environmental awareness and creativity. So gather your ingredients, invite some friends or family members, and let the fun begin! With newfound skills in crafting and knowledge about making paper mache clay, you’re now fully prepared to embark on your next artistic project. Enjoy the process, and most importantly, create stunning works of art in minutes!


