Introduction
Are you looking for fun and creative projects to celebrate the fall season? Paper mache pumpkins could be your go-to solution. These charming decorations not only add a festive touch to your home but also provide an excellent opportunity for crafting with family and friends. Whether you’re a seasoned crafter or a beginner, you’ll find that making paper mache pumpkin is quite enjoyable and rewarding. Let’s explore why these delightful projects are perfect for all ages!
What is Paper Mache?
Before diving into the projects, it’s essential to understand what paper mache is. Paper mache is a crafting technique that involves using strips of paper or pulped paper adhered together with a glue-like substance, typically flour and water or craft glue. Once layered and dried, this mixture hardens into a sturdy form. The versatility of paper mache means you can create various enchanting designs, with pumpkins being one of the most popular choices.
Why Choose Paper Mache Pumpkins?
There are several compelling reasons to create paper mache pumpkins. First, they are eco-friendly. By using recycled materials, you contribute to sustainability while having fun. Second, these pumpkins are lightweight and durable, perfect for indoor and outdoor decoration. Additionally, since paper mache pumpkins can be painted and embellished in countless ways, they allow for limitless creativity. Finally, this craft is a great bonding activity for family members, making it accessible for kids and adults alike.
Gathering Your Materials
Creating your own paper mache pumpkin requires a few essential materials. Here’s a simple list to get you started:
- Newspapers or any recycled paper: This will serve as your base medium.
- Flour and water (or craft glue): To make the paper mache paste.
- Balloon or a pumpkin mold: Use a balloon to shape your pumpkin or a mold if desired.
- Sealant and paint: After your pumpkin hardens, seal it and paint it for a finished look.
- Decorative supplies: Think stickers, glitter, or embellishments to personalize your pumpkin.
Step-by-Step Guide
Preparing Your Workstation
Before starting, ensure your workspace is protected. Lay down old newspapers or a plastic cover to catch any drips. Gather all your materials within reach, making the crafting process smoother.
Creating the Paste
If you’re opting for homemade paste:
- Mix one part flour with two parts water in a bowl. Stir until smooth, eliminating lumps.
- For a quicker option, simply use a pre-made craft glue.
Making the Pumpkin Shape
- Inflate a Balloon: Blow up a balloon to the desired size of your pumpkin. A medium-sized balloon works well.
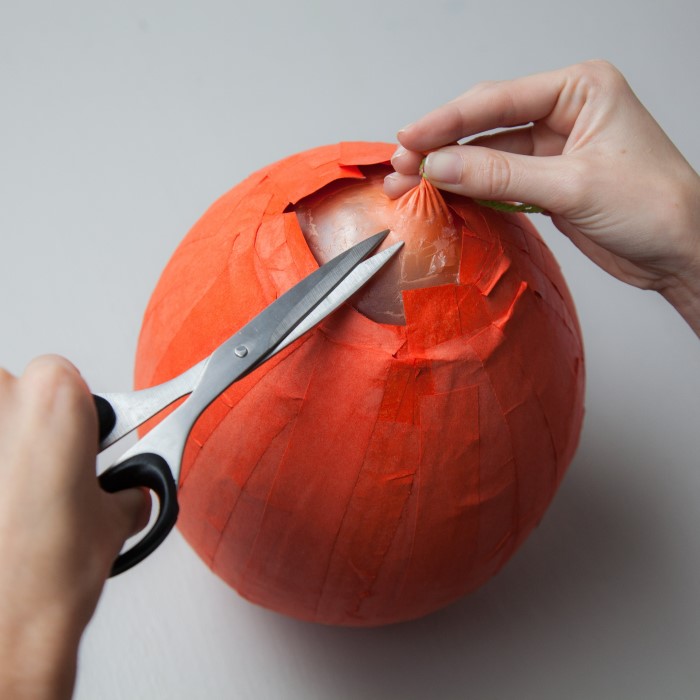
- Apply Paper Strips: Dip strips of newspaper in your paste and layer them over the balloon. Ensure even coverage and allow drying between layers. Aim for at least three layers for stability.
- Create the Pumpkin’s Top: After the base hardens, pop the balloon. You can shape the top of your pumpkin with additional paper mache or decorative elements.
Painting and Decorating
Once your pumpkin is completely dried and hardened, it’s time for the fun part: decorating! Here are some ideas:
Paint Your Pumpkin
- Choosing the Right Paint: When it comes to painting your pumpkin, you can opt for acrylic paint or spray paint. Both options have their advantages; acrylic paint allows for more detailed work, while spray paint provides an even coat with a smooth finish.
- Vibrant Fall Colors: Select vibrant colors that embody the essence of fall, such as traditional orange, deep green, or crisp white. These colors immediately evoke the seasonal spirit and can be used to create a classic or unique look.
- Preparation Before Painting: Before painting, make sure to clean your pumpkin thoroughly. Wipe it down with a damp cloth to remove any dirt or debris. This helps the paint adhere better and results in a smoother finish.
- Application Techniques: If using spray paint, work in a well-ventilated area and apply several thin coats to avoid drips. For acrylic paint, use brushes or sponges to apply colors in layers, allowing each layer to dry before adding more.
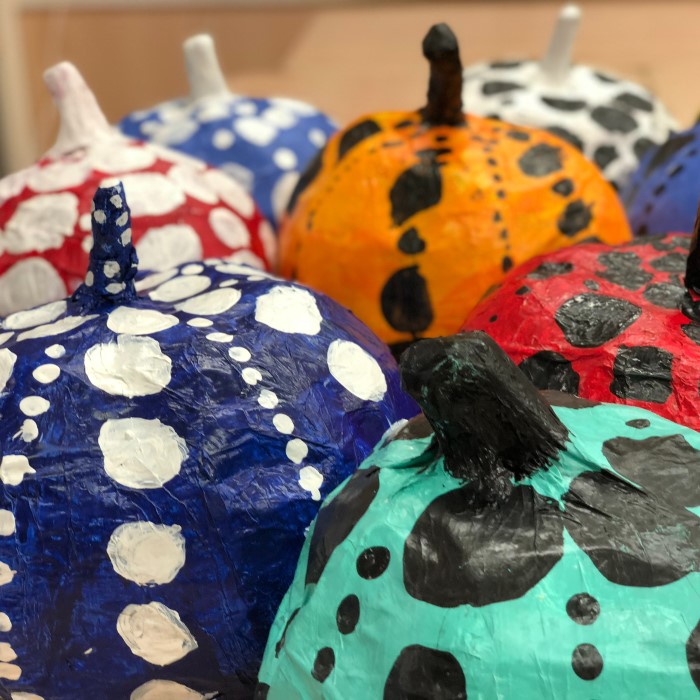
Add Details
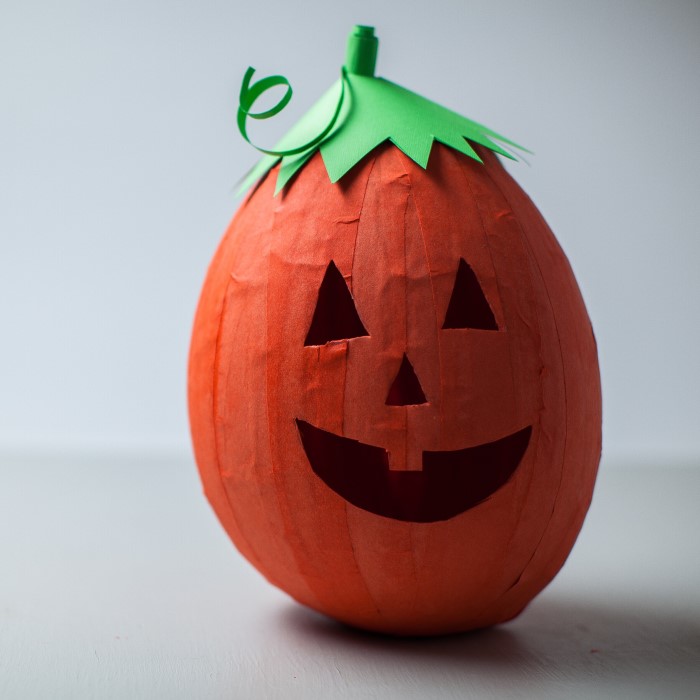
- Incorporating Faces and Patterns: Once your base coat is dry, think about adding faces, patterns, or designs. This is the perfect opportunity to let your creativity shine! Traditional jack-o-lantern faces can be painted on, or you can choose more intricate designs like floral patterns or geometric shapes.
- Using Different Tools: Consider using a variety of tools to add details; fine-tipped paintbrushes work well for small designs, while larger brushes or foam stamps can be used for bolder accents. Markers are also excellent for making quick and sharp lines.
- Exploring Decoupage Techniques: For a unique twist, try decoupage. This technique involves gluing decorative paper or fabric onto your pumpkin. You can use napkins, scrapbook paper, or printed images to create stunning visuals that add texture and depth to your decoration.
Embellish and Finalize
- Adding Embellishments: Once your painting is complete, it’s time to add embellishments. Faux vines can be wrapped around the stem or around the base of the pumpkin for a natural touch. Consider using dried leaves or artificial flowers to enhance the overall look.
- Decorative Items: Small decorative items like gems, beads, or sequins can be glued onto the pumpkin for a bit of sparkle. These elements will catch the light and add an extra layer of interest to your creation.
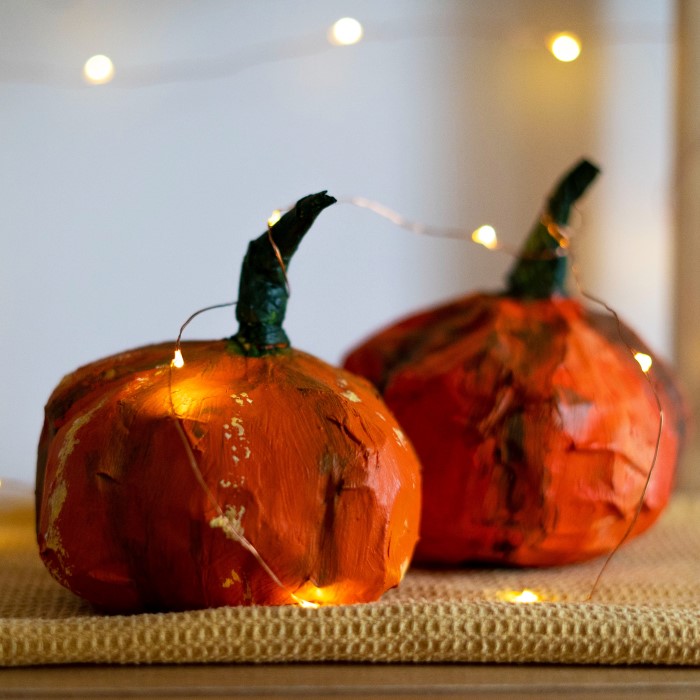
- Incorporating Lights: For a whimsical touch, consider adding lights. Battery-operated string lights can be woven around the pumpkin or placed inside it (if it’s hollow), creating an enchanting glow, especially for evening displays.
- Final Inspection and Touch-Ups: Before displaying your pumpkin, take a moment to inspect all the details. Make any necessary touch-ups to paint or embellishments to ensure everything looks polished and well-crafted.
These easy projects make your pumpkin unique, showcasing your personal style and creativity.
Fun Variations
If you want to mix it up, there are various ways to get creative with your paper mache pumpkin:
Mini Pumpkins
- Perfect for Centerpieces: Mini pumpkins are an excellent choice for creating charming table centerpieces. Their small size allows you to arrange them in clusters or use them individually to complement your dining decor during fall gatherings or festive occasions.
- Party Favors: Consider crafting mini pumpkins as delightful party favors. They can be personalized with guests’ names or decorated uniquely to reflect the theme of the event. Guests will appreciate the thoughtful token to take home.
- Customization Options: Mini pumpkins provide a canvas for creativity. You can paint them in various colors, use markers for detailed designs, or apply decoupage techniques to match your party’s theme or color scheme.
- Easy to Craft: Due to their size, mini pumpkins are quick and easy to craft with kids or during group activities. This makes them ideal for family gatherings or class projects, where each participant can create their own unique pumpkin.
Themed Pumpkins
- Character-Inspired Designs: Themed pumpkins can be crafted to resemble popular characters from movies, books, or television shows. For example, you could create a pumpkin inspired by a beloved cartoon character, making it both fun and engaging for children.
- Monsters and Superheroes: Consider crafting pumpkins decorated as classic monsters like vampires, witches, or zombies. Alternatively, superhero-themed pumpkins can be painted in the colors and symbols of favorite comic book characters, allowing for playful and imaginative designs.
- Seasonal Themes: Each season offers a plethora of themes to explore. For example, during Halloween, you can create a spooky pumpkin, whereas in the spring, pastel colors and floral designs can turn your pumpkin into a delightful springtime decoration.
- Interactive Decorations: Themed pumpkins can also be used interactively by incorporating features like removable accessories (e.g., capes for superhero pumpkins or hats for monsters), making them more engaging for children and providing an element of play.
Seasonal Pumpkins
- Adorning for Different Seasons: Seasonal pumpkins are a fantastic way to celebrate each time of year. For winter, consider transforming pumpkins into whimsical snowmen adorned with fabric scarves and felt buttons.
- Fall-Inspired Designs: During the fall, you can decorate pumpkins with leaves, acorns, and other elements that capture the essence of the harvest season. Painting them in warm autumn colors will evoke the cozy feelings of fall.
- Spring and Summer Themes: Don’t limit yourself to just fall and winter! In spring, decorate your pumpkins with pastel colors and floral patterns, while summer pumpkins can be adorned with bright colors and tropical designs, such as palm trees or beach themes.
- Festive Holidays: Think outside the box for various holidays—pumpkins can be used for Thanksgiving centerpieces, Halloween decorations, or even as unique Christmas ornaments when designed accordingly. Decorating them for various holidays can keep your decor fresh and fun throughout the year.
These variations help keep the crafting experience fresh and exciting.

Conclusion
Paper mache pumpkins are enchanting creations that provide an engaging and rewarding crafting experience. From the simple materials needed to the endless possibilities for personalization, everyone can share in the fun regardless of age or crafting skill. As we approach the fall season, why not gather your family or friends and embark on this crafting journey?
Crafting paper mache pumpkin is not only a way to decorate your home but also to create lasting memories. Embrace the creativity that comes with making these delightful decorations and enjoy the process as much as the result. Start your paper mache pumpkin project today, and discover the joy of crafting for all ages!