Introduction to Paper Mache Animals
Crafting paper mache animals is a delightful activity that brings out creativity and artistic expression. Paper mache animals are not only fun to create but also offer a unique way to decorate your home, participate in educational activities, or engage children in hands-on crafting. In this article, we will explore detailed techniques and various unique designs that you can try at home. Whether you’re a seasoned crafter or a beginner, this guide will provide you with everything you need to start your paper mache journey.
What is Paper Mache and Why Use It for Animal Crafting?
Paper mache is a crafting technique. It involves layering paper and glue to create solid shapes. This method has been used for centuries in art and decorations.
When crafting animals, paper mache is an excellent choice. It is easy to mold into various shapes, making it perfect for creating lifelike animal figures. It’s also very affordable, as most materials are commonly found at home or are inexpensive to purchase.
Paper mache is lightweight but durable once dried. This makes it ideal for making models, masks, or even sculptures of animals. Additionally, it is a great project for kids and adults alike, promoting creativity and hands-on learning.
By using paper mache, you can create unique animal designs. Whether you are making simple animal shapes or elaborate sculptures, the possibilities are endless. It is a fantastic way to bring your imagination to life while recycling old paper and materials.
In summary, paper mache is versatile, inexpensive, and beginner-friendly. These qualities make it a popular choice for animal crafting.
Materials Needed for Paper Mache Animal Projects
To make paper mache animals, you’ll need a few basic supplies. Most items can be found at home or purchased cheaply.
Key Materials
- Paper: Use newspaper, tissue paper, or any lightweight, absorbent paper.
- Glue: Regular white glue or flour-water paste works well. Choose a nontoxic option for kids.
- Water: Essential for diluting glue or making paste.
- A Bowl: Use a large bowl for mixing paste.
- Brushes: For applying layers and decorating your creation later.
Building Supplies
- Base Structure Materials: Balloons, cardboard, wire, or plastic bottles can form your animal’s shape.
- Tape: Helps secure the framework before applying paper mache.
- Scissors: Needed for cutting paper and shaping structures.
Decorating Items
- Paints: Acrylic or tempera paints for adding color and details.
- Markers: Optional for intricate patterns or small details.
- Extras: Items like beads, buttons, or feathers for special touches.
Having all these supplies ready ensures your paper mache animal project goes smoothly. Prepping your workspace is also important to keep things tidy and organized.
Step-by-Step Guide to Making Basic Paper Mache Paste
Making paper mache paste is simple and requires minimal ingredients. Follow these steps to create your paste:
Ingredients Needed
- Flour: Regular all-purpose flour works best for a homemade paste.
- Water: Room temperature water ensures smooth mixing.
- Optional Salt: Adds extra durability and prevents mold growth.
Steps to Make Paper Mache Paste
- Measure Ingredients: Use a 2:1 ratio of water to flour.
- Mix Together: Gradually combine water and flour in a bowl.
- Stir Well: Blend until the paste is smooth and free of lumps.
- Adjust Consistency: Add water if it’s too thick or flour if it’s too runny.
- Optional Salt: Mix in 1-2 tablespoons of salt to strengthen the paste.
Useful Tips
- Store leftovers in an airtight container for up to a day.
- Use nontoxic glue and water for a quicker, ready-made alternative.
- Avoid overly thick paste as it takes longer to dry.
Once your paste is ready, you can begin layering paper for your paper mache animals. Preparing a high-quality paste helps strengthen and smoothen your final creation.
Creating the Base Structure for Your Animal
Before adding paper mache, you need to create a sturdy base for your animal shape. This structure acts as a framework and gives your project stability and definition.
Steps to Build the Base Structure
- Choose a Framework Material: Use balloons, cardboard, wire, or plastic bottles. Select materials that suit the size and shape of your desired animal.
- Sketch Your Animal Shape: Draw a simple outline of the animal to guide your structure-building process. This helps you visualize the final design.
- Tape and Assemble: Use masking tape or clear tape to attach parts of your framework securely. For example, attach legs to a cardboard body or add a head to the base.
- Add Detailing Elements: Build smaller features like ears, tails, or wings using crumpled paper or rolled wire. Attach these details carefully with tape.
- Check Stability: Ensure your framework can stand or hold its shape. Reinforce weak areas with extra tape or wire.
Tips for Effective Framework
- Keep the structure lightweight; it will be easier to work with.
- For round shapes, use balloons as a base. For flatter animals, try cardboard.
- Use recyclable materials whenever possible to make it eco-friendly.
Creating a solid framework is a vital step in making paper mache animals. A well-crafted base ensures your project looks polished and lifelike when complete.
Applying Layers of Paper Mache to Build Your Animal Shape
Applying layers of paper mache is where your animal shape truly begins to take form. This process involves carefully layering paper strips over your prepared base structure. Follow these steps to ensure a smooth and durable finish.
Step-by-Step Instructions for Layering Paper Mache
- Tear Paper Strips: Cut or tear paper into strips. Keep pieces manageable by using small sizes.
- Dip in Paste: Submerge a paper strip into the paper mache paste, making sure it’s fully coated.
- Remove Excess Paste: Run your fingers down the strip to remove excess paste.
- Apply to Structure: Place the strip on your base structure, smoothing it out to avoid wrinkles.
- Repeat: Add more strips, overlapping them slightly to build a solid foundation.
- Layer Consistently: Apply at least two layers for basic animals and more for larger shapes.
- Dry Between Layers: Let each layer dry completely before adding the next one. This prevents bubbling.
Useful Techniques for Layering
- Start with larger strips to cover wide areas. Use smaller pieces for curves.
- Alternate the direction of strips between layers for stronger adhesion.
- Pay attention to details, such as ears or tails, while layering paper.
Common Pitfalls to Avoid
- Avoid using too much paste as it can make the paper soggy.
- Do not rush drying time as wet layers may collapse.
Final Checks
Once layering is complete, inspect for gaps or weak spots. Patch these areas before proceeding. Proper layering provides the foundation needed for a sturdy paper mache animal creation.
Tips for Drying and Sanding Your Paper Mache Creation
Drying and sanding are key steps to make your paper mache animals sturdy and smooth. Proper techniques ensure the final product is ready for painting and decorating. Follow these tips for the best results.
Drying Your Paper Mache Creation
- Choose a Drying Area: Place your project in a well-ventilated space. Ensure good air circulation.
- Use a Flat Surface: Lay your creation on a stable surface to avoid distortions while drying.
- Let Layers Dry Completely: Ensure each layer dries fully before adding more paper strips.
- Avoid Direct Sunlight: Too much heat can warp paper mache structures. Use indirect light or indoor drying.
- Monitor Humidity Levels: High humidity slows drying. Use fans or heaters to speed up the process if needed.
Sanding Your Paper Mache Creation
Choose Fine Sandpaper
- Selecting the Right Grit: When preparing a surface, use medium or fine-grit sandpaper. Fine sandpaper typically ranges from 180 to 220 grit and is ideal for smoothing without causing damage.
- Benefits of Fine Sandpaper: Fine sandpaper helps achieve a smoother finish, improving the overall appearance of the project. It minimizes the risk of scratches or gouges that might affect the final look.
- Avoiding Coarse Grit: Coarse-grit sandpaper can remove too much material and lead to an uneven surface. Always opt for finer alternatives when finishing, especially for delicate or detailed work.
Start Lightly
- Gentle Touch: Begin sanding with a light hand to avoid over-removing material. This approach allows you to maintain control over the sanding process and prevents damaging the underlying structure.
- Leveling Bumps: Focus on lightly sanding over bumps and imperfections rather than applying heavy pressure. This method gradually levels the surface rather than gouging it.
- Building Up Control: Starting lightly helps you assess the surface gradually, enabling you to stop once the desired smoothness is achieved without unnecessary alterations.
Focus on Details
- Precision on Edges and Curves: Pay special attention to edges, curves, and any intricate sections of your project. These areas often require more detailed work to ensure a polished and professional finish.
- Using Appropriate Techniques: For tighter spots, consider folding the sandpaper or using a sanding sponge to navigate curves effectively. This ensures you reach all areas and smooth out any inconsistencies.
- Regular Inspections: Take breaks to inspect your progress. Evaluating your work periodically helps you identify sections that may need extra attention to achieve a flawless look.
Dust Off Residue
- Cleaning the Surface: After sanding, it’s essential to wipe down the creation to remove any dust residue. This step prevents particles from interfering with subsequent finishing or decorating processes.
- Using Proper Tools: Utilize a damp cloth or tack cloth to effectively pick up fine dust particles. Avoid using dry cloths that may push the dust around instead of collecting it.
- Ensuring a Clean Work Area: Maintaining a clean workspace improves the quality of your work and ensures that your final decoration adheres properly without dust contamination.
Repeat as Needed
- Inspecting for Uneven Areas: After the initial sanding and cleaning, examine the surface carefully. Look for any remaining uneven areas that may need additional work to achieve a smooth finish.
- Sanding Again: If you find imperfections, don’t hesitate to sand again. Use the same gentle technique to gradually address any uneven spots without harming the overall structure.
- Final Touches: This reiterative process of inspection and sanding will help ensure that your final product is polished and ready for decorating or staining, leading to a more successful project outcome.
Useful Tips
- Drying may take a day or longer depending on thickness and size.
- Handle the structure carefully during sanding to avoid cracks or damage.
- Ensure the entire surface is dry before starting the sanding process.
By carefully drying and sanding, your paper mache animal will look professional and be ready for painting.
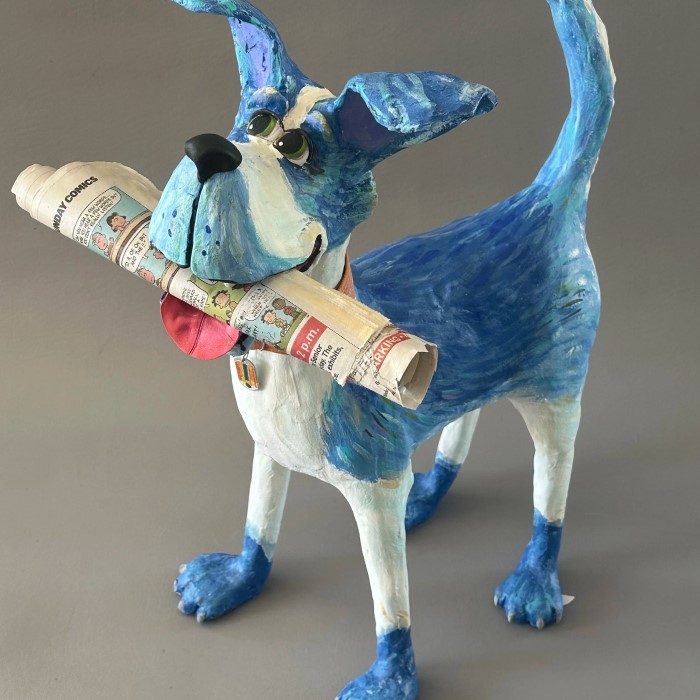
Painting and Decorating Your Paper Mache Animals
Painting and decorating transform your paper mache animal from plain to stunning. You can add color, patterns, and details to make it unique. Follow these steps to create an eye-catching design.
Steps to Paint Your Paper Mache Animal
- Clean the Surface: Remove any dust or residues left after sanding.
- Apply a Base Coat: Use white or light-colored paint to prime the surface.
- Choose Paints: Acrylic or tempera paints work well and dry quickly.
- Add Main Colors: Paint the animal’s body using solid colors first.
- Layer Paints: Build up details gradually using smaller brushes.
- Let It Dry: Allow each layer to dry fully before adding more.
Decorating Tips and Ideas
- Use markers for sharp lines or fine details like fur or scales.
- Add texture by gluing beads, buttons, or feathers to your creation.
- Use metallic paints for special features, like wings or eyes.
- Create patterns, such as spots, stripes, or abstract designs.
Final Touches
- Seal the Surface: Use a clear varnish or spray to protect the paint.
- Check for Missing Details: Touch up areas that need improvement.
- Display Your Creation: Place your finished animal where it can be admired.
Decorating is your chance to get creative. Experiment with colors, materials, and extras for a unique look. A well-decorated paper mache animal can become a fun centerpiece or a whimsical gift for friends.
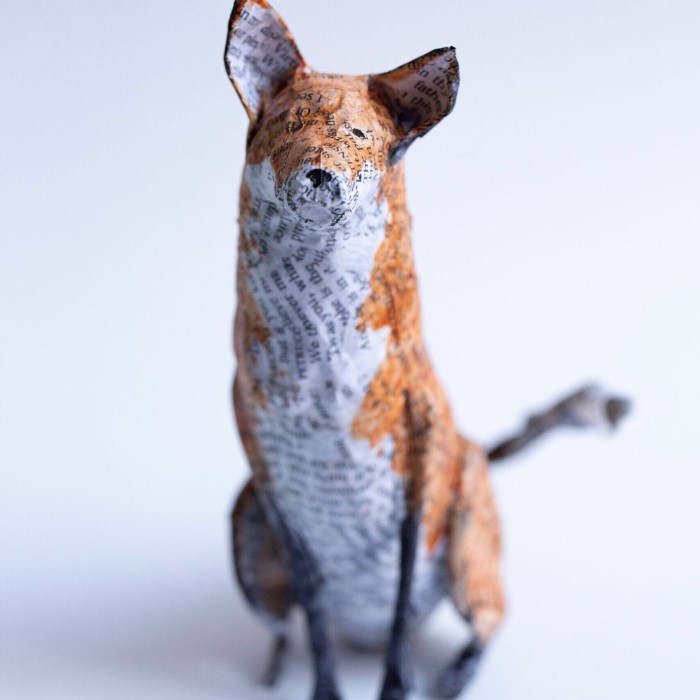
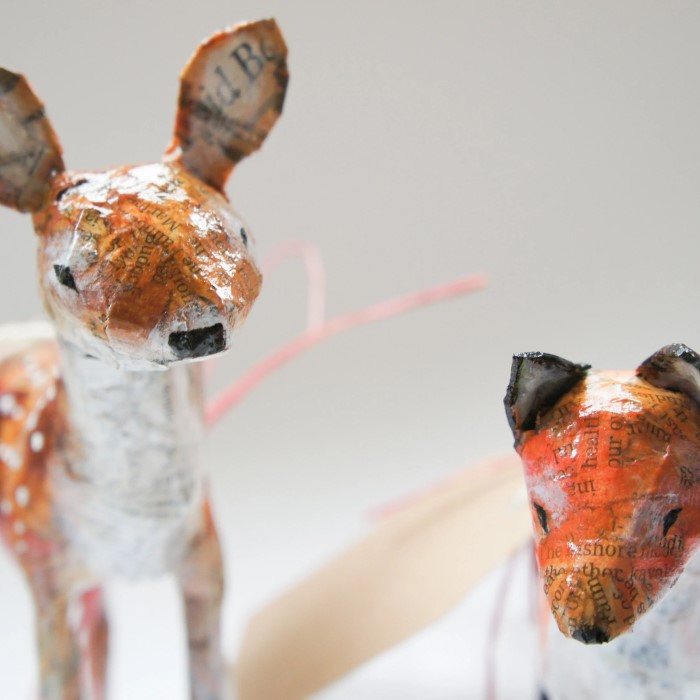
Creative Paper Mache Animal Ideas to Try at Home
Creating paper mache animals allows you to explore your imagination and make unique crafts. Here are some inspiring ideas for different skill levels:
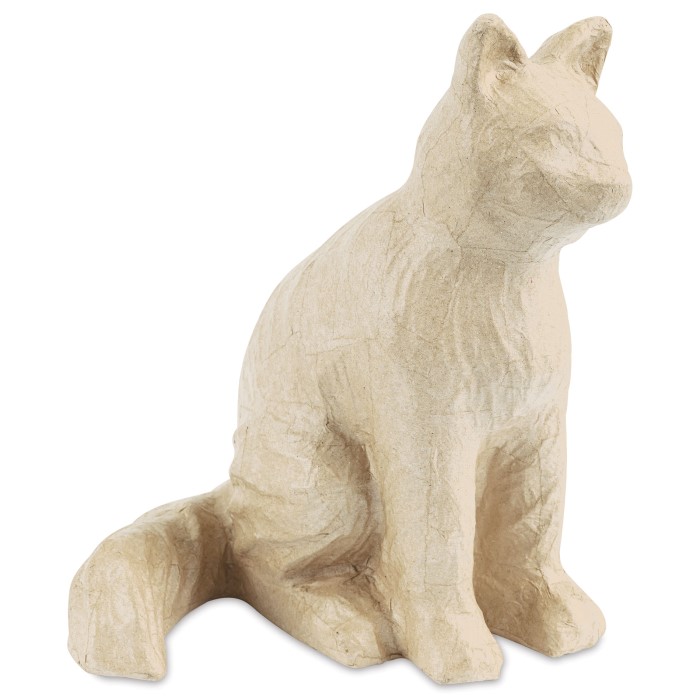
1. Simple Projects for Beginners
- Cute Cats or Dogs: Start with small shapes and basic features.
- Turtles: Use a balloon for the shell and cardboard for legs.
- Birds: Create small wings and tails with crumpled paper.
2. Intermediate Projects to Challenge Your Skills
- Wild Animals: Try a giraffe or elephant with detailed features.
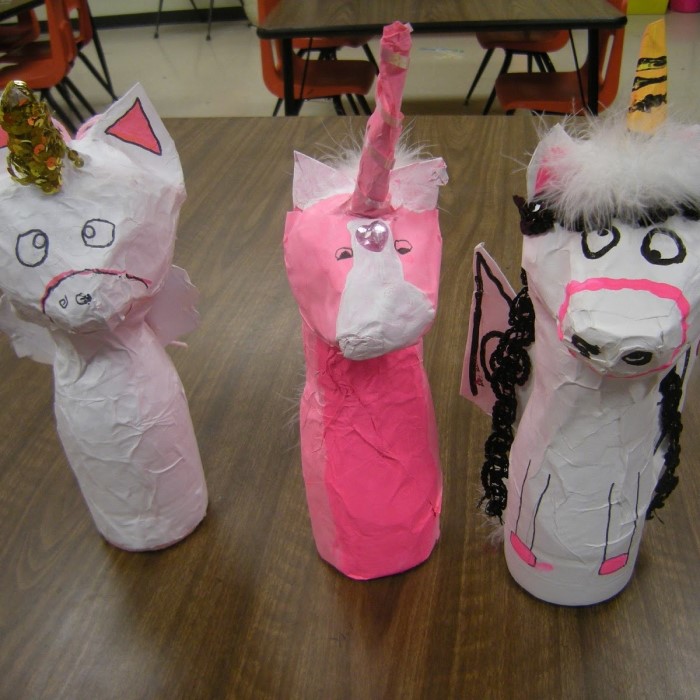
- Mythical Creatures: Create dragons or unicorns with unique details like horns or scales.
- Aquatic Animals: Make dolphins or whales using curved bases.
3. Advanced Projects for Experts
- Life-Sized Animals: Build large-scale models like horses or deer for home décor.
- Fantasy Characters: Combine animal features with human-like traits.
- Abstract Animals: Experiment with modern shapes or stylized designs.
Tips for Personalizing Your Creations
- Add accessories like hats, glasses, or necklaces.
- Use bright colors or unique patterns to make them stand out.
- Make pairs or themed groups, such as a bird family or jungle set.
These ideas spark creativity and allow you to craft memorable paper mache animal projects. Customize them to match your artistic flair and skill level.
Conclusion
In conclusion, making paper mache animals is a fantastic way to explore your creativity, engage in art projects, and create lasting decorations. By following the techniques and suggestions in this guide, anyone can craft unique and beautiful paper mache animals. So gather your materials, unleash your imagination, and start creating stunning designs that reflect your artistic style. Enjoy the rewarding experience of crafting your very own paper mache animals today!


