Introduction
Crafting a paper mache volcano is an engaging and fun activity. It is ideal for kids and educational projects. This creative project combines art and science in a hands-on way.
What is a Paper Mache Volcano?
A paper mache volcano is a model volcano made using paper and adhesive. It mimics the shape and structure of a real volcano. Paper mache involves layering strips of paper soaked in paste over a base. Once dried, the structure becomes sturdy and ready for decoration.
These volcanoes can be enhanced with painting and eruptive effects. This makes them visually appealing and interactive. They help children learn about volcanoes through a playful and memorable experience.
Benefits of Making a Paper Mache Volcano for Kids and Projects
Making a paper mache volcano offers creative benefits. It helps kids improve crafting and artistic skills. The project teaches the value of patience as the layers dry.
This activity also serves as an educational tool. Kids can learn about volcanic structures and eruptions in a visual way. It pairs well with science lessons and promotes critical thinking.
Another advantage is the flexibility of materials. Paper mache volcanoes use recyclable items, making the project budget-friendly. It emphasizes the importance of sustainable crafting practices.
Lastly, this project encourages teamwork and collaboration. Family members or classmates can work together and bond through this fun activity.
Materials Needed
To make a paper mache volcano, you need specific materials. These supplies ensure a sturdy, well-crafted model. Planning ahead and choosing the right tools simplifies the process.
Essential Supplies Checklist
Make sure to gather all essential supplies before starting. Here’s what you’ll need:
- Base Materials: Use cardboard, a paper cup, or any recyclable items for the volcano’s structure.
- Paper Strips: Tear old newspapers or use kraft paper for layering.
- Adhesive: Prepare paper mache paste using flour and water or choose white glue mixed with water.
- Paints: Select acrylic or tempera paints for decorating and creating realistic details.
- Brushes: A variety of brushes help with detailed painting and finishing touches.
- Containers: Use bowls for mixing the paste and holding small decorative items.
- Optional Decorations: Rocks, plants, or tissue paper for lava can enhance the model’s look.
Choosing the Right Type of Paper and Adhesive
Selecting suitable paper and adhesive ensures durability and ease of use:
- Paper Choice: Newspapers work best as they are thin and flexible. Tear them into strips for layering.
- Adhesive Options: Flour and water paste is cost-effective and eco-friendly. White glue mixed with water offers better hold and quick drying.
Invest in good-quality materials for smoother crafting. Choosing the right supplies makes your paper mache volcano durable and visually interesting.
Preparing the Volcano Base
Before applying paper mache, the volcano base must be prepared. A strong and stable base ensures the final model holds its shape and supports all decorations.
Creating the Structure with Recyclable Materials
- Choose Recyclable Materials: Use cardboard, plastic bottles, or paper cups as the foundation.
- Shape the Frame: Stack items like cups or bottles to create a volcano-like cone.
- Secure with Tape: Use masking or duct tape to hold the structure together tightly.
- Add Details: Use crumpled paper to form slopes or ridges on the volcano.
Working with recyclable materials reduces waste. It’s also budget-friendly and easy for kids to handle.
Ensuring Stability and Form for the Volcano
- Check Stability: Make sure your volcano doesn’t wobble or tilt. Flatten the base if needed.
- Reinforce Weak Spots: Add extra tape or a sturdy layer where the structure feels unstable.
- Smooth the Surface: Cover sharp edges with additional paper or tape for a seamless finish.
- Consider Size: Ensure the base fits well on your workspace and is not too large.
Preparing a stable and well-shaped base is crucial. It makes adding paper mache simpler and hassle-free.
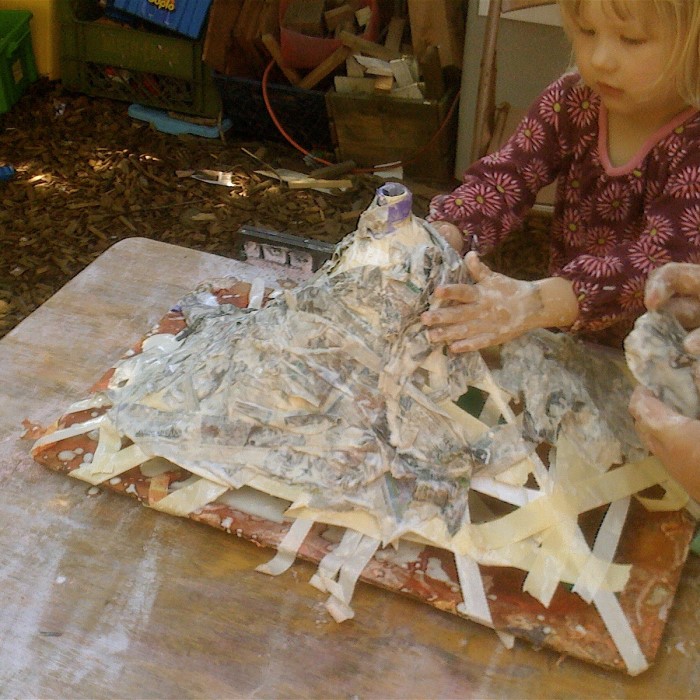
Paper Mache Application Process
The paper mache application process is key to crafting a sturdy and realistic volcano. It involves preparing the paste, layering paper strips efficiently, and allowing adequate drying time for the best results.
Mixing the Paste: Tips for Best Consistency
- Choose Ingredients: Use flour and water for a cost-effective paste. Alternatively, mix white glue with water.
- Measure Proportions: Typically, mix 2 parts water with 1 part flour or glue.
- Avoid Lumps: Stir until the paste is smooth and thick, resembling pancake batter.
- Optional Additives: Add salt to prevent mold or a drop of vinegar for extra durability.
Properly mixed paste ensures the paper strips stick well and dry firmly.
Layering Paper Strips for a Realistic Volcano Shape
- Prepare Strips: Tear newspaper into long, thin strips. Ensure they are evenly sized.
- Dip Strips in Paste: Submerge strips individually in the paste. Coat evenly but avoid over-saturation.
- Apply Over Base: Layer strips over the prepared base. Start at the bottom and work upwards.
- Overlap Layers: Cover each strip slightly with the next. This adds strength to the structure.
- Shape Volcano Features: Use crumpled paper under layers to form ridges and realistic slopes.
Take your time to create clean, neat layers for a natural look.
Drying Time Considerations
- Allow Full Drying: Leave the volcano to dry for at least 24 hours after layering.
- Speed Up Drying: Place the model in sunlight or near a fan for quicker results.
- Check Moisture: Ensure no damp spots remain before adding paint or decorations.
Patience during the drying phase prevents peeling and ensures a durable finished product.
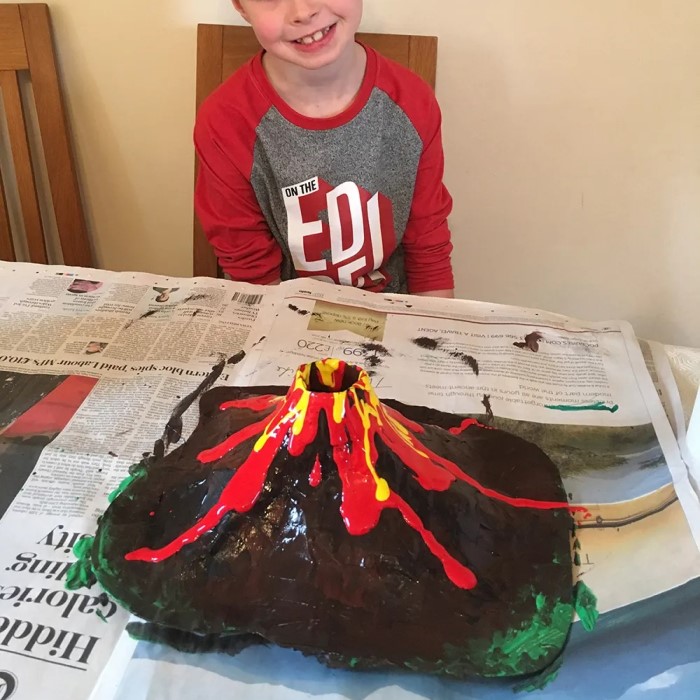
Painting and Decorating the Volcano
After the paper mache volcano has dried, it’s time to add creative touches. Painting and decorating bring life to your volcano, making it more realistic and visually appealing. This step allows you to showcase creativity and complete the project with a polished finish.
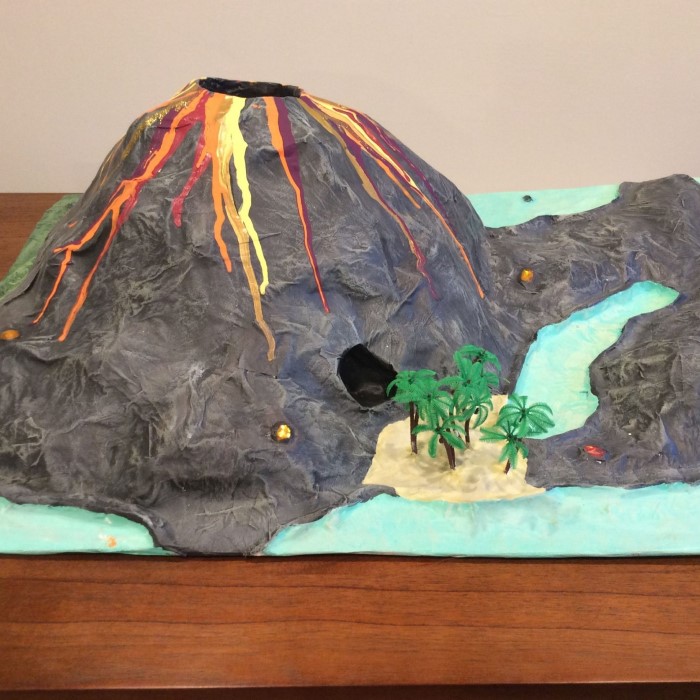
Color Choices for a Realistic Look
- Base Colors: Start with earthy tones like brown, gray, or dark green. These mimic natural volcanic rocks.
- Highlight Shades: Add lighter colors like beige or white to highlight ridges and slopes.
- Lava Effect: Use fiery colors like red, orange, and yellow to create the look of flowing lava.
- Blending Techniques: Blend colors while still wet for a smoother, realistic transition between shades.
- Final Touch: Add black or dark gray to create shadowed areas, adding depth and realism.
Use acrylic paints for vibrant and long-lasting colors. Apply multiple coats for even coverage. Let each layer dry before adding the next one.
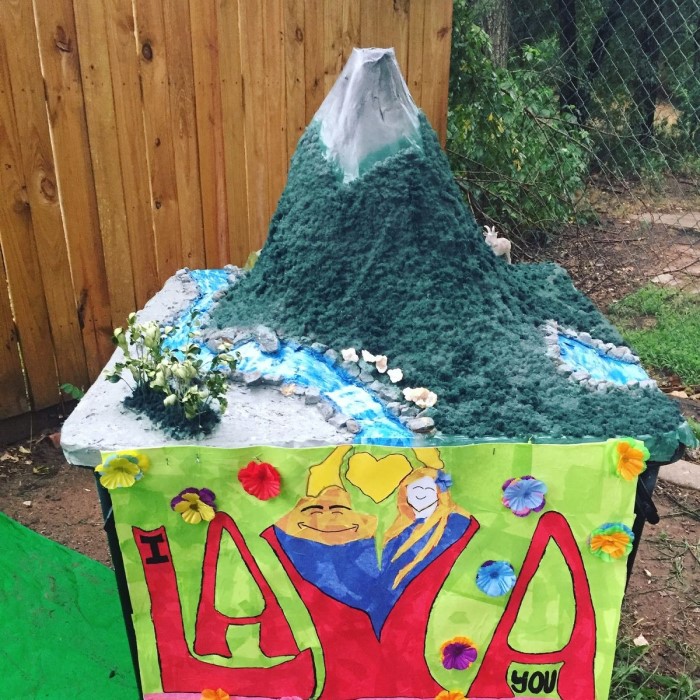
Adding Creative Details: Lava, Rocks, and Plants
- Lava:
- Tear red or orange tissue paper into strips for molten lava.
- Glue the strips along the volcanic slopes for a flowing effect.
- Add glitter for a glowing, molten look.
- Rocks:
- Use small stones or crumpled aluminum foil painted gray to mimic rocks.
- Glue them around the base or on the slopes for added texture.
- Vegetation:
- Add small green paper scraps or moss to create tiny plants.
- Place them along the sides for a natural environment around your volcano.
- Other Enhancements:
- Create smoke by attaching cotton balls dyed light gray near the crater.
- Sprinkle sand or dirt at the base for a natural effect.
Decorating enhances the volcano’s appeal and inspires creativity. Adding thoughtful details makes your model stand out while staying fun and engaging.

Adding the Eruption Effect
Bring your paper mache volcano to life with a fun eruption effect. Adding this feature makes the project more exciting and interactive. It’s simple and safe to create using basic materials.
Materials for a Safe and Fun Eruption
- Plastic Bottle or Cup: Use a small bottle to hold the eruption mixture.
- Baking Soda: Prepare 2-3 tablespoons of baking soda for the reaction.
- Vinegar: Use about half a cup of vinegar for the eruption.
- Dish Soap: Add a few drops for foamier lava.
- Food Coloring: Select red, orange, or yellow for a realistic lava appearance.
- Small Funnel: Makes adding materials to the bottle easier.
- Optional Extras: Glitter for a sparkling eruption or sand for added texture.
These materials are safe for kids and easy to handle. Gather them before starting to avoid interruptions.
Step-by-Step Instructions for Creating an Eruption
- Set the Bottle in Place:
- Place the plastic bottle inside the volcano’s crater.
- Ensure it sits securely without wobbling.
- Mix the Lava Colors:
- Add red, orange, or yellow food coloring into the bottle.
- Add a few drops of dish soap for foamy lava.
- Prepare Baking Soda:
- Use a small spoon to add baking soda into the bottle.
- Shake gently to mix it with the coloring and soap.
- Create the Eruption:
- Pour vinegar into the bottle using a funnel.
- Step back and watch the volcano erupt.
- Enhance the Effect:
- Sprinkle glitter for glowing lava.
- Surround the volcano with sand or dirt to mimic a natural setting.
- Repeat as Desired:
- Add more baking soda and vinegar for multiple eruptions.
- Adjust the vinegar amount for bigger eruptions.
This eruption effect completes the volcano project. It’s safe, fun, and educational for kids.
Tips and Tricks for a Successful Project
Creating a paper mache volcano can be simple with the right approach. By following these tips, you can avoid common issues and achieve a lasting, attractive result.
Common Mistakes to Avoid
- Skipping Base Stability: Ensure your volcano base is stable to avoid collapsing during layering.
- Over-Saturating Paper Strips: Avoid soaking strips excessively in paste; it can weaken the structure.
- Using the Wrong Paste Consistency: Thick or lumpy paste makes application difficult and less durable.
- Incomplete Drying: Let each paper mache layer dry fully before continuing; rushing leads to uneven results.
- Random Paint Application: Plan the paint scheme to mimic realistic volcano colors for a polished appearance.
- Ignoring Workspace Protection: Cover the surface with newspaper or plastic to prevent mess.
Prepare diligently and work patiently to avoid these setbacks.
Enhancing Durability and Visual Appeal
- Add Extra Layers: Build 2-3 layers of paper mache for a sturdy model.
- Seal with Varnish: Use clear varnish after painting to protect colors and improve longevity.
- Pay Attention to Small Details: Highlight ridges and lava flow areas for realism.
- Choose Quality Materials: Select durable paints and adhesives for a lasting project.
- Incorporate Depth: Blend darker shades and highlights to create a natural 3D effect.
- Test Eruptions: Practice the eruption effect several times for a seamless final demonstration.
These tips will help your paper mache volcano stand out and remain durable over time.
Cleaning Up and Preserving Your Volcano
After completing your paper mache volcano project, cleaning up and preserving it properly is important. These steps ensure a tidy workspace and extend the life of your volcano.
Proper Cleanup After Completion
- Clear the Workspace: Remove leftover paper strips, paste, and other materials after finishing.
- Wipe Surfaces: Use a damp cloth to clean any paste spills or paint smudges.
- Wash Brushes and Containers: Rinse brushes and bowls with warm water to avoid dried residue.
- Dispose of Waste Responsibly: Recycle paper scraps and other materials where possible.
- Dry the Volcano Completely: Ensure the model is free of moisture before storage or decoration.
Cleaning thoroughly prevents mess and maintains your crafting tools for future projects.
Storage Tips to Keep Your Volcano Intact
- Choose a Safe Location: Store the volcano in a dry and stable spot away from direct sunlight.
- Protect from Dust: Cover the model with a cloth or plastic wrap to prevent buildup.
- Avoid Moisture Exposure: Keep it away from bathrooms or kitchens to avoid damage.
- Handle With Care: Always lift the volcano from its base to prevent accidental breaks.
- Reinforce Weak Areas: Inspect and repair any loose paper or paint chips before storing.
Proper storage helps your paper mache volcano remain intact and ready for future use.
Conclusion
Creating a paper mache volcano is both a fun and educational project that sparks creativity while teaching fundamental scientific concepts. With this step-by-step guide to paper mache volcano, you now have the tools and knowledge needed to build your own stunning volcano. From the foundational structure to the explosive finish, this project offers an engaging experience for kids and adults alike.
Not only does it provide an opportunity for artistic expression, but it also cultivates curiosity about geology and natural phenomena. By trying this craft, you can create memorable moments filled with learning, exploration, and fun. So gather your materials and get started on your paper mache volcano adventure today!


