Introduction to the Last Layer Challenge
The final challenge in solving the Rubik’s Cube is mastering the last layer. This step tests both your memorization of algorithms and the ability to apply them correctly. The ‘last layer’ refers to the completion phase where the goal is to correctly position and orient the top pieces of the cube to achieve a uniform color across the entire top layer. While it might seem daunting, understanding and mastering this phase is crucial for solving the entire cube efficiently. Whether you’re a beginner or an intermediate cuber, getting through this phase requires patience, practice, and a good grasp of the last layer rubik’s cube algorithms and techniques. The following sections will guide you through the basics of the cube’s notation and pieces, and provide step-by-step instructions to effectively solve the last layer.
Basics of Rubik’s Cube Notation and Pieces
To effectively solve the Rubik’s cube, especially the last layer, a solid understanding of the cube’s notation and the types of pieces is essential. This section will break down the basic elements that make up the cube and explain the standardized notation used to describe the movements required to solve it.
The Three Types of Pieces
The Rubik’s Cube consists of three distinct types of pieces:
- Centers: These six fixed pieces show the color of their respective sides when the cube is solved. They serve as a guide during the solving process.
- Edges: Twelve pieces are located between the corners, each showing two colors. Managing these edges correctly is key for solving the second layer of the cube.
- Corners: With three colors each, the eight corner pieces are crucial for completing both the first and last layers of the puzzle.
Understanding these pieces’ placements and how they move relative to each other is crucial for mastering the Rubik’s Cube.
Understanding Rubik’s Cube Notation
The movements of the cube’s layers are notated by letters which represent different turns:
- R (Right): Turn the right face of the cube clockwise.
- L (Left): Turn the left face of the cube clockwise.
- U (Up): Rotate the upper face of the cube clockwise.
- F (Front): Turn the front face of the cube clockwise.
- D (Down): Rotate the bottom face of the cube clockwise.
Counterclockwise moves are indicated by adding an apostrophe (’) next to the letter, such as R’ or F’.
By following the explained notation and understanding the roles of each type of piece, you’re now better equipped to tackle the cube, particularly the challenging last layer Rubik’s cube tasks. Next, we will extend this knowledge into practical solving techniques for the initial two layers.

Step-by-Step Guide to Solving the First Two Layers
Solving the Rubik’s cube first two layers sets the foundation for the entire puzzle. Follow this guide to get started.
Starting with the White Cross
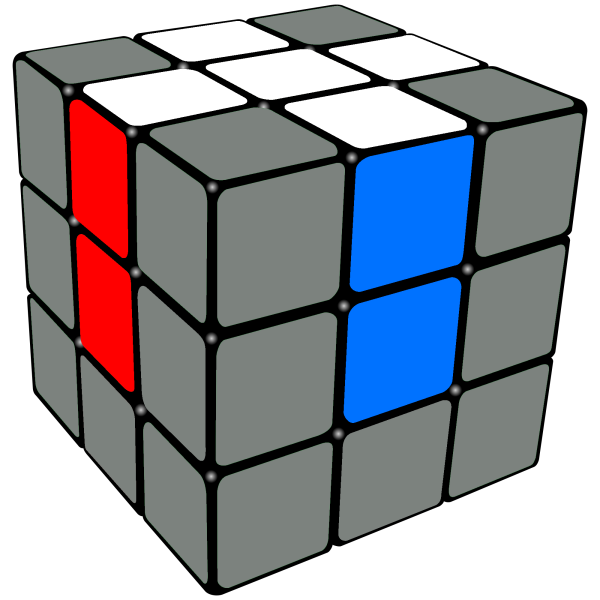
Begin your quest for the white cross by focusing on the cube’s center. Find and rotate white edges to match the center’s color. Adjust these edges until they line up, forming a plus sign on the white face. Remember, the side colors of these edges must align with the cube centers of the same color.
Placing the White Corners
Once your white cross is ready, shift your attention to the white corners. Spot a white corner piece and align its other colors with the matching centers. Utilize simple algorithms, such as the right-hand move sequence (R U R’ U’), to twist the corners into place without disturbing the cross. Repeat until all white corners are properly aligned with the surface colors.
Completing the Second Layer
With the white face solved, it’s time to work on the middle layer. Find edge pieces that don’t have yellow and fit them in between the correctly colored centers. Perform specific algorithms depending on the position of these pieces – one for inserting edges from the top to the right and one for the top to the left. Your goal here is to complete the central band of the puzzle, seamlessly transitioning into the final steps of the last layer solvation.

Algorithms for Solving the Last Layer
To effectively solve the last layer of the Rubik’s Cube, specific algorithms are employed that manipulate the cube’s orientation and position. The focus here is primarily on establishing a solid yellow face while ensuring the cube’s colors are aligned correctly. This section descripts the key algorithms needed to solve the last layer, ensuring the Rubik’s Cube presents a uniform solution.
Creating the Yellow Cross
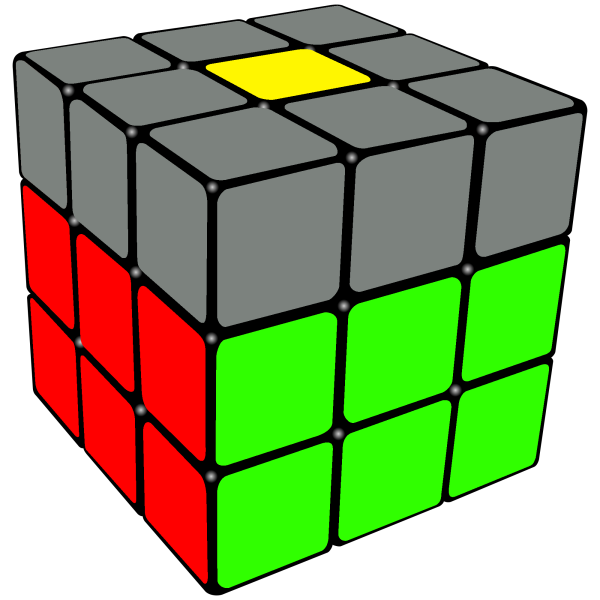
Start by creating a yellow cross on the top layer of the cube, though initially, the side colors may not match their centers. Use the algorithm F R U R’ U’ F’ to form a plus sign pattern on the yellow face. This might require several iterations, depending on the existing pattern (dot, L-shape, or line).
Positioning the Last Layer Edges
Once you have the yellow cross, the next step involves positioning the edges correctly. The algorithm R U R’ U R U2 R’ allows you to rotate these edges to align with their respective centers. Execute this algorithm until each edge matches the correct center color.
Orienting the Last Layer Corners
Finally, to correctly orient the corners, use the algorithm U R U’ L’ U R’ U’ L. This manipulation brings the corners to their right position. Make sure during execution, the yellow part of the corner pieces faces up. You may need to repeat this algorithm multiple times to align all corners correctly.
By mastering these algorithms, you can reliably complete the last layer Rubik’s cube, bringing you closer to solving the entire puzzle.
Fine-Tuning the Last Layer
Solving the last layer rubik’s cube is within reach with the right algorithms and techniques. This part of the process involves two key steps: aligning the corner pieces and permutating the edges.
Aligning the Corner Pieces
After forming the yellow cross and positioning the last layer edges, you’ll see that the corners may not yet be properly aligned. This is where you must align the corners so that each one fits into its correct position. Remember, the ultimate goal is to have all corners matching the surrounding colors. To align the corners, use the algorithm: R’ D’ R D. Apply this algorithm repeatedly to each corner until the yellow part of each corner piece matches the top face. This step may seem to temporarily disrupt the cube, but it brings the puzzle closer to completion.
Permutating the Edges to Finish
With the corners in place, the final step is to permute, or properly order, the edges. At this point, the edges of the top layer need to be moved around to match the colors of the middle layer’s centers. The commonly used algorithm for permutating the edges is: R U R’ U R U2 R’ U. Repeat this algorithm until all the edges line up with their respective colors. It’s essential to keep yellow on top during this part. This algorithm will rotate the edges until each aligns with the center colors of the corresponding face. When the edges are correctly permuted, the last layer will be solved, and the cube will show a uniform color on all faces.

Tips and Tricks for Faster Solving
To improve at solving the last layer Rubik’s cube, consider these effective strategies.
Practice and Memorization
Achieving speed in solving the Rubik’s cube involves consistent practice. Daily solving sessions help develop muscle memory. Memorize the key algorithms, especially for the last layer Rubik’s cube challenges. Use mnemonic devices or repetition to make recall quicker during solving. Set small, incremental goals to track progress and maintain motivation. Remember, practice makes permanent!
Transitioning to Advanced Methods
Once comfortable with the basic techniques, explore advanced solving methods. Advanced methods like CFOP (Cross, F2L, OLL, PLL) or Roux can significantly reduce solving time. Understand and practice OLL (Orient Last Layer) and PLL (Permute Last Layer) algorithms. These methods focus on efficient cube manipulation and fewer moves. Engage with the Rubik’s cube solving community online to learn and share tips. Aim to master these advanced techniques, which will allow you to participate in competitive speed cubing events.
Closing Thoughts on Rubik’s Cube Mastery
Closing your journey of mastering the last layer of the Rubik’s cube comes with a sense of accomplishment. It’s important to recognize the patience and effort it takes to reach this point. Remember, the ultimate goal is not just to solve the cube once but to refine your skills to solve it consistently and efficiently. You’ve come to understand the types of pieces, the cube’s notation, and the crucial algorithms that are the keys to solving the puzzle. With the knowledge and techniques outlined, you are well-equipped to tackle the last layer Rubik’s cube challenges that seemed daunting at the start.
Take pride in the progress made and always look for ways to improve. The path to Rubik’s cube mastery is filled with continuous learning and practice. Embrace the process and enjoy the satisfaction that comes with each solve. And when you feel ready, you can step up your game to advanced methods for even faster resolutions. Most importantly, keep having fun and challenging yourself, as that’s at the heart of any puzzle-solving experience.
Whether you’re a casual solver or an aspiring speedcuber, remember that every cuber started from scratch, just like you. So, pick up your cube and start twisting again, because with each solve, you’re not just solving a puzzle — you’re building skills, patience, and confidence.


