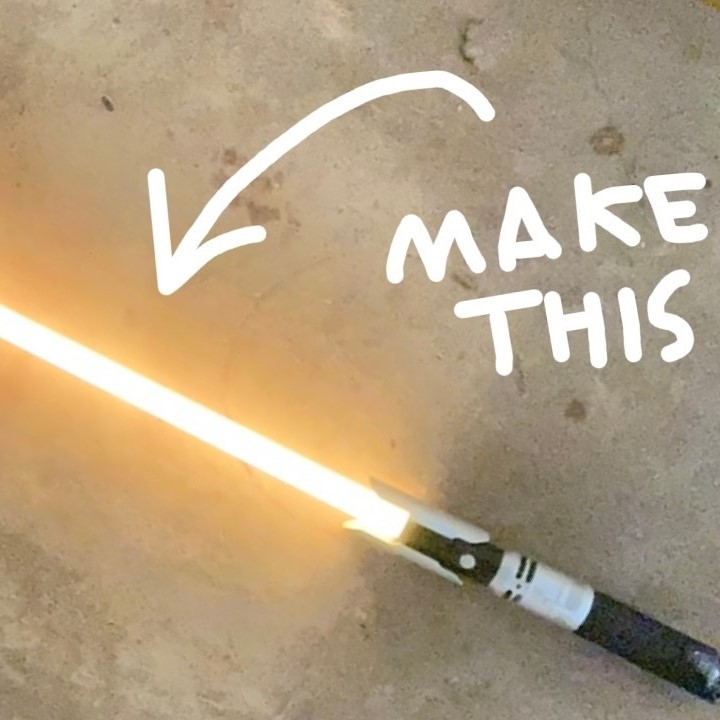
The allure of the lightsaber is timeless. It captures the imagination of generations. Consequently, many fans dream of owning a unique weapon. However, store-bought options often lack personal flair. Therefore, building your own diy lightsaber is the ultimate project. It allows you to craft a weapon that fits your hand perfectly. Furthermore, it reflects your specific taste and style. The year 2026 brings new technology to hobbyists. Advancements in LED strips and soundboards are significant. Thus, creating a realistic prop is easier than ever. You do not need to be an engineer. With the right guidance, anyone can succeed. This article explores the exciting world of custom saber building. We will cover everything from design to assembly. Get ready to ignite your diy lightsaber.
Understanding the Core Components of a Lightsaber
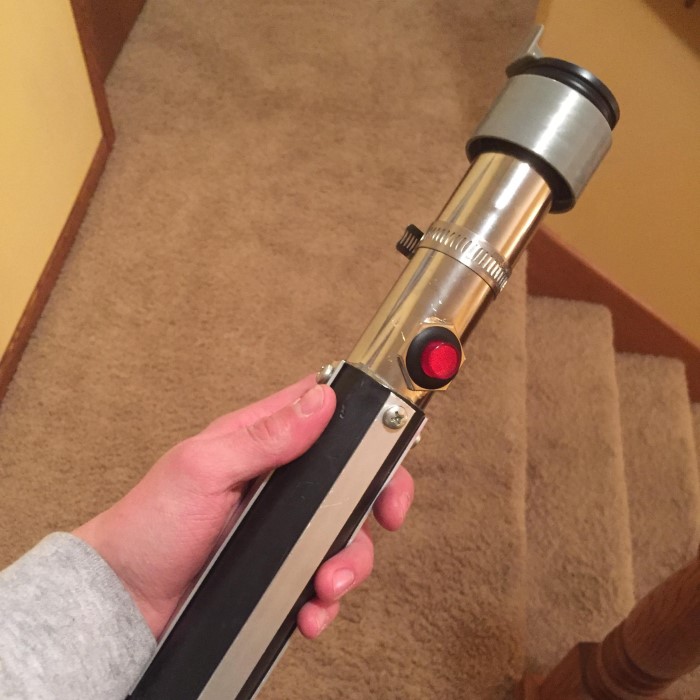
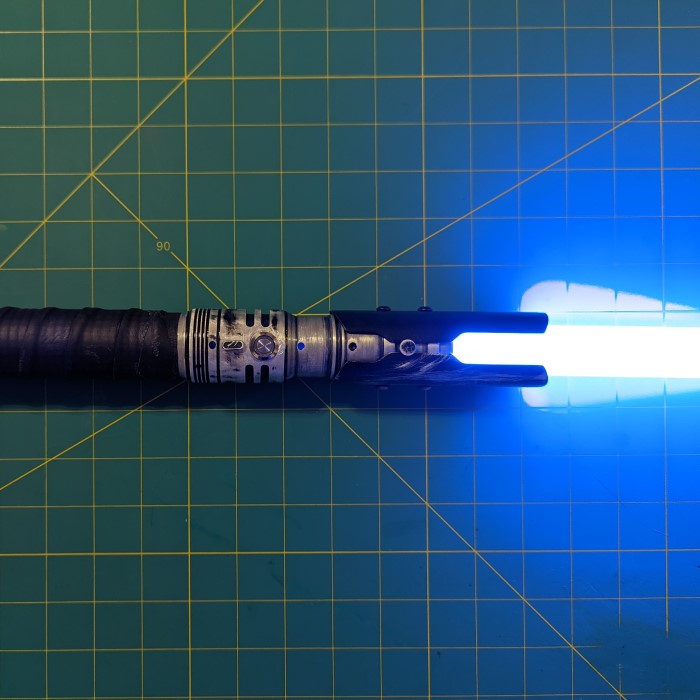
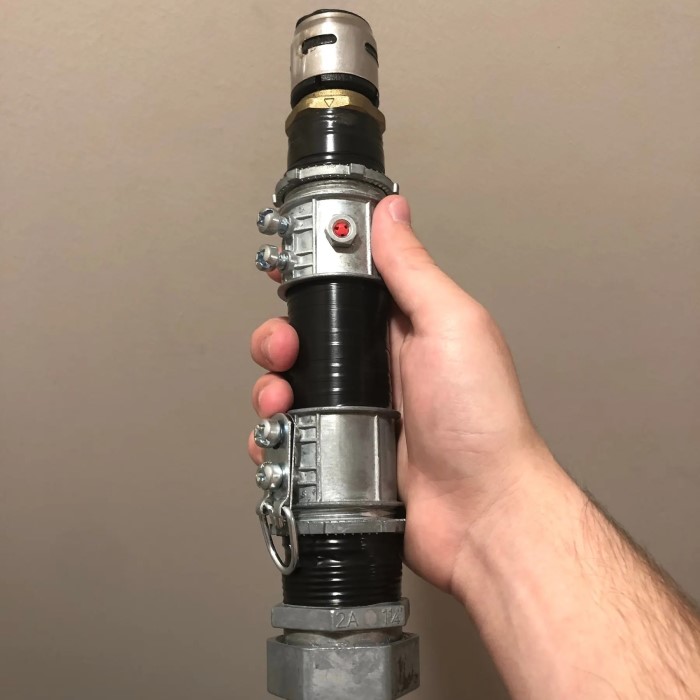
Every lightsaber consists of several key parts. You must understand these components before starting. The most visible part is the blade. This tube houses the LED lights. Consequently, it creates the glowing effect. Polycarbonate is the standard material for blades. It is durable and diffuses light beautifully. The handle is known as the hilt. It acts as the body of the weapon. Hilts can be simple or incredibly complex. You usually make them from metal. Aluminum is the preferred choice for builders. It is lightweight and sturdy. Therefore, it feels authentic in the hand.
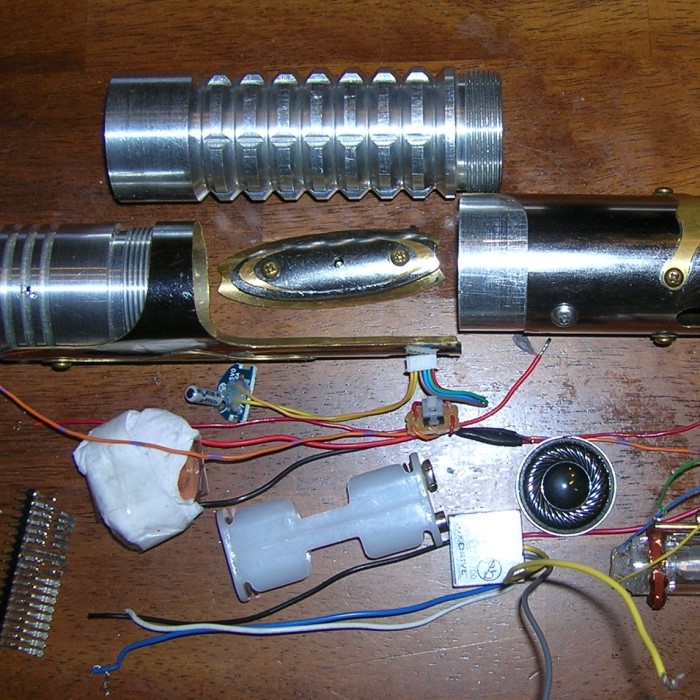
Furthermore, the electronics bring the prop to life. You need a power source. Rechargeable lithium-ion batteries are standard. They provide consistent power for high brightness. Additionally, you need an LED strip or a high-power LED star. This creates the light. A soundboard is essential for realism. It provides the iconic hum and clash sounds. Consequently, the saber feels like a real weapon. You must also consider the switch. This activates the saber. Many builders opt for a momentary switch. It sits flush with the hilt. Wiring connects all these elements. Therefore, soldering skills are very useful. Understanding the circuit diagram is crucial. In short, the hilt houses the brain, the battery, and the speaker. The blade displays the result.
Planning Your Design: From Screen Accuracy to Customization
The design phase is critical for a successful build. You should start with a clear vision. Are you replicating a famous character’s weapon? Or are you creating something entirely new? Screen-accurate sabers require precise measurements. Consequently, you must research reference photos meticulously. However, custom builds offer more freedom. You can mix and match parts. This approach is often called a “parts bin” build. It allows for unique combinations. Therefore, you can create a truly one-of-a-kind weapon. You should sketch your design on paper first. This helps visualize the final product.
Moreover, ergonomics play a major role. The hilt must feel comfortable in your hand. Consider the grip section carefully. Some designs feature angled emitters. Others have boxy clamp cards. These details define the aesthetic. In 2026, modular chassis systems are popular. They allow you to swap electronics easily. Consequently, you can upgrade your saber later. You should also decide on the blade color. LED strips offer millions of colors. This is controlled by the soundboard. Therefore, one saber can have many colors. This feature is known as “color changing.” Planning ensures you buy the correct parts. It prevents costly mistakes. A good plan acts as a roadmap. It guides you through the assembly process smoothly.
Gathering Materials and Tools for Construction
Once you have a plan, you need materials. The quality of your materials dictates the final result. For the hilt, aluminum tubing is best. You can buy pre-drilled hilts. Alternatively, you can machine your own. This requires a metal lathe. However, many hardware stores sell metal pipes. These work well for beginners. For the blade, you need a polycarbonate tube. It should have a thick wall. This ensures durability during dueling. Furthermore, you need a diffuser film. This goes inside the blade. It spreads the light evenly. Consequently, the blade looks full and bright.
Additionally, you need specific electronic components. A high-quality soundboard is vital. Brands like Proffieboard or CFX are popular. They offer smooth swing and blast effects. You also need a speaker. A bass speaker enhances the sound quality. Wire of various gauges is necessary. You will also need a battery charger. Tools are equally important. A rotary tool is essential for cutting and grinding. You also need a soldering iron. This connects the electronics securely. Screwdrivers and Allen keys are required for assembly. Safety gear is non-negotiable. Always wear safety glasses. Gloves protect your hands from sharp metal. Therefore, preparation is key. Having everything ready makes the build enjoyable. It prevents interruptions during the process.
The Science Behind the Plasma Blade
A real lightsaber is a weapon of pure plasma. It defies current physics. However, we can create realistic approximations. It is important to understand the science involved. Real lasers would not stop at a specific length. They would travel infinitely until they hit an object. Furthermore, they would be invisible from the side. This is because light does not scatter in a vacuum. Consequently, movie magic invented the “plasma blade.” Plasma is the fourth state of matter. It is superheated gas. It glows brightly. Therefore, it fits the visual description.
In our DIY builds, we use LEDs. They simulate the plasma effect. High-density LED strips are the current standard. They contain many tiny LEDs on a flexible strip. When powered, they emit a powerful glow. The polycarbonate blade contains the light. The diffuser material scatters the photons. Consequently, the blade appears to be a solid bar of light. This creates the illusion of a contained energy beam. However, the science of real lightsaber remains fiction. The power required to contain plasma is immense. We currently lack that technology. Therefore, our builds rely on optical illusions. They mimic the look perfectly. Yet, they do not possess the cutting power of a real weapon. This distinction is fascinating for science enthusiasts.
Step-by-Step Assembly of the Hilt
The assembly process requires patience. You should start with the hilt. First, cut your main body tube to the desired length. Then, you need to install the internal chassis. The chassis holds the electronics. It slides inside the hilt. You must ensure a snug fit. Consequently, the parts will not rattle. You should wire the electronics before installation. This is easier to do outside the hilt. Connect the battery to the soundboard. Then, connect the LED and the speaker. Pay close attention to polarity. Incorrect wiring can damage the board. Therefore, double-check every connection.
Furthermore, you need to drill holes for the switch and recharge port. Mark the locations precisely. Use a drill press for stability. De-burr the holes afterwards. This removes sharp edges. Then, install the switch. It should click firmly into place. Next, slide the chassis into the hilt. Use a retention screw to hold it in place. This screw is usually located near the pommel. The pommel is the end cap of the saber. It often holds the speaker. Some pommels have holes for sound venting. This enhances the volume. Consequently, the sound is louder and clearer. Finally, attach the emitter. This is the top section. It holds the blade. Ensure the blade holder is tight. A loose blade is dangerous during combat. Thus, the mechanical assembly is complete.
Wiring and Electronics: The Nervous System
The wiring is the most technical part of the build. It brings the saber to life. You must follow a schematic diagram. Most soundboards come with a manual. Read it thoroughly. The positive and negative wires must not touch. A short circuit can ruin your board. Therefore, use heat shrink tubing. It insulates the exposed wire sections. You will connect the battery first. The board needs a constant power source. Then, connect the LED pad. Neopixel strips require a specific connector. Standard LEDs need a negative and positive lead. Consequently, you must identify the correct pads.
Moreover, the soundboard needs configuration. Many modern boards connect to a computer. You can also add new sound fonts. This gives your saber a unique personality. The wiring must be neat. Messy wires can prevent the chassis from sliding in. Therefore, use thin wire. Silicone wire is flexible and durable. It withstands the heat of the blade. Soldering is a skill that takes practice. Heat the pad and the wire simultaneously. Then, apply the solder. A good joint is shiny and smooth. Dull joints are weak. Test the circuit before final assembly. This ensures everything works. It saves you from taking the saber apart later.
Blade Construction and Diffusion Techniques
The blade is the visual centerpiece. Building a good blade is essential. You start with a polycarbonate tube. Cut it to the standard length of 36 inches. Or choose a shorter length for a “shoto” saber. The edges must be sanded smooth. This prevents injuries. Next, you must prepare the interior. For Neopixel blades, you install the LED strip inside. You must guide it carefully to avoid damage. The strip connects to a connector in the hilt. Consequently, the blade is removable. For baselit sabers, the LED is in the hilt. The blade is just an empty tube. However, it still needs a diffuser.
Furthermore, diffusion is key for the baselit style. You can use a cellophane gift wrap. Roll it into a tube and slide it inside. This creates a “full blade” look. Another method is using a translucent blade plug. It scatters the light from the emitter. The tip of the blade is also important. You should use a rounded tip. It looks more aerodynamic. You must glue the tip onto the tube. Use a strong adhesive like epoxy. However, ensure the glue does not cloud the plastic. The blade must withstand impact. Thick-walled polycarbonate is best for dueling. Thin-walled tubes are brighter but more fragile. Therefore, choose your material based on usage. A well-built blade looks brilliant on camera. It enhances the overall realism of the prop.
Safety Precautions and Maintenance
Safety is paramount when building and using props. You are working with electronics and power tools. Therefore, caution is necessary. Lithium-ion batteries can be dangerous. They store a lot of energy. Never puncture a battery. It can explode or catch fire. Consequently, always use a proper battery holder. Do not use loose batteries rattling inside the hilt. Furthermore, always use a recharge port with a kill switch. This disconnects the battery when not in use. It prevents the saber from turning on accidentally. It also prolongs battery life. You should also monitor the battery voltage. Over-discharging a lithium battery damages it permanently.
Moreover, maintenance ensures longevity. You should clean the blade occasionally. Dust can dim the brightness. Use a microfiber cloth. Check the retention screws regularly. They can loosen from impact. Tighten them with an Allen key. However, do not over-tighten them. You might strip the threads. Store your saber in a cool, dry place. Extreme heat can damage the electronics. If you duel frequently, inspect the blade for cracks. Replace a cracked blade immediately. It can shatter during combat. This creates sharp plastic shards. Therefore, responsible ownership is important. Treat your diy lightsaber with respect. It is a complex piece of technology. Proper care will keep it glowing for years.
The Future of DIY Sabers in 2026
Technology of diy lightsaber advances rapidly. The hobby of saber building is changing. In 2026, we see new trends emerging. Wireless charging is becoming standard. You simply place the saber on a dock. Consequently, you do not need to open the hilt to charge. App integration is also on the rise. You can control your saber via a smartphone. This allows for real-time color mixing. You can also diagnose errors through the app. Therefore, the user experience is improving. Another trend is the “smooth swing” algorithm. It mimics the sound perfectly as you move the saber. This technology is getting cheaper. Thus, high-end features are accessible to beginners.
Furthermore, 3D printing is revolutionizing the hilt design. Metal 3D printing is becoming affordable. You can design a complex hilt on a computer. Then, you print it in metal. This eliminates the need for metal lathes. It opens the door for intricate designs. Consequently, the barrier to entry is lowering. More people can build their dream sabers. The community is also growing. Online forums and video tutorials are plentiful. This shared knowledge helps newcomers. The future of the diy lightsaber is bright. It promises more realism and easier builds. We are moving closer to the movie magic every year.
FAQ
How to make a lightsaber at home easy?
You can use a flashlight and a plastic tube. Attach the tube to the flashlight end. Use colored cellophane for the light effect. This is a very simple method for children. Alternatively, you can buy a kit. Kits include all the parts and instructions. They require minimal tools.
What is the illegal lightsaber form?
“Tràkata” is a form in the lore. It involves turning the blade on and off rapidly. This tricks the opponent. It is considered dishonorable by the Jedi. However, it is not “illegal” in the real world. It is purely a fictional concept from the Expanded Universe.
Could you actually make a diy lightsaber?
Currently, we cannot make a real plasma blade. The energy requirements are too high. We also cannot contain plasma in a force field. However, we can build high-quality props. They look and sound like the real thing. They use LEDs and polycarbonate tubes.
Conclusion
Building your own diy lightsaber is a rewarding journey. It combines creativity, engineering, and artistry. You start with a vision. Then, you bring it to life with your own hands. The process teaches you valuable skills. Furthermore, you end up with a unique collectible. A diy lightsaber is more than a toy. It is a personal expression of fandom. The advancements in 2026 make this the best time to build. You have access to incredible technology. Whether you are a seasoned builder or a novice, the Force is with you. Start planning your build today. May the Force be with your diy lightsaber.