Introduction
Finding the perfect gift can often feel like an impossible task. We all want to give something memorable. We want something that shows we care. A handmade item is always a great choice. It carries a piece of the giver’s heart. Among woodworking projects, the bandsaw box stands out as a truly special creation. These boxes are not just storage containers. They are intricate puzzles and works of art. Consequently, they make exceptional gifts for birthdays, anniversaries, and holidays. Unlike traditional boxes with metal hinges, these are cut from a single block of wood. Therefore, they have a seamless and organic feel. The grain patterns flow continuously around the corners. This creates a stunning visual effect.
Furthermore, making a bandsaw box is an accessible project. It does not require a shop full of expensive tools. You primarily need a bandsaw. Thus, it is perfect for beginners and experienced woodworkers alike. The process is also incredibly creative. You can design boxes in almost any shape. Think of hearts, animals, or abstract geometric forms. The possibilities are endless. Additionally, the “wow” factor is high when the recipient opens a hidden drawer. In this article, we will explore the entire process. We will discuss wood selection and design principles. We will also cover the cutting and finishing steps. By the end, you will be ready to create your own stunning bandsaw box.
Understanding the Unique Construction Method
The construction of a bandsaw box is fundamentally different from other woodworking projects. Traditional box making relies on joinery. You might use dovetails or miter joints. However, a bandsaw box is cut from a solid block. This method is often called “sculptural box making.” It allows for curves and shapes that are impossible with other methods. Therefore, the design potential is limitless. The process begins with a solid block of wood. You will cut the back off the block first. Then, you cut the drawer cavity from the front. Finally, you glue the back on again. The drawer front is also cut from the main block. This ensures the grain matches perfectly.
- Solid Block Origin: The project starts as one glued-up block. Consequently, the final piece feels substantial and solid.
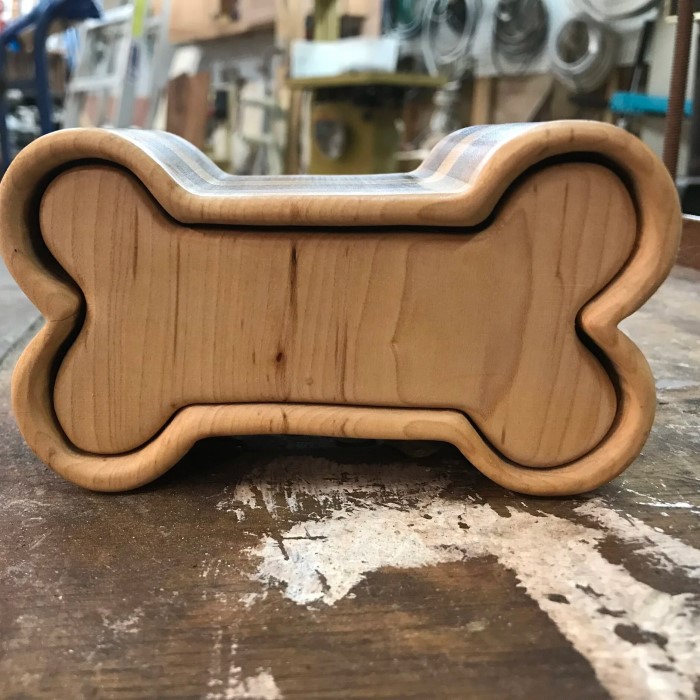
- Seamless Design: Because the box is cut from one piece, there are no visible joints on the corners. This creates a beautiful, continuous grain pattern.
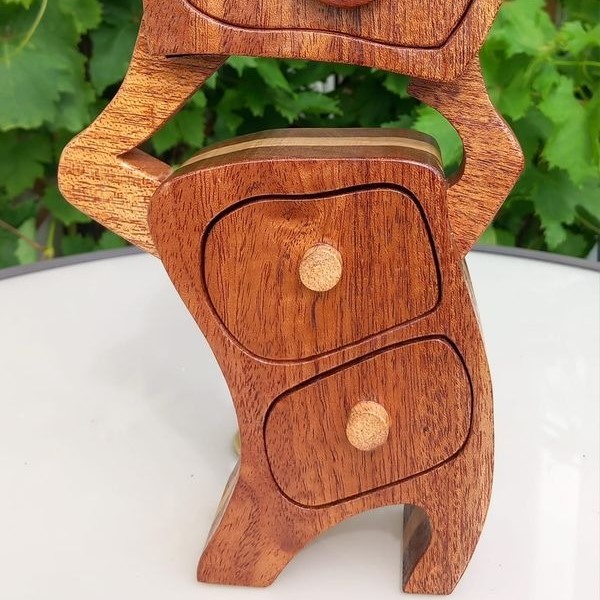
- Hidden Compartments: You can create secret drawers within drawers. This adds an element of surprise and fun.
- No Hardware: These boxes typically do not use metal hinges or pulls. The wood itself forms the drawer and the pull.
Understanding this method is crucial for success. It requires a different way of thinking. You are essentially sculpting the box from the inside out. Therefore, visualization is key. You must imagine the internal cuts before you make them. This technique is not only efficient but also very satisfying. It minimizes waste and maximizes the natural beauty of the wood.
Selecting the Perfect Wood for Your Project
Wood selection is a critical step in creating a beautiful box. The type of wood you choose will affect the look. It also affects the workability and the durability. You can use almost any hardwood for a bandsaw box. However, some species are better suited for the task. For instance, woods with interesting grain patterns are highly desirable. They add visual interest to the smooth, curved surfaces. Maple, walnut, and cherry are classic choices. They are dense and take a finish very well. Furthermore, they smell wonderful when cut.
- Hardwoods: Hardwoods like oak and ash are durable. However, they can be hard to cut into intricate curves. Therefore, you need a sharp blade.
- Exotic Woods: Woods like purpleheart or padauk offer vibrant colors. They can make a simple design look spectacular. However, some exotic woods can be oily. This might interfere with gluing.
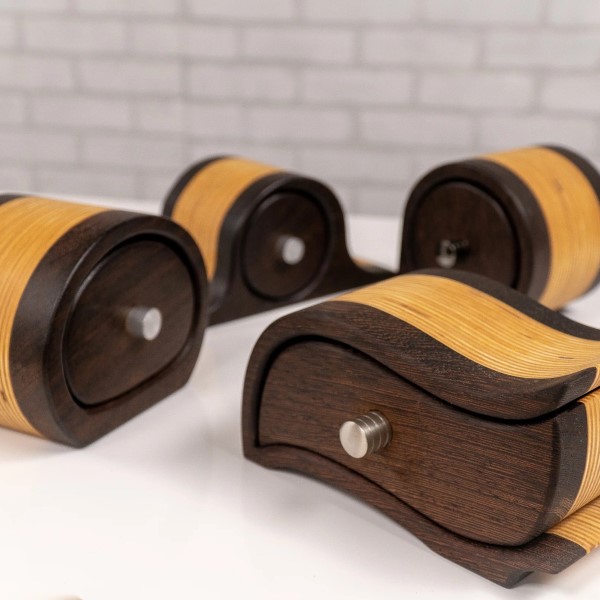
- Gluing Up Blanks: You do not need a massive solid block of wood. You can glue together smaller pieces. This is a great way to use up scrap wood. It also allows you to create sandwiched layers of different colors. Consequently, you can create stunning geometric patterns.
- Moisture Content: Ensure your wood is dry. Wet wood will warp and crack as it dries. This will ruin the tight fit of your drawers.
Take your time when selecting the wood. Look for pieces with unique character. A knot or a burl might add a beautiful detail. However, avoid wood with large cracks or checks. These structural flaws can cause the box to break apart during cutting. The wood is the canvas for your art. Therefore, choose it with care.
Essential Tools and Safety Equipment
While the bandsaw is the star of the show, other tools are necessary. Having the right equipment makes the job easier and safer. Safety is paramount in any woodworking shop. The bandsaw is a powerful machine. It has a fast-moving blade. Therefore, you must respect it. First, you need a reliable bandsaw. It does not need to be the most expensive model. However, it should have good blade guides. It should also run smoothly without excessive vibration.
- The Blade: Blade selection is vital. You need a narrow blade to cut tight curves. A 1/8 inch or 3/16 inch blade is standard for boxes. Furthermore, the blade should have a high tooth count. This ensures a smooth cut. A blade with fewer teeth cuts faster but leaves a rougher surface.
- Drum Sander: Sanding is a major part of the process. A spindle sander or a drum sander makes this much faster. Hand sanding is possible but time-consuming.
- Clamps: You will need clamps for gluing the layers back together. Quick-grip clamps work very well for this.
- Safety Gear: Always wear safety glasses. Sawdust can fly at high speed. Furthermore, use a dust mask or a respirator. Fine sawdust is harmful to your lungs. Hearing protection is also recommended. Bandsaws can be loud.
Do not skimp on safety. A moment of distraction can lead to injury. Keep your fingers away from the blade. Use a push stick whenever possible. A well-prepared workshop is a safe workshop. Therefore, check your tools before you begin. Ensure the blade is tracking correctly. Make sure the tension is set properly.

Step-by-Step Cutting Process
The actual cutting of the box is an exciting process. It requires patience and a steady hand. First, you need a pattern. You can draw this directly on the wood. Or, you can use a template made from cardboard or thin plywood. Once the design is ready, the cutting begins. This process is broken down into distinct stages.
- Cutting the Exterior: First, cut the outside shape of the box. Cut just outside the line. This allows for sanding later. Once the exterior is cut, you can sand it smooth.
- Slicing the Back: Next, cut a thin slice off the back of the block. This slice should be about 3/8 inch thick. This will become the back panel of the box. Set this piece aside safely.
- Cutting the Drawer: Now, draw the shape of the drawer on the front face. Cut along this line. This will remove the “core” of the box. This core will become the drawer.
- Hollowing the Core: Take the core piece you just cut out. Slice a piece off the front. This will be the drawer front. Then, hollow out the inside of the core to create the drawer box. You must leave enough wall thickness for strength.
- Gluing Up: Glue the back slice onto the main body. Then, glue the drawer front back onto the drawer box. Clamp everything securely. Wipe away any excess glue immediately.
This process requires careful sequencing. If you cut in the wrong order, you might ruin the project. For example, if you cut the drawer before the back, you have nothing to hold the block together. Therefore, follow the steps logically. Take your time with the cuts. Do not force the wood through the blade. Let the blade do the work.

Creative Design Ideas and Inspiration
One of the best things about this craft is the creative freedom. You are not limited to square shapes. You can let your imagination run wild. Nature is a great source of inspiration. You can create boxes that look like rocks, clouds, or animals. Abstract designs are also very popular. They look modern and artistic. Furthermore, you can play with the drawer configuration. A single box can have multiple hidden compartments.
- The Heart Box: This is a classic design. It is perfect for Valentine’s Day or anniversaries. The drawer pull can be shaped like a heart as well.
- The Pyramid Box: This design features a triangular shape. It looks mysterious and ancient. It is a great way to show off exotic wood.
- The “Fake” Drawer: You can design a box that looks like it has one drawer. However, the front might slide up to reveal two secret drawers behind it. This puzzle-like quality delights people.
- Segmented Designs: You can glue up different colored woods to create a pattern. For example, you could make a checkerboard pattern. Or, you could create a sunset scene using different shades of wood.
Look at other artists for inspiration. There are many online communities dedicated to bandsaw boxes. However, do not be afraid to try your own ideas. Even “mistakes” can lead to new and interesting designs. A wavy cut might become a design feature. Therefore, embrace the creative process. Keep a sketchbook handy. Draw your ideas before you head to the shop.
Sanding, Finishing, and Assembly
The cutting process leaves saw marks on the wood. Therefore, sanding is essential. It transforms a rough project into a smooth masterpiece. Start with a coarse grit sandpaper, like 80 or 100. This will remove the saw marks. Then, progress through the grits. Use 120, then 180, and finally 220. Sanding is tedious, but it is the key to a professional look. Do not rush this step. The inside of the drawer also needs to be sanded smooth. This ensures the drawer slides easily.
- Sanding Contours: Use a spindle sander for the inside curves. It will make quick work of the material. For the outside curves, you can use a belt sander or an oscillating spindle sander.
- Fitting the Drawer: Test the fit of the drawer frequently. If it is too tight, sand the sides a bit more. You want a smooth “piston fit.” This means the drawer slides in and out with gentle resistance. It should not fall out on its own.
- Applying Finish: There are many finish options. Oil finishes are popular. They are easy to apply and feel natural to the touch. Tung oil or Danish oil works beautifully. They penetrate the wood and highlight the grain. Spray lacquer is another option. It creates a hard, glossy shell. However, it requires good ventilation.
- Drawer Pulls: You need a way to open the drawer. You can carve a pull directly into the drawer front. Or, you can attach a separate wooden pull. A small magnet can also be used as a hidden opener.
Conclusion: The Joy of Handmade Gifts
Creating a bandsaw box is a rewarding journey. It combines technical skill with artistic expression. The process is challenging enough to be interesting. Yet, it is accessible enough for beginners. The result is a unique object that cannot be found in a store. It carries the warmth of the maker’s hands. It carries the beauty of the natural wood. Giving such a gift is a profound gesture. It tells the recipient that they are worth the time and effort. Furthermore, the skills you learn on one box will improve the next. You will discover new tricks and techniques. You will become more confident with the saw. Woodworking is a lifelong learning experience. The bandsaw box is a perfect project to hone those skills. So, gather your wood and fire up your bandsaw. Create something beautiful today. The perfect gift is waiting to be made by you.