Introduction to Home Malting
Craft brewing has become a passionate hobby for many people around the world. Consequently, more brewers want to control every aspect of their beer. One of the most rewarding steps is learning how to malt barley. This process transforms raw grain into the sugary gold that yeast loves. Most brewers buy their malt from large suppliers. However, doing it yourself opens up a world of unique flavors. You can customize the color and taste of your brew completely. Furthermore, it connects you to the ancient traditions of brewing. Our ancestors performed these steps by hand for centuries. Therefore, you can replicate their methods with modern knowledge. The journey from raw barley to fermentable sugar is fascinating.
It involves three main stages. These are steeping, germinating, and kilning. Each stage requires patience and attention to detail. However, the result is incredibly satisfying. Imagine tasting a beer made from grain you malted yourself. It is a true farm-to-glass experience. This guide will walk you through the entire process. You will learn the science behind the transformation. Additionally, you will gain practical tips for success. So, let us begin this exciting adventure into the heart of brewing.
Understanding the Science of Malting
Before you start, you must understand the biological process. Malting is essentially controlled germination. You are tricking the grain into thinking it is time to grow. The barley seed wakes up from its dormant state. Consequently, it starts to produce enzymes. These enzymes are crucial for the brewer. Specifically, they break down the starchy endosperm of the seed. This process modifies the grain’s internal structure. The goal is to make the starches accessible. Later, during the mash, these enzymes will convert starch into sugar. Therefore, malting is the foundation of brewing. Without it, you cannot make beer easily. When you learn how to malt barley, you manage this biological activity.
You must balance moisture and temperature. If the grain grows too much, it uses up all its starch. This is called “over-modification.” Conversely, if it grows too little, the starch remains locked away. Thus, the maltster acts as a careful guardian. You guide the grain to the perfect point of modification. Then, you stop the growth by drying it. This preserves the enzymes and starch for the brewer. Understanding this cycle is key to producing high-quality malt.
Selecting the Right Barley Variety
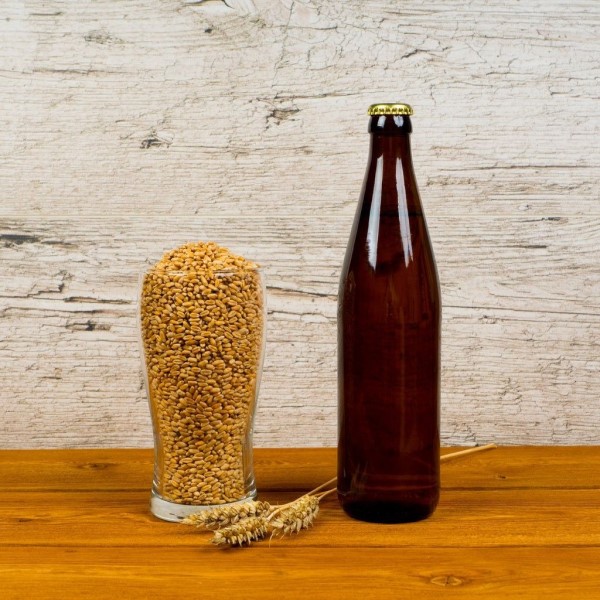
Not all barley is created equal for malting. You cannot simply use feed barley from a farm store. Instead, you need high-quality brewing barley. There are two main types to consider. These are two-row and six-row barley. Two-row barley is the preferred choice for most craft brewers. It has larger kernels and a higher starch-to-husk ratio. Furthermore, it tends to have a smoother flavor profile. Therefore, you should look for certified malting barley varieties.
Check with local agricultural suppliers or homebrew shops. They often carry seeds specifically meant for brewing. Additionally, you must ensure the barley is viable. This means the seed is alive and can germinate. Ideally, you want a germination rate of over 95%. You can test this by sprouting a small sample on a wet paper towel. If most seeds sprout, you have a good batch. Another factor to consider is the moisture content of the raw grain. It should be dry enough to store without rotting. However, it must not be so dry that the embryo is dead. Sourcing good grain is the first critical step in how to malt barley. Without good raw material, your efforts will not yield good beer.
The Steeping Process Explained
Steeping is the first active stage of malting. Its primary goal is to increase the grain’s moisture content. The barley needs water to wake up from dormancy. Typically, you will soak the grain in water. However, you cannot just leave it underwater forever. The grain needs oxygen to survive. Therefore, you must use an intermittent steeping schedule. This involves periods of wet steeping and dry resting. For instance, you might soak the barley for eight hours. Then, you drain the water and let it rest for eight hours.
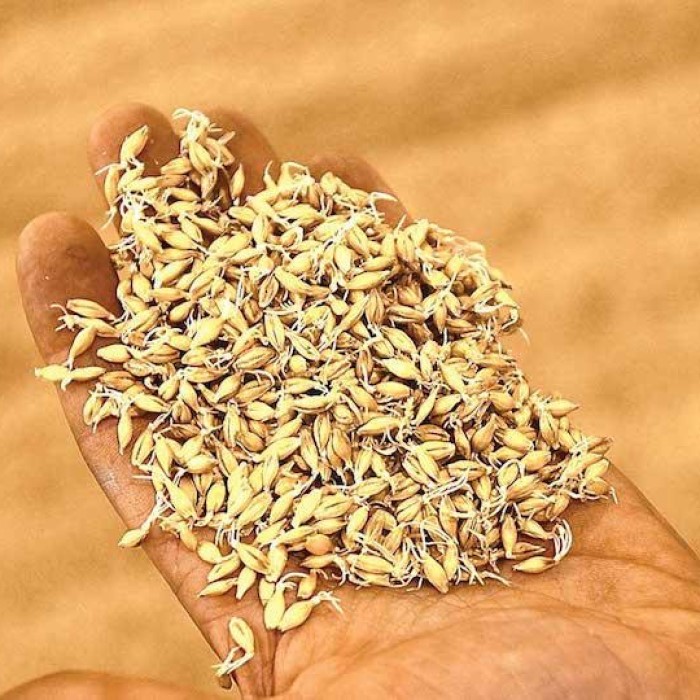
During the rest, the grain breathes in oxygen. Consequently, the moisture content rises steadily. You aim for a moisture level of around 44% to 46%. You can check this by weighing the grain before and after soaking. The weight increase indicates water uptake. Furthermore, you must keep the water cool. Ideally, the temperature should be between 50°F and 60°F. Warm water encourages mold growth and can kill the embryo. Therefore, change the water regularly. This keeps the grain clean and aerated. When you see small white tips, called “chits,” emerging, the steeping is nearly done. This indicates the grain has successfully germinated.
Managing Germination Effectively
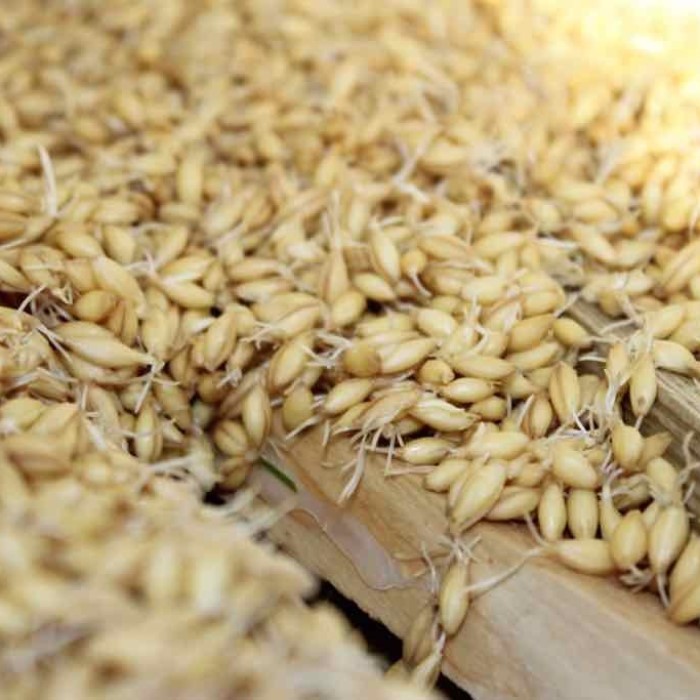
Once the grain has chitted, it enters the germination phase. This is where the real magic happens. You must move the grain to a germination vessel. This could be a large tray or a specialized malting drum. The goal here is to allow the embryo to grow. However, you must prevent the rootlets from getting too long. You are aiming for controlled growth. During this stage, the grain produces heat. Therefore, you must turn the grain regularly. Turning prevents the roots from matting together.
It also keeps the grain bed cool. If the temperature rises too high, the grain might die. Ideally, you want to maintain a temperature of around 64°F. Furthermore, you must keep the grain moist but not soaking wet. You can mist it with a spray bottle occasionally. The germination process typically lasts four to five days. You will observe the rootlets growing. Additionally, the acrospire, or the shoot, will grow along the back of the kernel. A general rule of thumb is that the acrospire should grow to about 75% of the kernel’s length. This indicates full modification. Mastering this timing is essential when learning how to malt barley. It ensures you have the maximum amount of fermentable sugar.
The Kilning and Drying Stage
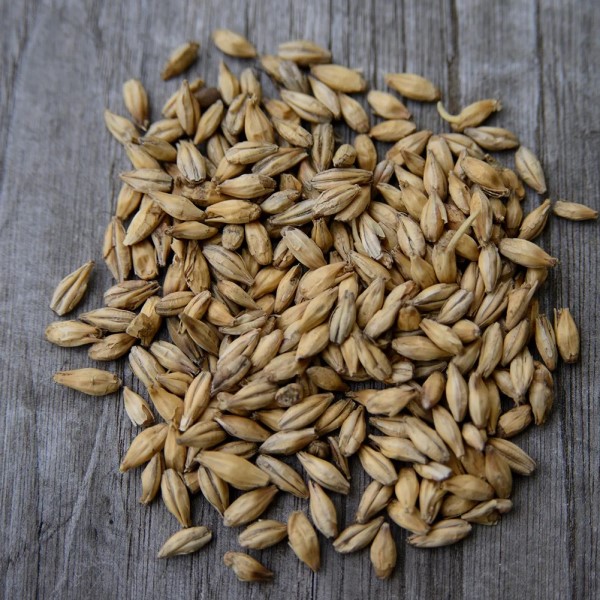
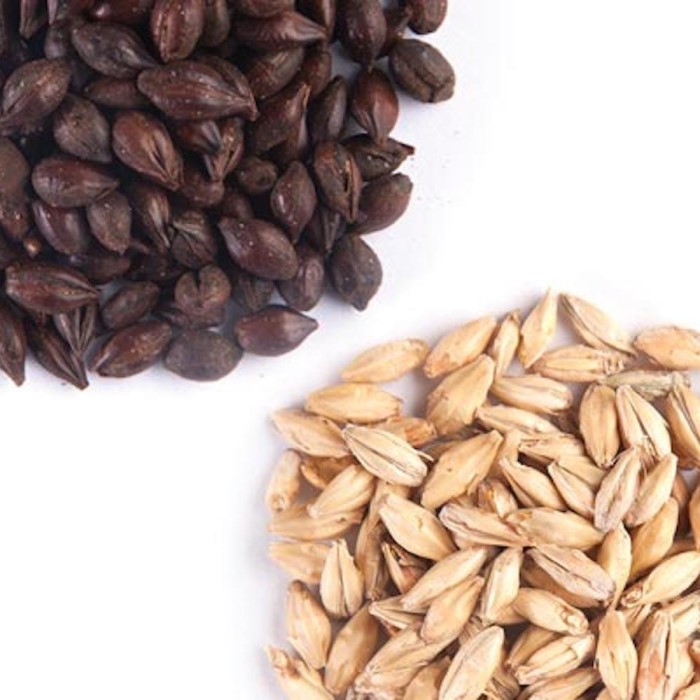
The final major step is kilning. Here, you stop the germination process. You do this by drying the grain with heat. If you do not stop it, the plant will consume all the starch. The kilning process serves two main purposes. First, it preserves the grain for storage. Second, it develops the flavor and color. You must dry the grain slowly at first. If you apply high heat immediately, you might kill the enzymes. This would create “glassy” malt that is hard to mash. Therefore, start with a low temperature, around 100°F to 125°F. Keep the air moving through the grain. You can use a fan or a food dehydrator. As the moisture drops, you can increase the temperature. For a base malt, you finish at a moderate temperature.
This preserves the light color. However, you can make specialty malts by raising the heat. For instance, higher temperatures create caramel and roasted flavors. This is where you can get creative. You control the final profile of your beer. Kilning usually takes 24 to 48 hours. The final moisture content should be around 4% to 5%. The grain will feel dry and brittle. Properly kilning is the final hurdle in how to malt barley.
Cleaning and Storing Your Malt
After kilning, the malt is not quite ready for the mash tun. You must clean it first. During germination, the rootlets grew significantly. These small, dry roots are called “culms.” They are bitter and provide no sugar. Consequently, you need to remove them. You can do this by agitating the grain. Some home malters use a colander or a sieve. The dry roots will fall off or break away. You can save these culms for your garden compost. They are rich in nitrogen. Once the malt is cleaned, inspect it. It should smell pleasant and biscuit-like.
There should be no moldy odors. Next, store the malt in a cool, dry place. Moisture is the enemy of malt. If it absorbs water, mold can grow. Therefore, use airtight containers or sealed buckets. Properly stored malt can last for a year or more. It is important to let the malt rest for a few weeks before using it. This allows the moisture to equalize throughout the kernel. This resting period improves the brewing performance. By following these storage steps, you ensure your hard work pays off. You will have a stash of fresh, homemade malt ready for your next brew day.
Troubleshooting Common Malting Issues
Malting at home is a complex process. Things can go wrong occasionally. However, most problems have simple solutions. One common issue is uneven germination. You might notice some grains growing faster than others. This often happens if the grain bed is too deep. The grains in the center get hot and suffocate. Therefore, make sure to turn the grain frequently. This ensures even temperature and oxygen distribution. Another problem is mold growth. You might see fuzzy white or black spots.
This usually indicates that the grain was too wet or too warm. To prevent this, ensure good airflow during steeping and germination. Additionally, always use clean equipment. If your malt smells like vinegar or mildew, discard it. Do not use moldy grain for brewing. It can ruin your beer and pose health risks. Sometimes, the malt ends up too hard. This means the kilning temperature was too high initially. The starches set like glass. Consequently, they will not convert to sugar. To fix this, lower your starting kilning temperature next time. Learning how to malt barley involves trial and error. Do not get discouraged by failures. Every batch teaches you something new about the grain.
FAQ: Answering Your Malting Questions
How do I malt my own barley?
You malt barley by steeping it in water to wake it up. Then, you let it germinate for several days. Finally, you dry it in an oven or kiln to stop the growth.
Is drinking malt healthy?
Yes, malt is generally healthy. It contains vitamins, minerals, and amino acids. Malt extract is often used as a nutritional supplement. However, it is high in sugar and calories.
How is barley converted to malt?
Barley converts to malt through controlled germination. The grain produces enzymes that modify its starches. This process is halted by drying the grain with heat.
How long does it take to make malted barley?
The entire process usually takes about seven to ten days. Steeping takes two days. Germination takes four to five days. Kilning takes one to two days.
Conclusion: Your Journey into Malting
Mastering the art of malting is a significant achievement for any brewer. It elevates your brewing from a hobby to a craft. You now understand the detailed steps of how to malt barley. From selecting the perfect seed to the final kilning, every step matters. You have learned to control nature to create a brewing ingredient. This knowledge gives you a deeper appreciation for commercial maltsters. Furthermore, it allows you to experiment with flavors you cannot buy. You can create unique beers that tell a story.
The process requires patience and attention. However, the reward is a truly homemade pint. There is nothing quite like the taste of beer made with your own malt. So, take the plunge. Start with a small batch and learn as you go. Your brewing skills will improve significantly. Ultimately, the heart of beer lies in the malt. By making it yourself, you capture that heart completely. Cheers to your next brewing adventure.