Introduction to the Art of Mazes
Learning how to draw a maze is a fascinating journey into the world of puzzles and design. Many people enjoy solving mazes, but creating them is even more rewarding. This activity is perfect for both children and adults. It serves as a great way to improve spatial awareness. Furthermore, it acts as a relaxing creative outlet. You do not need to be an artist to start. All you need is a pencil, some paper, and a bit of patience. The process involves logic as much as it involves drawing. Consequently, you engage your brain in unique ways.
You can create simple squares for kids. Alternatively, you can design complex labyrinths for adults. The possibilities are truly endless. In this article, we will explore various methods. We will look at grid-based designs and freeform styles. Therefore, you will find a technique that suits your skill level. Additionally, we will discuss the history behind these puzzles. Understanding the background adds depth to your creations. Whether you are a teacher making worksheets or a hobbyist, this guide is for you. So, grab your drawing tools. Let us dive into the exciting process of maze construction.
The Cognitive Benefits of Maze Creation
Drawing mazes is not just a fun pastime; it is a mental workout. When you design a maze, you plan ahead. You must think about the solution path first. Then, you actively work to block that path with dead ends. Consequently, this boosts your critical thinking skills. It forces your brain to anticipate problems.
For children, this activity enhances fine motor skills. Holding a pencil and drawing precise lines improves hand-eye coordination. Furthermore, it teaches them about cause and effect. They learn that every decision creates a consequence for the solver. Therefore, educators often use mazes as learning tools. They are excellent for developing problem-solving abilities. Moreover, the act of drawing can be meditative. Repetitive patterns and lines calm the mind. It is similar to doodling or zentangling. You might find yourself losing track of time. This state of flow reduces stress significantly. Adults can benefit from this just as much as kids. It is a productive break from digital screens. You create something tangible with your hands. Thus, learning how to draw a maze contributes to mental well-being. It sharpens the mind while soothing the soul.
Essential Tools and Materials
Before you begin your maze-making journey, you need the right supplies. Fortunately, the barrier to entry is very low. You likely have everything you need at home. First, you need paper. Graph paper is the best choice for beginners. The grid lines help you keep your walls straight. Consequently, your maze will look neat and organized. If you do not have graph paper, plain white paper works too. However, you might need a ruler to keep lines straight. Next, you need a drawing instrument.
A standard HB pencil is perfect for sketching. It allows you to erase mistakes easily. Speaking of erasers, a high-quality one is essential. You will make changes as you go. Therefore, a clean eraser keeps your work tidy. For finalizing your design, you might want black markers. Fine-tip pens create crisp, dark lines. These scan well if you want to share your maze digitally. Additionally, consider colored pencils. You can color code the start and finish points. This makes the puzzle more visually appealing. Finally, a ruler is a helpful tool. It helps you draw long, straight border lines. With these simple tools, you are ready to create masterpieces.
Understanding Maze Topology and Structure
To master how to draw a maze, you should understand the basic structure. A maze consists of several key components. First, there is the start point. This is where the solver enters the puzzle. Then, there is the finish point. This is the goal. Between these two points lies the solution path. This is the correct route the solver must find. However, you cannot make it too easy. You must add “false paths” or dead ends. These are branches that lead nowhere. Furthermore, there are “islands.” These are wall sections completely surrounded by paths. They confuse the solver effectively. Understanding these elements helps you design better puzzles. You should also consider the “difficulty level.” A maze with many dead ends is harder.
Conversely, a maze with long, winding paths is often easier. The density of the walls also matters. More walls mean more choices. Consequently, the puzzle becomes more challenging. You must balance these elements. A good maze is challenging but solvable. It should not be frustratingly impossible. By grasping these concepts, you gain control over the solver’s experience. You guide their journey through your design.
Step-by-Step Guide: The Grid Method
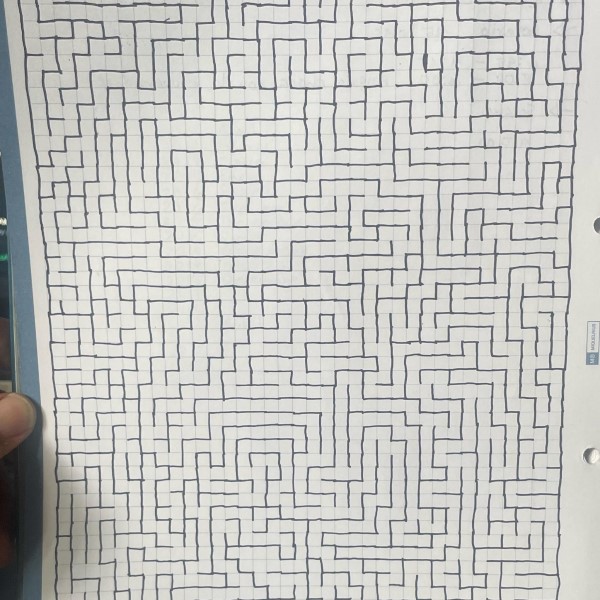
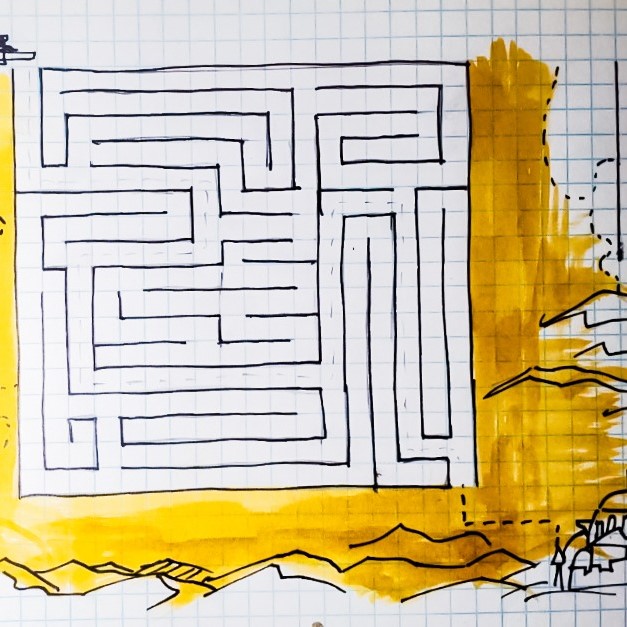
The grid method is the most popular way to learn how to draw a maze. It provides a structured framework. First, draw a large square or rectangle on your paper. This is your border. Next, decide on your scale. Will one grid square equal one unit of space? If you use graph paper, this is already done for you. Now, mark your start and finish points. Place them on opposite ends of the border. Then, draw the solution path. Use a light pencil line to connect the start to the finish. Do not make it too direct.
Add some turns and curves. This is your “cheat sheet.” Now, start drawing the walls. Begin at the start point. Draw walls perpendicular to the solution path. Ensure you do not block the correct path you drew earlier. As you draw, create branches. These branches are the dead ends. Some should be short. Others can be long and winding. Consequently, the solver will be tricked. Work your way towards the finish. Remember to leave the exit open. Once the walls are drawn, erase your light solution line. Now, you have a finished maze. You can test it yourself. This method ensures your maze is always solvable.
Creating Mazes for Different Age Groups
When you learn how to draw a maze, you must consider your audience. A maze for a five-year-old looks different from one for an adult. For young children, simplicity is key. Use a small grid, perhaps 5×5 or 10×10. Make the paths wide. Consequently, the walls are short and easy to navigate. Avoid long, confusing dead ends. The solution path should be relatively direct. You can also add fun pictures. Draw a rabbit at the start and a carrot at the finish. This gives them a story context. On the other hand, adults require a challenge.
Use a larger grid. 20×20 or even 50×50 grids work well. Make the paths narrow and the walls thick. Create multiple layers of dead ends. You can even have “loops.” These are paths that circle back on themselves. They are very disorienting. Furthermore, you can remove the border. Let the maze edges be open. This adds a layer of complexity. Therefore, always tailor your design to the solver. If a child finds a maze too hard, they will give up. If an adult finds one too easy, they will be bored. Adjusting your technique ensures everyone has fun.
Advanced Techniques: Freeform and Shape Mazes
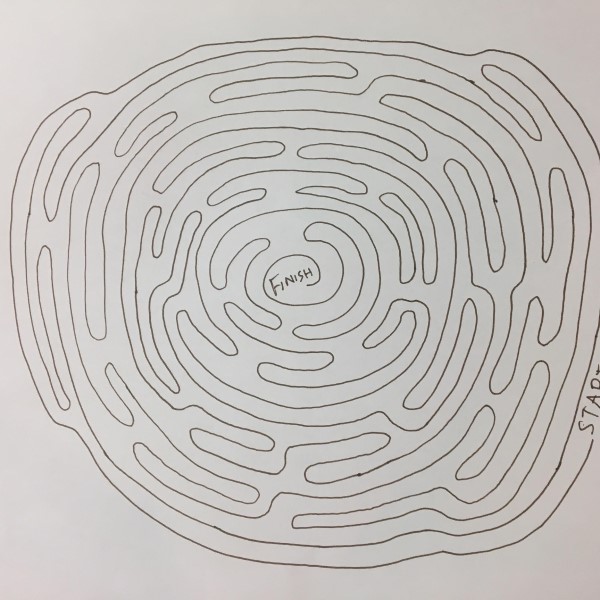
Once you master the grid, you can try freeform mazes. This technique is more artistic. You do not use a grid. Instead, you draw organic, flowing lines. First, draw the outer border in any shape you like. It could be a circle, a star, or even a dinosaur shape. Then, draw the solution path inside. After that, fill the empty space with walls. This requires a steady hand. Consequently, the maze looks more natural and less rigid. Another advanced technique is the “blind” method. Here, you start drawing walls without planning the solution.
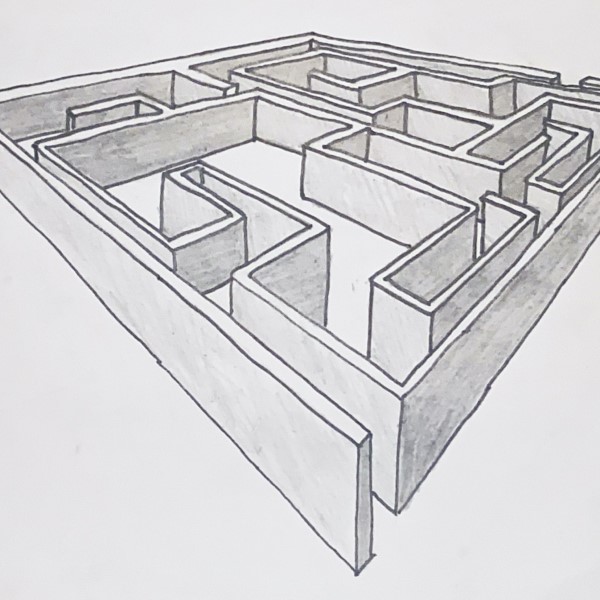
You let the maze grow organically. However, you must be careful. You might accidentally block the exit. Therefore, you need to check for solvability later. This method is risky but exciting. Additionally, you can experiment with 3D effects. Draw walls that look like tubes or boxes. This creates an optical illusion. It makes the puzzle much harder to solve. These advanced styles transform a simple puzzle into art. They are perfect for experienced designers looking for a new challenge. Let your creativity run wild with these freeform methods.
Digital Tools for Modern Maze Design
In the modern age, you can also draw mazes digitally. This offers several advantages. First, the “undo” button is a lifesaver. If you make a mistake, you simply tap a button. Consequently, there is no fear of ruining your paper. There are many software options available. Simple programs like MS Paint work for beginners. However, specialized apps offer more features. Procreate on the iPad is a popular choice. It allows for layers. You can draw the solution on one layer and the walls on another.
This keeps your workspace clean. Furthermore, digital tools allow for perfect symmetry. You can mirror your drawing instantly. This is great for creating mandala-style mazes. Additionally, there are maze generator algorithms. While this article focuses on drawing by hand, knowing about generators is useful. They can provide inspiration. You can study their patterns to learn new dead-end techniques. However, hand-drawn mazes have a unique charm. They show the artist’s personal touch. Therefore, try a mix of both. Sketch by hand, then ink digitally. Or design on a tablet and print it out. The digital world expands your possibilities significantly.
FAQ: Answering Your Maze Questions
How to create a simple maze for kids?
To create a simple maze for kids, start with a small grid. Draw a clear start and finish. Then, draw a direct solution path. Finally, add a few short dead ends. Keep the design open and not too cluttered.
Can ChatGPT make mazes?
ChatGPT cannot generate images directly. However, it can describe a maze layout or provide a text-based ASCII maze. It can also guide you through the steps to draw one yourself.
What makes a labyrinth different from a maze?
A maze has branching paths and dead ends. You must choose the correct direction. A labyrinth has a single, winding path to the center. There are no choices to make in a labyrinth.
What’s the rule for mazes?
The main rule is that the maze must be solvable. There must be a clear path from the start to the finish. Additionally, “wall-following” is a common solving rule. You keep one hand on the wall to find the exit.

Conclusion: The Endless Possibilities of Maze Art
Mastering how to draw a maze opens up a world of creativity. You have learned about the tools and techniques. Furthermore, you understand the logic behind the lines. From simple grids for kids to complex freeform designs, the options are vast. This hobby is accessible to everyone. You only need a pencil and paper to start. As you practice, your skills will improve. You will start seeing patterns everywhere. Consequently, you can turn everyday objects into puzzles. Remember to focus on the solver’s experience.
Balance difficulty with fun. Whether you use digital tools or stick to traditional paper, the joy remains the same. Creating a maze is an act of storytelling. You guide the explorer through a journey of twists and turns. So, pick up your pen today. Start drawing lines and building walls. Challenge your friends and family. Most importantly, have fun with the process. The world always needs more clever puzzles. Now, you have the power to create them.