Introduction: What is a Mini Book?
If you’re looking to create something special for friends or family, you may be wondering how to make a mini book. Mini books are delightful, small-sized books that can be personalized to capture memories, tell stories, or serve as thoughtful gifts. They are perfect for a range of occasions, from birthdays to holidays. Often made from simple materials, mini books provide a wonderful canvas for creativity, enabling you to create unique gifts and keepsakes.
Whether you’re an experienced crafter or a beginner, making a mini book can be a fun and rewarding project. In this article, we’ll explore various ways to make mini books, including tips, techniques, and creative ideas that can elevate your project. Let’s dive into the world of mini book crafting!
Materials You Will Need
Before learning how to make a mini book, it’s important to gather the necessary materials. Here’s what you’ll need:
Paper
- Importance of Paper Choice: The selection of paper is one of the most crucial aspects of crafting a mini book. The paper you choose will affect not only the look and feel of the mini book but also its durability and usability.
- Variety of Paper Types: You can utilize several types of paper, such as:
- Plain Paper: Ideal for beginners or for those looking to create a minimalist design. It allows for writing or drawing without distraction.
- Colored Paper: Adds vibrancy and can enhance the visual appeal of each page. Choose colors that match your theme or the recipient’s preferences.
- Patterned Scrapbook Paper: This type of paper can bring texture and creativity to your mini book. Patterns like stripes, polka dots, or floral designs can be fun and engaging.
- Recycled Items: Consider using old greeting cards, magazine pages, or wrapping paper. These materials offer a unique touch and add character to your mini book, showcasing your creativity and ability to recycle.
- Thickness and Stability: Pay attention to the thickness of the paper, as it directly affects the stability of your mini book. Thicker paper tends to hold up better and gives a more substantial feel, whereas thinner paper may cause pages to bend or tear more easily. For writing or drawing, use thicker paper or a specific paper type designed for art projects.

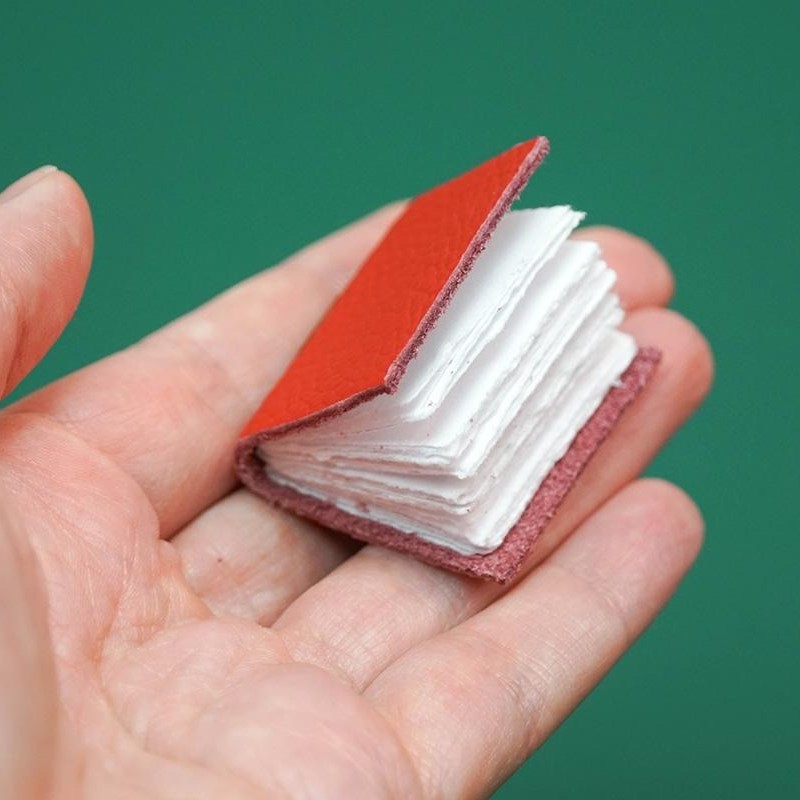
Cover Material
- Choosing the Right Cover Material: The cover is crucial for protecting the contents of your mini book. Selecting the appropriate material can greatly enhance its durability and aesthetic appeal.
- Options for Cover Materials:
- Heavyweight Cardstock: This material is excellent for creating a sturdy cover. It provides solid protection for the pages and can withstand wear and tear from handling. Cardstock comes in various colors and textures, giving you many choices for customization.
- Cardboard: If you want a more robust cover, using lightweight cardboard can be an effective choice. It offers significant protection and can be easily customized with decorations or cover art.
- Fabric: Using fabric for the cover allows you to create a soft, inviting feel. Fabric covers can add warmth and creativity to your mini book. Consider using cotton, felt, or even denim for different textures. Fabric can also be embellished with embroidery or patches for a personalized touch.
- Creating a Soft Cover: If you choose fabric, you may want to line it with interfacing to add structure. This lining will help the fabric hold its shape better. Alternatively, you can sew or glue fabric directly onto cardstock to combine the softness of fabric with the sturdiness of paper products.
Binding Supplies
- Binding Options and Requirements: Depending on the binding technique you choose to secure your mini book, the required supplies may vary significantly. Understanding your chosen method will help determine what you need.
- Basic Binding Supplies:
- Thread and Needle: For hand-stitched binding, you’ll need strong thread and a needle. This method often results in a charming, artisanal appearance.
- Glue: Glue is essential for many binding techniques. Use either craft glue or a glue stick to secure your pages and components together. Be sure to cover the edges thoroughly to prevent pages from slipping.
- Stapler: A stapler can be a quick and effective way to bind pages together. This method works well for smaller mini books and allows for a secure hold.
- Advanced Techniques: For those looking to try more advanced binding options, consider using:
- Brads: These fasteners can add a decorative touch while securing the pages. They create a nice pop and allow for some flexibility in how the pages turn.
- Washi Tape: This decorative tape can serve as both an embellishment and a binding technique. Use it to connect pages or secure covers while adding visual interest.

Scissors and Ruler
- Essential Cutting Tools: A reliable pair of sharp scissors or a paper cutter is essential for accurately cutting your pages and covers. Accuracy in cutting ensures that your mini book has a finished look and that the pages fit together neatly.
- Precision with a Ruler: Using a ruler while measuring for cuts helps maintain uniformity. It is especially important when creating multiple pages to ensure that they are all the same size. Accurate measurements contribute to a polished and professional appearance.
- Tips for Efficient Cutting:
- Cut multiple pieces of paper at once if the thickness allows it, to speed up your process.
- Make sure to align your paper properly against the ruler to avoid any jagged edges while cutting.
Decorative Elements
- Personalizing Your Mini Book: Decorating your mini book with unique embellishments is an excellent way to add character and flair. Thoughtful details make the book visually appealing and can enhance its sentimental value.
- Types of Decorative Items:
- Stickers: Decorative stickers are a quick and easy way to personalize and embellish your mini book. Stickers can represent themes, characters, or messages that align with the content of the book.
- Stamps: Using stamps can add wonderful designs and text to your project. This method allows you to create various patterns or illustrations without needing artistic skills.
- Washi Tape: This decorative tape comes in countless designs and colors. You can use it to create borders, add flair to pages, or even as a colorful binding method. Washi tape can easily be repositioned, making it user-friendly.
- Creating Cohesion with Decorations: Aim for a cohesive look by selecting decorative items that complement the book’s theme or message. Consistency in colors and styles will unify your mini book’s overall appearance.
Step-by-Step Guide on How to Make a Mini Book
Step 1: Choose a Design
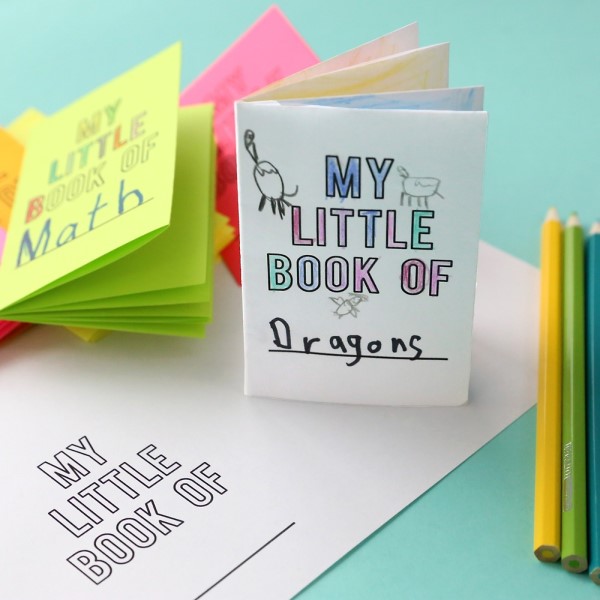
How to make a mini book? Start by deciding on the size and design of your mini book. Popular sizes include A6 or A5, but you can create any size that suits your needs. Sketch out a rough plan that includes the number of pages and the layout.
- Page Count: Determine how many pages you’d like to include. A good starting point is between 8 to 12 pages, which provides enough space for creativity without becoming overwhelming.
Step 2: Cut the Pages
Using your paper, cut out the pages according to your desired size. If you’re using A4 sheets, for example, folding them in half will yield A5 pages, creating a mini booklet effect.
- Folding Technique: To create neat folds, align your paper carefully and press down firmly along the crease. A bone folder can help create precise folds.
Step 3: Create the Cover
Next, it’s time to prepare the cover. Cut your cover material to match the size of your pages, making it slightly larger for added protection.
- Personalizing the Cover: Decorate the cover with designs or titles. You could apply stickers, paint, or even attach fabric to give it a unique touch. This is your chance to be creative and set the tone for the book.
Step 4: Bind the Book
Binding can be done in various ways. Here are a couple of common methods:
- Saddle Stitch Binding: Align the pages and cover, then use a hole punch to create holes along the spine edge. Thread a needle with strong thread, and sew through the holes, tying off at the end. This method is simple and effective for securing your mini book.
- Glue Binding: For a quicker method, apply glue along the spine and carefully press the pages together. Ensure they are evenly aligned, and place a weight on top to secure them while drying.
Step 5: Add Pockets and Interactive Elements
To enhance your mini book, consider adding pockets. Here’s how:
- Creating Pockets: To create a pocket, cut a piece of paper slightly larger than the desired pocket size, then fold up the bottom and secure it with glue on the sides. This pocket can hold notes, small photos, or surprises.
- Interactive Features: Adding flaps or cutouts can make the book more engaging. Children especially enjoy these creative elements, which encourage interaction during reading.
Creative Ideas for Mini Books
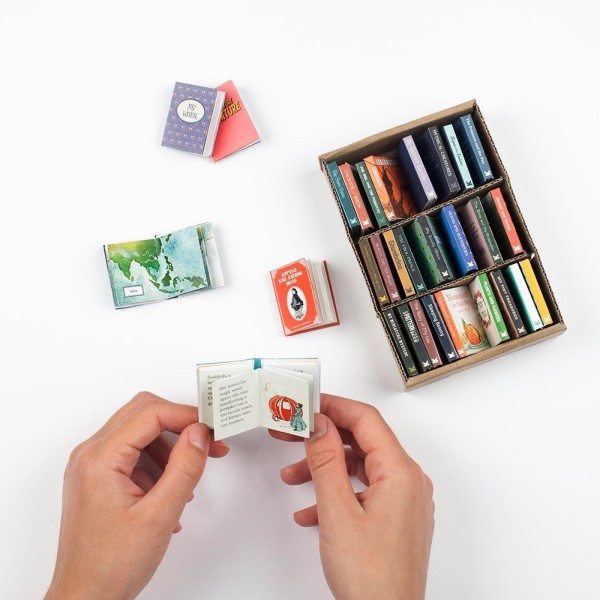
Personalized Gifts
Mini books make wonderful gifts when personalized. Create a photo book filled with cherished memories, or write a short story tailored to the recipient. Including personal anecdotes or drawings can add significant sentimental value.
- Family Recipe Book: Compile family recipes in a mini book format. Each page can include a recipe, along with photos or stories related to the dish, turning a collection of recipes into a cherished keepsake.
Themed Mini Books
Consider creating themed mini books that align with special occasions or interests. For instance, make a mini book centered around a child’s favorite character, showcasing quotes and images.
- Adventure Book: For older children or teens, a mini book that chronicles their adventures—such as vacations or milestones—can be a fantastic way to capture memories in a compact format.
Frequently Asked Questions
How to fold an A4 page into a mini book?
To fold an A4 page into a mini book, simply fold the page in half, then fold it again if you want smaller pages. Cut along the fold to create individual pages or keep it intact for a booklet effect. Use a bone folder for a clean crease.
Are mini books expensive to make?
Mini books can be very economical, especially if you use recycled materials. The costs primarily depend on the materials you choose. Basic supplies like paper, glue, and scissors are typically inexpensive, making mini book crafting an affordable project.
How many books does it take to make a mini library?
To create a mini library, there’s no set number of books required, as it depends on the space available. Consider starting with 10 to 20 mini books to create a small, engaging collection. You can continuously add more over time as your interest grows.
Conclusion: The Joy of Making Mini Books
In conclusion, understanding how to make a mini book opens up a world of creativity and fun. Mini books serve as fantastic gifts, keepsakes, and educational tools, all while providing opportunities for self-expression.
Crafting mini books can be a delightful and fulfilling activity, whether for personal enjoyment or as thoughtful gifts for others. By following the steps outlined in this guide and exploring creative ideas, you can produce unique mini books that will be cherished for years to come. Whether you’re making memories, teaching skills, or simply enjoying the artistic process, mini books are a wonderful way to express creativity and share love through the written word. Happy crafting!