Introduction: The Charm of Clay Earrings
In the world of handmade jewelry, clay earrings have emerged as a stylish and versatile option. They allow for creativity and personalization in ways that traditional materials do not. Learning how to make clay earrings offers a fulfilling experience that nurtures your artistic side while producing unique accessories. This article delves into various designs, techniques, and patterns you can explore in 2025, ensuring your creations stand out in any collection.
Gathering Materials and Tools
How to make clay earrings? To make exceptional clay earrings, having the right materials and tools is essential. This step sets the foundation for creating stunning designs efficiently. Let’s dive into what you’ll need.
Essential tools for creating clay earrings
Start with basic tools:
- Roller or rolling pin – Flattens clay evenly for cutting.
- Clay cutters – Provides clean, precise shapes.
- Craft knife – Helps in detailed trimming and adjustments.
- Needles or toothpicks – Creates holes for earring hardware.
- Texture tools – Gives your clay artistic patterns.
- Work mat – Protects surfaces and offers stability.
Quality tools make designing simpler and more enjoyable.
Types of clay to use
Choose clay as per your needs:
- Polymer clay – Ideal for detailed designs, available in many colors.
- Air-dry clay – Good for quick projects, doesn’t need baking.
- Metallic or marbled clay – Adds shimmer or elegant effects.
Polymer clay is the most popular due to its versatility.
Additional supplies you’ll need
Gather supplementary items:
- Baking tray – To cure polymer clay properly.
- Earring hardware – Hooks, posts, or hoops for finishing.
- Glue – Secures components firmly.
- Paint or glaze – Adds color and protects the surface.
- Storage containers – Stores unused clay safely.
- Sandpaper or files – Smoothens edges after baking.
With these tools and materials ready, you’re prepared to create beautiful clay earrings.
Preparing Your Workspace
Setting up a proper workspace is crucial for creating stunning clay earrings. A clean, organized environment enhances focus and minimizes unnecessary mess.
Setting up a clean and organized space
- Choose a dedicated work area: Set up on a flat surface away from distractions. A designated workspace helps stay organized.
- Use a protective mat: Lay a work mat to shield your table and ensure stability while working.
- Keep tools and materials accessible: Arrange tools, clay, and supplies within reach but maintain order.
- Good lighting: Bright, natural lighting ensures you see details clearly.
- Ventilation matters: A well-ventilated room keeps you comfortable when working for extended periods.
- Have cleaning materials ready: Use wet wipes or cloths to clean your hands and tools.
Creating a tidy workspace saves time and avoids stress while working on intricate designs.
Tips for working with clay
- Condition your clay: Knead and soften the clay to make it easier to work with.
- Avoid sticky surfaces: Wax paper or silicone mats prevent sticking and make handling smoother.
- Use clean tools: Dirty tools can ruin your designs.
- Work in small batches: Manageable amounts of clay prevent drying out.
- Wash hands before starting: Clean hands keep your clay free from dust or oil residue.
- Practice patience: Take your time to achieve precise and polished results.
By carefully setting up your workspace and using these tips, you’ll be ready to focus on creating beautiful clay earrings efficiently.
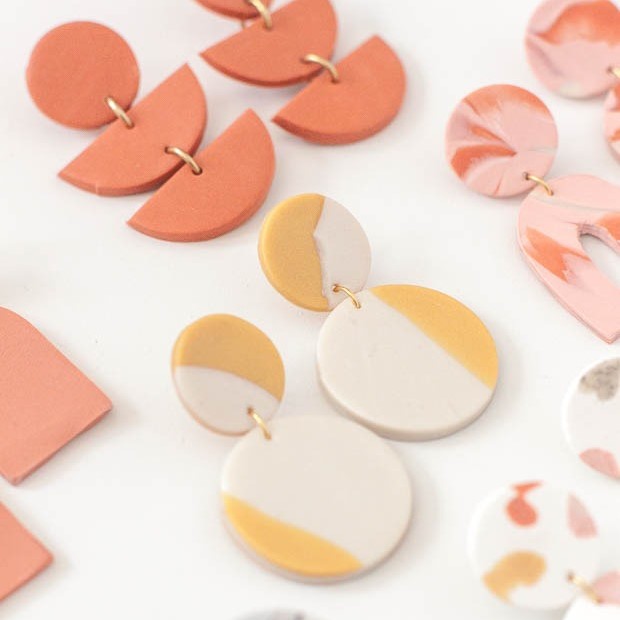
Designing Your Clay Earrings
Craft stunning clay earrings by exploring creative designs. This section will guide you through creating unique shapes, selecting colors and textures, and finding inspiration for your designs.
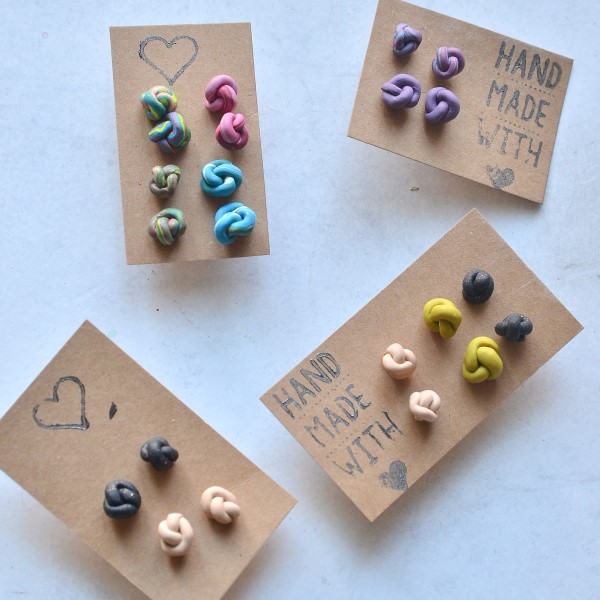
Creating unique shapes and patterns
- Experiment with basic shapes: Start with circles, squares, and triangles to keep designs simple.
- Layer shapes for depth: Combine multiple shapes to create dimension and complexity.
- Use texture tools: Imprint patterns like dots, lines, or floral designs.
- Create signature designs: Try abstract or themed patterns for a personalized touch.
- Incorporate embellishments: Add beads, stamps, or accents for uniqueness.
Take your time to refine shapes and patterns for standout designs. Creativity is key!
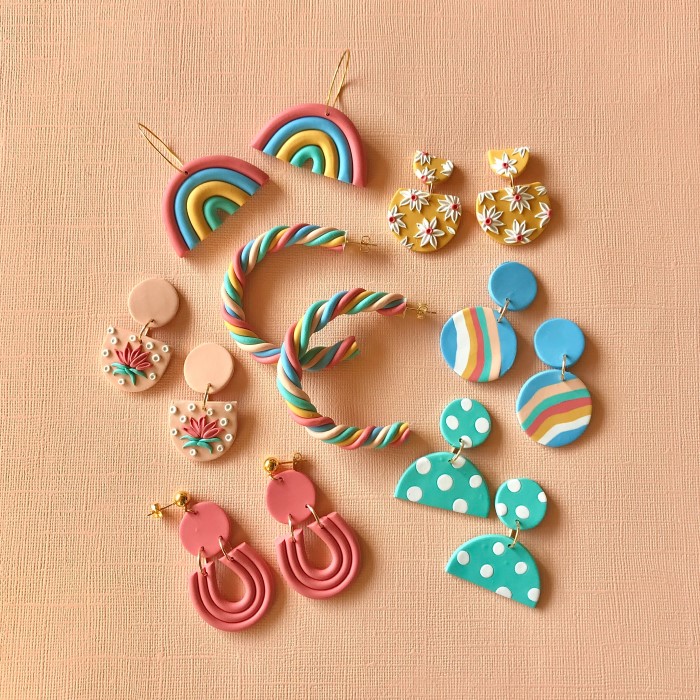
Selecting colors and textures
- Choose complementing colors: Pair colors that enhance each other for appealing combinations.
- Explore metallics and marbled clays: Create glossy or swirling effects with these options.
- Add painted details: Use paint to include intricate patterns or highlights.
- Test finishes: Try matte, glossy, or textured finishes for a unique look.
- Think of contrasts: Pair light and dark tones to make your earrings pop.
The right color and texture combination can turn simple designs into artistic pieces.
Inspiration for your designs
- Nature themes: Use plants, leaves, or animal shapes for earthy designs.
- Cultural patterns: Draw ideas from traditional art or global motifs.
- Geometric styles: Bold shapes can add a modern touch.
- Seasonal designs: Match themes with holidays or seasons.
- Look at handmade trends: Research contemporary designs online for fresh ideas.
Gathering inspiration helps you stay creative and produce one-of-a-kind clay earrings.
Shaping and Sculpting Clay Earrings
Shaping and sculpting clay earrings is a creative and enjoyable process. With the right methods and tools, you can produce precise and artistic designs that stand out.
Techniques for shaping clay
- Hand shaping: Use your fingers to mold the clay into basic and creative shapes.
- Rolling: Flatten clay evenly using a roller or rolling pin to prepare it for cuts.
- Carving: Employ craft knives or blades to cut or carve intricate patterns.
- Pinching: Shape small details or textures by pinching the clay gently.
- Layering: Stack thin layers of clay to create depth and unique forms.
- Texturing: Press stamps, lace, or texture tools to add character to designs.
Take your time experimenting with these techniques to create distinct features in your earrings.
Using molds and cutters
- Clay cutters: Use these for clean, uniform shapes like circles, squares, or hearts.
- Silicone molds: Create predefined intricate shapes like flowers or patterns with molds.
- Stencils: Place stencils on clay to trace perfect shapes or duplicate designs.
- Custom molds: Make your own molds for unique or signature designs.
- Combination tools: Pair molds with cutters to add variety to your creations.
Molds and cutters simplify the process, ensuring consistency and elegance in your designs.
Tips for achieving precise designs
- Work on a stable surface: Make sure your workspace is steady while sculpting clay.
- Focus on details: Use small tools for refining edges and details carefully.
- Keep tools clean: Prevent smudges or unwanted marks by cleaning tools often.
- Measure sizes: Ensure consistency by measuring all earrings uniformly.
- Test before baking: Review and refine designs before curing to avoid mistakes.
- Practice regularly: Build skills by creating different designs frequently.
By following these shaping and sculpting tips, you can craft clay earrings that are both beautiful and precise.
Baking and Curing Clay Earrings
Proper baking and curing are crucial for durable and professional-looking clay earrings. Follow these steps to ensure success.
Guidelines for baking clay properly
- Preheat your oven: Set your oven temperature based on the clay packaging (usually between 230°F to 275°F).
- Use a dedicated baking tray: Avoid using trays that you cook food on. Line it with parchment paper.
- Place clay evenly: Arrange pieces flat and evenly spaced. Avoid stacking to ensure even baking.
- Monitor the temperature: Use an oven thermometer for accuracy; some ovens may not display the exact temperature.
- Bake as instructed: Follow the clay packaging for the exact baking time and temperature.
- Cool completely: Allow earrings to cool completely on the tray before handling to prevent warping.
Proper baking keeps your clay earrings firm and long-lasting.
How to avoid cracks and imperfections
- Condition clay thoroughly: Ensure clay is soft and pliable by kneading it well before shaping.
- Bake at the correct temperature: Baking too hot or too cold can cause cracks or uneven textures.
- Avoid air bubbles: Press and roll the clay evenly to remove any trapped air before shaping.
- Test bake small pieces: Check a small sample first to ensure no cracking or distortion occurs.
- Use an oven tent: Cover your pieces with aluminum foil to prevent burning or discoloration.
- Cool gradually: Avoid sudden temperature changes to reduce the risk of cracks.
- Repair cracks after baking: Use liquid clay or epoxy glue to fix minor imperfections.
Following these tips will give your earrings a smooth and crack-free finish. Proper care during baking ensures that your earrings are ready for the next steps in the creative process.
Painting and Finishing Touches
Adding finishing touches to your clay earrings enhances their beauty and durability. This step allows you to bring out intricate details and protect your creation effectively.
Adding details with paint or glaze
- Choose the right paint or glaze: Use acrylic paint for vibrant colors or specialized polymer clay glazes. Test on a small piece first.
- Apply thin coats: Thin, even layers prevent clumps and ensure smooth application. Let each coat dry well.
- Create designs with precision: Use fine brushes for drawing patterns or adding details. Paint pens also work well.
- Add depth and dimension: Combine shades to make designs pop or create gradient effects.
- Seal with glaze for shine and protection: Glazing your earrings protects them and gives them a polished finish.
- Allow sufficient drying time: Let your paint and glaze cure completely before handling your earrings.
Tips for ensuring durability
- Pick high-quality materials: Use durable paints and glazes suitable for polymer or air-dry clay.
- Avoid over-firing: Ensure you bake the clay at the correct temperature before adding finishes.
- Handle with care during painting: Use tools like tweezers to avoid smudging paint or damaging details.
- Apply multiple thin glaze layers: Two to three thin layers provide better protection than one thick coat.
- Sand rough edges before painting: Use fine-grit sandpaper to smoothen surfaces, ensuring even paint application.
- Store in a cool, dry place: Protect your finished earrings from extreme temperatures and humidity.
Proper painting and finishing can transform your clay earrings. With added durability, they’ll shine for years to come.
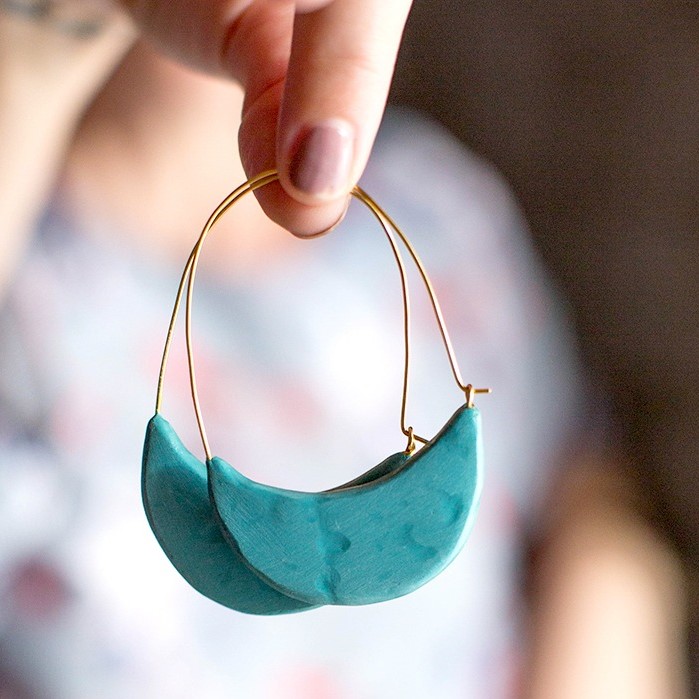
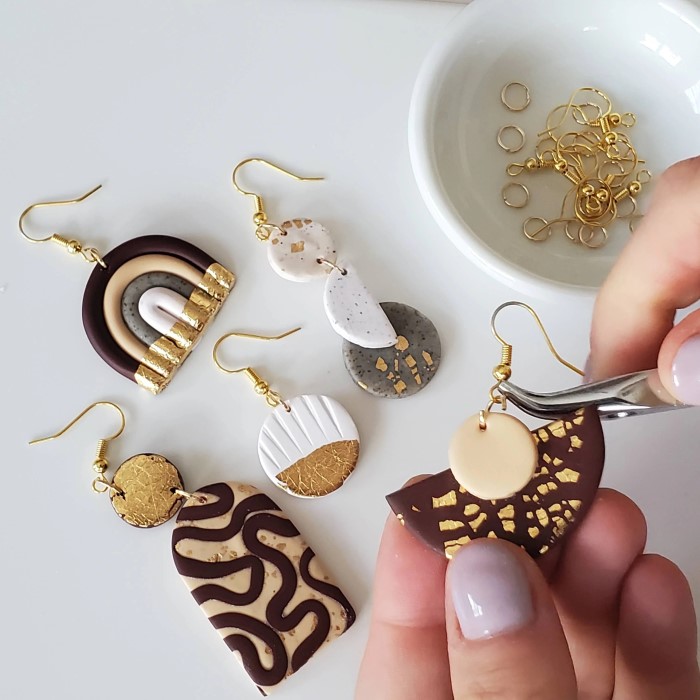
Attaching Earring Components
Attaching the right earring components is essential for a polished, wearable final product. The right hardware not only complements your design but ensures the earrings are functional and durable. Let’s explore the different types of earring hardware and methods to attach them securely.
Types of earring hardware
Choosing the appropriate earring hardware can enhance the overall look and function of your earrings. Here are common types:
- Earring hooks: Ideal for lightweight dangle earrings, offering a classic and elegant style.
- Stud posts: Suitable for smaller earrings, providing a secure fit on the earlobe.
- Hoops: Great for creating trendy and stylish hoop designs.
- Clip-ons: Perfect for non-pierced ears, offering a comfortable clasp.
- Jump rings: Small rings used to connect the clay piece to the hardware.
- Butterfly backs: Secures stud earrings onto the earlobe.
Ensure the hardware complements your clay design and matches the aesthetic you aim to achieve.
How to securely attach components
Attaching components correctly ensures your earrings are durable and wearable. Follow these steps to secure them effectively:
- Drill holes before baking: Use a needle or toothpick to create holes while the clay is soft.
- Ensure holes fit the hardware: Test hole sizes to make sure they suit the jump rings or earring hooks.
- Use jump rings: Open a jump ring with pliers, attach it to the clay piece, then add hooks or clasps.
- Secure with glue if needed: Use jewelry glue to add firmness to the attachment.
- Attach stud posts: Glue the flat surface of the post to the back of the clay piece.
- Allow glue to cure: Ensure glue dries fully before wearing or handling the earrings.
- Test the attachment: Check each earring to ensure components are secure and safe to wear.
By carefully selecting and securely attaching your earring components, your clay earrings will look beautiful and last longer.
Care and Maintenance of Clay Earrings
Proper care and maintenance can extend the lifespan of your handmade clay earrings. By following simple steps, you can keep them looking beautiful for years to come.
Cleaning and storage tips
- Clean gently: Use a soft cloth to clean your earrings without scratching their surface.
- Avoid harsh chemicals: Steer clear from cleaners that can damage the paint or glaze.
- Wash minimally: If needed, use mild soapy water but dry them immediately afterward.
- Store individually: Keep earrings in separate compartments to prevent scratches or breakage.
- Use silica gel: Store earrings with silica gel to prevent moisture damage.
- Keep away from direct sunlight: Prolonged exposure can fade colors and weaken the material.
- Avoid extreme heat or cold: Sudden temperature changes can cause material cracks.
Repairing and handling damages
- Repair minor cracks with glue: Use a strong adhesive like epoxy to fix small cracks.
- Smooth edges with sandpaper: Use fine-grit sandpaper to even out damaged areas.
- Reapply paint or glaze: Retouch worn designs with matching paint or glaze.
- Replace damaged hardware: Replace earring hooks, posts, or clasps if they lose functionality.
- Handle with care: Avoid rough handling, dropping, or forceful bending of earrings.
- Seek professional help: For significant damage, visit a jeweler familiar with clay accessories.
Taking proper care of your clay earrings ensures they maintain their beauty and remain wearable over time.
Conclusion: Embrace Your Creativity with Clay Earrings
In conclusion, learning how to make clay earrings can be a delightful and rewarding craft that allows for limitless creativity. With various clays, tools, and trending designs for 2025, your handmade clay earrings can reflect your personal style and flair. From choosing the right materials to implementing various techniques, each step of crafting adds to the character of your earrings. Enjoy experimenting with colors and patterns, and remember to take care of your beautiful creations. Your journey into the world of clay earrings is just beginning, and the possibilities are endless!