Introduction
Crafting engages children’s creativity and imagination. One delightful project to try is the paper plate frog craft. This fun activity allows kids to create a playful frog that can jump and hop. Not only is it easy to make, but it also promotes fine motor skills and coordination. In this guide, we’ll provide a step-by-step process for making your very own jumping paper plate frog. This craft is perfect for classrooms, at-home activities, or even birthday parties.
Materials Needed for the Craft
Before diving into the crafting process, gather all necessary materials. Having everything at hand will keep the activity flowing smoothly. Here’s a list of what you’ll need:
- Paper Plates: Two paper plates serve as the frog’s body and base.
- Green Paint or Green Construction Paper: This will give your frog its vibrant color.
- Scissors: For cutting out shapes.
- Glue or Tape: Essential for attaching various parts of your frog.
- Googly Eyes: Make your frog look lively and fun!
- Markers or Crayons: For additional decorative touches.
- Rubber Bands: These will enable the jumping action of your frog.
- Cardstock: Use this for the frog’s legs and any additional decorations.
Step-by-Step Instructions to Create the Jumping Frog
Now that you have your materials ready, let’s get started with the step-by-step instructions for creating your jumping paper plate frog:
Step 1: Preparing the Paper Plates
First, take your two paper plates and decide which one will serve as the body. If you want your frog to have some different textures or colors, you can paint the plates green or cover one with green construction paper.
- Color the Plates: Ensure that the plates are evenly covered. If paint is used, let the plates dry fully before proceeding to the next steps to avoid smudging.
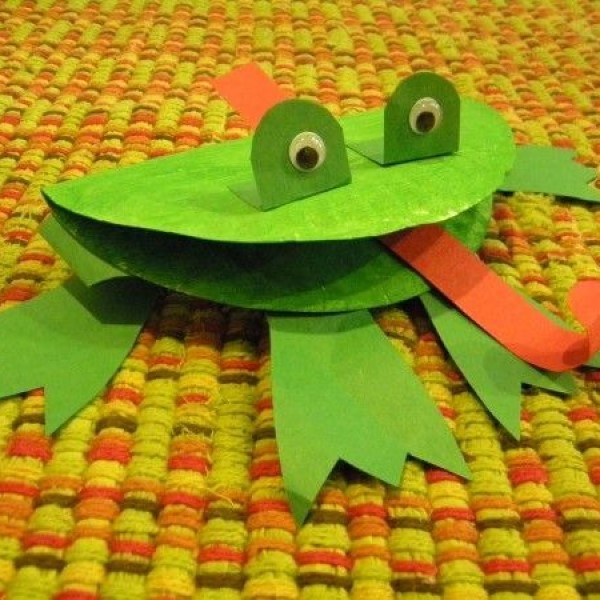
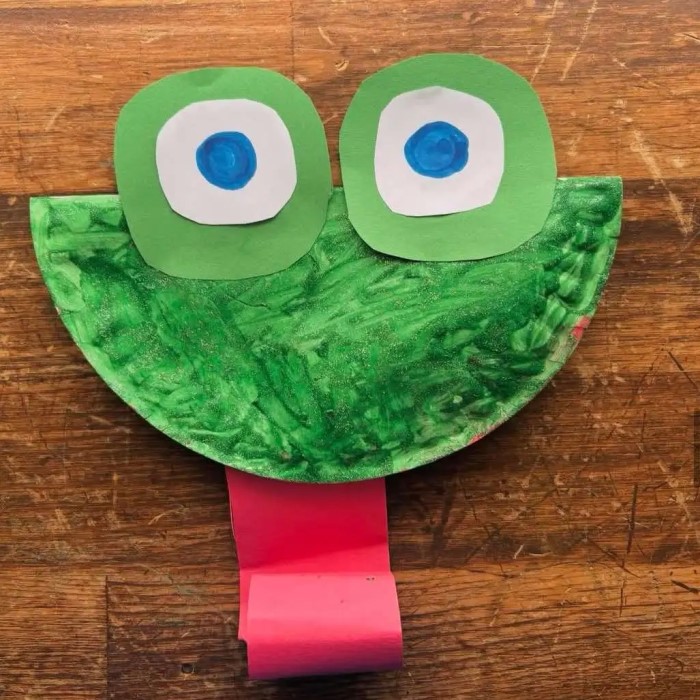
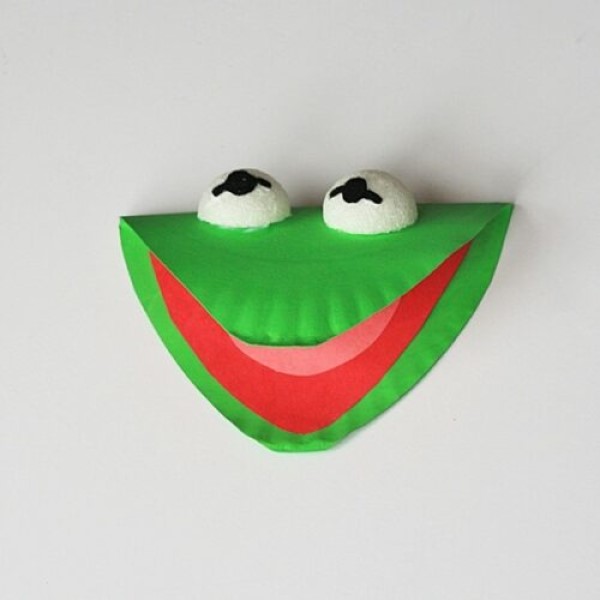
Step 2: Creating the Frog’s Face
Next, it’s time to create the frog’s face using one of the paper plates.
- Add Googling Eyes: Attach googly eyes to the upper part of the paper plate body using glue or tape. If you don’t have googly eyes, you can cut out circles from white paper and draw pupils with a black marker.
- Draw a Mouth: Use markers to draw a big smiling mouth. This adds character to your frog and makes it more appealing.
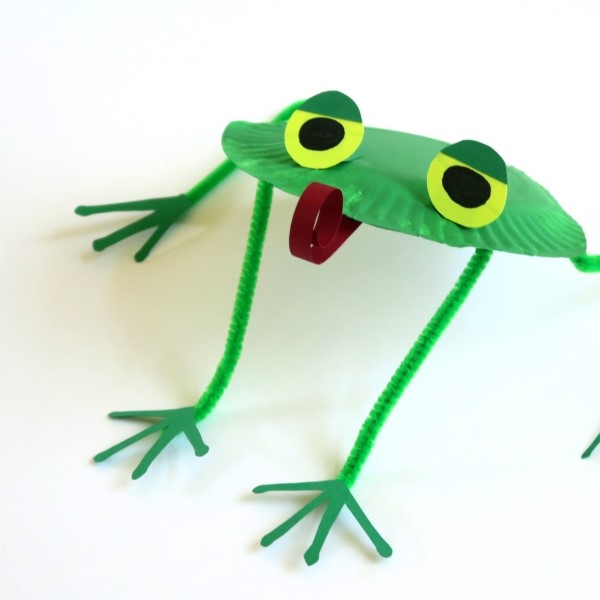
Step 3: Making the Frog’s Legs
The legs are significant for the frog’s jumping action. They can be made from the second paper plate or cardstock.
- Cut the Legs: Cut out two long rectangles or leaf shapes from the cardstock. These will represent the frog’s legs. They should be around 3-4 inches long and wide enough to attach rubber bands.
- Decorate the Legs: Paint or draw patterns on your frog’s legs to give them personality. Green is essential, but adding other colors can make your frog unique.
Step 4: Attaching the Legs
Now it’s time to secure the legs to the frog’s body.
- Secure with Rubber Bands: Use rubber bands to attach the legs to the bottom of the frog’s body. Slide the rubber bands through the legs and the paper plate base, creating a hinge that allows movement.
- Check the Movement: Ensure that the legs can move up and down. This movement is critical for the jumping action.
Step 5: Assemble Your Frog
At this point, your frog body and legs are ready.
- Connect Everything: Use glue or tape to secure any loose ends. Make sure everything is firmly attached so that the frog can withstand jumping and playing.
- Test the Jumping Function: Hold the frog upright, and pull down on the rubber bands before letting go. Watch it jump!
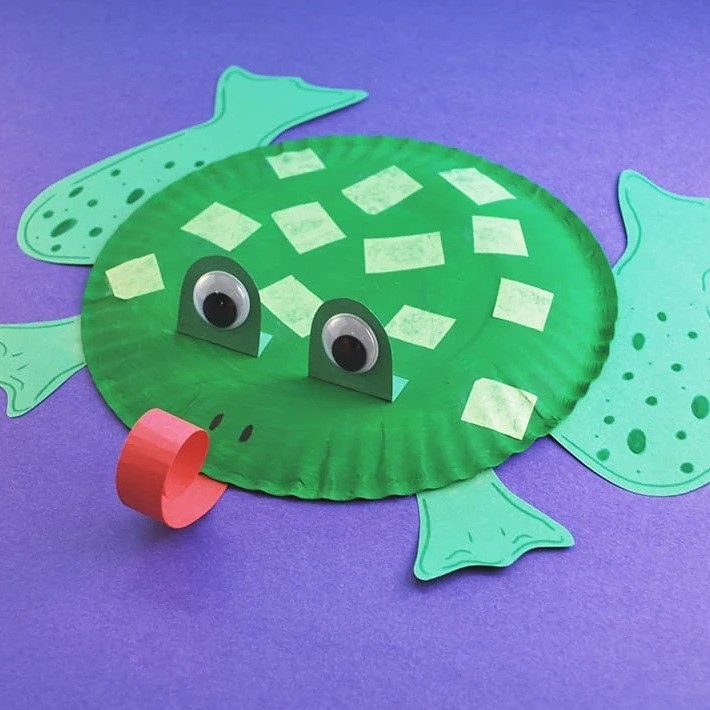
Adding Final Touches and Decor
After assembling your paper plate frog, you can add details to enhance its appearance.
- Accessorize: Consider adding small decorations like a paper crown or flowers made from construction paper. This adds a personal touch to the craft.
- Create a Pond Scene: Use blue construction paper or a plastic tablecloth to create a pond scene. Place your jumping frog on the “water” for an extra special presentation.
Discussing the Educational Value of Crafting
Engaging in crafting activities like the paper plate frog craft provides numerous benefits for children. Here are some educational aspects to consider:
Fine Motor Skills Development
- Hand-Eye Coordination: The act of cutting, gluing, and assembling parts in crafting enhances hand-eye coordination. As children manipulate their tools and materials, they learn to coordinate their movements with their visual input, which is essential for many daily activities.
- Grip Strength: Engaging in tasks like holding scissors or spreading glue helps to build grip strength in children’s hands. This strength is crucial not only for crafting but also for activities such as writing and self-care routines.
- Precision and Control: Crafting requires a certain level of precision when cutting out shapes or aligning components. By practicing these skills, children learn to control their movements better, which translates into improved dexterity.
- Sequential Motor Skills: The process of completing a craft involves multiple steps, from planning to execution. Working through these steps teaches children how to manage sequences of movements, which are foundational for more complex tasks in life.
Creative Thinking
- Imagination Activation: Crafting allows children to engage their imagination freely. They are encouraged to think beyond the ordinary and come up with unique ideas for their projects, which boosts their creative problem-solving skills.
- Exploration of Materials: Kids can experiment with different materials, textures, and colors during crafting. This exploration encourages them to push boundaries and discover new ways to express themselves artistically.
- Personal Expression: Each child can reflect their personality through their creations, which fosters a sense of individuality. Crafting thus becomes a medium for self-exploration and expression.
- Innovation: By providing an environment where children can try new things, crafting promotes innovative thinking. They learn that it’s okay to make mistakes and that these mistakes can lead to new ideas and solutions.
Follow Directions
- Understanding Instructions: Completing a craft project often involves following a set of instructions or a recipe. This process teaches children how to read and comprehend directions, which is an essential skill in all learning environments.
- Sequential Learning: Crafting reinforces the concept of sequences. Children learn the importance of doing things in the correct order, which is critical not only in crafting but in many aspects of life.
- Attention to Detail: By focusing on the details provided in instructions, children learn to pay close attention. This practice can improve their observational skills, helping them in both academic and everyday contexts.
- Problem-Solving: If a child encounters a challenge while following directions, they must think critically to resolve it. This fosters resilience and the ability to troubleshoot in various situations outside of crafting.
Environmental Awareness
- Recycling Education: Discussing the use of recycled materials like old cardboard or newspapers introduces children to the concepts of recycling and reusing. They learn the importance of reducing waste and conserving resources.
- Sustainability Practices: Engaging in eco-friendly crafting practices teaches children about sustainability. This knowledge can inspire them to think about their impact on the environment and become responsible stewards of the planet.
- Creative Repurposing: When children craft with recycled items, they practice creative repurposing. They learn to see potential in materials that may otherwise be discarded, fostering ingenuity.
- Promoting Green Habits: Encouraging eco-friendly crafting instills good habits and values in children related to the environment. It leads them to practice sustainability in their daily lives beyond crafting.
Art Appreciation
- Visual Literacy: Crafting helps children understand various artistic concepts like color theory, composition, and balance. By experimenting with these concepts, they develop a sense of visual literacy that enhances their art appreciation.
- Cultural Exposure: Through the exploration of different art forms and styles in their crafting projects, children gain insight into various cultures and artistic traditions, broadening their perspective.
- Inspiration from Artists: Introducing children to famous artworks and artists can inspire them to create. They may want to imitate styles or techniques they admire, igniting a passion for art.
- Lifelong Interest: As children engage in crafting activities, they develop a love for art and design that can last a lifetime. This interest can lead them to explore careers in creative fields or simply pursue art as a joyful hobby.
FAQs
What age group is this craft suitable for?
The paper plate frog craft is ideal for children ages 4-10. Younger children may benefit from assistance, while older kids can work independently.
Can this craft be done in a classroom setting?
Yes! This craft is perfect for classroom activities, promoting teamwork and creativity among students.
What if I don’t have all the materials?
You can substitute items! If you lack googly eyes, use buttons or draw them on paper. Be creative with what you have.
Is this craft eco-friendly?
If you use recyclable materials, this craft can be eco-friendly. Consider using repurposed items that may otherwise go to waste.
Conclusion: Enjoying Your Jumping Paper Plate Frog Craft
The paper plate frog craft is an enjoyable and educational activity that kids will love. By following this step-by-step guide, you can create a delightful jumping frog that brings joy and excitement. Crafting not only enhances creativity but also fosters important learning skills. Encourage the youngsters in your life to express their imagination and enjoy their time crafting.
By offering fun projects like the jumping paper plate frog, you can cultivate an appreciation for arts and crafts, making learning playful and engaging. Gather your materials and embark on this creative adventure today!