Introduction
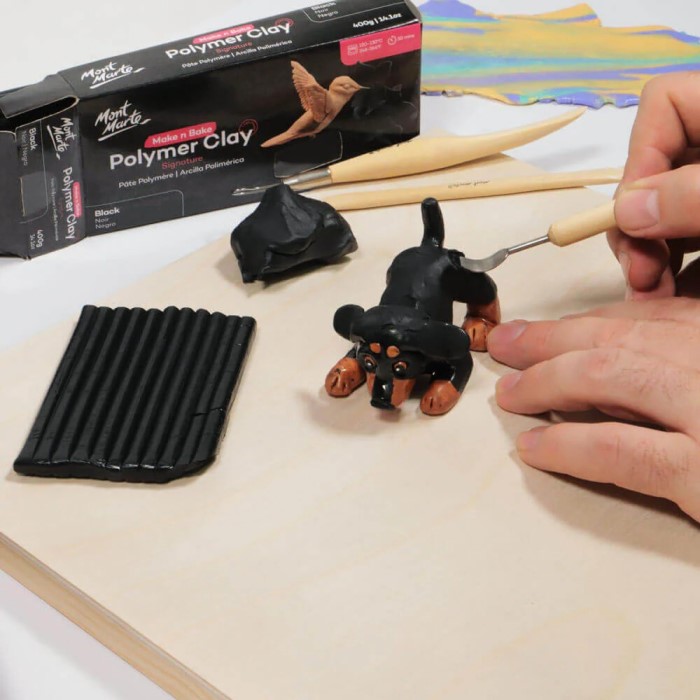
Polymer clay is a favorite among artists and crafters due to its versatility and ease of use. This man-made crafting medium is soft and easily molded, making it perfect for a variety of creative projects ranging from intricate jewelry to adorable figurines. However, an important aspect of working with polymer clay is learning how to harden polymer clay effectively. In this article, we will explore the various methods available, the science behind them, and how you can transform your artistic endeavors by ensuring your pieces are not only beautiful but durable too.
Understanding Polymer Clay
To appreciate the significance of hardening polymer clay, it’s essential to understand what this crafting medium is made of. Polymer clay is a composite material that primarily consists of polyvinyl chloride (PVC), along with plasticizers and other additives that give it flexibility and a wide range of colors. This type of clay remains soft and workable until it undergoes a curing process, which can take place in an oven. Unlike traditional clays, polymer clay won’t air-dry; it must be baked to achieve its final form.
How to Harden Polymer Clay: The Baking Process
How to harden polymer clay? Baking is the most effective way to harden polymer clay, and it’s essential to follow the manufacturer’s guidelines for best results. Here’s a step-by-step guide on how to harden your polymer clay:
1. Prepare Your Oven
- Set the Temperature: Adjust your oven settings to match the recommended baking temperature. For polymer clay, this is generally between 265°F and 275°F (130°C to 135°C). This range is critical for ensuring that the clay hardens properly without burning.
- Check with an Oven Thermometer: To ensure that your oven is accurately calibrated, consider investing in an oven thermometer. Many home ovens can have discrepancies in temperature readings, which can impact the baking process and the final quality of your clay pieces.
2. Arrange Your Pieces
- Use a Baking Sheet: Take a baking sheet and line it with parchment paper. This will provide a non-stick surface and help to prevent your items from adhering to the sheet during baking.
- Spacing is Key: When placing your polymer clay pieces on the baking sheet, make sure they are spaced apart and not touching each other. This spacing is important to ensure even baking, allowing heat to circulate freely around each piece, which leads to a better final outcome.
3. Bake According to Guidelines
- Understand the Timing: Timing is crucial when baking polymer clay. The general recommendation is to bake for a duration of 15 to 30 minutes. However, the exact time will depend on the thickness of your pieces.
- Adjust for Thickness: Thicker items will need a longer baking time to ensure they cure properly, while thinner items will bake faster. It’s vital to monitor the time closely.
- Avoid Overbaking: It’s important to remain vigilant and avoid overbaking your clay. Overbaking can result in brittle structures or burnt sections, compromising the integrity and aesthetic of your creations.
4. Cool Down
- Initial Cooling: Once the baking time is complete, allow your polymer clay pieces to cool in the oven for a few minutes with the door slightly ajar. This gradual cooling helps to prevent any sudden temperature changes.
- Prevent Cracking: Rapid changes in temperature can lead to cracking in your finished pieces. By letting them cool slowly, you enhance their durability and appearance.
5. Post-Baking Treatment
- Finishing Touches: After your pieces have cooled completely, you can proceed to fine-tune them. This may include sanding to smooth out any rough edges, polishing for a shiny finish, or painting with acrylics to add color and personality.
- Enhance Aesthetics: These post-baking treatments allow you to enhance the visual appeal of your finished product, giving your creations a professional and polished look.

Advantages of Baking Polymer Clay
How to harden polymer clay? Baking offers numerous advantages that improve both the look and longevity of your creations. First, once cured, the items become sturdy and can withstand daily use. Second, baked polymer clay offers the versatility to be manipulated further, including painting, sanding, and coating with sealants. This process also ensures that color integrity is preserved, allowing you to achieve a glossy finish or a matte look, depending on your preferences.
Alternative Hardening Techniques
While baking is the standard practice, some crafters may look for alternatives due to specific constraints such as not having an oven. Although polymer clay should ideally be baked, air-dry alternatives exist, but these are often not as durable and offer different handling characteristics. Products labeled as “air-dry clay” have different formulations that may be suitable for projects requiring no baking; just keep in mind they won’t have the same flexibility or finish as polymer clay that has been baked properly.
Common Mistakes When Hardening Polymer Clay
Even seasoned artists can make mistakes when working with polymer clay. Here are some pitfalls to avoid:
Mismatched Temperatures
- Importance of Following Guidelines: Baking guidelines are carefully crafted to ensure optimal results. Not adhering to these can lead to significant issues.
- Consequences of Overbaking: If you bake your items for too long, the results can be disastrous—often leading to burnt surfaces or unattractive discoloration, which can ruin the overall appearance and flavor.
- Results of Underbaking: On the other hand, underbaking your creations means that they won’t set properly, resulting in a soft, undesirable texture that may not hold up during handling or further cooking processes.
- Referencing Brand-Specific Instructions: Different baking materials or brands may have distinct requirements. Always check the specific instructions to ensure that you are using the correct temperature and time for the best results.
Crowded Baking Sheets
- Spacing Is Essential: Placing too many pieces close together on a baking sheet can create problems during the baking process.
- Potential Issues: When items are too close, they can fuse together, which can affect their individual shapes and lead to an uneven bake.
- Giving Your Pieces Room: Ensuring there is adequate space between pieces allows hot air to circulate freely, enabling even cooking and a uniform texture across all your baked goods.
Incomplete Cooling
- The Cooling Process Is Critical: After baking, it’s tempting to manipulate your creations right away, but patience is essential in this stage.
- Risk of Physical Damage: If you handle items before they are fully cooled, you risk causing cracks or bends in the structure, which can detract from the final appearance and integrity.
- Allowing Time for Cooling: Always allow sufficient cooling time before moving or decorating your baked goods to ensure they maintain their intended shape and quality.
Neglecting Quality Control
- The Importance of Inspection: Before placing your pieces in the oven, it’s crucial to perform a thorough inspection of each item.
- Removing Imperfections: Identifying and eliminating any fingerprints, smudges, or other imperfections prior to the hardening process greatly enhances the overall finish.
- Achieving a Polished Finish: Taking the time to ensure that all pieces are flawless before baking not only improves aesthetics but also elevates the quality of the final product.
Frequently Asked Questions
Will polymer clay harden without baking?
No, polymer clay does not harden without baking. It must be cured in the oven to achieve its intended hardness. Other types of clay may air-dry, but polymer clay is not one of them.
Can you use a hair dryer to dry polymer clay?
Using a hair dryer is not advisable for hardening polymer clay. This method does not provide uniform heating and cannot reach the high temperatures required for proper curing. It’s best to stick with baking in an oven for reliable results.
How long does it take to harden polymer clay?
Typically, polymer clay takes about 15 to 30 minutes to harden, depending on the thickness of your creations. Thicker pieces should be monitored closely to ensure they are baked thoroughly without burning.
Tips for Successful Hardening
To improve your experience with polymer clay, keep these tips in mind:
- Invest in an Oven Thermometer: This will ensure your oven is at the right temperature for baking.
- Use High-Quality Clay: The better the clay, the easier it is to work with and bake successfully.
- Experiment and Document: If you’re new to polymer clay, try different brands and baking times to find what works best for your style. Keep notes for future reference.
- Give Yourself Time: Crafting should be enjoyable and relaxed. Don’t rush the process, as thorough and careful work yields the best results.
Conclusion
Learning how to harden polymer clay is an essential skill that’ll elevate your crafting projects. By following the proper baking techniques, avoiding common pitfalls, and embracing the creative process, you can achieve stunning results that showcase your talents. The guide we explored provides you with vital knowledge about hardening polymer clay, ensuring that you can create lasting pieces that stand the test of time. Now that you are equipped with this information, dive into the world of polymer clay and let your creativity shine! Happy creating!
By understanding how to harden polymer clay correctly and the implications of the curing process, you position yourself for success, ensuring your artistic expressions are not only beautiful but also resilient.