Introduction: The Art of Drawing a Book
Drawing a book can be an exciting and rewarding artistic endeavor. Whether you’re a beginner or a more experienced artist, understanding how to draw a book adds a valuable skill to your repertoire. In this article, we will guide you through a comprehensive process for creating an impressive book drawing. You will learn about the necessary materials, step-by-step techniques, and useful tips to create stunning artwork.

Essential Tools and Materials for Drawing
Before you start learning how to draw a book, gathering the right tools is crucial. Proper materials not only make the process easier but also improve the final outcome. Here’s what you need:
Pencils, Erasers, and Paper
- Pencils: Choose pencils of varying grades, such as HB for sketching and 2B or 4B for shading. This variety helps achieve depth and detail in your drawing.
- Erasers: Use a regular eraser for corrections and a kneaded eraser for small details. A kneaded eraser allows better precision when adjusting fine lines or highlights.
- Paper: Select smooth drawing paper for sketching or textured paper if you prefer more grip. A sturdy surface helps support detailed and clean work, especially when refining edges.
Optional Drawing Accessories
- Rulers: Rulers help maintain straight lines, essential for the book’s edges and spine. While optional, they ensure crisp and professional-looking drawings.
- Blending Tools: Use blending stumps or tissues to smooth out shading. These tools enhance realistic effects, especially when shading the book’s cover or pages.
- Colored Pencils or Markers: If you plan to add color, invest in quality colored pencils or markers. These tools bring vibrancy and life to your drawings.
With the right tools, you’re well-equipped to begin your book-drawing journey. The next step is planning your drawing and selecting the ideal perspective and style.

Getting Started: Planning Your Drawing
Creating a great book drawing starts with proper planning. Having a clear idea helps simplify your process. Consider these aspects before you pick up your pencil.
Choosing the Book’s Perspective
Decide how you want the book to appear in the drawing. Common perspectives include:
- Front View: A detailed look at the book’s cover. This is great for focusing on text or design.
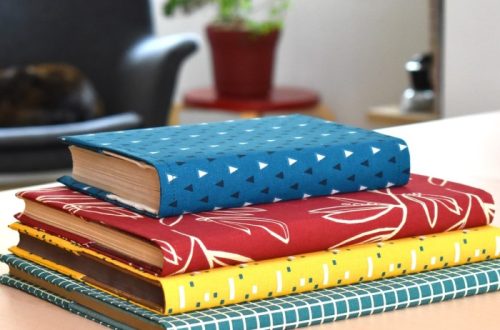
- Side View: Highlight the book’s spine and pages. This perspective works well for stacked or shelved books.
- Angled View: Combines the cover, spine, and some pages. It provides a dynamic and realistic look.
Pick a perspective based on your skill level. Beginners may find flat views easier to start with.
Deciding on the Book’s Shape and Size
Consider the book’s dimensions and design. Options include:
- Types of Books: Think of hardcover, paperback, or notebooks. Each one has unique features.
- Size: Small notebooks, medium-sized novels, or oversized coffee table books all vary in proportions.
Sketch a rough outline of the shape based on your decision. Smaller books require less detail, while larger books offer more room for creativity.
Start simple to build confidence. Choose one perspective and size before adding advanced elements.
Drawing the Book’s Basic Outline
Creating the basic outline of a book is the foundation of your drawing. A well-defined base makes it easier to add realistic details later. Follow these steps to get started.
Sketching the Rectangle or Book Cover
- Draw a Rectangle: Start by sketching a simple rectangle on your paper. This represents the book’s cover.
- Determine Proportions: Adjust the rectangle’s height and width based on the book’s size and type.
- Outline Lightly: Use light pencil strokes. Avoid pressing hard to make erasing and refining easier.
- Add Rounded Corners (Optional): If the book has rounded edges, gently curve the corners of the rectangle.
Adding Spine and Page Details
- Draw the Spine: Extend a narrow rectangle or curve from one edge of the original rectangle. This represents the spine.
- Divide the Cover: Use light lines to separate the front and spine visually.
- Include Page Lines: Draw thin, parallel lines within the rectangle to depict stacked pages. Space them evenly.
- Add Curve to Pages (Optional): For added realism, slightly curve the page lines.
- Connect the Spine and Cover: Ensure smooth lines between the spine and front cover for a cohesive look.
With these steps, your book’s basic outline is complete and ready for additional features and textures.

Adding Realistic Features
How to draw a book? To make your book drawing stand out, adding realistic features is essential. These details give the illusion of depth and authentic design.
Creating the Bookbinding Effect
- Sketch the Binding Lines: Draw lines along the spine to showcase the binding.
- Add Stitch Details: For hardcover books, include subtle stitch marks or glue ridges.
- Use Shading: Apply shading to the spine to create curves and enhance the 3D effect.
- Vary Thickness: Thinner lines show subtle bindings, while thicker ones represent durable stitching.
Adding binding effects makes your drawing look professional and realistic. Emphasize precision when sketching these details.
Drawing Stacked Pages and Edges
- Outline Each Page Layer: Use parallel lines to show stacked pages within the book.
- Create Gaps: Lightly sketch small gaps between pages for added realism.
- Draw Edge Textures: Add fine crosshatching or lines to represent textures on the book edges.
- Curve Some Lines: Slightly curve page lines to mimic the natural layout of a closed book.
- Shade Edges: Darken areas between layers to show depth and stacked pages.
These techniques help depict realistic stacked pages in your drawing. Pay close attention to spacing and shading to ensure accurate results.
Enhancing the Details
How to draw a book? Enhancing details adds realism and ensures your book drawing stands out. Fine touches elevate the overall look.
Shading and Texturing the Cover
- Apply Base Shading: Start with light, smooth shading across the book cover.
- Add Depth: Darken edges and corners for a three-dimensional effect.
- Include Textures: Create patterns like leather, cloth, or paper textures using short lines or dots.
- Blend Smoothly: Use blending tools to soften shading and eliminate harsh lines.
- Highlight Wear: Sketch slight wear marks for a vintage or used appearance.
Shading and texture bring life to your book drawing, making it feel more authentic.
Adding Highlights to Make It Pop
- Mark Bright Spots: Identify areas on the spine and corners where light naturally hits.
- Use an Eraser: Lightly erase spots for clean, bright highlights.
- Create Subtle Glow: Use white colored pencils or soft chalk for added brightness.
- Define Edges: Highlight edges for a crisp, distinct appearance.
- Stress the Cover Design: Add sparkle or lighter spots to the book title or design elements.
Highlights enhance contrast and give your drawing a dynamic, polished look.
Drawing Open Books and Complex Styles
How to draw a book? Drawing an open book or adding complex elements can enrich your artwork. These methods bring movement and storytelling to your drawing. Start with simple techniques and gradually explore more advanced features.
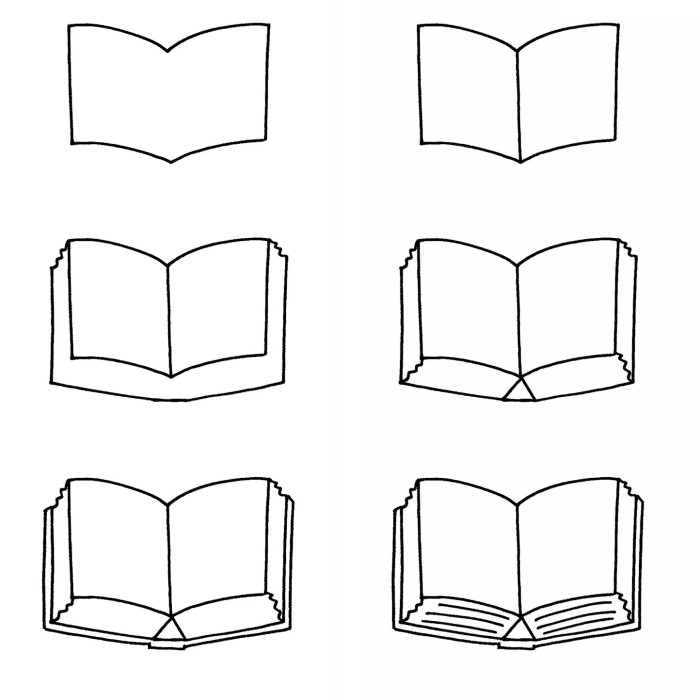
Sketching Open Pages
- Draw the Main Shape: Start with two adjoining rectangles representing the visible pages.
- Add a Center Curve: Lightly sketch a curved line to show the book’s spine.
- Outline Page Layers: Draw thin, parallel lines to depict individual pages on both sides.
- Include Page Folds: Add slight curves to some pages for a natural and flowing appearance.
- Show Depth: Shade the spine and any overlapping pages for a 3D effect.
Focusing on symmetry ensures your open book looks balanced and realistic.

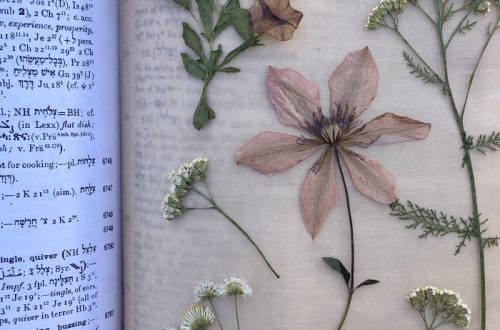
Including Text or Illustrations in the Book
- Plan the Layout: Choose simple text or small illustrations to avoid overcrowding the pages.
- Draw Light Guidelines: Use faint lines to divide the page for even spacing.
- Sketch Details Lightly: Begin with light lines for letters or drawings.
- Refine Final Details: Darken the text or illustrations once you’re satisfied with the placement.
- Add Depth with Shade: Shade areas around text or images to enhance focus.
Incorporating text or visuals adds personality and storytelling to your open book drawing. Pay attention to proportion for consistency.
Common Mistakes to Avoid
How to draw a book? Avoiding common mistakes can improve your book drawing significantly. Here are key pitfalls to steer clear of:
Proportion Errors
- Inconsistent Dimensions: Keep the book’s height, width, and spine proportional.
- Misaligned Pages: Ensure page lines are evenly spaced and aligned with the spine.
- Overlooking Perspective: Maintain correct perspective for realistic angles and depth.
- Excessive Curves: Avoid over-bending edges unless drawing an open or softcover book.
- Improper Size for Details: Adjust detail size to match the book’s dimensions for balance.
Sticking to proper proportions ensures your drawing looks natural and accurate.
Overcomplicating Details
- Adding Too Much Texture: Avoid excessive detail on the cover—it can clutter the design.
- Overdone Page Lines: Use subtle lines to show pages instead of dense, overlapping strokes.
- Excessive Shading: Balance shading for depth without making it too dark.
- Crowded Elements: Space out text, designs, or illustrations for cleaner visuals.
- Skipping Simplification: Start simple before attempting intricate patterns or designs.
Keeping details manageable maintains clarity and enhances the overall look.
Final Touches and Presentation
Adding finishing touches improves the overall quality of your book drawing. This step ensures a polished result that stands out.
Refining Line Work
- Examine the Drawing: Check for irregular lines or uneven shading.
- Smooth Out Edges: Use an eraser or sharp pencil to refine edges and curves.
- Enhance Key Details: Darken important features like the spine or cover edges.
- Clean Up Smudges: Erase unwanted marks for a neat appearance.
- Adjust Proportions: Correct dimensions and align all elements accurately.
Refining lines makes your book look cleaner and more professional. Focus on precision and symmetry.
Choosing Colors or Leaving as Black and White
Decide on Style:
- Consider Your Vision: Think about the overall mood and theme of your artwork. Do you want it to be vibrant and eye-catching or more subdued and classic?
- Choose Between Options: Decide if you prefer a colored drawing, which typically offers a dynamic and lively aesthetic, or a classic black-and-white drawing, which can convey elegance and sophistication.
Select Color Tools:
- Explore Different Mediums: Depending on your chosen style, pick from a variety of color tools.
- Colored Pencils: Ideal for precision and fine details, colored pencils allow for layered coloring and can achieve both bright and soft effects.
- Markers: Great for bold, flat colors and quick applications, markers can give your artwork a vibrant look.
- Watercolor: For a softer, more blended look, watercolor paints can create beautiful washes and gradients, adding a unique texture to your work.
Add Subtle Tones:
- Blend Soft Colors: Incorporate lighter, softer colors into your piece to create depth and dimension. This can be done by layering lighter shades over darker ones or using techniques like wet-on-wet in watercolor.
- Create Gradients: Gradually change colors in areas of your artwork to mimic natural lighting, shadows, and reflections, enhancing realism.
- Focus on Highlights and Shadows: Pay attention to where the light hits objects and where shadows fall to make your piece more lifelike.
Highlight Specific Areas:
- Choose Focal Points: Identify the areas of your drawing that you want to draw attention to, such as the cover design or key illustrations.
- Use Brighter Colors: Apply more vibrant or saturated colors to these focal areas to make them stand out from the rest of the artwork.
- Consider Composition: Make sure that the highlighted areas contribute to a balanced overall composition, enhancing the viewer’s eye movement throughout the piece.
Contrast in Black and White:
- Apply Shading Techniques: If you decide to skip color entirely, focus on using various shading methods to create depth. This may include hatching, cross-hatching, or stippling.
- Utilize Light and Dark: Establish a strong contrast between light and dark elements within your drawing to bring dimension and interest to your art.
- Focus on Texture: Employ different techniques to convey texture in your black-and-white artwork, capturing the essence and details effectively without the use of color.
Choose your method based on personal preference. Both styles can yield stunning results when done thoughtfully.
Conclusion: Transforming Your Drawings into Stunning Artwork
In conclusion, learning how to draw a book is both enriching and fun. By following the steps outlined in this guide and immersing yourself in the art of drawing, you can create incredible illustrations that capture the essence of books. Remember to practice consistently, explore different techniques, and find your unique style.
Drawing is a journey of self-expression, so don’t hesitate to experiment and enjoy the process. As you continue to explore your artistic abilities, may each stroke of your pencil bring you closer to stunning artwork that brings your vision to life. Happy drawing!