Introduction: Embrace the Art of Paper Mache
Creating a paper mache lamp is a wonderful way to add a personal touch to your home décor. Not only does it allow for creative expression, but it also provides a unique and stylish lighting solution. With just a few materials and some patience, you can transform an everyday item into a beautiful lamp. In this article, we will guide you through the process, providing tips and ideas to inspire your crafting journey.
Materials and Tools Needed
Essential Supplies for the Project
To create a paper mache lamp, gather key supplies for every stage of the project. The primary material needed is paper, such as newspapers or tissue paper, which forms the main structure. A suitable adhesive like white glue, school glue, or flour paste is essential for binding the layers. You will also need water to mix the adhesive if you’re creating paste from scratch. Consider including a drop cloth or old newspapers to protect your workspace from mess.
Additional supplies include paints for designing the lamp and decorative elements like beads or ribbons. Don’t forget to have a base structure for shaping, such as balloons or plastic molds. Having enough layers of materials can ensure the lamp is durable and sturdy over time.
Tools to Shape and Finish the Lamp
Certain tools make the shaping and finishing process easier and more precise. Scissors are crucial for cutting paper into manageable strips. A mixing bowl is needed for preparing the adhesive paste efficiently. Brushes or sponge applicators help spread the paste evenly on the structure.
You may also need sandpaper to smooth the dried surface of the lamp for painting. For electrical assembly, wire cutters and a small screwdriver can be useful. People keen on unique designs may need stencils or stamps to add details during the painting process. With the right tools, your paper mache lamp will turn out polished and artistic.

Choosing the Perfect Lamp Design
Choosing the right design is the first step in creating a stunning paper mache lamp. The shape and style you pick will greatly influence the overall look and functionality. Consider where you’ll place the lamp, its purpose, and your personal style.
Exploring Different Styles and Shapes
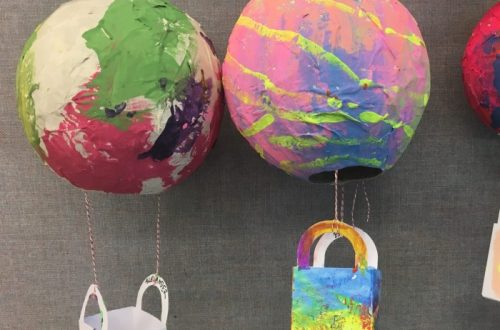
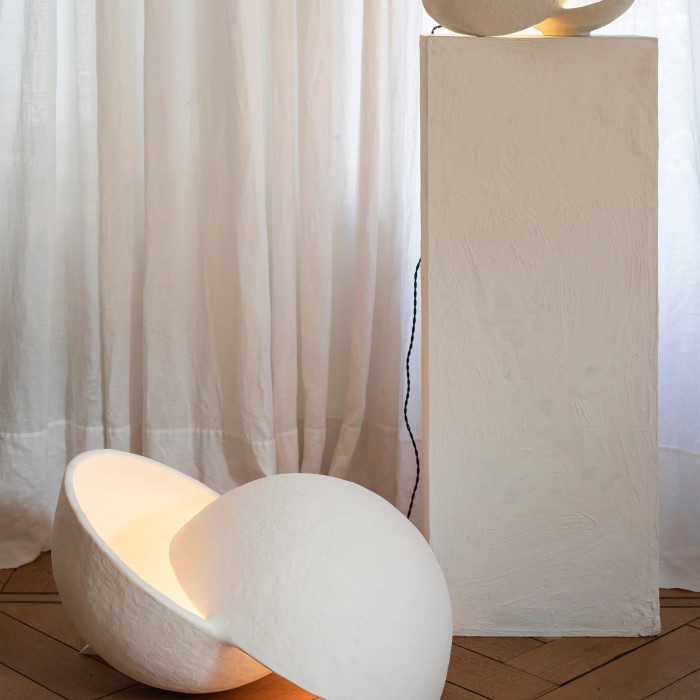
There are plenty of styles to choose from for your paper mache lamp. Round or globe-shaped lamps provide a classic look, perfect for general rooms. Geometric shapes like cubes or triangles can offer a modern, edgy vibe. For a whimsical touch, explore irregular or free-form designs. Consider tapering or flaring shapes for more intricate and unique lamps. Always balance aesthetics with practicality, like ensuring sufficient light diffusion.
Choosing a Base Structure (e.g., Balloons or Molds)
The base structure is essential for shaping your lamp. Balloons are a popular and budget-friendly option for rounded designs. Plastic molds offer stability and can be reused for more complex shapes. If you’re experimenting with angular designs, cardboard boxes or sturdy objects wrapped in plastic can work well. Choose a sturdy base that complements your chosen design and can hold its shape during the drying process.
Preparing the Paper Mache Mixture
Getting the perfect mixture is key for a durable paper mache lamp. This mixture acts as your adhesive, holding the layers of paper together securely. Whether using a simple flour paste or glue-based formula, a proper balance of ingredients ensures a smooth and strong base for your lamp.
Ingredients for the Paste
Creating a paper mache paste requires just a few basic ingredients. The most common options include:
- Flour and Water: Mix plain flour with water for an affordable and effective paste. Add a pinch of salt to prevent mold.
- White Glue: Use school glue or white craft glue diluted with water for a smoother texture.
- Cornstarch Paste: A combination of cornstarch and water works well for a thicker, glossy paste.
Regardless of your choice, water is always essential to achieve the right consistency. Keep extra flour or glue on hand for adjustments if the mixture feels too thin or thick.
Step-by-Step Guide to Making the Mixture
Follow these steps to prepare your paste effortlessly:
- Gather Ingredients: Choose your preferred adhesive base—flour, glue, or cornstarch—and measure it.
- Mix the Base: In a mixing bowl, combine your adhesive with water in equal parts.
- Stir Thoroughly: Use a spoon or whisk to mix until smooth and lump-free.
- Adjust Consistency: Add more adhesive for thickness or water for a thinner paste.
- Optional Heating (for flour paste): Simmer on low heat for a few minutes to increase stickiness.
- Cool Completely: Let the mixture cool before applying it to the paper.
By preparing a high-quality paste, your paper mache lamp will have a sturdy and flawless finish.
Building the Paper Mache Base
Building the base structure is a critical step in creating a durable lamp. This process involves applying layers of paper mache to form the lamp’s body and ensuring it’s sturdy for long-term use.
Applying Layers of Paper Mache
- Prepare Your Workspace: Lay down a drop cloth to prevent messes and gather your paper strips.
- Dip Paper Strips in Paste: Soak the strips in your prepared paste. Remove excess paste using your fingers.
- Apply the First Layer: Place the strips over your base structure, such as a balloon or mold.
- Smooth Strips: Flatten the paper to avoid air bubbles. Overlap edges for better strength.
- Add Layers: Repeat the process with multiple layers, allowing each layer to dry partially.
- Focus on Even Coverage: Ensure the entire structure is covered evenly for stability.
Remember, patience is key. Rushing can result in weak or uneven layers.
Shaping and Reinforcing the Structure
- Shape While Wet: Adjust the strips gently while the layers are moist for desired contours.
- Add Details: Use folded paper pieces to form raised designs or thickness in specific areas.
- Reinforce the Base: Add extra layers where the lamp will bear more weight or stress.
- Smooth the Surface: Once the base dries, sand it lightly if needed for a smooth finish.
This step sets the foundation for both functionality and design of your paper mache lamp. Proper layering and shaping ensure a sturdy, long-lasting piece.
Drying and Strengthening the Lamp
Drying the base is crucial for a sturdy paper mache lamp. It ensures durability and prevents damage. A proper drying setup will help the structure maintain its shape. Once dried, additional techniques can strengthen the lamp further.
Tips for Efficient Drying
- Use a Ventilated Area: Ensure the drying space has good airflow to speed up the process.
- Place the Lamp on a Stand: Elevate the lamp to allow air circulation for all sides.
- Room Temperature: Keep the temperature warm to encourage faster drying without affecting the structure.
- Avoid Direct Sunlight: Direct sunlight can lead to uneven drying and potential deformities.
- Turn the Lamp: Rotate the lamp occasionally to ensure all areas dry evenly.
- Monitor Humidity: High humidity slows drying, so use a fan or dehumidifier if necessary.
Following these tips, your lamp will dry efficiently without compromising its stability.
Methods to Avoid Cracks or Deformities
- Dry in Layers: Allow each layer to dry partially before adding the next one. This prevents cracking.
- Control Paste Quality: Ensure the paper mache paste is smooth and evenly applied to avoid weak spots.
- Monitor the Structure: Check the base regularly to correct any distortions before it fully dries.
- Add Reinforcement: Strengthen areas prone to stress by adding extra layers or folded paper.
- Sand Carefully: Use sandpaper lightly after drying to smooth surfaces without damaging layers.
- Prevent Over-Drying: Moisture control stops the paper from becoming brittle and prone to cracks.
By using these techniques, you can create a well-shaped, crack-free paper mache lamp.
Designing and Painting the Finished Lamp
Designing and painting your paper mache lamp bring it to life. These steps focus on adding color and creativity to enhance its look.
Painting Techniques for Paper Mache
- Prepare the Surface: Ensure your lamp’s surface is smooth and fully dry before painting.
- Choose Suitable Paints: Use acrylic paints for vibrant colors and good coverage. Watercolors can add subtle tones.
- Prime the Lamp: Apply a base coat to ensure even colors and to conceal any paper imperfections.
- Start with Light Shades: Begin with lighter colors, then layer darker shades for depth and accents.
- Use Sponges or Brushes: Sponges create texture, while brushes are ideal for details and patterns.
- Apply Stencils: Use stencils for consistent shapes, like stars, leaves, or floral patterns.
- Blend Colors: Gradual blending of shades adds a magical, gradient-like effect.
- Add a Protective Coat: Seal the paint with a clear varnish or sealant for durability and shine.
Adding Decorative Elements
- Choose Embellishments: Use beads, ribbons, or glitter to give your lamp an eye-catching finish.
- Create Design Contrast: Add bold colors or metallic foil for standout designs.
- Glue Decorative Items: Attach elements using strong craft glue to ensure they stay in place.
- Add Fabric or Thread: Wrap parts of your lamp with colorful threads or fabric for a unique touch.
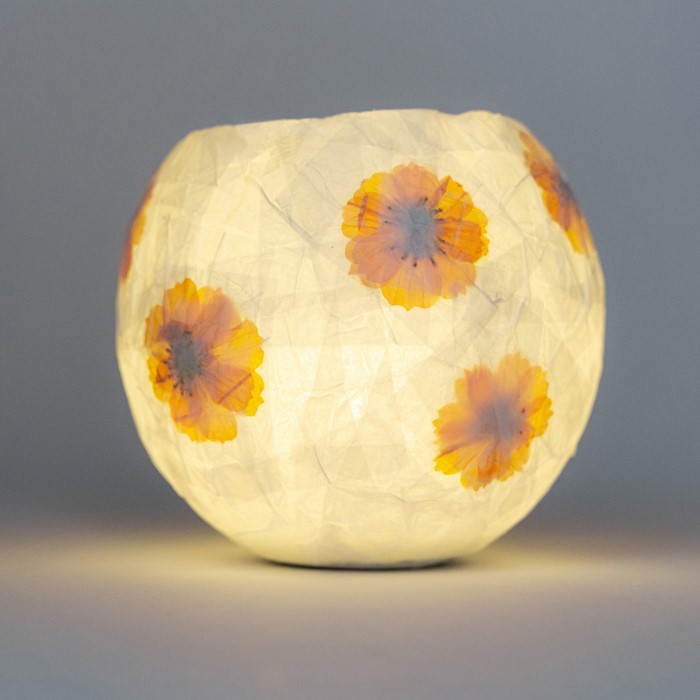
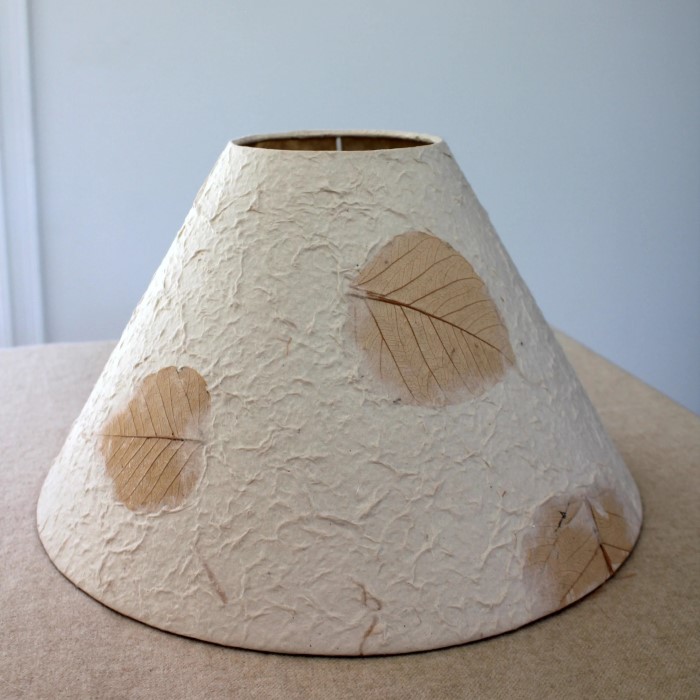
- Incorporate Natural Materials: Use dried leaves, pressed flowers, or twigs for an artistic, organic look.
- Style with Lighting: Match decorations with the glow of the bulb for a cohesive aesthetic.
With thoughtful painting and decorative accents, your paper mache lamp will be a stunning, personalized masterpiece.
Assembling the Electrical Components
Adding electrical components to your paper mache lamp is the final step. This process ensures the lamp is functional and safe to use. Following the right steps is crucial to avoid risks.
Installing the Light Bulb and Wiring
- Choose the Bulb and Holder: Select a light bulb with the appropriate wattage and size. Ensure it fits the holder securely.
- Prepare the Wiring Kit: Use a wiring kit that includes a bulb holder, wire, and plug. Check the instructions provided with the kit for guidance.
- Make an Opening: Carefully cut or carve an opening in the paper mache base for the bulb holder. The hole should match the holder’s size exactly.
- Place the Bulb Holder: Insert the bulb holder into the opening. Ensure it sits securely within the structure.
- Connect the Wires: Attach the wires from the holder to the power cord. Follow the wiring kit’s instructions for proper connections.
- Secure the Connections: Use electrical tape or connectors to secure the connections and prevent loose ends.
- Test the Setup: Plug the lamp into a socket to ensure the bulb functions correctly.
- Install the Bulb: Tighten the light bulb in the holder carefully.
Ensuring Safety with Electrical Installation
- Use Quality Materials: Always choose certified electrical kits and high-quality wires to ensure safety.
- Double-Check Connections: Inspect all connections to ensure they are secure and free from exposed wires.
- Avoid Overheating: Use LED or low-wattage bulbs to reduce heat and prevent damage to the lamp.
- Protect the Wires: Cover wires with shrink tubes where needed for extra insulation.
- Keep Wires Organized: Tuck wires neatly into the base or use clips to keep them in place.
- Test for Short Circuits: Test the lamp using a multimeter before regular use.
- Supervise Final Use: Check the bulb and wiring periodically to ensure no damage occurs over time.
By carefully assembling the electrical components, your paper mache lamp becomes a functional and safe piece of art.
Tips and Tricks for a Successful Paper Mache Lamp Project
Creating a paper mache lamp can be fun but requires some smart decisions for the best results. These tips will guide you through common pitfalls and inspire new ideas.
Common Mistakes to Avoid
- Using Thin Paper: Avoid using very thin paper, as it may tear during the process.
- Skipping Layer Drying: Make sure each layer dries partially before applying the next one.
- Uneven Paste Mixing: Poorly mixed paste can lead to lumps or weak bonding.
- Overloading Decorations: Avoid adding too many embellishments that could overwhelm the lamp’s design.
- Ignoring Ventilation During Drying: A poorly ventilated drying area can leave the structure damp.
- Choosing Inappropriate Bulbs: Using high-wattage bulbs can damage the paper mache base.
- Neglecting Safety Checks: Always double-check electrical connections to ensure the lamp is safe to use.
- Rushing the Process: Patience is key for a neat, durable lamp. Allow time for each step.
Creative Add-Ons and Variations
- Add a Pop of Color Inside: Paint the inside of the lamp with metallic or reflective shades.
- Create Unique Shapes: Experiment with layering paper mache over irregular or custom-shaped molds.
- Incorporate Personal Touches: Utilize family photos, unique patterns, or favorite quotes in your design.
- Integrate Textures: Add materials like fabric or textured paper for a tactile effect.
- Lighted Cut-Out Designs: Carve small shapes or patterns into the base for artistic light diffusion.
- Seasonal Themes: Create lamps inspired by seasons, holidays, or special events.
- Add A Base Stand: Use a wooden or metal stand to elevate your finished lamp.
- Experiment with Multicolor Lights: Install a color-changing LED bulb for dynamic lighting effects.
A creative approach and attention to detail will make your paper mache lamp a truly unique masterpiece.