Introduction
Making a paper mache pinata at home can be a fun and rewarding project for people of all ages. These colorful creations are not just for parties; they can also serve as exciting decorations for any celebration, including birthdays, holidays, or school events. The process of crafting your pinata allows for creativity and personalization, resulting in a unique piece that reflects your artistic flair.
In this DIY guide, we will walk you through the entire process of making a colorful paper mache pinata, starting from the materials needed to the final touches. By the end of this article, you will have the knowledge and inspiration required to impress your guests with your homemade pinata!
Essential Materials Needed
A. Basic Ingredients
Creating a paper mache pinata requires some specific materials and ingredients. Gather everything before starting your project to streamline the process.
- Newspapers: Old newspapers are ideal for crafting your pinata. They are easy to tear and work well when wet, making them a staple in paper mache projects.
- Flour and Water: The traditional recipe for paper mache paste includes mixing one part flour with two parts water. This mixture creates a strong adhesive.
- Balloon: A large balloon serves as the base structure for your pinata. Once the paper mache dries, you can pop and remove the balloon to leave a hollow shape.
- Paint and Paintbrushes: To decorate your pinata, gather brushes and non-toxic acrylic paints. You can select vibrant colors to bring your pinata to life.
- Decorative Items: Consider collecting additional decorative materials, such as glitter, stickers, or crepe paper, to add extra flair to your creation.
B. Additional Tools
In addition to the materials listed above, consider having various tools on hand to simplify the task.
- Mixing Bowl: Use a bowl for mixing your paper mache paste. Ensure it is large enough to accommodate the mixture.
- Scissors: Keep a pair of scissors for trimming your paper strips to desired lengths.
- Plastic Coverings: Protect your work area by using plastic tarps or old newspapers. This will minimize cleanup.

Step-by-Step Guide
Step 1: Prepare Your Workspace
Before beginning, it is essential to ensure your workspace is clean and organized.
- Cover-Up: Lay down a plastic sheet or old newspapers to catch any spills or drips from your paste. This setup simplifies cleanup and protects your surfaces.
- Gather Materials: Arrange all your supplies within easy reach. This organization helps streamline the crafting process.
Step 2: Create the Paper Strips
Your next task is to prepare the strips of paper that will form the body of the pinata.
- Tearing the Newspaper: Tear the newspaper into strips, aiming for about 1 to 2 inches wide and 6 to 10 inches long. Uniform strips will help achieve a smoother finish on the final product.
- Creating Different Shapes: Depending on the design of your pinata (e.g., a traditional donkey shape or a simple star), vary the lengths of the strips accordingly. This flexibility allows you to customize your project as you go.
Step 3: Make the Paper Mache Paste
Creating the paste is the next critical step in your pinata-making process.
- Mix the Ingredients: In your mixing bowl, combine one part flour with two parts water. Stir thoroughly until you achieve a smooth consistency without lumps. This mixture will serve as your adhesive for layering the newspaper.
- Adjust for Consistency: If the paste appears too thick, gradually add more water until it reaches a coating consistency. Strive for a smooth texture that easily adheres to the paper strips.
Step 4: Begin the Mache Application
Now it’s time to start applying the paper mache layers to the balloon.
- Soak the Strips: Take a strip of newspaper and dip it into the paste until fully saturated. Allow excess paste to drip off before applying it to the balloon.
- Layering Process: Begin wrapping the soaked strip around the inflated balloon. Overlap the edges to ensure complete coverage. Continue applying strips, working your way around the balloon until 2 to 3 layers have been added.
- Support and Drying: Once layers are applied, place the balloon in a bowl or on an overturned cup for support. Ensure that it stays secure while the layers dry.
Step 5: Let the Pinata Dry
Drying is a crucial step that determines the strength of your pinata.
- Drying Time: Allow your pinata to dry for at least 24 hours. Ensure it is in a well-ventilated area to promote even drying.
- Check for Dampness: Before proceeding, give it a gentle poke to ensure no wetness remains. If the paper feels damp, allow more time to dry.
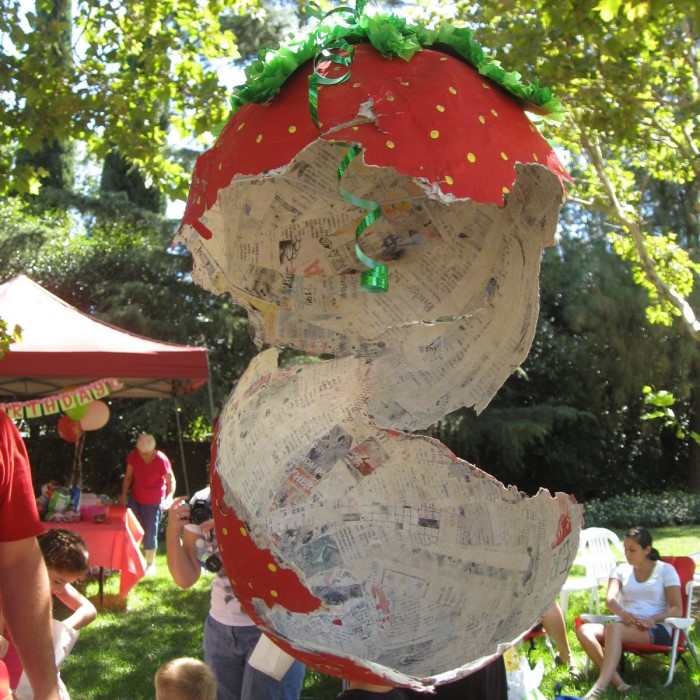
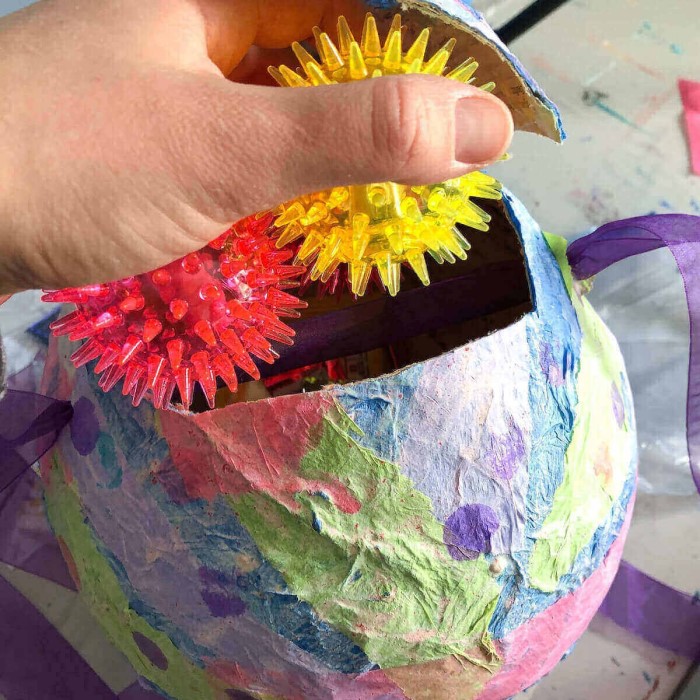
Step 6: Pop the Balloon
Once your pinata has dried completely, it’s time to reveal the structure.
- Removing the Balloon: Carefully pop the balloon using scissors or a pin. As the balloon deflates, gently peel it away from the interior of the pinata.
- Inspect the Structure: After popping, check the pinata structure for strength. If any areas seem weak, you can reinforce them by adding additional layers of paper mache.
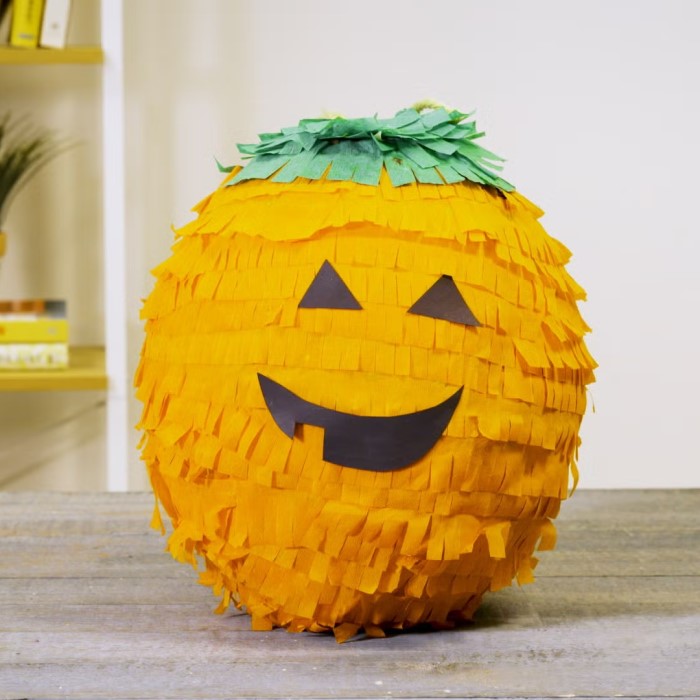
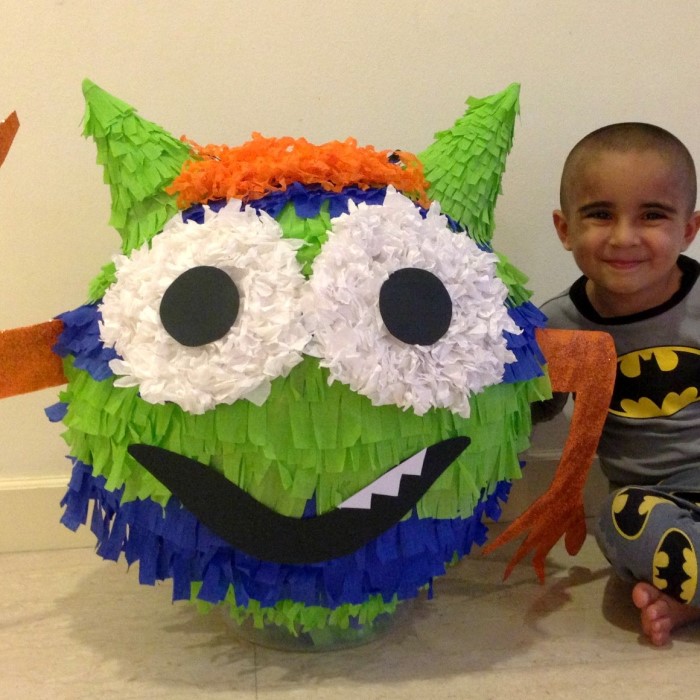
Step 7: Decorate Your Pinata
Now comes the fun part—decorating your completed pinata!
Base Coat for Painting:
- Purpose of a Base Coat: A base coat serves as a foundation for your painting, providing an even surface and improving the vibrancy of the colors applied later.
- Choosing a Color: If desired, start by using a base coat of white or another light-colored paint, as these shades help brighter colors pop and provide better coverage.
- Application Technique: Apply the base coat evenly across the entire surface of the pinata using a broad brush or sponge. Make sure to cover all areas thoroughly, including any hard-to-reach spots.
- Drying Time: Allow the base coat to dry completely before proceeding to the next step. This ensures that the subsequent layers adhere properly and maintain even colors.
Final Touches:
- Design Selection: Once the base coat is dry, it’s time to unleash your creativity by painting your desired designs or patterns onto the pinata. You might choose seasonal motifs, characters, or abstract designs based on the occasion.
- Color Choices: Use bright, bold colors that will stand out against the base coat. Consider using complementary colors to enhance visual appeal and make your designs more striking.
- Adding Decorative Elements: To take your pinata to the next level, consider incorporating additional decorative elements such as:
- Glitter: Sprinkle or apply glitter to specific areas for a fun, sparkly effect that catches the light.
- Stickers: Use themed stickers to quickly add depth and texture to your designs without needing to paint intricate details.
- Magazine Cutouts: Get creative by using magazine cutouts to add images or words, making your pinata unique and personalized.
Hang Your Pinata:
- Securing Your Pinata: Once all painting and embellishments are thoroughly dried, it’s time to hang your pinata. Choose a secure method to ensure it stays in place during use.
- Selecting a Hanging Method: Attach a strong string or rope to the top of the pinata:
- Ensure that the string or rope is sturdy enough to support the weight of the pinata.
- Double-knot the string for added security and make sure it is evenly balanced.
- Finding the Right Location: Look for a suitable place to hang the pinata, such as a sturdy beam, tree branch, or ceiling hook, allowing enough space for participants to swing at it safely.
- Height Considerations: Hang the pinata at a height that is challenging yet reachable, adding an element of fun to the game while ensuring safety for all participants involved.
FAQs
How to make a piñata with paper mache?
To make a piñata using paper mache, prepare strips of newspaper and a paste made from flour and water. Layer the strips over an inflated balloon and let it dry thoroughly. Once dry, pop the balloon and decorate your piñata as desired.
How many layers of paper mache does a piñata need?
Typically, 2 to 3 layers of paper mache are recommended for a piñata. This number provides adequate strength while ensuring the structure is not too thick. If you want a more durable piñata, you can add additional layers.
Is paper mache good for piñatas?
Yes, paper mache is excellent for making piñatas. It creates a lightweight yet durable structure that can withstand the impact from attempts to break the piñata, making it a popular choice for this craft.
What are the 4 ingredients for paper mache?
The four basic ingredients for traditional paper mache include:
- Newspaper
- Flour
- Water
- Optional: Salt (to prevent mold growth)
Conclusion
In conclusion, making a paper mache pinata at home is an enjoyable and creative endeavor. By following the steps outlined in this DIY guide, you can create a beautiful and personalized pinata that will surely impress at any celebration. From preparing the materials and creating the layers to decorating the final product, the entire process is filled with creativity and fun.
So gather your supplies, unleash your imagination, and get started on your colorful paper mache pinata! Enjoy the crafting process, and don’t forget to take pictures of your artistic creation to share with friends and family!
This detailed guide will help anyone looking to create a paper mache pinata, ensuring an exciting and rewarding crafting experience!