Introduction
Creating colorful paper mache flowers with kids is an excellent way to unleash their creativity while spending quality time together. This hands-on project not only allows kids to express themselves artistically but also teaches them important skills in crafting and patience. In this blog post, we will provide a comprehensive guide with tips on crafting these beautiful decorations, ensuring that both you and your children have a fun and rewarding experience.
What is Paper Mache?
Paper mache, a French term meaning “chewed paper,” is a crafting technique that has been used for centuries. It involves creating a paste from materials such as flour and water, which is then applied to strips of paper. Once layered and dried, the mixture hardens to form a sturdy mold. Paper mache can be shaped into various forms, making it perfect for creating decorative items like flowers.
Benefits of Crafting with Kids:
- Enhances Creativity: Working with paper mache allows children to experiment with colors and shapes.
- Improves Motor Skills: The process of tearing paper, applying the paste, and assembling flowers improves fine motor skills.
- Encourages Problem-Solving: Crafting challenges kids to think critically about how to approach their projects.
Overall, crafting paper mache flowers offers many learning benefits while allowing kids to express their creativity.
Materials Needed
Before diving into the crafting process, gather the necessary materials. Here’s a comprehensive list to ensure that you have everything you need:
Paper
- Types of Paper: You can utilize a variety of paper types for your project. Common choices include newspaper, which is readily available and easy to tear; tissue paper, which adds a delicate finish; and any scrap paper you might have lying around your home. This flexibility allows you to use resources that you already have on hand, making it an economical option for crafting.
- Creative Uses: Each type of paper can lend different textures and colors to your project. For example, using colored scrap paper can add vibrancy, while newspaper can create an interesting layered effect when mixed with other materials. Mix and match different types of paper to achieve unique looks and styles.
Glue
- White Glue: White glue, often known as school glue or PVA glue, is a versatile adhesive that is safe and effective for paper mache projects. It dries clear and provides a strong bond between the paper layers. Children can easily apply it since it’s straightforward to use and clean up.
- Homemade Paste: You can make a simple paste using flour and water, which is a traditional method for paper mache crafting. To create the paste, mix flour with water in a bowl until you achieve a thick, smooth consistency. This option is cost-effective and non-toxic, making it suitable for children’s projects.
Balloon or Mold
- Shaping Flowers: Balloons are a fantastic option for creating round or bulbous shapes when working with paper mache. Inflate the balloon to your desired size, and once the paper mache is dry, you can deflate it to reveal your shape.
- Alternative Molds: In addition to balloons, you can use plastic bottles or any other object that can serve as a base for your flowers. Look around the house for containers or shapes that might inspire your design. For instance, an inverted plastic bottle can create a unique flower shape.
Paint
- Acrylic Paints: Non-toxic acrylic paints provide a wide range of vibrant colors, ideal for decorating your paper mache creations. These paints are easy to work with; they adhere well to paper mache surfaces and dry quickly, allowing for multiple layers if desired.
- Creative Possibilities: Using different colors can enhance the beauty of your flowers. Encourage children to experiment with blending colors or using sponges and brushes to create different effects. You can also add details with fine brushes for added artistry.
Craft Scissors
- Essential Cutting Tool: Kids will need craft scissors to cut the paper into manageable strips or shapes. Opt for safety scissors designed for children, which are easier to handle and help minimize accidental cuts.
- Encouraging Independence: Providing children with their own scissors allows them to participate actively in the crafting process. They can learn how to measure and cut pieces, fostering creativity and improving fine motor skills as they work.
Brushes
- Application Tools: Brushes are essential for applying both glue and paint, making it easier for children to cover surfaces effectively. Using different brush sizes, kids can experiment with various techniques and achieve different finishes.
- Easier for Younger Kids: Brushes also help prevent messy hands since they keep the adhesive and paint contained to the project surface. This allows for a cleaner crafting experience, encouraging kids to enjoy the process without fear of making a mess.
Old Cloths
- Cleanup Supplies: It’s a good idea to have old cloths or paper towels on hand to clean up any spills or messes during the crafting process. Children can be messy, especially when working with glue and paint, so having these ready can facilitate an easy cleanup.
- Encouraging Responsibility: Teaching kids to clean up after themselves helps instill responsibility and keeps the workspace tidy. Designate a specific area for messes and encourage them to use the cloths for any glue drips or paint spills.
By assembling these materials in advance, you’ll create a smoother crafting experience and allow your kids to focus on the fun aspects of the project.
Step-by-Step Guide to Crafting Paper Mache Flowers
Step 1: Prepare the Paper Mache Paste
To begin, you must create the paper mache paste. This can be done easily using flour and water. Mix one part flour with two parts water in a bowl until it reaches a smooth, consistent texture. Some parents prefer using glue instead of flour for an easier cleanup process. Choose whichever option works best for you and your children.
Step 2: Create the Paper Strips
While the paste settles, have your kids tear or cut paper into strips. The size of the strips can vary based on personal preference, but they should be about 1 to 2 inches wide. Smaller strips work well for detailed areas, while larger strips can create sturdy bases.
Step 3: Inflate the Balloon or Prepare the Mold
For this project, you can use an inflated balloon as the foundation for the flower. Inflate the balloon to your desired size and tie it securely. If using a different mold, ensure it is clean and will not stick to the paper mache. Depending on the flower design you choose, preparation steps may slightly differ.
Step 4: Apply the Paper Mache Layers
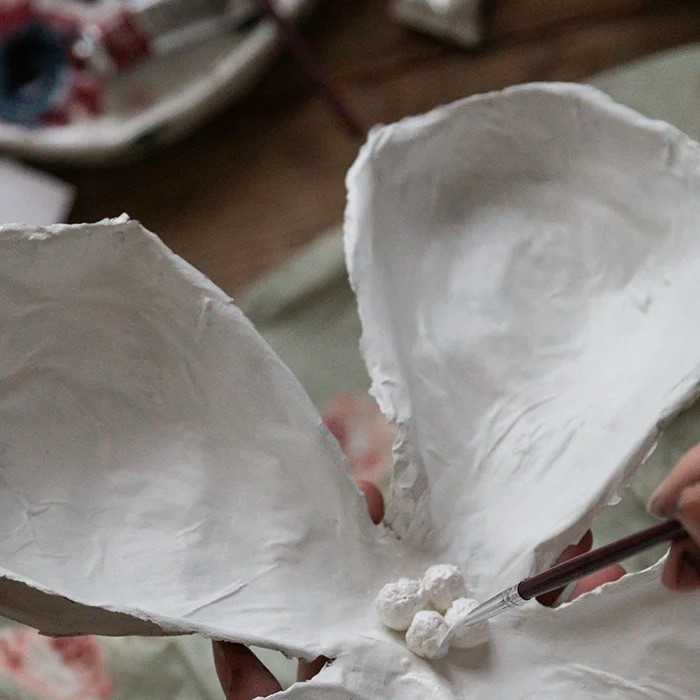
Now it’s time to let the kids apply the paper mache strips. Dip each strip in the paste, ensuring it’s fully coated, then apply it to the balloon or mold. Press firmly to eliminate air bubbles and ensure a smooth surface. Aim for about three layers of paper for a sturdy finish. Remind your children to overlap the strips for better durability.
Step 5: Allow to Dry
After applying the paper mache layers, it’s essential to let the mold dry completely. This process generally takes 24 hours, depending on the humidity and thickness of the layers. For kids, waiting can be challenging, so encourage patience by planning another fun activity in the meantime.
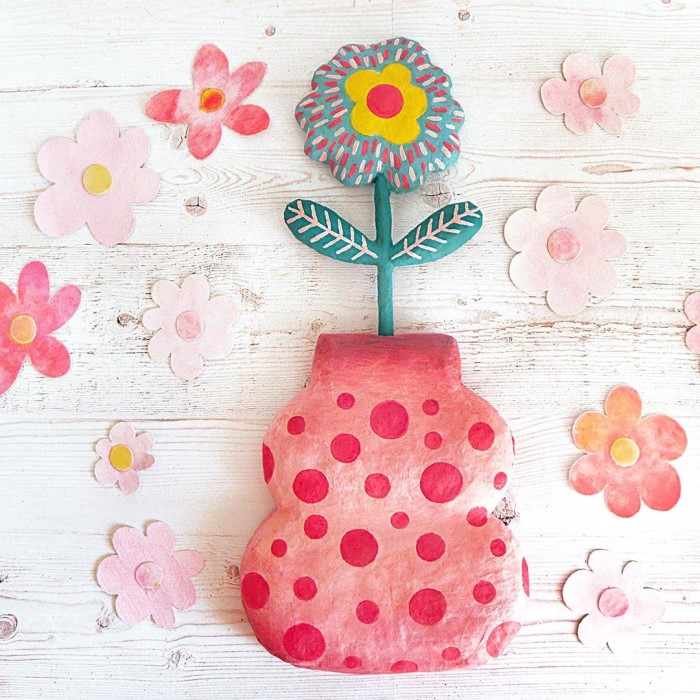
Step 6: Paint and Decorate the Flowers
Once the paper mache has dried, pop the balloon carefully, or gently remove the flower mold. This is where kids can truly express their creativity! Use non-toxic acrylic paints to decorate the flower. This step involves choosing colors and patterns, allowing kids to fully engage their artistic abilities.
Step 7: Finish and Display
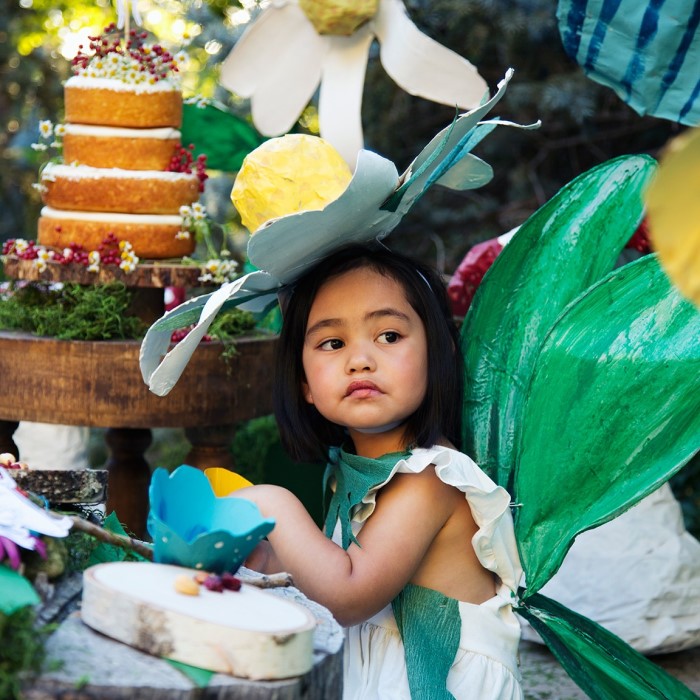
Once the paint dries, you can finish the flowers by adding features like glitter or additional embellishments. Attach strings or wires to hang the flowers, or place them in a vase for a beautiful display. Encourage children to showcase their creations, as this fosters a sense of accomplishment.
FAQs
How to Make Flowers Out of China Paper?
Making flowers from china paper follows a similar process to traditional paper mache. Begin by cutting the china paper into petal shapes. Next, layer them in sets to create a flower effect. You can use glue to secure the petals together, and then place them on wire or stick for supportive stems. Paint and embellish as desired.
How to Draw an 8 Petal Flower?
To draw an 8 petal flower, start by sketching a small circle for the center. Then, draw eight petal shapes around the circle. Each petal should be symmetrical and evenly spaced. You can add details within each petal and color them afterward. A consistent technique will enhance the overall aesthetic of the flower.
How to Make Magic Paper Flowers?
Magic paper flowers can be made using a combination of crafting techniques. Start by folding tissue paper into layers and cutting out petal shapes. Next, tie the center with a string, fluff the layers out to create a three-dimensional effect, and finally, paint or decorate as desired to reveal a beautiful “magic” flower!
Conclusion
Crafting paper mache flowers with kids is not just an enjoyable activity; it’s also an opportunity to bond and learn together. By following the tips and steps outlined in this guide, you can create colorful flowers that brighten up your home while allowing your children to explore their artistic abilities. These projects can be fun and educational, providing lasting memories and beautiful decorations. So gather your supplies, unleash your creativity, and enjoy crafting colorful paper mache flowers today!