Introduction
Educational experiences should inspire curiosity and creativity. One engaging way to achieve this is through hands-on projects like creating paper mache planets. This versatile art form combines science, art, and interactive learning, making it an ideal fit for the classroom. Teachers can utilize paper mache planets to enrich their lessons about the solar system, artistry, and teamwork among students. In this article, we will explore various methods and ideas for integrating paper mache planets into your teaching curriculum. We will cover essential steps on how to make planets with paper mache, addressing potential challenges and sharing additional resources to encourage student engagement.
The Educational Benefits of Paper Mache Projects
Hands-on activities are crucial in fostering a deeper understanding of abstract concepts. When students create paper mache planets, they gain practical skills and enhance their learning experience in meaningful ways.
Enhancing Creativity and Problem Solving
Creating paper mache planets enables students to express their artistic side. This project encourages them to envision and design each planet, making choices about size, color, and texture. Through this process, students learn to articulate their vision while discovering new materials and techniques. Additionally, making decisions about how to represent each planet’s unique characteristics promotes critical thinking and problem-solving.
Encouraging Collaboration and Teamwork
When teachers implement paper mache planets in the classroom, they often turn the project into a group activity. Working in teams fosters collaboration, requiring students to communicate, coordinate efforts, and share resources. These social skills are vital for success in both academics and future careers. Students can learn to appreciate different perspectives, leading to a broader understanding of creativity and group dynamics.
Connecting Art and Science
Using paper mache planets as a teaching tool allows educators to bridge the gap between art and science. Students learn about the solar system and basic astronomy while engaging in a creative process. Teachers can incorporate lessons about planetary composition, distances, and sizes, enriching students’ knowledge. This interdisciplinary approach encourages students to view subjects through a holistic lens, enhancing their educational experience.
How to Make Paper Mache Planets: A Step-by-Step Guide
To create paper mache planets, teachers need a simple yet effective plan. Below is a step-by-step guide on how to make planets with paper mache.
Step 1: Gather Materials
Before starting, teachers should gather essential materials for the project. The basic supplies required include:
- Newspapers (torn into strips)
- Flour (for the paper mache paste)
- Water
- Balloon (for forming the planet shape)
- Paint (for decoration)
- Sealing spray (to finish the planets)
The supplies can easily be acquired, making this a cost-effective project. Additionally, consider recycling old newspapers for an eco-friendly approach!
Step 2: Make the Paper Mache Paste
Teachers can create paper mache paste using a simple 1:1 ratio of flour and water. Mix the flour and water together until it reaches a smooth consistency. For added strength, some teachers opt to add a dash of salt to the mixture. This shortens the drying time and helps prevent mold.
Step 3: Inflate the Balloon
Teachers should inflate balloons to the desired size of the planets. Remind students that different planets vary in size, providing an opportunity for further discussion about the solar system.
Step 4: Apply Paper Mache Strips
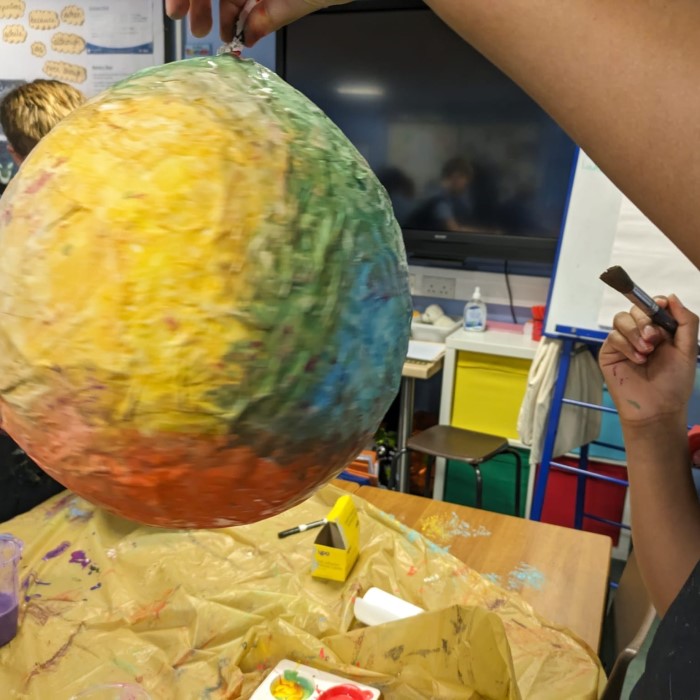
Once the balloons are prepared, students are ready to dip the newspaper strips into the paste. After coating the strips, they should place them over the inflated balloon. This process requires patience, as several layers must be built up for durability. It’s advisable to apply at least three layers to ensure the planets are sturdy.
Step 5: Dry and Pop
The paper mache planets typically take one to two days to dry completely. Once the surface feels firm and firm, students can carefully pop the balloon and remove it from inside the dried paper mache shell.
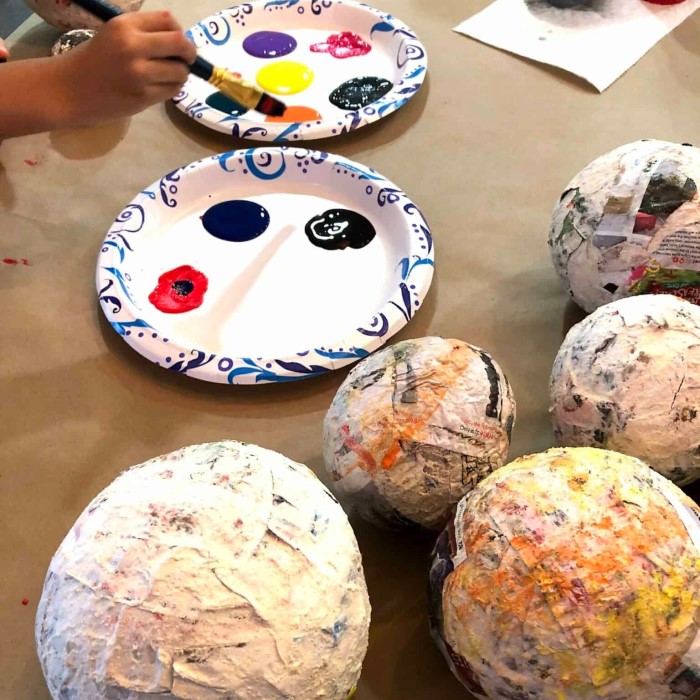
Step 6: Painting and Decorating
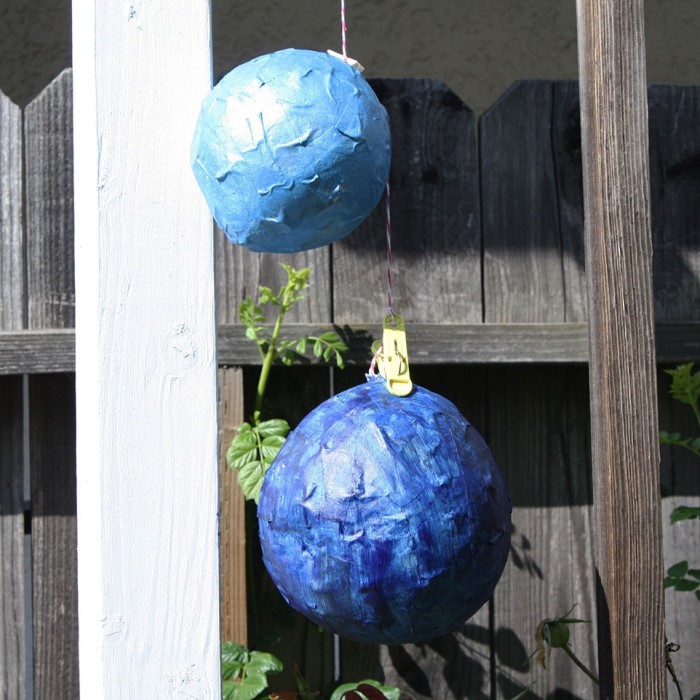
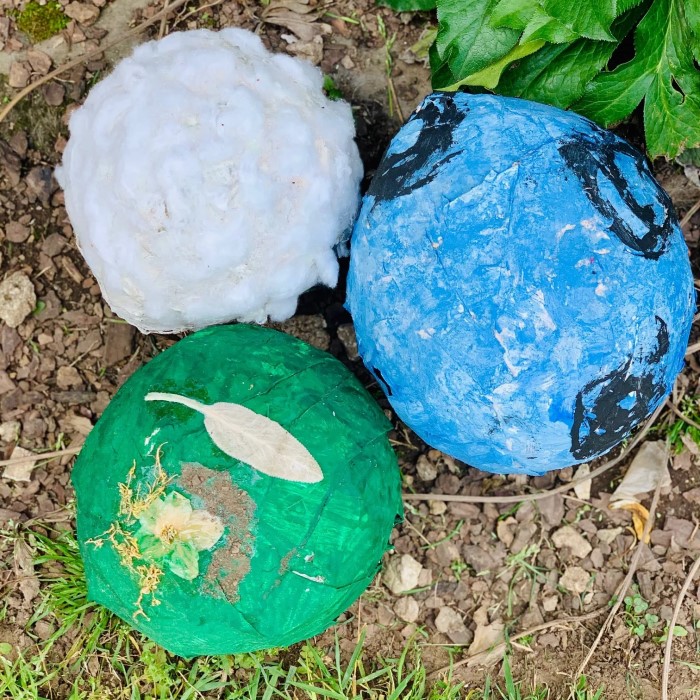
Once the paper mache has dried, students can paint their planets. Discuss how each planet varies in color and texture, allowing students to represent these differences creatively. Students can use gloss and matte finishes to mimic textures like gas giants or rocky surfaces.
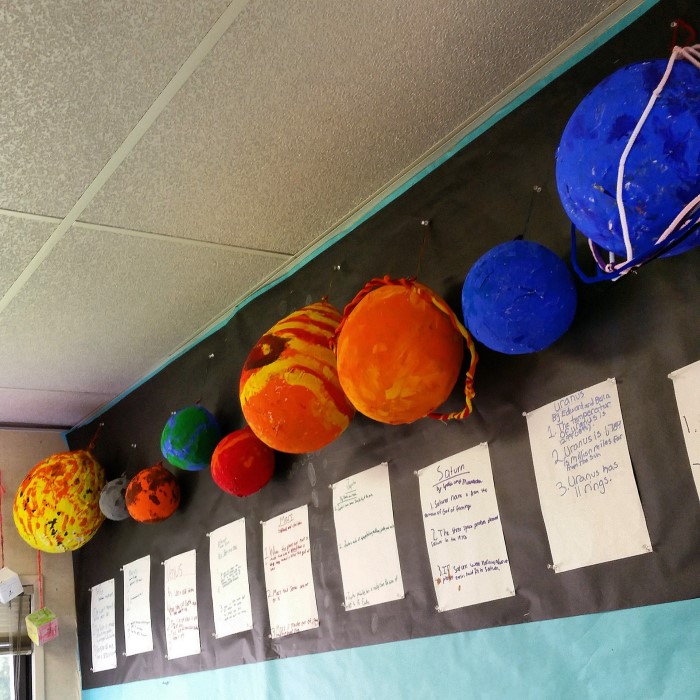
Step 7: Display the Finished Planets
After finishing the painting, consider ways to display the planets. Teachers can create a hanging display or use a mobile structure to represent the solar system. A visual representation of the planets enhances the classroom atmosphere and provides an exciting focal point.
Troubleshooting Common Paper Mache Challenges
While projects like making paper mache planets are immensely rewarding, teachers should be aware of potential challenges. Here are some common problems that may arise and solutions to help overcome them.
Why is My Paper Mache Not Hardening?
Sometimes students may find that their paper mache does not harden as expected. This could be due to several factors, including excessive moisture during the drying process. Ensure that the environment where the planets are drying is well-ventilated.
If layers are too thick, the drying process may take longer. Encourage students to apply thinner layers so that the drying time is minimized.
Does Elmer’s Glue Work for Paper Mache?
Some teachers might wonder if they can use Elmer’s glue instead of the flour-water mix. Elmer’s glue can work effectively and may even provide a smoother texture. However, it can be more costly, especially for large groups. Depending on classroom budgets, teachers should choose the medium that works best for their situation.
When using Elmer’s glue, some educators recommend mixing it with water to maintain a manageable consistency.
Creative Extensions for Enhanced Learning
Teachers looking to enhance their paper mache planet project can consider these creative extensions:
Comparative Studies
After completing the planets, teachers can organize a comparative study where students can research different planets’ composition, orbits, and characteristic features. Each student can share their findings in mixed media presentations, utilizing their handcrafted planets as visual aids.
Interactive Learning Stations
Setting up interactive learning stations can provide additional engagement. For example, groups can rotate through stations that offer activities such as quizzes about planetary facts or building solar system diagrams using the completed paper mache planets. This not only reinforces knowledge but also creates a dynamic learning environment.
Technology Integration
Enhancing Learning through Technology
- Importance of Technology: Utilizing technology in the classroom is crucial for creating a modern learning environment. Integrating these tools helps enrich the educational experience by making lessons more interactive and engaging for students.
- Variety of Learning Styles: Incorporating technology accommodates different learning styles. Visual learners benefit from presentations, while auditory learners may enjoy video creation. This multifaceted approach can cater to the diverse needs of students.
Creating Presentations
- Using Presentation Apps: Encourage students to use apps like Canva or Google Slides to create visually appealing presentations. These platforms provide templates, graphics, and design elements that make it easy for students to convey their ideas clearly and effectively.
- Highlighting Key Features: In their presentations, students can focus on various aspects of their chosen planets, such as terrain, atmosphere, temperature, and any unique characteristics. This allows for in-depth exploration of each planet’s significance within the solar system.
- Collaboration Opportunities: Presentations can be created individually or in small groups, fostering collaboration among students. Group work encourages communication, teamwork, and the pooling of ideas.
Creating Videos
- Exploring Video Creation Tools: Video editing apps like iMovie or Adobe Spark Video enable students to produce engaging and informative videos about their planets. These tools offer intuitive interfaces that make video editing accessible to students of all skill levels.
- Incorporating Multimedia Elements: Students can enhance their videos by incorporating images, voiceovers, music, and animations. This use of multimedia helps to captivate their audience and makes the learning experience more memorable.
- Presenting Research: Videos can serve as an excellent medium for students to present their findings in a creative way. They can showcase their planets’ features and significance in the solar system dynamically and visually.
Engaging Students
- Interactive Learning Experiences: By integrating technology into assignments, students are more engaged and motivated. The opportunity to use apps and creative tools often leads to increased excitement about learning.
- Self-Directed Learning: Technology encourages students to take responsibility for their own learning. They can explore topics further, utilizing online resources, and enhance their understanding beyond the textbook.
Preparing for the Future
- Developing Important Skills: Using technology in the classroom helps students cultivate essential skills they will need in the future. This includes digital literacy, critical thinking, creativity, and collaboration.
- Familiarity with Modern Tools: Being adept at using various applications prepares students for future academic and professional environments. Understanding how to create presentations and videos is a valuable asset in many fields.
Frequently Asked Questions
How to make planets with paper mache?
Making planets with paper mache is a straightforward and enjoyable process. You will need newspapers torn into strips, a flour-water paste, balloons for shaping, and paint for decoration. Follow the step-by-step guide shared in this article for a comprehensive approach.
Does Elmer’s glue work for paper mache?
Yes, Elmer’s glue can work for paper mache, offering a smooth texture. However, it may be more expensive than a flour-water mixture, especially for larger projects. Choose the medium that fits your classroom budget and project needs.
Why is my paper mache not hardening?
If the paper mache is not hardening, it may be due to excessive moisture or thick layers. Ensure that the planets are drying in a well-ventilated area, and encourage students to apply thinner layers for quicker drying.
How to paper mache a globe?
To paper mache a globe, use a round object as your base (like a balloon). Cover the surface with strips of newspaper dipped in your paper mache paste. Allow it to dry, pop the base (if using a balloon), and paint it to represent earth or another planet.
Conclusion
Incorporating interactive learning through projects like paper mache planets enriches students’ educational experiences. Not only do they explore creativity and artistry, but they also engage in collaborative learning and scientific exploration. Teachers can utilize this engaging project to merge art and science, building foundational skills for students.
By following the guides outlined in this article and anticipating potential challenges, educators can successfully implement paper mache planets in their classrooms. Embrace the opportunities this art form presents and inspire young minds to discover the exciting world of astronomy! Get started on your paper mache planet project, and watch as creativity flourishes in your classroom!