Introduction
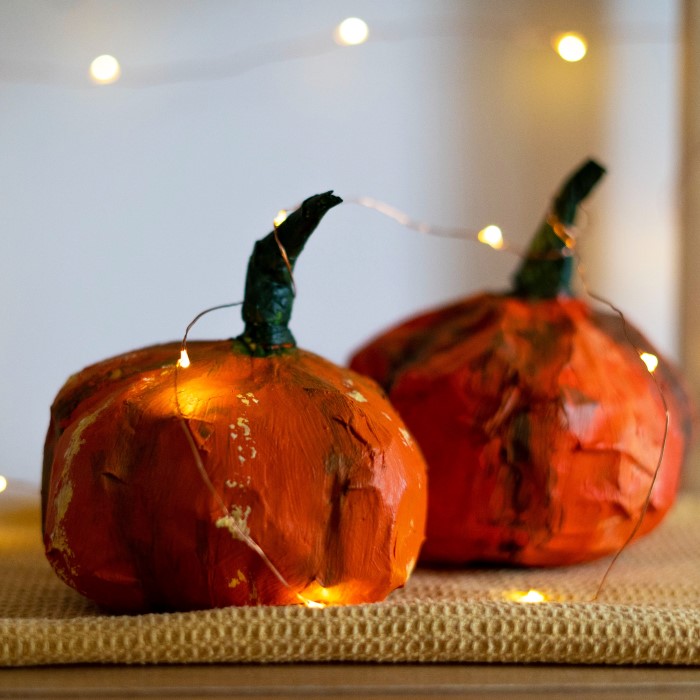
As the leaves begin to change and the air turns crisp, it’s time to think about how to enhance your fall decor. One fun and creative way to celebrate the autumn season is by making paper mache pumpkins. These charming crafts are perfect for Halloween and can add a whimsical touch to your home. In this article, we will explore how to make paper mache pumpkins, including the materials needed, step-by-step instructions, and creative decorating ideas. By the end, you will be equipped to transform your fall decor and impress friends and family with your handmade creations.
Making paper mache pumpkins is not only a delightful activity but also an eco-friendly option. This project allows you to repurpose old newspapers or paper, keeping waste to a minimum. Additionally, crafting these pumpkins can be a fun family project, bringing everyone together to celebrate creativity and the season.
Materials Needed for Paper Mache Pumpkins
Creating paper mache pumpkins requires a simple set of materials. Having all supplies ready saves time.
Essential Supplies Checklist
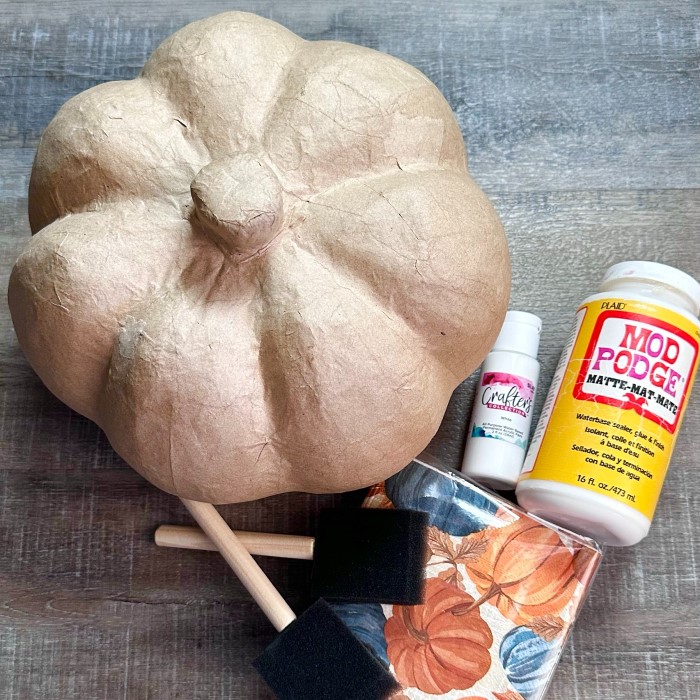
Before starting, gather these essential materials:
- Balloons or molds: Use these as the base shape for your pumpkin.
- Newspaper strips: Torn pieces work best.
- Glue: White school glue or a paper mache-specific adhesive.
- Flour or cornstarch: These are alternatives for making homemade paste.
- Paints and brushes: Acrylic paints work well for decorating.
- Craft knife or scissors: For trimming and shaping the pumpkin.
- Plastic tablecloth: Keeps your workspace clean.
- Container: For mixing the paste.
- Water: For thinning out paste or glue as needed.
- Tape: Useful for securing shapes or reinforcing molds.
- Varnish or sealant: To protect your painted design.
Choosing the Right Type of Paper and Glue
The paper and glue you choose make a big difference:
- Paper: Opt for lightweight paper like newspaper or tissue paper. Heavier papers may not stick well.
- Glue: White glue is an affordable and effective choice. A mix of glue and water creates a strong paste.
- If making your own paste, use a flour-and-water mixture. Add salt to prevent mold.
Using the right materials ensures your paper mache pumpkin is sturdy and long-lasting.
Preparing Your Workspace
Before creating paper mache pumpkins, organize your workspace for efficiency and cleanliness.
Setting Up a Mess-Free Crafting Area
- Choose a spacious area: Use a table or desk with enough room for materials.
- Cover surfaces: Place a plastic tablecloth or old newspaper to catch spills.
- Gather materials: Arrange all supplies within easy reach. This minimizes disruptions.
- Ensure good lighting: Bright lighting helps you see details clearly while crafting.
Tips for Protecting Surfaces and Clothes
- Wear old clothes: Glue and paint may accidentally stain fabrics.
- Use an apron: A craft apron provides extra protection against mess.
- Place a trash bag nearby: Dispose of used paper strips and scraps easily.
- Protect floors: Lay down old towels or mats under your workspace.
A tidy and mess-free setup makes crafting paper mache pumpkins more enjoyable and stress-free.
Crafting the Base Pumpkin Shape
Creating the base shape is the first step in making paper mache pumpkins. This stage lays the foundation for your design.
Using Balloons or Other Molds
Choose a Base Shape
When creating a pumpkin decoration, the first step is to choose a suitable base shape. You can either use round balloons or molds that closely resemble the traditional round form of a pumpkin. Balloons are particularly versatile since they can be inflated to various sizes, giving you flexibility in your design. Alternatively, if you prefer a sturdier option, look for molds specifically designed for crafting or baking that mimic the pumpkin’s rounded shape. Selecting the right base will set the foundation for your pumpkin project and make the subsequent steps easier.
Inflate the Balloon
After selecting your base shape, the next step is to inflate the balloon to your desired pumpkin size. Be mindful to pump air until the balloon is firm but not overly stretched, as over-inflating can cause it to burst. A well-inflated balloon should have a smooth surface that allows for easy application of paper mache. If you’re using a mold instead of a balloon, ensure it is fully prepared for the crafting process. Proper inflation is crucial, as it dictates the overall size and form of your pumpkin decoration.
Secure the Balloon or Mold
Once your balloon is properly inflated or your mold is prepared, the following step is to secure it in place. Use tape or a holder to keep the base steady while you apply the paper mache. If using a balloon, you can tape it to a flat surface or use a container to hold it upright. If using a mold, make sure it is adequately supported so that it does not move while you are working. Having a stable base allows for greater precision in your crafting, ensuring that the paper mache adheres evenly without slipping or shifting.
Shape the Pumpkin’s Ridges
To give your pumpkin decoration a realistic appearance, it’s essential to shape the ridges that mimic natural pumpkin textures. This can be done by placing tape or rolling paper strips around the base shape, strategically positioned to create the iconic ridged look of a pumpkin. The ridges should be spaced evenly and can vary in size to add depth and dimension to your decoration. By carefully shaping these details, you can enhance the authenticity of your pumpkin, making it more visually appealing once the project is completed. This step is crucial for capturing the essence of a real pumpkin while allowing for creative expression in your design.
Balloons work best for lightweight designs, while molds offer unique shapes for larger pumpkins.
Creating a Pumpkin-Like Texture with Layers
- Start with thin layers: Dip newspaper strips in paste and apply them to the base.
- Build ridges: Add extra layers of paper strips to refine the texture and ridges.
- Smooth edges: Use your fingers or tools to blend layers and avoid rough edges.
- Repeat layering: Add 4–5 layers to ensure strength and a sturdy finish.
A thick, textured base gives your paper mache pumpkin a realistic look and durability.
Applying Paper Mache to the Base
To bring your paper mache pumpkin to life, apply layers of paper mache to the prepared base. This process involves mixing the paste correctly and layering newspaper strips to achieve the desired texture and strength.
Mixing the Paper Mache Paste
- Prepare ingredients: Use white glue and water or make a paste with flour and water.
- Mix thoroughly: Blend the ingredients until you achieve a smooth consistency. Avoid lumps.
- Adjust thickness: Add more water to thin the paste or more glue/flour to thicken it.
- Optional mold prevention: Add salt if using a flour-and-water paste to deter mold.
- Use a container: Keep paste in a sturdy container for easy application.
Accurately mixed paste is crucial for even application and durability.
Layering Paper Strips for Texture and Strength
- Dip strips in paste: Fully saturate newspaper strips in the paste.
- Apply to base: Lay strips smoothly over the balloon or mold. Press them down securely.
- Build layers: Add at least 4–5 layers for strength. Focus on even coverage.
- Create texture: Form pumpkin ridges using rolled strips of paper or tape.
- Smooth edges: Use fingers or tools to flatten rough areas for a polished finish.
- Check for gaps: Fill any exposed spots with more strips.
Layering carefully ensures a sturdy pumpkin base with an authentic texture.
Drying and Shaping the Pumpkin
Once you’ve layered your paper mache, drying is essential for achieving its final form. Proper drying and shaping can make or break your pumpkin’s durability and appearance.
Ensuring Proper Drying Time
- Allow sufficient time: Let the paper mache pumpkin dry completely over 24-72 hours.
- Use a well-ventilated space: Place it in a room with good air circulation to avoid damp spots.
- Rotate periodically: Turn the pumpkin every few hours so all sides dry evenly.
- Avoid direct sunlight: Drying in direct sunlight may cause warping or uneven drying.
- Test dryness: Gently press the pumpkin to check for firmness before handling further.
Proper drying ensures a sturdy base for painting or decorating.
Adjusting the Shape After Drying
- Trim uneven edges: Use a craft knife or scissors for smooth edges and consistent shape.
- Modify ridges: Gently add or shape extra layers to enhance pumpkin textures if needed.
- Fix dents or imperfections: Cover gaps with small paper mache patches and let them redry.
- Test durability: Press lightly to ensure the structure is solid and ready for decoration.
- Sand rough spots: For a polished surface, lightly sand any rough areas before painting.
Shaping the pumpkin after drying creates a clean and realistic finish.
Painting and Decorating Your Pumpkin
Once your paper mache pumpkin is dry, it’s time to bring it to life with vibrant colors and decorative elements. This step allows you to showcase your creativity and make your pumpkin unique.
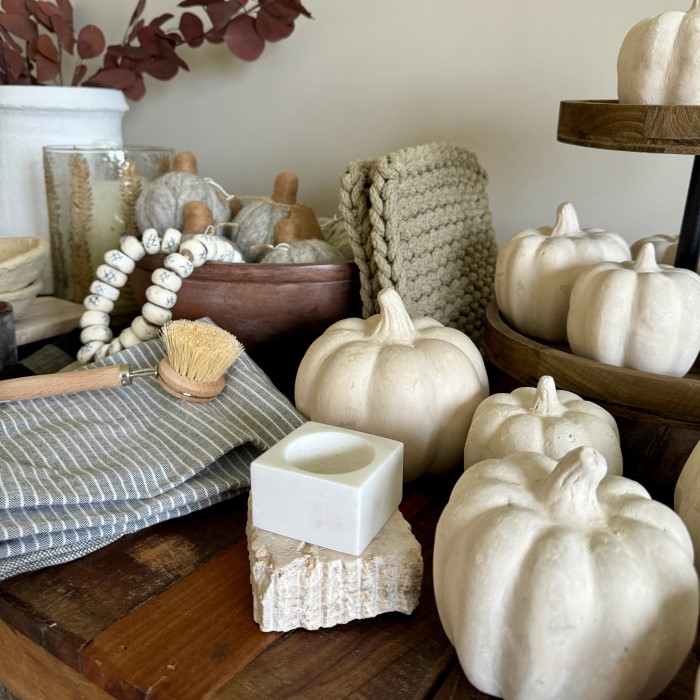
Choosing the Perfect Colors and Finishes
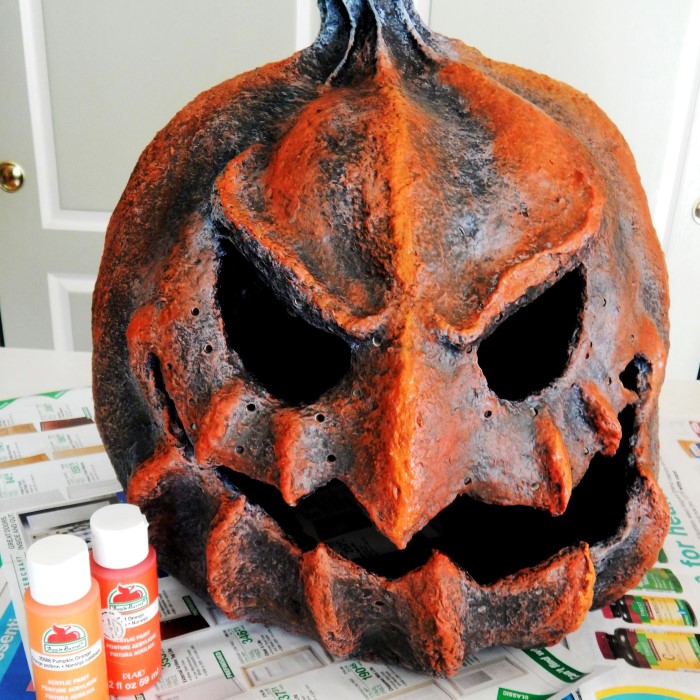
- Select acrylic paints: Acrylic paints are ideal due to their fast-drying and durable properties.
- Pick traditional or bold colors: Use orange for a classic look or experiment with metallics for modern styles.
- Use multiple shades: Blend light and dark tones for a realistic and dimensional effect.
- Apply a base coat: Start with a solid base layer to prepare your pumpkin for additional details.
- Add finishes: Use matte for a natural look or glossy varnish for a polished appearance.
- Let each layer dry: Allow paint layers to dry completely before applying more.
Carefully chosen colors and finishes enhance your paper mache pumpkin’s overall look.
Adding Details Like Stems and Leaves
- Create a stem: Use rolled paper, cardboard, or clay to shape a realistic pumpkin stem.
- Attach the stem: Secure it to the top using glue or hot glue for stability.
- Paint the stem: Use green or brown shades to mimic natural colors.
- Craft leaves: Cut out shapes from paper or fabric to resemble leaves.
- Add vines: Twist thin wires or floral tape to create spiral vines for an authentic touch.
- Secure extras: Use glue to attach stems, leaves, and vines securely.
Adding fine details like stems and leaves completes your pumpkin’s realistic design. Combine creativity and careful execution to achieve stunning results.
Creative Variations to Try
Creating paper mache pumpkins allows for a lot of creative freedom. From sizes to designs, you can craft unique pumpkins that stand out. These variations are perfect for adding a personal touch to your projects.
Making Miniature or Oversized Pumpkins
- Miniature pumpkins:
- Use small balloons as the base for tiny pumpkins.
- Ideal as table centerpieces or decorations for small spaces.
- Use delicate, intricate paint details to make them stand out.
- Oversized pumpkins:
- Start with large balloons or inflatable yard balls.
- Reinforce with extra layers of paper mache for added strength.
- Perfect for making a dramatic statement in outdoor displays or party décor.
- Tips for both sizes:
- Adjust drying and layering times accordingly to avoid cracks.
- Choose colors and designs that fit the intended display area.
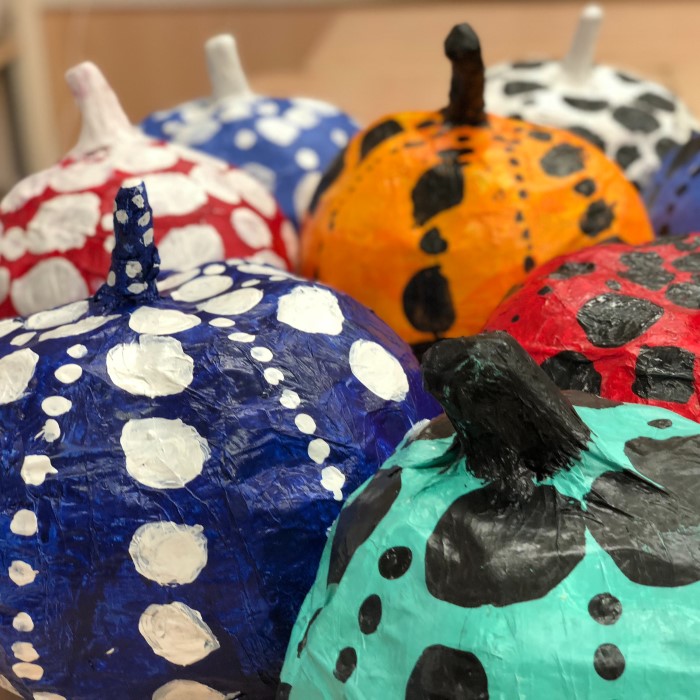
Incorporating Patterns or Unique Themes
- Add fun patterns:
- Paint stripes, polka dots, or even floral designs for a playful look.
- Use stencils or painter’s tape for crisp, clean shapes.
- Explore themed pumpkins:
- Create seasonal designs like spooky faces for Halloween or snowflakes for winter.
- Make character-themed pumpkins inspired by movies, books, or cartoons.
- Use mixed materials:
- Enhance textures by adding fabric, glitter, or metallic accents.
- Incorporate craft accessories like beads, sequins, or 3D paint for extra flair.
- Personalized ideas:
- Paint names, initials, or special messages on the pumpkin.
- Use decorative handwriting techniques for a polished finish.
These creative variations will make your paper mache pumpkins unique and memorable. Experiment with size and design to match your vision!
Conclusion
Making paper mache pumpkins is not just a craft; it’s an opportunity to express creativity and engage with the ever-changing beauty of the fall season. By following the steps outlined above, you can create stunning decorations that enhance your home and reflect the festive spirit of autumn.
Remember, crafting is about the process as much as the final product. Enjoy making a mess, experimenting with colors, and spending quality time with family or friends. Your finished pumpkins may serve as delightful conversation starters throughout the season.
As you embrace your creative side, don’t forget to share your results! Post photos of your paper mache pumpkins on social media to inspire others. Whether you’re preparing for Halloween or simply celebrating fall, these charming pumpkins are sure to bring warmth and joy to your decor. Enjoy your crafting journey, and may your fall be filled with creativity and fun!