Introduction
Crafting is a wonderful way for kids to express their creativity. One of the most enjoyable and versatile materials they can work with is paper mache. Among the various projects, crafting with paper mache letters stands out as a fantastic option. Not only does it keep children engaged, but it also fosters their artistic abilities. In this guide, we’ll explore exciting ideas for using paper mache letters in kids’ projects, along with some tips and tricks to make the crafting experience enjoyable.
What Are Paper Mache Letters?
Paper mache letters are crafted using layers of paper and adhesive. The paper is molded around a base structure to create durable shapes. These letters are often hollow and lightweight, making them ideal for personal and professional crafts. They are available in various sizes and font styles to suit your needs.
Benefits of Using Paper Mache Letters for Crafting
Paper mache letters have several advantages:
- Cost-Effective: They are affordable compared to many crafting materials.
- Customizable: You can paint, decorate, or embellish them as you like.
- Eco-Friendly: Made mostly from paper, they have minimal environmental impact.
- Versatile: Use them for home decor, gifts, or event decorations.
- Lightweight: Their light material makes them easy to handle and display.
With their many benefits, paper mache letters are perfect for unleashing your creativity.
Materials Needed
Before creating paper mache letters, gather all the necessary materials. Having the right tools ensures a smooth crafting process. It also allows for more creative freedom in decorating.
Essential Supplies for Beginners
If you’re new to crafting with paper mache, start with basic supplies:
- Paper: Use newspaper, tissue paper, or scrap paper.
- Adhesive: Make a glue mixture using white glue or flour-based paste.
- Base Structure: Purchase pre-made paper mache letters or craft your own from cardboard.
- Brushes: Small brushes for applying glue and paint.
- Paint: Acrylic paints work great for finishing touches.
- Protective Gear: Wear gloves and cover your workspace with plastic or old newspaper.
- Crafting Tools: Keep scissors, cutting blades, and rulers handy for adjustments.
These basic materials cover everything you need to start creating your letters.
Creative Add-ons for Advanced Designs
For advanced crafters, consider adding extra materials to enhance your designs:
- Glitters and Sequins: Add sparkle and shine to your letters.
- Stencils: Create uniform patterns or motifs.
- Textured Papers: Use specialty paper like crepe or embossed varieties for a unique finish.
- Beads and Rhinestones: Glue them onto your letters for a 3D effect.
- Ribbon or Fabric: Wrap or embellish for added texture and color.
- Spray Paint: Achieve a metallic or smooth finish with spray paint.
- Markers and Pens: Draw designs or add intricate details.
These add-ons help customize your paper mache letters, making them truly one-of-a-kind.
Step-by-Step Guide
Creating paper mache letters can be an enjoyable and straightforward process. Follow these steps for a seamless crafting experience. From preparation to the final touches, each stage is essential in achieving your desired result.
Preparing the Materials and Workspace
- Organize Supplies: Arrange paper, glue, brushes, scissors, and your base structure.
- Protect Your Workspace: Cover your table with newspaper or a plastic sheet to prevent messes.
- Wear Gloves: Protect your hands from glue and paint residues.
- Prepare Glue: Mix white glue with water or a paste made from flour and water.
- Cut Paper Strips: Tear paper into strips for smoother application.
- Set Up Drying Area: Designate a space for drying your paper mache letters.
Building the Base Structure of the Letters
- Choose Pre-Made Letters: Beginners can use pre-made paper mache letters.
- Make Your Own Base: Cut letter shapes from sturdy cardboard if crafting from scratch.
- Secure Edges: Tape the edges of the cardboard letters to create a clean structure.
- Add Layers for Strength: Glue additional cardboard pieces for stability where necessary.
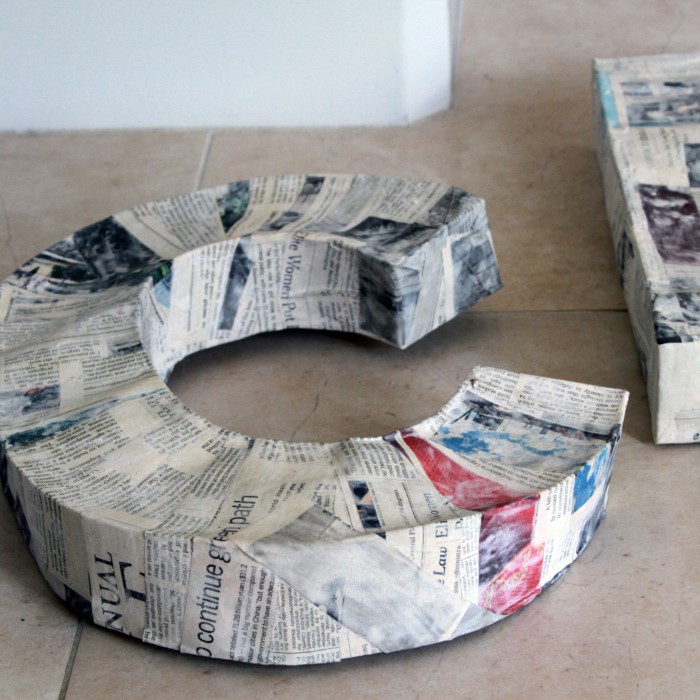
Applying Paper Mache Layers
- Dip Paper Strips: Soak paper strips in the glue mixture.
- Remove Excess Glue: Gently squeeze excess glue from the strips.
- Apply to Base: Layer the strips onto the base structure, covering the entire surface evenly.
- Smooth Layers: Use your fingers or a brush to smooth the strips and remove air bubbles.
- Repeat Layers: Apply 3-5 layers for a sturdy and firm letter structure.
Drying and Finishing Techniques
- Allow Drying Time: Let the letters dry completely after applying the paper mache layers.
- Speed Up Drying: Use a fan or place them under sunlight for faster drying.
- Sand Rough Edges: Lightly sand any uneven or rough areas for a smooth finish.
- Prime Before Painting: Apply a primer layer to ensure paint adheres well to the surface.
By following these steps, your paper mache letters will be ready for decorating and showcasing!

Decorating Paper Mache Letters
Decorating paper mache letters is where creative ideas come to life. Customizing them can make your project unique and eye-catching. With the right techniques, you can transform plain letters into beautiful works of art.
Painting and Coating Options
Painting is one of the simplest ways to decorate paper mache letters. Here are some ideas:
- Acrylic Paint: Use acrylic paint for vibrant, long-lasting colors. Apply 1-2 coats for an even finish.
- Spray Paint: Achieve a smooth, glossy, or metallic look with spray paint.
- Chalk Paint: For a matte, vintage appearance, chalk paint works wonders.
- Gradient Effects: Blend two or more colors for an ombre or gradient design.
- Sealants: Use clear varnish or mod podge to protect and finish your painted letters.
Tips:
- Use a primer before painting for better coverage.
- Allow each layer of paint to dry fully before applying the next.
Adding Glitter, Patterns, and Embellishments
Take your designs to the next level with these decorative elements:
- Glitter:
- Apply glue to select areas and sprinkle glitter for sparkle.
- Mix glitter with mod podge for a shimmering surface.
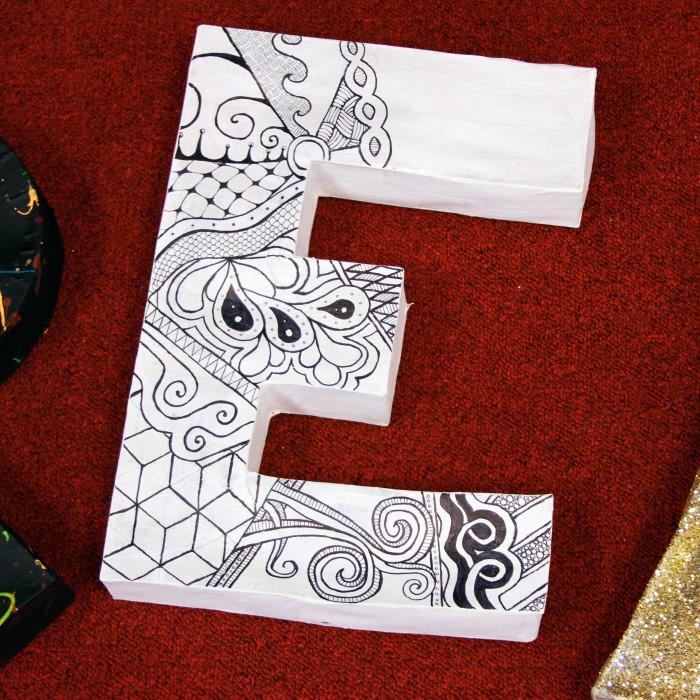
- Patterns and Stencils:
- Use stencils to create geometric shapes, floral designs, or other motifs.
- Freehand designs with markers or pens for intricate detailing.
- Decoupage:
- Glue patterned paper or fabric onto the letters for a textured look.
- Beads and Rhinestones:
- Adorn letters with beads or rhinestones for a 3D, glamorous effect.
- Mixed Materials:
- Add lace, burlap, or ribbons for a rustic or elegant touch.
- Seasonal Detailing:
- Adapt designs for holidays—red glitter for Christmas, pastel hues for spring.
Experiment with these options to create designs that fit your theme or style.
Creative Uses
Paper mache letters offer endless creative possibilities. Their lightweight and customizable nature make them ideal for various projects. Let’s explore how you can use them to enhance your space or gifts.
Home Decor and Wall Art
Enhance your living space with paper mache letters. Here are some ideas for home decor:
- Family Names or Initials: Display your family name or initials on walls or shelves.
- Inspirational Words: Use words like “Love,” “Joy,” or “Dream” for motivation.
- Gallery Walls: Combine letters with photos or art for a curated look.
- Room Labels: Spell out “Kitchen” or “Laundry” to organize spaces creatively.
- Colorful Designs: Match the letters’ color scheme to your room’s decor.
Paper mache letters can blend function and style, transforming walls into personalized masterpieces.
Party and Event Decorations
Paper mache letters are perfect for celebrations and events. Use them to make gatherings more vibrant:
- Event Names: Display “Birthday” or “Wedding” as part of the decor.
- Table Centerpieces: Arrange letters spelling out themes or guest names on party tables.
- Photo Props: Use letters like “Love” or “Celebrate” for memorable event photos.
- Entrance Signage: Welcome guests with bold decorative letters near doorways.
- Themed Decor: Paint or embellish letters to match party themes, such as rustic for weddings.
These ideas add a creative and personal touch to any celebration.
Gift Personalization Ideas
Personalize gifts with paper mache letters for an extra-special touch:
- Name Displays: Craft paper mache letters with the recipient’s name for unique gifts.
- Holiday Themes: Create festive designs for occasions like Christmas or Halloween.
- Message Boards: Form meaningful words like “Thanks” or “Congrats” from decorated letters.
- Keepsake Letters: Embellish letters with patterns or photos for memorable treasures.
- Gift Wrapping: Attach small paper mache letters to gift boxes or bags for added charm.
These personalized ideas make any gift thoughtful and unforgettable.
Paper mache letters serve as a versatile and fun tool for home decor, events, and gifting. Let your creativity flow!
Tips and Tricks for Paper Mache Projects
Paper mache crafting is rewarding but requires attention to detail for the best results. Here are tips to avoid mistakes and create durable, long-lasting letters.
Common Mistakes to Avoid
- Using Excessive Glue: Too much glue creates soggy layers. Always squeeze off extra glue.
- Skipping Base Preparation: Weak or flimsy bases lead to uneven results. Strengthen cardboard before layering.
- Thin Paper Strips: Thicker strips don’t mold well. Tear paper into manageable, thin pieces.
- Inadequate Drying: Wet layers can ruin designs. Allow each layer to dry fully before adding more.
- Ignoring Workspace Protection: Unprotected areas can get messy. Cover surfaces with plastic or newspaper.
- Rushing Layers: Quickly applied layers cause lumps or air bubbles. Take time to smooth each strip.
- Skipping Primer: Paint may flake without a primer. Prep the surface before decorating.
Avoid these common errors to ensure smooth and polished paper mache projects.
How to Strengthen and Preserve Your Letters
- Reinforce the Base: Apply extra cardboard pieces to the edges for stability.
- Layer Strategically: Add 3-5 layers of paper mache for durability and strength.
- Seal Finished Letters: Use mod podge or varnish to protect against wear and moisture.
- Avoid Direct Sunlight: Keep letters away from prolonged sun exposure to prevent fading.
- Store Properly: Place letters in a cool, dry space to preserve their quality.
- Sand Edges: Smooth rough areas to avoid tears or damage over time.
- Handle with Care: Lightweight letters need gentle handling to maintain their shape.
These tips ensure paper mache letters stay sturdy and look their best for years to come.
Inspiring Project Ideas
Unleash your creativity with paper mache letters by exploring unique themes and designs. Discover ideas to create standout decorations and personalized crafts that suit your style.
Seasonal Themes and Holiday Designs
Paper mache letters can brighten up your seasonal decor. Transform plain letters into festive masterpieces:
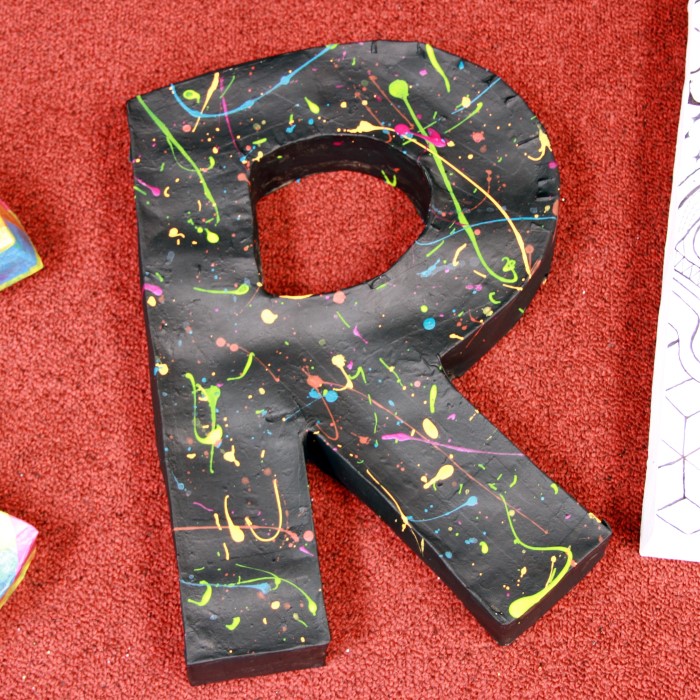
- Christmas Cheer: Use red glitter and green paint to spell out “Joy” or “Merry.”
- Halloween Fun: Add spooky colors like black and orange for words like “Boo” or “Fright.”
- Spring Elegance: Pastel paints and floral embellishments make “Bloom” or “Fresh” perfect.
- Winter Wonderland: Create icy effects with white and silver paint for “Snow” or “Chill.”
- Summer Vibes: Incorporate beach themes and vibrant hues for “Relax” or “Sunny.”
These seasonal ideas make decorations vibrant and festive for every occasion.
Custom Monograms and Name Displays
Personalized monograms and names are perfect for home decor and gifts. Here’s how to make them:
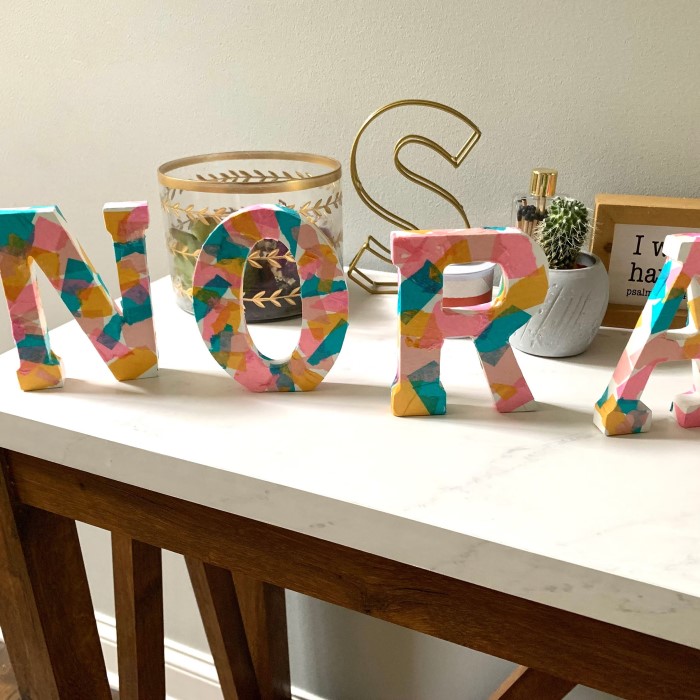
Name Art for Kids
- Playful Designs: Create name art featuring playful and vibrant designs that resonate with children’s imagination.
- Personalization: Use names like “Emma” or “Alex” to create unique pieces for children’s rooms, allowing them to see their names in a fun and artistic light.
- Color Choices: Incorporate bright colors, whimsical patterns, and engaging illustrations to make the name art visually appealing for kids.
- Thematic Elements: Consider adding themes like animals, nature, or favorite characters to the artwork, enhancing its significance to the child.
Elegant Monograms
- Stylish Initials: Design elegant monograms that highlight initials, such as “J” or “H,” presenting them in a sophisticated manner.
- Gold and Metallic Finishes: Utilize gold or metallic paint to give the initials a classy and luxurious look, making them stand out.
- Sophisticated Typography: Choose elegant fonts and styles that convey refinement and can fit various decor styles, from modern to traditional.
- Versatile Applications: These monograms can be used on items like wall art, stationery, or home decor accents, adding a touch of class to any space.
Wedding Tags
- Romantic Themes: Create beautifully crafted tags that spell out “Mr & Mrs” designed with romantic themes perfect for wedding decor.
- Decorative Elements: Incorporate floral designs, lace patterns, or soft color palettes to enhance the romantic essence of the tags.
- Personalized Touch: Add names or wedding dates to the tags for a personal touch that makes them memorable keepsakes.
- Versatile Use: These tags can be used on wedding favors, centerpieces, or place settings, adding elegance to the overall wedding atmosphere.
Office Desk Names
- Customized Letters: Create personalized desk accessories by customizing letters with clean, professional styles appropriate for office environments.
- Sleek Designs: Utilize minimalistic designs that complement various office aesthetics while ensuring readability and style.
- Functional Decor: Enhance organizational products like pen holders, nameplates, or paperweights with these customized letters to add a personal touch to the workspace.
- Branding Options: Consider incorporating company logos or branding elements for a professional appearance that reflects individual personality and brand identity.
Gift Packaging
- Unique Personalization: Add small-crafted names or initials to gift boxes to create a unique and special touch for gift packaging.
- Craft Techniques: Employ various crafting techniques such as painting, embossing, or die-cutting to create eye-catching name tags.
- Themed Wrapping: Match the style of the names or initials with the theme of the gift or occasion to enhance the presentation.
- Memorable Impressions: This personalized approach not only makes the gift more memorable but also shows thoughtfulness and effort, enhancing the recipient’s experience.
Customized letters show thoughtfulness and make any space or gift memorable. Begin crafting today and let your imagination guide you!
Conclusion
Recap of Key Techniques and Ideas
Crafting with paper mache letters is creative and enjoyable. Start with basic materials like paper and glue. Gradually, add advanced items like glitter and patterns for unique designs. Follow the step-by-step guide to prepare, build, and finish your letters. Explore decorating techniques like painting, stenciling, or using mixed materials. Remember the versatility of paper mache letters for decor, events, and personal gifts. Keep in mind tips for avoiding mistakes and preserving your work for lasting results.
Encouragement to Start Crafting
Now it’s time to bring your ideas to life. Grab your materials and start crafting today. Let your creativity take over and make something truly distinctive. Whether it’s for home decor, parties, or personalized gifts, paper mache letters are a great project. Enjoy the process and create designs that will delight and inspire!