Introduction
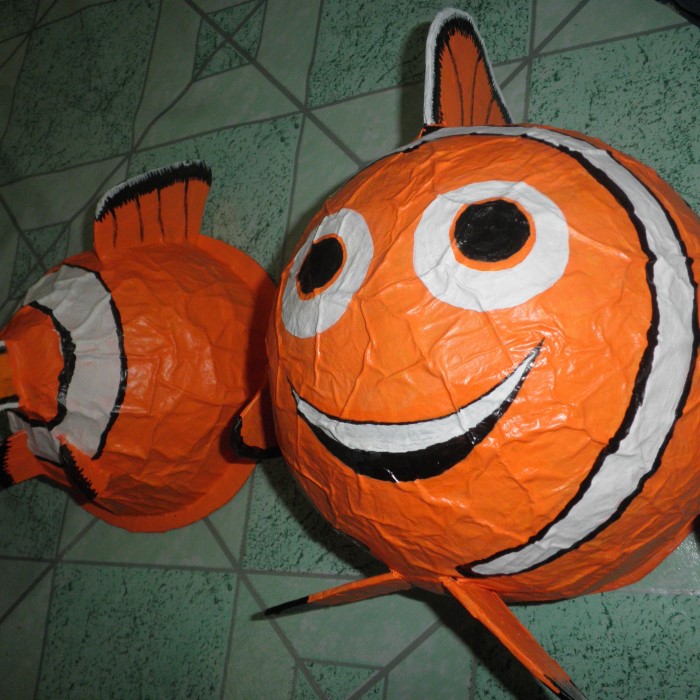
Crafting decorative items for the home and garden has never been more popular. One particularly trending project is creating paper mache fish. This versatile craft allows crafters of all skill levels to express their creativity while designing stunning pieces that can enhance indoor and outdoor spaces.
Crafting paper mache fish is not only fun, but it also provides an opportunity to incorporate colors, textures, and personalized patterns. In this article, we will explore various ideas for creating beautiful paper mache fish, delve into techniques, and share insights into how these creations can add character to your decor. Let’s dive deeper into this delightful craft!
Understanding Paper Mache
- What is Paper Mache?
- Paper mache, or “chewed paper,” is a crafting technique that involves using paper strips or pieces and a binding agent, typically a paste made from flour and water. The mixture allows the paper to be molded into various shapes, which harden once dry.
- History and Popularity:
- Historically, paper mache has been used for hundreds of years in various cultures to create arts and crafts, including masks, sculptures, and decorative items. Today, it has gained renewed interest among crafters seeking inexpensive yet captivating projects.
- Why Choose Paper Mache Fish?
- Paper mache fish are a fantastic choice because they can be tailored to match personal aesthetics and themes. They can serve as colorful wall decor, festive centerpieces for parties, or even whimsical garden ornaments.
Crafting Techniques
- Gathering Your Materials:
- To make paper mache fish, you will need several basic supplies. This typically includes:
- Paper (newspaper, tissue paper, or craft paper)
- A paste mixture (made from flour and water or glue-based alternatives)
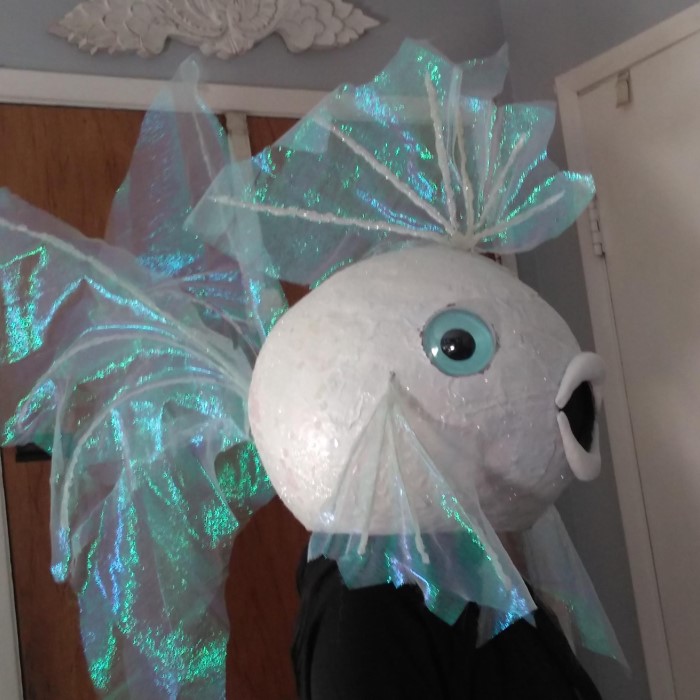
- A mold or form to shape your fish (this can be created using wire or balloons)
- Paints and brushes for decorating
- Sealant to protect the finished product
- To make paper mache fish, you will need several basic supplies. This typically includes:
- Creating the Mold:
- You can design your fish mold using various materials. Balloons work well for creating round shapes, while wire frames can be formed into more structured fish forms. Ensure your mold is stable enough to support the paper mache layers you will add.
- Layering Techniques:
- Once your mold is prepared, start applying the paper mache strips. Dip each strip in the paste, remove excess paste, and layer them over the mold. It’s best to apply 3-4 layers to ensure durability.
- Drying Process:
- After applying the layers, leave your creation to dry in a well-ventilated space. Depending on the thickness and humidity, drying can take anywhere from 24 to 48 hours. Ensure you allow sufficient time for complete drying.
Decorating Your Paper Mache Fish
Painting Techniques:
- Preparation for Decorating:
- After your paper mache fish has completely dried, it’s time to begin decorating. Ensure the surface is clean and ready for paint.
- Choosing Your Paint:
- Use high-quality acrylic paints, as they provide vibrant colors and excellent coverage. Acrylics dry quickly, allowing you to work efficiently.
- Color Selection:
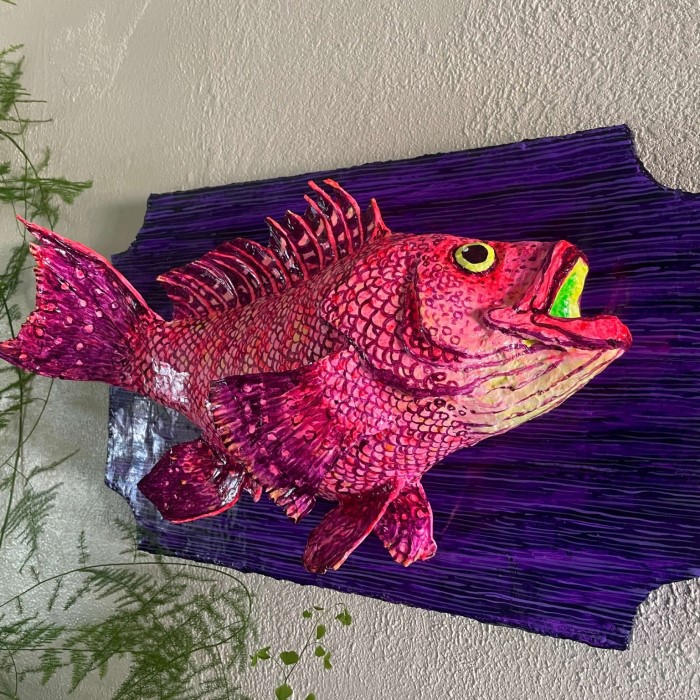
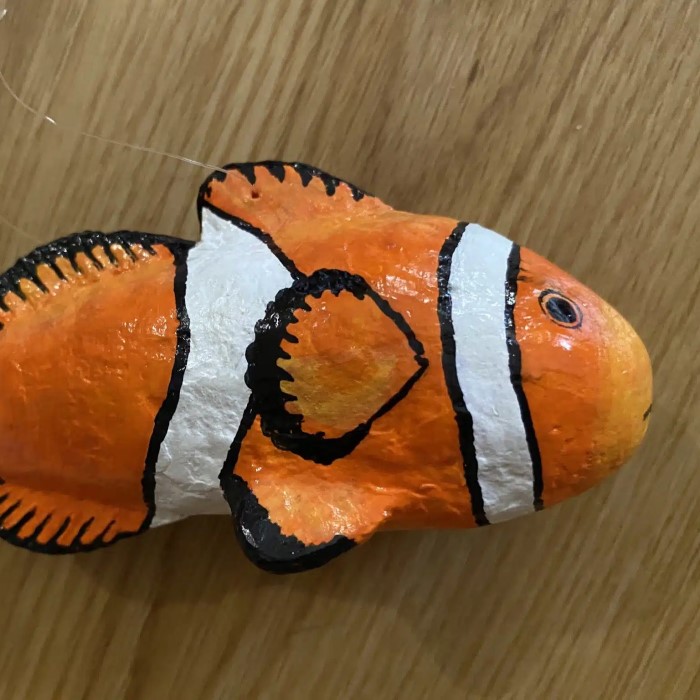
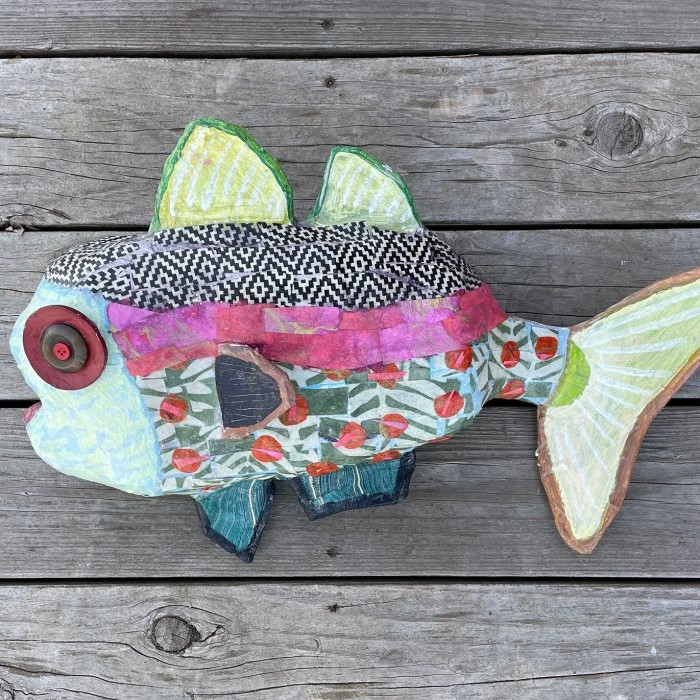
- Opt for a variety of vibrant colors that can bring your fish to life. Bright blues, greens, oranges, and pinks can mimic the vivid hues of actual marine life, making your artwork eye-catching.
- Layering Colors:
- You may choose to layer different colors to create a more dynamic appearance. Use a sponge or brush to blend colors together for a gradient effect.
- Detailing:
- Don’t forget to add small details, such as stripes or spots, to mimic the intricate patterns found on real fish. Fine brushes can be helpful for precision work.
Adding Texture:
- Incorporating Different Materials:
- To make your fish visually interesting, think about applying various materials that can add texture. This step will make your piece unique and tactile.
- Using Fabric:
- Strips of fabric can be glued onto the fish’s surface to create scale-like effects or fins. Different fabrics can impart diverse textures, enhancing the overall look.
- Incorporating Glitter:
- Sprinkle glitter onto your paint while it’s still wet, which can simulate the sparkle of sunlight on water. This will add an alluring touch to your creation.
- Adding Sand or Other Elements:
- Glue on fine sand to replicate the look of a fish’s natural habitat or to represent scales. This added dimension can make your artwork stand out even more.
Finishing Touches:
- Sealing the Artwork:
- Once the painting and texturing are complete and dry, it’s crucial to seal your paper mache fish. Apply a protective layer of varnish to preserve your hard work.
- Choosing the Right Varnish:
- Select a varnish that is suitable for crafting projects, ensuring that it is weather-resistant if the piece will be displayed outdoors.
- Application Process:
- Use a brush or spray to evenly coat the fish, being careful to cover all surfaces including textured sections. Allow sufficient drying time according to the varnish instructions.
- Consider the Environment:
- Remember that sealing your piece not only protects it from moisture but also from sun damage and fading if placed outside.
- Final Check:
- Once the varnish is fully dry, inspect your fish for any areas that may need additional touch-ups or sealing before displaying it prominently.
Trending Ideas for Displaying
Indoor Decor:
- Artistic Wall Hangings:
- Consider hanging your paper mache fish on the walls to transform them into colorful and unique art pieces. They serve as conversation starters and can be a delightful addition to any room.
- Ideal for Children’s Rooms:
- Use these vibrant creations to add a playful touch to children’s rooms. The bright colors and imaginative designs can inspire creativity and enhance the overall atmosphere of the space.
- Enhancing Living Areas:
- In living rooms, these fish can provide a vibrant pop of color that brightens up the environment. Consider creating a gallery wall featuring a collection of fish in various sizes and colors for added visual interest.
- Customization Options:
- Tailor the designs and colors of the fish to match the existing decor of your home. This customization ensures that the artwork harmonizes with your interior design style.
Outdoor Decor:
- Garden Focal Points:
- Place your fish creations in gardens, patios, or balconies to infuse the outdoor space with creativity and color. They can create a whimsical atmosphere and can be positioned strategically to catch the eye.
- Planter Inserts:
- Consider integrating your paper mache fish into planters. They can act as fun decorative elements that complement the plants, adding a unique touch to your gardening displays.
- Creating Underwater Scenes:
- Design an outdoor display that mimics an underwater scene, incorporating your paper mache fish among plants and decorative rocks. Use additional elements like faux seaweed or shells to enhance the theme.
- Weather Protection:
- Ensure that your fish creations are sealed properly to withstand outdoor conditions. This involves using a protective varnish to guard against moisture and UV damage.
Seasonal Displays:
- Festive Adaptations:
- Integrate paper mache fish into seasonal displays to keep your decor fresh throughout the year. This versatility allows for creative expression during special occasions.
- Summer Celebrations:
- For summer barbecues or gatherings, consider painting your fish in festive, bright colors that reflect the joyful spirit of the season. This can create a fun and inviting atmosphere for guests.
- Thematic Parties:
- Get creative with themed parties by designing jellyfish or other sea creatures to complement the overall decor. These additions can enhance a beach-themed party, making the event more cohesive and visually appealing.
- Year-Round Appeal:
- By planning seasonal decorations with your paper mache fish, you can celebrate various holidays and seasons while keeping your home decor lively and engaging throughout the year.
FAQs
What are the 4 ingredients for paper mache?
The four basic ingredients for paper mache include:
- Paper (like newspaper or craft paper)
- A binding paste made from flour mixed with water or a glue-based solution
- Water
- Optional ingredients like salt or vinegar to prolong shelf life.
How to paper mache jellyfish?
To create paper mache jellyfish, form a balloon as the base. Apply torn strips of paper mache, let it dry, and once it’s ready, decorate with colorful paints and long streamers for tentacles.
How to make paper fish easily step by step?
To make paper fish, follow these steps:
- Prepare your mold (a balloon or wire form).
- Mix your paste (flour + water or glue).
- Apply paper mache strips onto the mold (3-4 layers).
- Allow to dry completely.
- Decorate with paint and details.
- Seal with varnish.
How long will paper mache last?
Depending on materials and environmental conditions, paper mache can last for several years. Proper sealing and care will protect it from moisture and allow it to withstand time, especially when used as decor.
Conclusion
In conclusion, creating paper mache fish is an engaging and creative project suitable for all ages. With its affordability and versatility, this craft allows anyone to transform simple materials into stunning decorative pieces for both home and garden.
By following the guidelines and techniques outlined in this article, you can build beautiful paper mache fish that reflect your personal style. Don’t hesitate to experiment with colors, patterns, and textures to create unique designs. So gather your materials, release your creativity, and dive into the wonderful world of paper mache today! Your decor will be more vibrant and eye-catching with the addition of these delightful fish!