Creating a paper mache bowl is a delightful activity that introduces kids to the world of crafting. This versatile medium allows children to express their creativity while developing fine motor skills. The process is simple, inexpensive, and engages kids in hands-on play. By the end of this guide, you will learn how to make a paper mache bowl, including materials, step-by-step instructions, and some fun creative ideas for decorating.
What Is Paper Mache?
Paper mache is a crafting method using paper and adhesive. It is simple and versatile. Artists use it to create lightweight and durable items. You can turn scrap paper into functional or decorative objects.
A Brief History of Paper Mache
Paper mache has origins in many cultures. It became popular in China centuries ago. Early craftsmen used rice-based adhesives to shape forms. In Europe, it gained popularity during the 17th century. Artists used it for creating masks and furniture. It continues to evolve.
Common Uses for Paper Mache Today
Today, paper mache is used for art, decor, and practical items. People make bowls, sculptures, and masks. Teachers use paper mache in classrooms for creative lessons. Home decorators use it for custom designs. The possibilities are endless.
Materials Required
Making a paper mache bowl requires some basic supplies and tools. Gathering everything beforehand ensures a smoother crafting process. Let’s explore what you’ll need for this fun project.
Essential Supplies Checklist
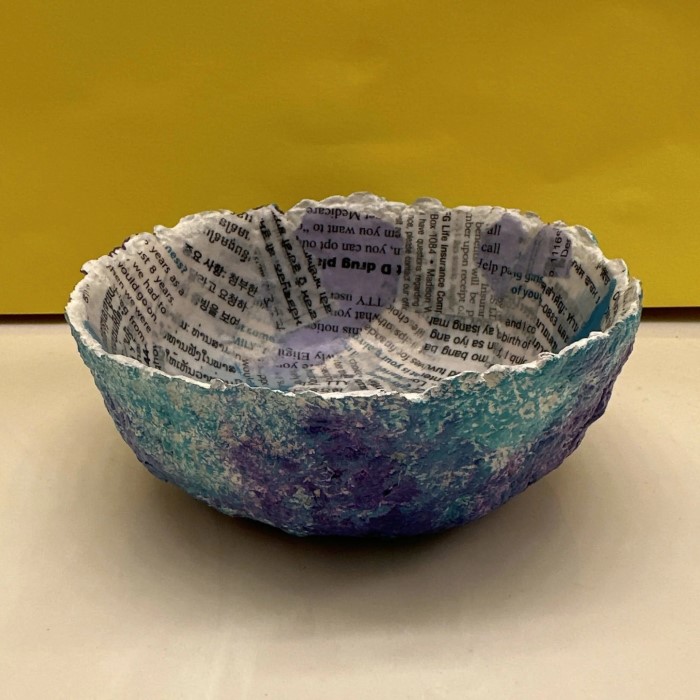
- Paper: Use newspaper, tissue paper, or scrap paper. Newspaper is most commonly used.
- Adhesive: Choose between glue or flour paste. White glue mixed with water works well.
- Bowl Mold: Use an old bowl as a base mold for shaping your paper mache bowl.
- Plastic Wrap: Cover the mold with plastic wrap to prevent sticking.
- Brush or Hands for Application: Use a brush or your hands to apply the adhesive.
- Scissors: Cut paper into strips or desired shapes for layering.
Keep these items handy for a successful start to your paper mache bowl project.
Optional Tools and Accessories
- Paint: Acrylic or watercolor paints work great for decorating your bowl later.
- Sealant: Use clear varnish or Mod Podge for a protective finish.
- Sandpaper: Smooth the surface of the dried bowl for a cleaner look.
- Gloves: Protect your hands from stickiness or irritation while handling adhesive.
- Stencil and Patterns: Add creative designs and shapes to personalize your bowl.
Optional tools enhance the crafting process but are not necessary. They can add polish and flair to your final design.
Preparing Your Workspace for Paper Mache
Setting up your workspace properly makes crafting easier and more enjoyable. A clean and organized area helps avoid mess, saves time, and minimizes stress during your paper mache bowl project.
Tips for an Organized Craft Area
Choose a Well-Lit Space
- Importance of Good Lighting: A well-lit area is essential for any crafting project. It allows you to see details clearly and reduces the chance of making mistakes due to poor visibility.
- Natural Light Benefits: Whenever possible, choose a space with plenty of natural light. Sunlight provides the best clarity and can help you notice subtle differences in colors and textures.
- Supplementary Lighting Options: If natural light isn’t available, consider using bright LED lamps or task lighting. Adjustable lamps can help direct light to specific areas of your workspace.
Use a Flat Surface
- Stability is Key: A flat and sturdy table or countertop is the best option for crafting. This stability prevents your materials from rolling away or becoming misaligned while you work.
- Avoid Soft Surfaces: Using a soft surface, like a couch or bed, may lead to uneven crafting results and can be uncomfortable for extended periods.
- Size Matters: Ensure the surface is large enough for your project and any additional materials you might need, allowing space to spread out comfortably.
Protect Your Workspace
- Preventing Damage: Covering your craft surface with old newspapers, a plastic sheet, or a craft mat helps protect it from spills, stains, and scratches. This practice will preserve your workspace for future projects.
- Easy Cleanup: Using a protective covering makes cleanup easier. When your crafting session is over, simply roll up the newspaper or remove the plastic sheet and discard or clean it.
- Enhance Safety: A protective layer can also reduce the risk of slipping or accidents caused by spilled glue or paint on hard surfaces.
Keep Tools Within Reach
- Organized Tools: Store essential tools like scissors, glue, brushes, and paints nearby so that you don’t have to pause your project to search for them. This organization enhances focus and productivity.
- Tool Caddy Options: Consider using a small caddy or basket to keep frequently used tools in one place. Many craft stores offer organizers designed specifically for this purpose.
- Minimize Distractions: Having your tools close at hand prevents unnecessary distractions, allowing you to stay in the creative flow while working on your project.
Use Containers for Supplies
- Limit Clutter: Organizing supplies in separate containers helps minimize clutter and makes it easier to locate what you need when you need it.
- Labeling for Convenience: Use clear containers or label boxes to easily identify where each type of material is stored—this could be paper strips, adhesives, paints, etc.
- Accessible Storage: Consider stacking containers or using a small shelving unit to maximize vertical space, keeping your crafting area tidy and efficient.
Create a Drying Zone
- Separate Drying Area: Establish a designated space for drying your paper mache bowl. This area should be free from disturbances to prevent accidental bumps or movements.
- Ensure Proper Airflow: Good air circulation is important for the drying process. A well-ventilated space allows your project to dry more evenly and efficiently.
- Use a Tray or Surface: Place your bowl on a tray, wire rack, or paper towels in the drying zone. This setup keeps it stable and helps avoid damage to other surfaces from potential drips or spills.
An organized workspace encourages creativity and simplifies crafting.
Safety Considerations
- Ventilation: Ensure your room is well-ventilated, especially when using adhesives or paints.
- Protective Clothing: Wear old clothes or an apron to prevent stains.
- Avoid Sharp Edges: Handle scissors and other sharp tools with care.
- Skin Protection: Use gloves if you’re sensitive to glue or paste.
- Child Supervision: Monitor children closely if they are involved in the craft.
Following these safety tips ensures a safe and enjoyable crafting experience. Preparing your workspace this way sets the stage for creating a beautiful paper mache bowl.
Step-by-Step Guide
Creating a paper mache bowl is a simple and fulfilling project. Follow these steps to make your own bowl. Ensure you have all materials ready before starting.
Creating the Base Structure
- Prepare Your Mold: Use an old bowl as your mold. Cover it with plastic wrap.
- Cut the Paper: Cut newspaper or any scrap paper into small strips for layering.
- Secure the Mold: Place your mold on a stable surface to prevent movement while working.
Mixing and Applying the Paper Mache Paste
- Make the Paste: Mix white glue with water or create flour-based paste. Ensure it’s not too thick.
- Apply the Paste: Dip paper strips into the paste. Remove excess paste by running the strip between fingers.
- Start Layering: Apply pasted strips over the mold and cover it fully. Use hands or a brush for even application.
Layering Paper Mache
- Build Layers: Add several layers of paper strips for durability. Let each layer dry slightly before adding the next.
- Smooth All Areas: Press and smooth strips to prevent wrinkles or uneven surfaces.
- Strengthen Edges: Pay extra attention to the edges of your bowl for added strength.
Drying and Finishing the Base
- Let It Dry: Allow the paper mache bowl to dry completely. This may take 1-2 days.
- Remove the Mold: Once dried, gently separate the paper mache from the mold.
- Trim Excess: Trim uneven edges or excess paper using scissors.
- Sand the Surface (Optional): Use sandpaper for a smoother finish if desired.
By following these steps, you can create a sturdy paper mache bowl ready for decoration!
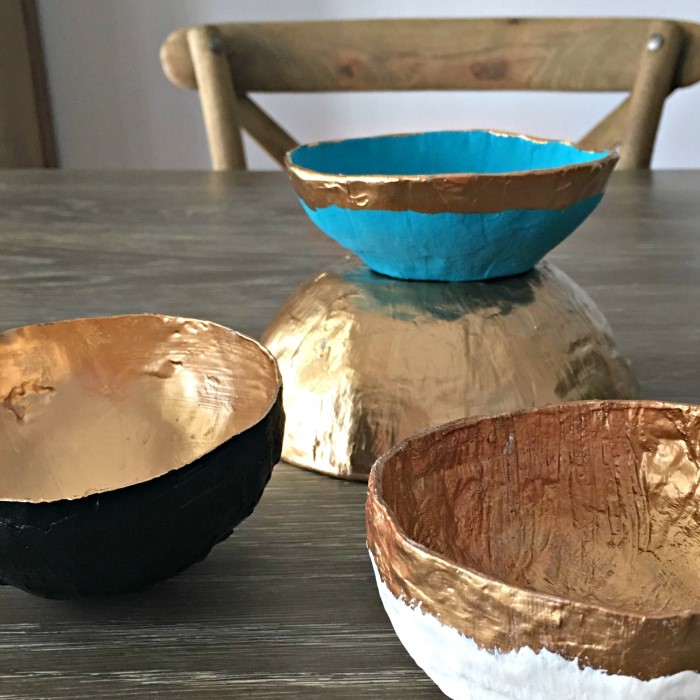
Decorating Your Paper Mache Bowl
Decoration transforms your paper mache bowl into a personalized piece of art. You can paint it, add patterns, or seal it for a polished look. These steps will help you make your bowl visually appealing.
Painting Techniques
- Choose Your Paint: Acrylic paint works best due to its vibrant and durable finish.
- Base Coat: Apply a white or neutral base coat to cover newspaper print.
- Layer Colors: Use brushes or sponges to add bold or blended colors.
- Add Texture: Experiment with dry brushing, splattering, or stenciling for unique effects.
- Let It Dry: Let each paint layer dry before adding another to avoid smudging.
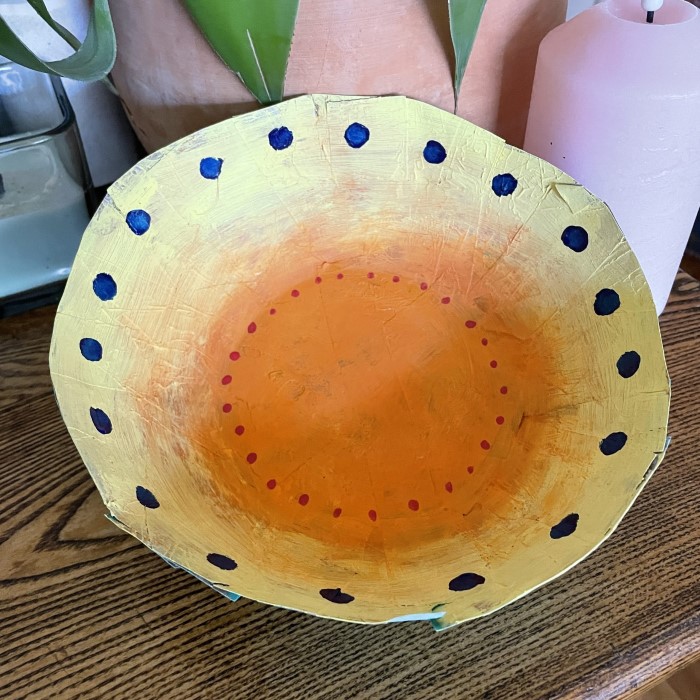
Adding Patterns and Designs
- Plan Your Design: Sketch ideas such as stripes, dots, or intricate patterns.
- Use Stencils: Secure stencils onto the bowl for clean, professional designs.
- Hand-Paint Details: Use fine-tip brushes for detailed work like outlines or highlights.
- Incorporate Mixed Media: Add embellishments like beads, sequins, or fabric for depth.
- Customize Themes: Match designs to special occasions or room decor for a cohesive look.
Applying a Protective Sealant
- Pick the Right Sealant: Use clear varnish or Mod Podge for a glossy or matte finish.
- Test on a Small Area: Check how the sealant interacts with paint before full application.
- Apply Even Coats: Use a brush to evenly coat the entire bowl.
- Ensure Full Coverage: Cover all painted areas to protect and enhance colors.
- Let It Cure: Allow the bowl to dry completely for a durable, polished result.
Decorating your paper mache bowl is creative and fun. Take your time and enjoy the process!
Tips and Tricks for Successful Paper Mache Crafting
Crafting with paper mache can lead to incredible results, but it also comes with challenges. Below, you’ll find helpful tips and strategies for crafting efficiently and solving common issues.
Common Challenges and How to Overcome Them
- Lumpy Surface: Smooth strips carefully when layering to avoid lumps. Use sandpaper once dry.
- Weak Structure: Add multiple layers and reinforce edges for strength and durability.
- Adhesive Problems: Ensure paste has the right consistency for better adhesion. Use fresh glue mixtures.
- Slow Drying: Place the project near a fan or in a warm area for quicker drying.
- Cracking During Drying: Avoid overloading layers with paste; let each layer dry before applying the next.
- Difficulty Removing Mold: Cover the mold with plastic wrap or oil to ease separation once dry.
Address these challenges with care and patience for a smoother crafting experience.
Time-Saving Strategies
- Pre-Cut Paper Strips: Cut paper strips before starting to save time mid-project.
- Prepare Adhesive in Advance: Mix glue or paste beforehand to keep the process uninterrupted.
- Set Up Stations: Arrange tools, materials, and drying areas for swift crafting.
- Work in Small Sections: Tackling small sections at a time ensures efficiency and avoids overwhelm.
- Use Quick-Dry Paints: Opt for acrylic paints for faster decoration steps.
- Batch Crafting: Make multiple bowls at once by preparing additional molds and materials.
With these strategies, you can enjoy faster and more organized paper mache crafting sessions.
Creative Variations
Paper mache bowls offer endless opportunities for creativity. You can experiment with shapes, styles, and themes.
Unique Shapes and Styles
- Freeform Shapes: Create organic or abstract shapes for modern and artistic designs.
- Layered Designs: Add layers of varying heights for tiered or textured bowls.
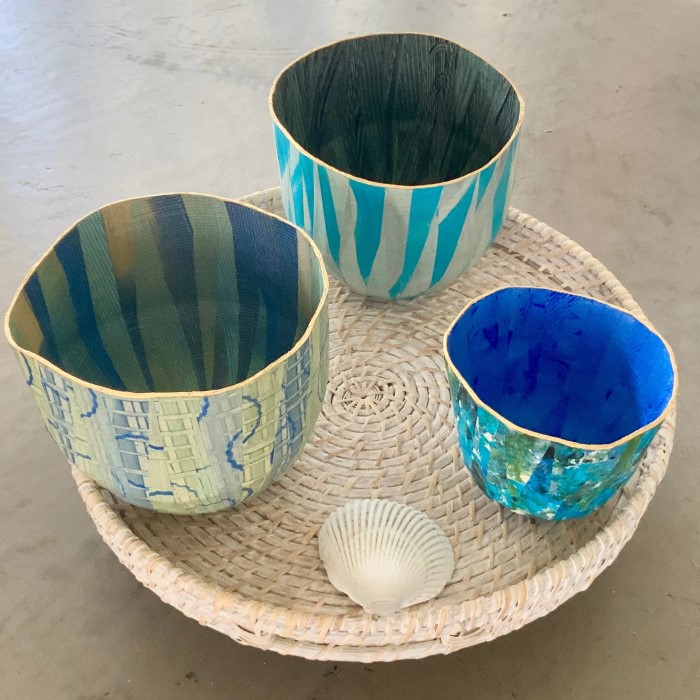
- Nested Bowls: Make bowls of different sizes that fit into one another for a set.
- Fluted Edges: Shape wavy or scalloped edges for a decorative touch.
- Inspired by Nature: Mold bowls to mimic leaves, flowers, or seashells.
- Extra-Large Bowls: Craft oversized bowls for dramatic centerpieces or functional storage.
Experimenting with unique shapes will make your paper mache bowls stand out and reflect your style.
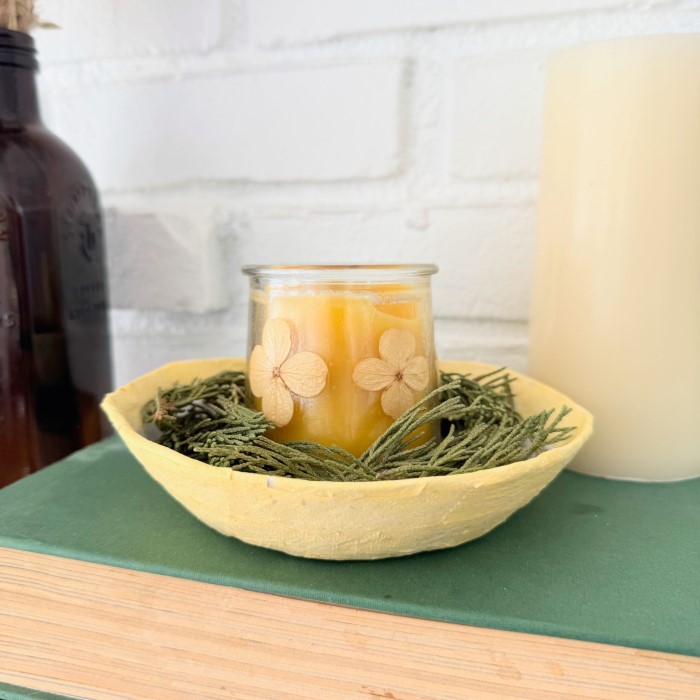
Themed Bowl Ideas for Home Decor
- Seasonal Themes: Design bowls inspired by winter snowflakes, autumn leaves, or spring blossoms.
- Holiday Bowls: Use colors and decor for Christmas, Halloween, or other festive occasions.
- Cultural Patterns: Incorporate traditional designs from different cultures, such as mandalas or tribal art.
- Minimalist Style: Stick to neutral tones and clean lines for an elegant, modern look.
- Oceanic Inspiration: Decorate with blues, greens, and wave-like patterns for a marine vibe.
- Rustic Charm: Use natural colors and textures for a cozy farmhouse aesthetic.
Themed bowls can elevate your home decor while aligning with personal tastes or celebrations.
Maintenance and Care
Proper care keeps your paper mache bowl looking good for longer. Follow these tips to clean, store, and repair your craft effectively.
Cleaning and Storage Tips
- Dust Regularly: Use a soft cloth to gently wipe away dust from the bowl.
- Avoid Water Exposure: Keep the bowl dry to prevent weakening or damage to its structure.
- Spot Cleaning: Clean stains with a slightly damp cloth. Dry immediately with a soft towel.
- Store in Dry Conditions: Choose a cool, dry space for storage to avoid moisture-related damage.
- Protect From Sunlight: Avoid direct sunlight to prevent fading of colors.
- Use Covers: Store bowls in plastic bags or containers to avoid dust and accidental scratches.
Repairing Damaged Paper Mache Projects
- Assess Damage: Identify tears, holes, or cracks to know what needs fixing.
- Patch Tears: Apply paste-covered paper strips to cover small tears and let dry completely.
- Fill Holes: Layer paper strips in the damaged area for a full repair. Dry thoroughly.
- Fix Cracks: Smooth cracks with additional paste or glue before painting over them.
- Repaint Affected Areas: Redecorate repaired spots to maintain the original design.
- Reapply Sealant: Use a protective sealant to preserve the bowl after repairs.
Regular care and timely fixes ensure your paper mache bowl remains attractive and functional for years!
Conclusion
In conclusion, making a paper mache bowl is a fantastic craft activity for kids. Not only does it provide an avenue for creativity, but it also teaches valuable skills in a fun, engaging way. By following the simple steps outlined in this guide, you can ensure an exciting and productive crafting experience.
Encourage kids to explore different designs and themes as they develop their artistic talents. Remember, the beauty of paper mache lies in its versatility and the endless possibilities it offers for creation. So gather your materials and let the crafting adventures begin! Happy crafting!