What Are Paper Mache Numbers?
Paper mache numbers are decorative figures made using a paper-based crafting technique. They are lightweight and highly customizable, making them popular for DIY craft projects. These numbers can be used for special events, home décor, or educational purposes. Their versatility allows for endless creative possibilities, such as painting, glittering, or adding textures.
Materials Needed for Paper Mache Numbers
To create paper mache numbers, you will need the following materials:
- Base Structure: Cardboard, foam, or a store-bought number mold.
- Paper: Strips of newspaper or craft paper.
- Adhesive: Homemade paste (flour and water) or store-bought glue.
- Tools: Scissors, paintbrushes, and containers for mixing paste.
Additional materials may include paint, glitter, fabric, or decorative embellishments based on your design.
The Popularity of Paper Mache Numbers in DIY Projects
Paper mache numbers are widely appreciated in the DIY community. Their ease of crafting makes them ideal for beginners and experts alike. They’re often seen in birthday parties, weddings, and classroom activities. Craft enthusiasts love these numbers for their affordability, eco-friendliness, and creative potential. You can customize them to match themes, colors, or events, making them a unique addition to any setting.
How to Make Paper Mache Numbers
Creating paper mache numbers at home can be fun and easy. Follow these tips to make your crafting process smooth.
Step-by-Step Guide for Beginners
- Prepare Your Base Structure: Use cardboard, foam, or premade number molds as the base.
- Create Paper Strips: Cut newspaper or craft paper into strips for layering.
- Mix the Adhesive Paste: Combine flour and water or use store-bought glue for a strong adhesive.
- Apply the Paper Strips: Dip paper strips into the paste. Remove excess paste by running it through your fingers.
- Layer the Paper: Cover the base with several layers of pasted strips, allowing each layer to dry.
- Dry Thoroughly: Let your numbers dry completely, preferably overnight.
- Customize the Design: Paint or decorate your numbers once the paper mache is fully set.
This simple guide is perfect for beginners who want to achieve satisfying results easily.
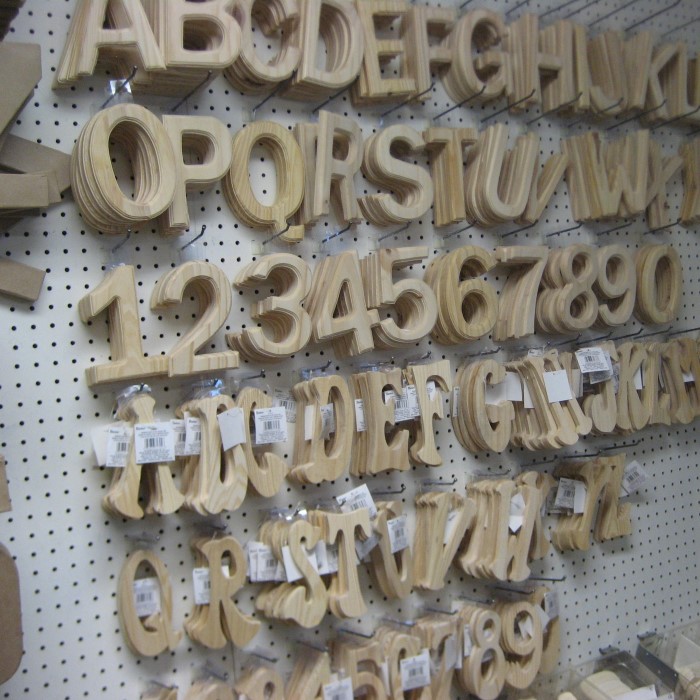
Choosing the Right Mold or Base for Your Numbers
Selecting the right base is crucial for the final look of your paper mache numbers. Here are some tips:
- For Straight Edges: Use cardboard as it cuts well and maintains structure.
- For Predefined Shapes: Choose store-bought molds for uniformity.
- For Large Numbers: Foam is lightweight and easy to cut.
Ensure the base aligns with your desired size and theme. A sturdy base leads to durable numbers.
Common Mistakes to Avoid When Making Paper Mache Numbers
Avoid these common errors to ensure a smooth crafting experience:
- Skipping Base Preparation: Always shape the base securely before adding paper layers.
- Overloading Adhesive: Excess paste weakens the structure; remove extra paste before application.
- Insufficient Drying: Incomplete drying can lead to deformations or cracks later.
- Uneven Layers: Apply the paper strips evenly for a polished finish.
Avoid these mistakes to achieve strong and appealing paper mache numbers.
Creative Decorating Ideas
Paper mache numbers offer endless creative opportunities. You can personalize them to match any occasion or theme. Here are some inspiring ideas to take your paper mache designs to the next level.
Painting and Coloring Techniques
- Acrylic Paints for Bold Colors: Use acrylic paints for vibrant and even coverage.
- Ombre Gradients: Blend two or more shades to create an ombre effect.
- Metallic Paint: Choose gold, silver, or bronze hues for an elegant look.
- Pattern Painting: Add stripes, polka dots, or florals for a fun, customized design.
- Stencil Art: Use stencils to create precise shapes or numbers within your design.
For a smooth finish, always apply a base coat before detailing. Let each layer dry before adding new elements.
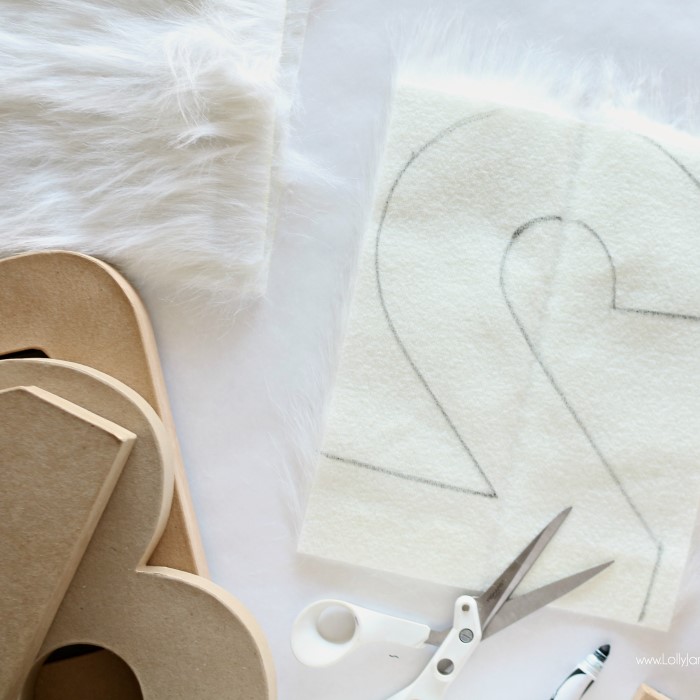
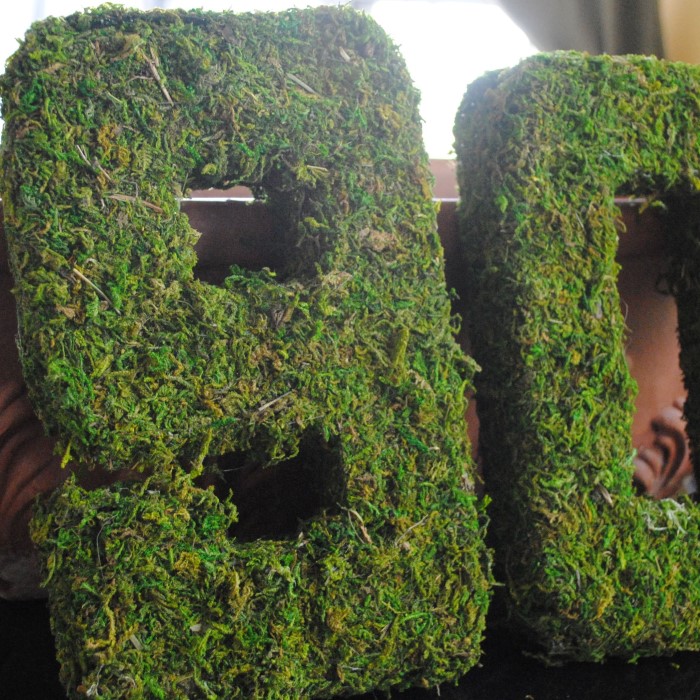
Adding Glitter, Fabric, or Other Unique Textures
- Glitter Coating: Apply glue and sprinkle glitter for a shimmering effect. Seal with a top coat.
- Fabric Wrapping: Cover numbers with printed fabrics for a textured and cozy look.
- Textured Paper: Use tissue or craft papers to add rippled or folded textures.
- Beads or Sequins: Attach small beads or sequins for a more glamorous appearance.
- Rope and Ribbons: Wrap them with rope or ribbon for rustic or elegant designs.
Experiment with combinations of textures. Layering materials can create dynamic and unique results.

Designing Themed Numbers for Special Events
- Birthday Themes: Use bright colors and patterns like balloons or confetti.
- Wedding Themes: Opt for soft pastels, lace fabric, and metallic accents.
- Seasonal Designs: Incorporate seasonal motifs like snowflakes for winter or leaves for autumn.
- Educational Events: Add numbers decorated with alphabets or equations for school or classroom use.
- Holiday Celebrations: Use red and green for Christmas, or black and orange for Halloween.
Align your designs with the theme of the occasion. This adds a cohesive visual appeal to your décor.
Paper mache numbers are a blank canvas for your creativity. Try these ideas to create stunning and memorable decorations.
Uses for Paper Mache Numbers
Paper mache numbers are incredibly versatile for various occasions and settings. These lightweight and customizable decorations suit events, celebrations, and educational spaces. Let’s explore some creative ways to use them in different scenarios.
Decorating Birthday Parties and Celebrations
Paper mache numbers are perfect for creating themed birthday displays. Use bold colors or patterns to match the party theme. Set up a centerpiece with large numbers representing the celebrant’s age. Add glitter or metallic paint for extra shine. You can also use smaller numbers as part of party favors or photo booth props.
Wedding Décor and Anniversary Displays
For weddings or anniversaries, paper mache numbers add a personal and elegant touch. Use soft pastels, lace, or metallic accents to match the event’s aesthetic. Create displays with the couple’s wedding date or anniversary years. Position these numbers near the entrance, gift table, or cake stand to enhance the décor. Adding floral elements or fairy lights can make them more romantic.
Classroom and Educational Uses
In classrooms, paper mache numbers can be both functional and decorative. Utilize them to teach counting, math, or other educational activities. Create colorful and engaging numbers to grab students’ attention. Use textured designs to make the numbers more tactile for younger learners. Display them on bulletin boards or as part of themed classroom decorations.
Paper mache numbers are adaptable for various events and purposes. Their customization options make them a must-have for creative projects.
Tips for Enhancing Durability and Quality
Creating sturdy and long-lasting paper mache numbers ensures they remain beautiful over time. Focus on proper sealing and handling to extend their lifespan and maintain their quality.
Sealing Methods for Long-Lasting Numbers
- Use a Protective Sealant: Apply a coat of clear varnish or acrylic sealer over your finished numbers. This adds a protective layer that prevents damage from moisture and wear.
- Waterproof Finishes: Use waterproof sealants if the numbers may face outdoor conditions or humid environments.
- Mod Podge for Added Strength: Brush Mod Podge over the surface for additional protection and a smooth finish.
- Spray Sealers for Convenience: Spray sealers are quick and ensure even coverage, especially for intricate designs.
Always allow the sealant to dry completely before displaying or storing your numbers. This step locks in the design and provides a smooth, polished look.
Tips for Preventing Cracks or Deformations
- Use Quality Adhesive: Pick strong adhesive paste to ensure the structure stays firm during and after drying.
- Dry Numbers Thoroughly: Allow layers to dry completely before adding more paper. This builds a strong structure.
- Store in Stable Conditions: Keep your numbers in a cool, dry place, away from direct sunlight and moisture.
- Avoid Excess Water in Paste: Use a consistent, thick paste to prevent weakening the base.
- Apply Even Layers: Ensure all paper strips are applied evenly. Uneven layers may cause cracks while drying.
By following these tips, your paper mache numbers will remain durable and maintain their structure for years.
Eco-Friendly Paper Mache Alternatives
Creating sustainable paper mache numbers is both environmentally friendly and cost-effective. By using eco-conscious materials and methods, you can craft beautiful decorations while reducing waste. Let’s explore some responsible alternatives for paper mache projects.
Using Recycled Materials
- Newspaper and Magazines: Use old newspapers or magazines instead of buying new paper. They are perfect for layering.
- Cardboard Scraps: Repurpose leftover cardboard pieces as the base for your numbers.
- Paper Grocery Bags: Cut these into strips for an affordable and eco-friendly alternative to craft paper.
- Shred Office Paper: Reuse printed office documents by shredding and using them for your paper mache.
- Egg Cartons: Tear egg cartons into small pieces, soak them, and use them for molding shapes.
Using recycled materials not only saves money but also keeps paper out of landfills. Always ensure the paper is clean and free of plastic coatings before use.
Creating Eco-Conscious Decorative Numbers
- Homemade Adhesives: Create paste using flour and water instead of chemical-based glues.
- Natural Paints: Choose eco-friendly paints made from natural pigments and non-toxic ingredients.
- Plant-Based Sealers: Use sealants derived from plant-based materials for finishing your creations.
- Eco-Themed Decorations: Add natural embellishments like dried flowers, twigs, or leaves for decoration.
- Biodegradable Embellishments: Replace plastic accessories with materials like jute rope, hemp, or fabric scraps.
By using these alternatives, you minimize your environmental impact without compromising creativity. Craft numbers that are both artistic and sustainable!
Display and Storage Ideas
Properly displaying and storing paper mache numbers ensures they stay safe and retain their appeal. Thoughtful placement and storage techniques will enhance their longevity and maintain their visual charm.
How to Hang or Mount Your Paper Mache Numbers
- Wall Hooks: Attach lightweight hooks for easy wall mounting of paper mache numbers.
- Double-Sided Tape: Use strong adhesive tape to attach numbers to flat surfaces securely.
- String and Ribbon: Hang numbers using string or ribbons for a decorative touch.
- Tabletop Stands: Position numbers on small stands or easels for flat surfaces like tables.
- Frames or Shadow Boxes: Enclose numbers within frames or shadow boxes to preserve them while displaying.
Choose a mounting method compatible with the weight and size of your creations.
Storing Your Paper Mache Creations Properly
Use Dry Boxes
-
- Storing your paper mache numbers in sealed, dry containers is crucial for maintaining their condition.
- Moisture can lead to mold growth, warping, or degradation of the paper mache material over time.
- Opt for airtight plastic boxes or containers that effectively protect against humidity.
- This approach not only preserves the integrity of the pieces but also prolongs their lifespan, ensuring they remain beautiful for future use.
Wrap in Bubble Wrap
-
- To safeguard intricate designs, carefully wrap each piece in bubble wrap or soft paper tissues.
- This cushioning prevents scratches, dents, or breakage during storage and transportation.
- Bubble wrap is especially effective in absorbing shocks, which can occur if the storage boxes are moved or jostled.
- Additionally, using layers of paper tissue can provide an extra layer of protection for delicate areas and decorative elements.
Label Storage Areas
-
- Keeping your numbers organized makes it easier to locate them when needed.
- Clearly label each storage container with its contents, including details such as the number and any special designs or occasions.
- This practice helps streamline the process when you want to display or use specific numbers, saving time and effort.
- Use waterproof labels or permanent markers to ensure that the information remains legible over time.
Avoid Direct Sunlight
-
- Store your paper mache numbers in a cool, shaded area to avoid exposure to direct sunlight.
- Prolonged sun exposure can cause colors to fade and materials to degrade, impacting their appearance and structural integrity.
- Consider placing them in a closet, storage room, or shaded shelf where they won’t suffer from heat or UV damage.
- This precaution helps maintain the vibrant colors and textures of your numbers for as long as possible.
Stack Carefully
-
- When stacking your paper mache numbers, take care to avoid pressing down on fragile areas.
- Use padded materials such as towels or felt between numbers to prevent them from scratching or crushing one another.
- Ensure that heavier pieces are placed at the bottom of the stack to maintain balance and stability, reducing the risk of toppling.
- By stacking carefully, you can maximize storage space while protecting the integrity of your art.
Adopting proper storage techniques extends the lifespan of your paper mache numbers.
Conclusion
In summary, paper mache numbers offer endless opportunities for creativity and personalization across various occasions. From birthday celebrations to home decor, crafting unique numbers can add joy and character to your events. With the right materials, techniques, and a bit of imagination, anyone can create stunning pieces that delight and inspire.
Exploring creative ideas for paper mache numbers encourages not just artistic expression but also enhances the significance of your celebrations. Whether you’re getting children involved in a fun project or looking to add personal flair to your decor, paper mache numbers are a delightful choice.
So gather your materials, unleash your creativity, and discover the joy of crafting with paper mache! Enjoy the process of bringing your ideas to life as you embark on this fun-filled artistic journey.