What Are Model Airplane Kits?
Model airplane kits are sets of parts designed to build miniature airplanes. They come with pre-made components and instructions to help enthusiasts construct their aircraft. These kits cater to hobbyists, ranging from beginners to advanced builders. The activity promotes creativity and skill development, making model airplane kit a fun and rewarding pastime.
Types of Model Airplane Kits
There are two main types of model airplane kits:
- Ready-to-assemble kits: These kits come with pre-cut parts and clear instructions. They are ideal for beginners and are often made for static display.
- Scratch-building kits: These kits require cutting and shaping materials from scratch. Advanced builders often choose these kits to customize their models.
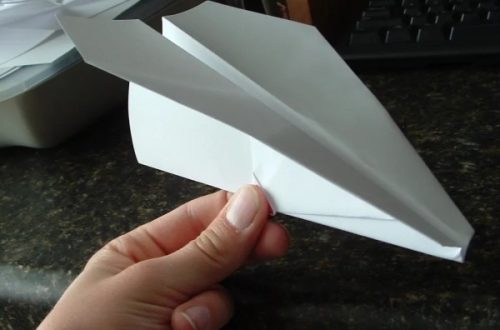
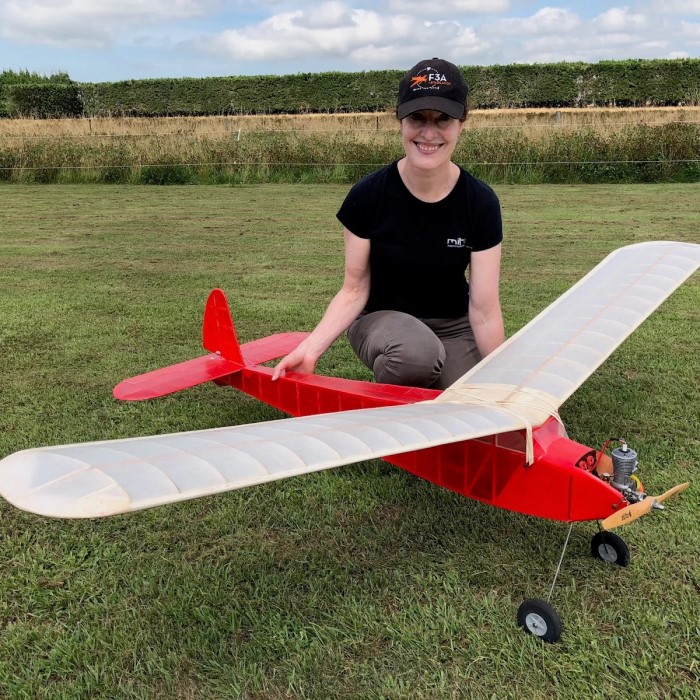
Additionally, model airplane kits can be categorized into static models and flying models based on their purpose. Static models are built for display, while flying models are designed to take flight.
Materials Used in Model Airplane Kits
Model airplane kits use different materials depending on their complexity and purpose:
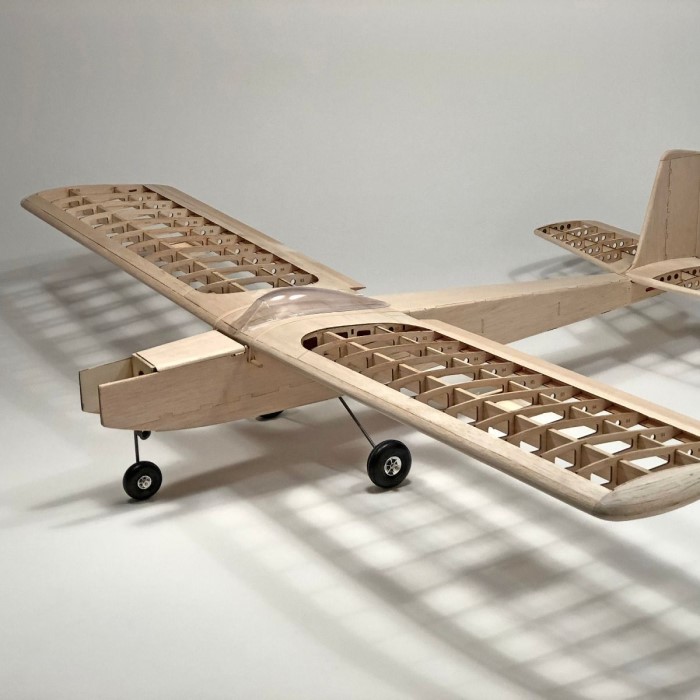
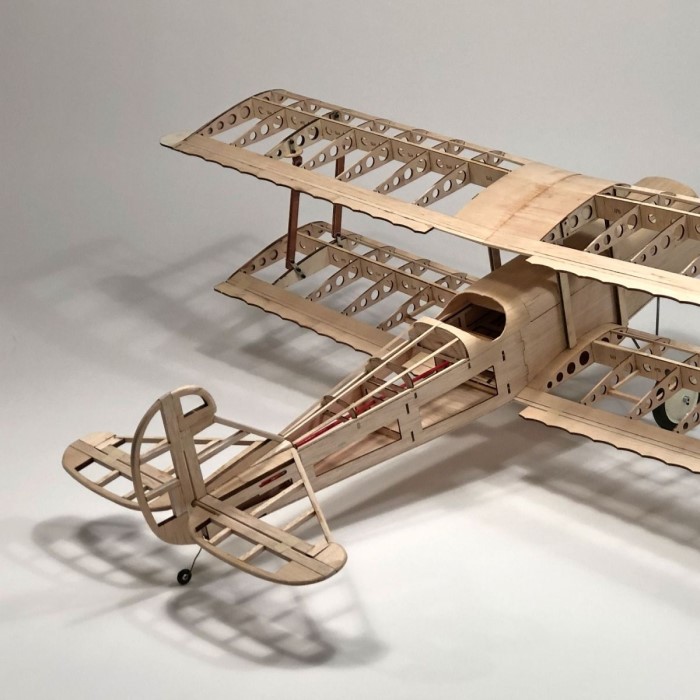
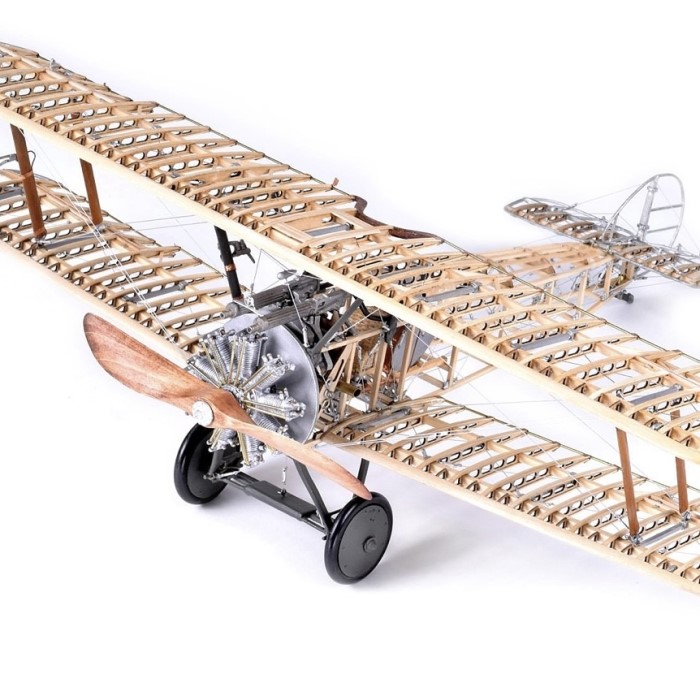
- Wood: Balsa wood is common for lightweight and sturdy structures, especially in flying models.
- Plastic: Used for detailed parts in static models; it is easy to mold and paint.
- Foam: Lightweight foam is popular for beginner kits and planes designed to fly.
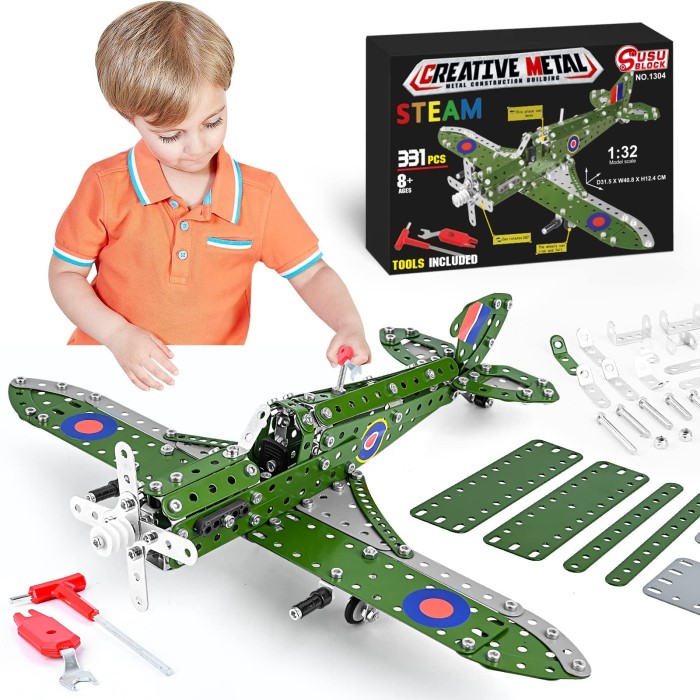
- Metal: Some advanced kits include metal components for durability.
Each material has advantages. Beginners benefit from simpler kits with plastic or foam. Advanced builders may prefer wood or metal for customization and durability.
Choosing the Right Model Airplane Kit
Selecting the right model airplane kit is important for both fun and success. Different kits cater to varying skill levels and needs. Beginners should focus on simpler designs while advanced builders can explore more intricate options.
Factors to Consider for Beginners
Beginners should seek kits that are easy to assemble and come with clear instructions. Ready-to-assemble kits are often ideal for those new to the hobby. Look for kits made of plastic or foam as they are lightweight and beginner-friendly. Flying models designed for novices can also provide an exciting experience.
Other considerations include:
- Time Commitment: Choose kits that can be completed within a few hours.
- Purpose: Decide between building for display or flight.
- Cost: Start with affordable kits to avoid overspending.
- Durability: Ensure materials can withstand minor mistakes during assembly.
Popular Brands and Their Features
Several well-known brands offer model airplane kit suitable for different levels of expertise. Here are some popular choices:
- Revell: Known for detailed static models with easy-to-follow guides.
- Guillow’s: Offers balsa wood flying kits perfect for advanced builders.
- Tamiya: Produces high-quality plastic kits suitable for detailed static models.
- Flite Test: Specializes in foam-board flying kits, ideal for beginners.
Research each brand’s features to match your skill level and preferences. Read reviews to learn more about specific kits and their challenges. Taking your time to choose the right kit ensures a great building experience and lasting enjoyment.
Tools and Supplies Needed for Building
Choosing the right tools and supplies is crucial for building model airplane kit efficiently. Using proper tools ensures precision and makes the assembly process smoother and enjoyable.
Essential Tools for Assembly
Essential tools help with the basic assembly of a model airplane kit. Here are the must-have tools:
- Craft Knife: A sharp knife is needed for cutting materials like foam or plastic.
- Glue or Adhesive: Use strong adhesives to attach components securely.
- Sandpaper: Smooth edges and surfaces with fine-grit sandpaper.
- Paintbrushes: Use different sizes to apply paint to the model.
- Tweezers: Handle small parts with precision.
- Clamps or Clips: Keep parts in place while the glue dries.
- Ruler and Measuring Tools: Ensure accuracy and proper alignment during assembly.
These tools cover the basics and are suitable for beginners and advanced builders.
Optional Tools to Improve Craftsmanship
Optional tools provide advanced builders with more control and creativity. They enhance detailing and ensure better craftsmanship:
- Airbrush Kit: Create smooth and professional paint finishes.
- Cutting Mat: Protect your workspace while cutting materials.
- Woodburning Tool: Shape and detail parts in wooden kits.
- Magnifying Glass or Lamp: Improve visibility for detailed work.
- Rotary Tool: Sand, polish, or drill parts efficiently.
- Modeling Clamps: Helpful for delicate or dynamic assemblies.
Investing in these tools takes your building skills to the next level. Choose them based on your kit and experience level.
Having both essential and optional tools ensures you are well-prepared for any project. A well-equipped toolkit makes the building process enjoyable and stress-free.
Step-by-Step Guide to Building a Model Airplane Kit
Building a model airplane kit can be enjoyable and rewarding. Follow these steps for a smooth process.
Preparing Your Workspace
Setting up a proper workspace is an essential part of starting your project. Here are some tips:
- Choose a Clean and Stable Area: Use a table or workbench that provides enough space.
- Gather All Tools and Supplies: Keep your tools like craft knives, glue, and paint within reach.
- Ensure Proper Lighting: Good lighting helps with precision, especially when assembling small parts.
- Use a Cutting Mat: Protect your surface and improve accuracy while cutting materials.
- Keep Instructions Handy: Lay out the kit instructions for reference during building.
Preparing your workspace will save time and improve efficiency.
Assembling Component Pieces
Assembling the pieces is where your work takes shape. Follow these steps:
Read the Instructions Carefully
- Thorough Review: Begin by carefully reading through the entire instruction manual provided with your model airplane kit. Take your time to understand each step before diving into assembly.
- Sequential Understanding: Familiarize yourself with the sequence of assembly. Comprehending the order of steps can help avoid mistakes that may arise from skipping parts or assembling them incorrectly.
- Highlight Key Steps: Consider highlighting or making notes on crucial steps in the instructions. This can serve as a helpful reference as you proceed with building your model.
Organize Parts
- Sort Components: Upon unpackaging your kit, take the time to sort each component. Group similar pieces together to streamline the assembly process.
- Create an Accessible Workspace: Arrange parts in an organized manner within your workspace, so everything is easy to access. Consider using trays or containers to prevent small parts from being misplaced.
- Label Parts: If your kit includes numerous small pieces, labeling them can save you time and effort. Knowing what each part is can help you quickly locate what you need during assembly.
Dry Fit Pieces
- Temporary Assembly: Before applying any glue, conduct a dry fit by placing the parts together without adhesive. This lets you see how they align and whether they fit as expected.
- Make Adjustments: If any parts do not appear to fit correctly during the dry fit, you can make adjustments as necessary. This could involve trimming parts or repositioning them for a better fit.
- Identify Alignment Issues: During the dry fit, take note of any areas that may require additional attention. Ensuring parts align properly during this stage can prevent complications later on.
Apply Adhesive Carefully
- Select Appropriate Glue: Use the type of glue recommended in the instructions, as different materials require specific adhesives. This ensures a strong bond that will hold effectively.
- Apply Glue Sparingly: When applying adhesive, do so sparingly. Excess glue can create messes and lead to unsightly drips or smudges on your model.
- Check Any Joints: Pay careful attention to joints and connections while applying glue. Ensuring each connection is well-coated without excess can lead to a cleaner finish.
Use Clamps or Clips
- Secure Joints: Utilize clamps or clips to hold parts in place once you’ve applied glue. This not only stabilizes the assembly but also ensures a secure fit as the adhesive dries.
- Select the Right Tools: Depending on the size of your pieces, choose appropriate clamps or clips that won’t damage delicate parts but are strong enough to provide adequate pressure.
- Leave to Dry Fully: Allow the glued components to dry fully while secured by the clamps. Patience during this step is crucial, as it ensures the integrity of the assembly once the adhesive sets.
Work in Small Sections
- Focus on One Area: Rather than tackling the entire model at once, focus on one section at a time. Breaking the process down into manageable pieces can prevent feeling overwhelmed.
- Increase Control: By concentrating on a single section, you can work with greater control and accuracy. This helps ensure that each part of the model is assembled correctly without rushing.
- Cross-Check Each Section: After completing one section, cross-check it against the instructions before moving on to the next part. This can catch any potential mistakes early in the assembly process.
Taking time and care during assembly leads to a solid and attractive model airplane.
Painting and Detailing Tips
Painting and detailing add character and realism to your model airplane. Here’s how to excel:
- Prepare the Surface: Sand rough areas for a smooth finish before painting.
- Choose Quality Paints: Use model-specific paints for best results.
- Use Small Brushes or Airbrush: Paint intricate details with precision using the right tools.
- Apply Thin Coats: Multiple thin layers ensure an even finish and prevent dripping.
- Add Stickers or Decals: Follow the kit instructions to add decals for added realism.
- Dry Fully Between Steps: Let each coat dry before starting the next step.
Proper painting and detail work bring your model airplane to life. Take your time and enjoy the process.
Common Challenges and How to Overcome Them
Building a model airplane kit can be tricky, especially for beginners. Challenges like fit issues or mistakes during assembly can arise. Learning how to address these problems ensures a smoother process and a successful result.
Troubleshooting Fit Issues
Fit issues occur when parts don’t align or fit as expected. Here’s how to resolve them:
- Double-check Instructions: Revisit the manual to ensure you’re using the correct parts.
- Dry Fit First: Test-fit components before applying glue to avoid permanent mistakes.
- Use Sandpaper: Sand edges gently for better alignment and smoother fits.
- Trim with a Craft Knife: Remove any excess material blocking proper assembly.
- Apply Light Pressure: Press pieces together firmly but avoid forcing them.
- Inspect Parts: Look for warping or defects that may affect the fitting.
Addressing fit issues early prevents frustration and ensures a solid build.
Avoiding Common Mistakes
Mistakes happen, but many are avoidable with care and preparation. Here are tips to minimize common errors:
- Organize Components: Keep all parts organized to prevent confusion during assembly.
- Follow Steps Closely: Build in the order specified in the instructions.
- Use Glue Sparingly: Excess glue can create unwanted messes and affect alignment.
- Allow Glue to Dry Fully: Rushing can weaken joints and ruin your work.
- Take Breaks: Avoid working too long, which can lead to tired mistakes.
- Test Before Painting: Ensure all parts are securely attached before adding paint or decals.
By being careful and attentive, you can avoid these common pitfalls while building your model airplane kit.
Benefits of Building Model Airplanes
Building model airplanes offers a unique and enriching experience. It not only entertains but also helps you learn skills and develop patience. These benefits make it a worthwhile hobby for enthusiasts of all ages.
Learning Skills and Patience
Creating model airplanes enhances various skills while teaching patience and focus. Here’s how:
- Improves Fine Motor Skills: Handling small parts boosts precision and hand-eye coordination.
- Develops Problem-Solving Abilities: Overcoming challenges, like fit issues, strengthens your analytical thinking.
- Enhances Attention to Detail: Painting and applying decals require careful effort and focus.
- Teaches Time Management: Completing intricate projects encourages better planning and time management skills.
- Builds Patience: Slowly crafting parts helps you stay calm and persistent.
These skills can benefit other aspects of life, making this hobby truly rewarding.
Enjoying a Fun and Rewarding Hobby
Building model airplanes is a fulfilling activity that brings joy and satisfaction. Here’s why:
- Creative Outlet: Designing and painting airplanes lets you express your imagination.
- Relaxing Activity: Focusing on the build helps relieve stress and calm your mind.
- Sense of Achievement: Completing a project gives you pride and a sense of accomplishment.
- Social Benefits: Sharing your passion with like-minded builders fosters friendships and community.
- Educational Value: Learning about aircraft history adds depth to the experience.
This hobby combines creativity, relaxation, and accomplishment, making it enjoyable and worthwhile for all builders.
Recommended Resources for Model Airplane Builders
Finding the right resources enhances your model airplane building experience. You can learn tips, tricks, and techniques.
Online Communities and Forums
Online communities and forums are great places to connect with fellow enthusiasts. Here’s how they help:
- Ask Questions: Get advice from experienced builders to overcome challenges.
- Share Projects: Showcase your builds and gain feedback.
- Learn Tutorials: Access step-by-step guides shared by community members.
- Discuss Brands: Compare different kits and tools with others.
- Find Inspiration: Explore designs and ideas for your next model.
Popular platforms include Reddit hobby groups, RC Universe, and Flying Scale Models forums. Engaging with these communities provides valuable insights and support.
Books and Tutorials
Books and tutorials offer detailed instructions and ideas to improve your skills. Here’s why they’re useful:
- Step-by-Step Guides: Learn techniques for assembly, painting, and customization.
- Advanced Tips: Discover methods to resolve complex building challenges.
- History Insights: Understand the background of different aircraft.
- Building Fundamentals: Learn the basics, like tools and materials, with beginner-friendly books.
- Visual References: Tutorials often include images for better understanding.
Recommended titles include “Airplane Modeling for Beginners” and “Mastering Model Aircraft Painting.” Many tutorials are available on websites like YouTube or model-building blogs.
Using these resources ensures continuous learning and growth in your hobby. Stay engaged and keep exploring new materials to enhance your experience.
Conclusion: Start Your Journey into Model Airplanes Today
In conclusion, the model airplane kit hobby offers a unique blend of creativity, engineering, and fun. Whether you want a relaxing pastime or a gateway to a thrilling flying experience, building and flying model airplanes can enrich your life.
Starting this hobby doesn’t require prior experience; it merely asks for patience and passion. By selecting the right kit, gathering the essential tools, and following our beginner’s guide, you can successfully break into the world of model airplanes today. Enjoy every moment of your journey, and watch as your skills develop over time. Your next favorite hobby awaits!