Introduction to Paper Mache
Paper mache is a versatile and enjoyable crafting technique that allows you to transform simple materials into beautiful art pieces. This ancient method combines paper with a binding agent to create a moldable material. If you’re curious about how to make paper mache with glue, you’re in the right place! In this step-by-step guide, we will cover everything from materials needed to project ideas. Whether you’re a beginner or a seasoned crafter, you’ll find valuable insights that will enhance your paper mache experience.
Paper mache has roots that date back centuries and has been used for various purposes, from decorative objects to practical items. Its allure lies not only in the creativity involved but also in its accessibility. You can create stunning works of art using recycled materials, making it an eco-friendly choice as well.
Understanding the Basics of Paper Mache
Before embarking on your paper mache journey, it’s essential to understand the fundamentals. The term “paper mache” derives from the French phrase “papier mâché,” meaning “chewed paper.” This technique involves tearing or cutting paper into strips, mixing it with glue or paste, and applying the mixture to a mold.
The beauty of paper mache lies in its flexibility. You can use different types of paper, including newspaper, tissue paper, or even magazines. Each type of paper lends a unique texture and appearance to your finished piece. The binding agent, usually glue or flour-based paste, holds the paper together and provides strength.
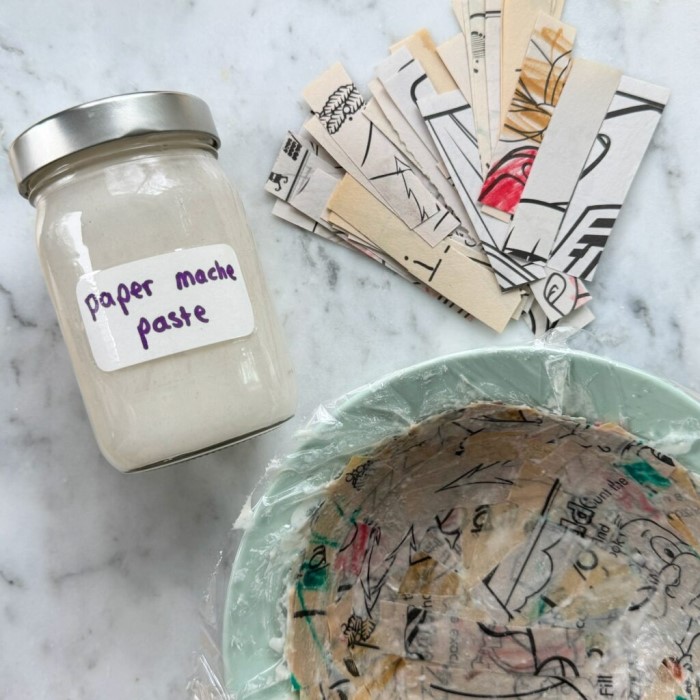
Materials Needed for Making Paper Mache with Glue
To make paper mache with glue, you’ll need a straightforward set of materials. Here’s a comprehensive list:
- Glue: The primary ingredient. White school glue or PVA glue is commonly used. These types of glue dry clear and hold well for paper mache projects.
- Paper: You can use any paper you have on hand. Old newspapers are a popular choice because they are cheap and readily available. You may also consider using colored paper for vibrant creations.
- Water: This will be mixed with glue to achieve the right consistency for application.
- Mixing Bowl: A bowl is necessary for combining the glue and water.
- Brush: Use a paintbrush or a sponge brush for applying the glue mixture to the paper strips.
- Mold: You can create a mold from various objects, such as a balloon for a round shape or cardboard for flat items.
- Non-Stick Surface: A plastic sheet or wax paper will help to prevent sticking during the drying process.
- Optional: Scissors for cutting paper, and paint or sealant for finishing touches.
Having all your materials in place makes the crafting process more efficient and enjoyable.
Step-by-Step Guide to Making Paper Mache with Glue
Step 1: Prepare Your Workspace
Start by preparing a clean workspace. Cover your table with a non-stick surface, as paper mache can be messy. Gather all your materials nearby, so you don’t waste time searching for items during the crafting process. This organization will help you stay focused and in the flow of the project.
Step 2: Create Your Glue Mixture
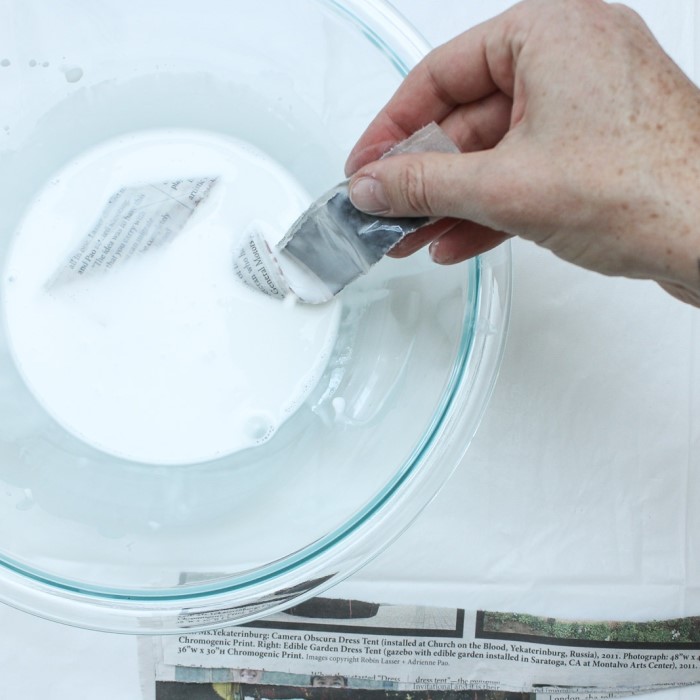
In your mixing bowl, combine equal parts of glue and water. Stir the mixture thoroughly until it’s well combined. The ideal consistency should be smooth and runny enough to coat the paper strips without being too thin. If desired, you can adjust the ratio to create a thicker or thinner paste based on your preference. For a faster-drying solution, you can use a polymer or craft glue instead of traditional PVA glue.
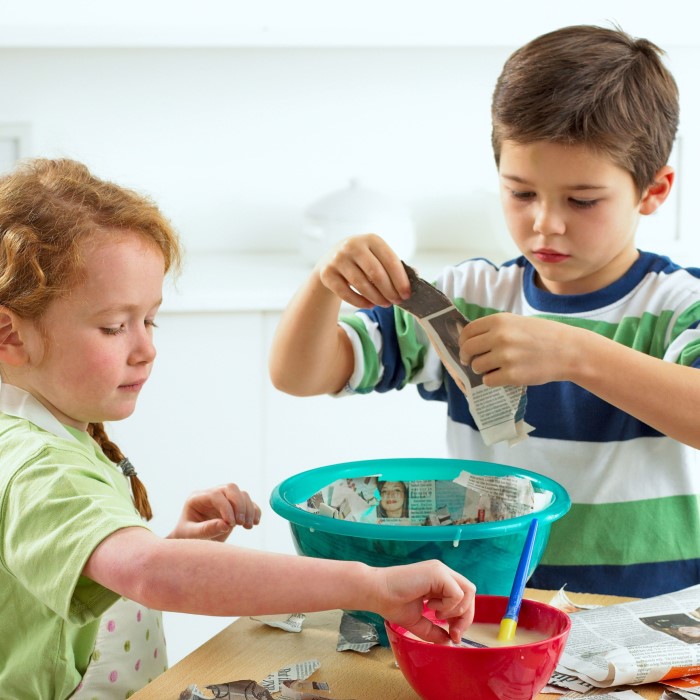
Step 3: Tear Your Paper into Strips
Now it’s time to prepare your paper. Tear your paper into strips about 1 inch wide and 6 inches long. Tearing rather than cutting is preferable because it creates softer edges that blend more easily when layered, resulting in a better finish. Feel free to mix different types of paper for various textures and colors in your creation.
Step 4: Apply the Paper Strips
Take a strip of paper, dip it into your glue mixture, and then remove any excess glue by sliding it between your fingers. Carefully place the wet strip onto your mold, ensuring it covers the surface smoothly. Press firmly to eliminate air bubbles and uneven surfaces. Repeat this process, overlapping the strips as you progress.
Step 5: Build Up Layers
Creating multiple layers is crucial to achieve a sturdy final product. You’ll want at least three to four layers for thickness. Allow each layer to dry before adding the next one. The drying leads to improved strength and durability, essential for a long-lasting piece. If working on a large project, consider placing it in a well-ventilated area or using a fan to speed up the drying process.
Step 6: Drying and Finishing Touches
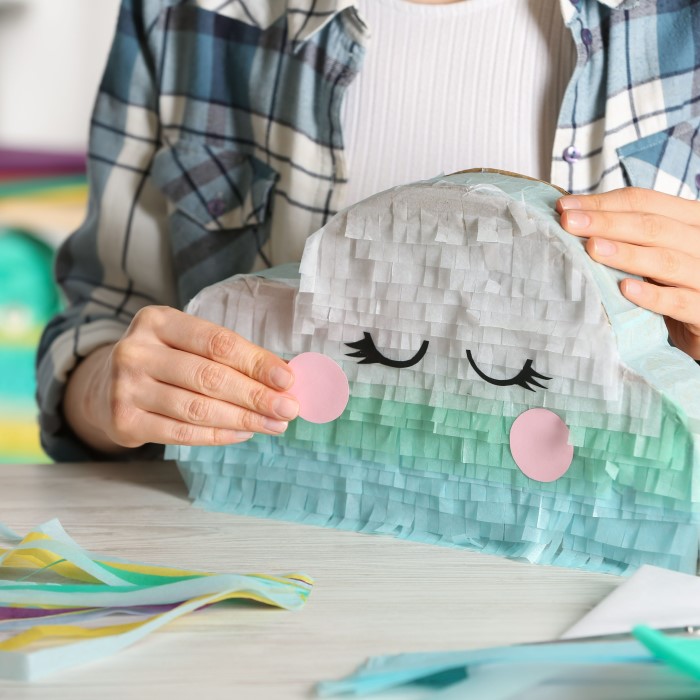
Once you’ve added your final layer, let your project dry completely. Depending on the humidity and thickness, this may take several hours or even overnight. Once dry, you can choose to paint your paper mache creation or leave it natural. If painting, use acrylic or water-based paints. Finally, you may want to seal your piece with a clear varnish or mod podge to protect it from moisture and wear.
Creative Project Ideas for Paper Mache
Now that you know how to make paper mache with glue, let’s explore some creative project ideas:
- Masks: Paper mache masks are a fun way to express creativity. You can create animal faces or fantastical characters, perfect for parties or theatrical performances.
- Bowls: Use a suitable mold to create decorative bowls. These can be used as storage for small items or display pieces. With various paint designs, you can make them truly unique!
- Sculptures: Create three-dimensional sculptures portraying animals, people, or abstract concepts. This project allows for much personal expression and experimentation.
- Decorative Objects: Fashion items like picture frames, vases, or ornaments. You can even make seasonal decorations for holidays.
- Puppet Making: Create puppets from paper mache to use for storytelling. This adds a fun element to impromptu performances!
- Holiday Decorations: Make themed decorations for events like Halloween or Christmas. Paper mache provides a lightweight and easy way to create festive displays.
- Educational Projects: Consider using paper mache for school projects. It’s suitable for science models, such as planets or anatomical structures.
- Furniture Replicas: If you’re ambitious, try making mini furniture replicas or home decor items. Paper mache can mimic shapes and designs beautifully.
Troubleshooting Common Issues
While making paper mache, you may encounter some common challenges. Here are a few solutions:
Cracked Surface
- Identify the Cause: Cracks in your paper mache surface typically indicate that the layers applied were too thin. When this happens, the underlying structure lacks the strength needed to hold its shape during the drying process.
- Layering Technique: To prevent cracks, ensure that you build up enough layers. Generally, applying at least three to four layers helps create a more robust and resilient structure.
- Drying Process: If the drying process occurs too quickly, it can cause the outer layer to dry more rapidly than the inner layers. This imbalance can lead to cracking. Allow adequate time for each layer to dry thoroughly before applying the next one.
- Environmental Factors: Consider your drying environment. If you’re in a very warm or breezy area, you may need to slow the drying process to avoid cracks. Try moving your project to a cooler, more stable environment.
Sticky Residue
- Insufficient Drying Time: A sticky or tacky feel on your finished project is usually due to insufficient drying. This indicates that the glue hasn’t cured fully, which can affect the overall integrity of your piece.
- Patience is Key: Allow your project to sit for an extended period in a well-ventilated space to facilitate even drying. Depending on size and humidity, drying may take anywhere from several hours to a full day.
- Using a Hairdryer: If you’re short on time, you can use a hairdryer set to low heat to gently speed up the drying process. Keep the hairdryer at a safe distance from the project to avoid overheating or melting the paper.
- Check Sealing Methods: If you’ve sealed your project with paint or varnish prematurely, it can also lead to a sticky finish. Make sure to allow enough drying time before applying any coatings.
Not Sticking Well
- Assess Adhesion: If you notice that your paper strips are not adhering properly to the mold or to each other, it’s crucial to re-evaluate your glue mixture for optimal performance.
- Adjust Glue Consistency: The glue might be too thick or diluted; therefore, adding a bit more water can help make it more workable. Aim for a balance that allows the glue to soak into the paper and bond effectively.
- Reapply Glue Strategically: For areas where strips are peeling, gently peel them back, reapply the glue, and press them down again firmly. This attention ensures a good bond and helps eliminate air bubbles.
- Consider the Surface: If the surface of your mold is too smooth or shiny, the glue may struggle to adhere. Lightly scuff the surface with sandpaper or use a primer before applying the paper strips for better adhesion.

Warping
- Understanding Warping: Warping often occurs in larger paper mache projects. This can be a result of applying too much glue, which adds excess weight, or if the underlying mold isn’t providing adequate support.
- Monitoring Glue Application: Pay attention to how much glue you’re using; too much can lead to sogginess, which contributes to warping as the project dries unevenly.
- Choose the Right Mold: Ensure that the mold you are using is sturdy and resistant to bending. Using a heavier base mold or a shape that distributes weight evenly can help prevent warping.
- Support Structures: For larger projects, consider adding support underneath, such as cardboard or wooden frames. These enhancements provide more stability and help maintain the intended shape throughout the drying process.
Final Thoughts
In summary, learning how to make paper mache with glue is both rewarding and fun. This craft fosters creativity and can result in beautiful works of art suitable for various purposes. With the minimal materials required and the straightforward steps outlined in this guide, you’ll be well on your way to creating stunning paper mache projects. Whether you want to engage in a solitary crafting session or involve friends and family, paper mache encourages creativity across all age groups.
We hope this guide inspires you to explore the endless possibilities that paper mache has to offer. Remember, each project is an opportunity to express your unique style and creativity. Happy crafting!