Introduction
Paper mache is a versatile and fun crafting technique that allows you to create a variety of projects, from decorative items to functional pieces. It’s an engaging activity for kids and adults alike, fostering creativity and artistic expression. The beauty of paper mache lies in its simplicity. All you need is a few basic materials and a few hours to unleash your artistic potential. In this guide, we will provide you with a simple paper mache recipe that is easy to follow, along with tips and ideas to make the most of your crafting experience.
Understanding the Basics of Paper Mache
Before diving into the recipe, let’s explore the basic concept of paper mache.
1. What is Paper Mache?
- Definition and Overview: Paper mache, or papier-mâché, is a crafting technique that involves using paper pieces mixed with an adhesive to create sculptures or decorative objects. The paper can be layered to build strength and shape, making it an ideal medium for various projects.
- Historical Context: This crafting technique dates back centuries and has been used worldwide for various purposes, including art, décor, and functional items.
2. Benefits of Paper Mache
- Eco-Friendly: Paper mache utilizes recycled paper products, making it an environmentally friendly craft option. This helps reduce waste and encourages sustainable creative practices.
- Accessible to All Ages: One of the greatest advantages of paper mache is its accessibility. With simple materials and tools, almost anyone can enjoy the fun of creating with paper mache.
What You Need for a Simple Paper Mache Recipe
Having the right materials at your fingertips is key to a successful paper mache project.
1. Essential Materials
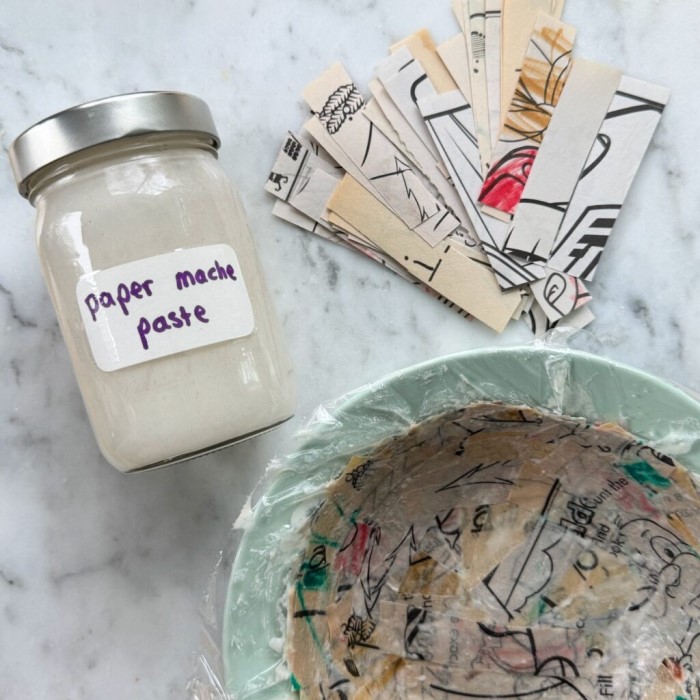
- Paper: Old newspapers, magazines, or any scrap paper work well. These materials can easily be torn into strips or squares.
- Adhesive: There are various adhesives you can use in your paper mache recipe. You can opt for flour, glue, or even a water-based adhesive.
- Water: Water is necessary to create the paste or glue mixture that bonds the paper layers together.
- Mixing Bowl: A sturdy bowl for mixing your paper mache paste.
2. Optional Supplies
- Masking Tape: Useful for securing the base structure or shape before applying paper mache.
- Sealant: Once your project is complete, a sealant can be applied to protect it and enhance durability.
Step-by-Step Guide: Simple Paper Mache Recipe
Now that you have all the materials, let’s go through a comprehensive recipe for making paper mache.
1. Prepare the Paper
- Tearing the Paper: Start by tearing your paper into strips or pieces. Aim for a size that is manageable for layering, typically about one inch wide.
- Setting Up Your Workspace: Cover your work surface with a plastic sheet or old newspapers to keep things clean. This also allows for easy cleanup later on.
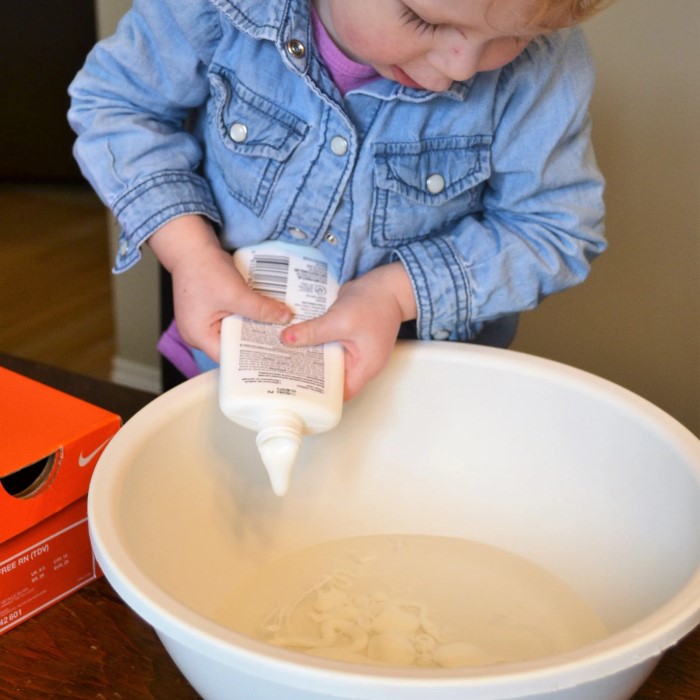
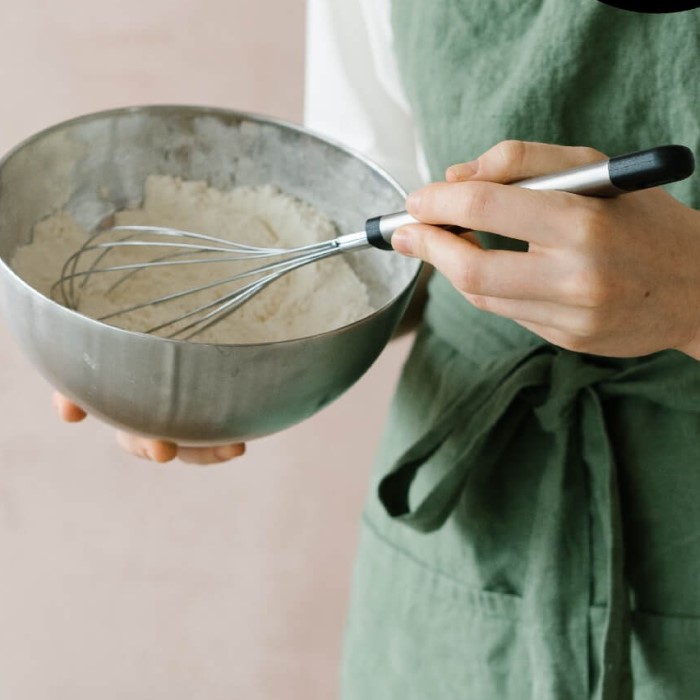
2. Create the Paper Mache Paste
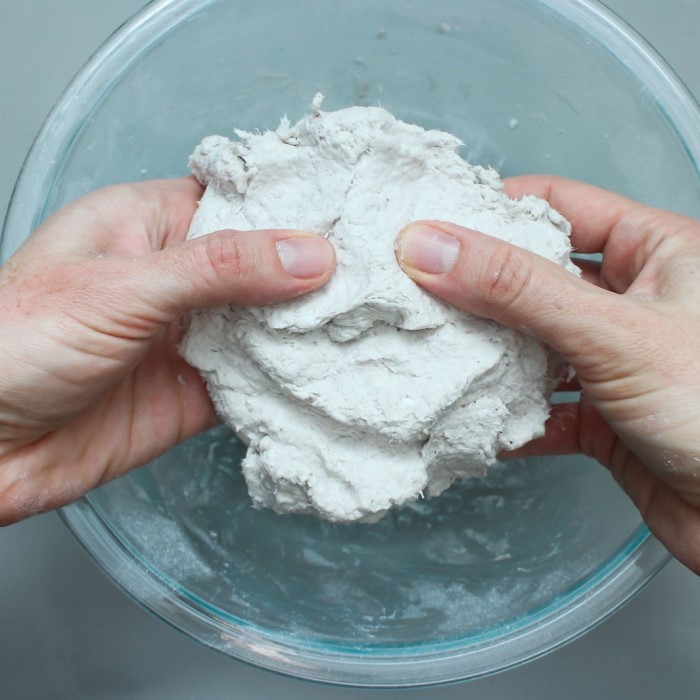
- Basic Flour and Water Paste: Mix one part flour with two parts water in your mixing bowl. Stir thoroughly to eliminate lumps, creating a smooth paste.
- Glue Mixture Option: If you prefer a glue mixture, combine one part white glue with one part water in the mixing bowl. Stir the mixture well until it reaches a uniform consistency.
3. Application of Paper Mache
- Submerging the Paper: Take your paper strips and submerge them in the paste mixture, ensuring they are coated evenly. Allow excess paste to drip off.
- Layering: Start applying the wet strips to your chosen form, whether it’s a balloon, wireframe, or sturdy object. Overlap the strips slightly to prevent gaps. Continue to layer until you reach your desired thickness.
4. Allowing to Dry
- Drying Cycle: Once your initial layers are applied, set the project aside in a safe area to dry completely. This may take up to 24 hours, depending on humidity and thickness.
- Additional Layers: After the first layer is dry, consider adding more layers for extra durability. Apply the same methodology until you achieve the desired strength.
Tips for Successful Paper Mache Projects
In addition to the basic instructions, follow these tips for the best results.
1. Ensure Even Application
- Smooth Application: When applying paper strips, press them down gently to eliminate air pockets. This will help the paper adhere better and create a smoother surface.
- Layer Gradually: Build your project slowly, allowing each layer to dry fully before adding more. This prevents sagging or collapsing in the structure.
2. Use a Variety of Paper Types
- Mix Your Materials: Don’t hesitate to experiment with different paper types. Mixing newspaper, tissue paper, and cardstock can add interesting textures and colors to your finished project.
3. Creative Ideas for Paper Mache Projects
Crafting a Pinata:
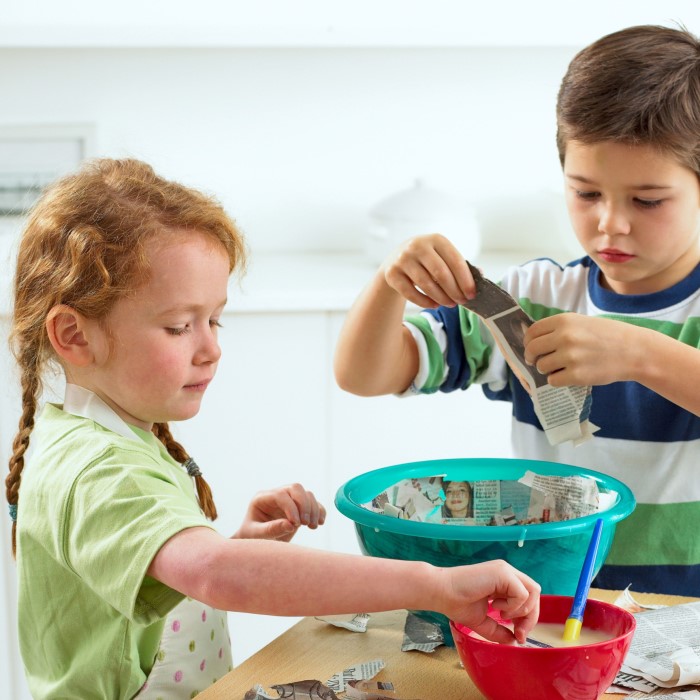
- Materials Required: Gather necessary supplies including balloons, newspaper, glue, water, and a mixing bowl. These materials are essential for creating a sturdy and colorful pinata.
- Creating the Balloon Structure: Begin by inflating a balloon to your desired size, as this will serve as the base structure for your pinata. Ensure that the balloon is securely tied to prevent air from escaping during the crafting process.
- Preparing the Paper Mache Mixture: Mix equal parts of glue and water to create the paper mache paste. Alternatively, you can use a flour and water mixture as a more traditional recipe. This mixture will adhere the paper layers together.
- Layering with Newspaper: Tear strips of newspaper, dipping them into the paper mache mixture before applying them to the balloon. Make sure to cover the entire surface, building up multiple layers for durability. Aim for at least four to five layers for a solid pinata.
- Drying Process: Allow the layers to dry completely before proceeding; this could take several hours or overnight. Once dry, carefully pop the balloon and remove it from the inside, leaving a hollow shell.
- Decorative Touches: Use colorful tissue paper, paint, or other crafting materials to decorate your pinata. This adds character and makes it appealing for party guests. Think of designs that match your party theme for a cohesive look.
- Filling the Pinata: Once decorated, cut a small opening at the top or bottom to fill the pinata with candy or small toys. Seal it securely to ensure that the contents stay inside until the big reveal.
Sculptures and Masks:
- Exploring Artistic Opportunities: Paper mache can be used to create unique sculptures or artistic masks, allowing for a wide range of creativity and expression. The malleable nature of paper mache makes it ideal for both simple and intricate designs.
- Starting with a Framework: For sculptures, consider building an armature with materials like wire or cardboard to support the shape you want to create. This foundation helps with stability as you apply your paper mache layers.
- Designing Masks: If making masks, shape the paper mache directly over a facial mold or a chosen surface. This allows you to create custom-fitting masks that can be decorated in various styles.
- Intricate Designs: The flexibility of paper mache allows for detailed embellishments, including textures, patterns, and painted designs. Use smaller strips or additional materials such as fabric or beads to add dimension and interest.
- Finishing Touches: Once your sculpture or mask is dry, consider painting it with vibrant colors or adding finishing touches such as glitter, sequins, or additional decorative elements to enhance its artistic expression.
- Personalization: Encourage personal creativity by allowing everyone to design their own masks or sculptures. This can be a fun and engaging group activity that fosters artistic skills and appreciation for the craft.
Caring for Your Completed Paper Mache Project
Once your paper mache project has dried and achieved the desired shape, some care considerations are necessary.
1. Sealing Your Work
- Apply a Sealant: To protect your project from moisture and wear, consider applying a clear sealant once the piece is completely dry. This can also enhance colors and textures.
- Painting Options: If you want to add color, use acrylic paints after sealing. This helps prevent water damage, preserving the vibrant hues.
2. Storage Recommendations
- Storing Dry Projects: Keep your completed projects in a dry, cool place to avoid warping or deterioration. Avoid direct sunlight as prolonged exposure can affect the colors.
- Display with Care: When displaying your projections, use shelves or hooks that will not place too much pressure on the structures to avoid potential damage.
FAQs About Paper Mache
What is the best glue mixture for paper mache?
The best glue mixture for paper mache can vary based on personal preference. A popular choice is a simple flour and water paste, or a combination of white glue and water.
Is paper mache flour or glue better?
Using flour offers a more traditional and cost-effective approach, while glue mixtures can provide better adhesion and produce a smoother finish. Ultimately, both can yield impressive results.
How do you make the strongest paper mache?
For a stronger paper mache project, apply multiple layers, ensure even application, and use a strong adhesive mixture such as white glue and water. Allow adequate drying time between layers to build strength.
What projects can I make with paper mache?
You can create a variety of projects including decorations, sculptures, masks, pinatas, and even functional items like bowls or planters using the paper mache technique.
Conclusion
In summary, the world of paper mache is filled with creativity and fun. With this simple paper mache recipe, you can jumpstart your crafting journey and explore a variety of projects, from decorations to sculptures. Remember to collect the necessary materials, follow the step-by-step instructions, and enjoy the process of creating something uniquely yours. Whether a beginner or an experienced crafter, paper mache offers endless opportunities for artistic expression, so gather your materials and start crafting today!