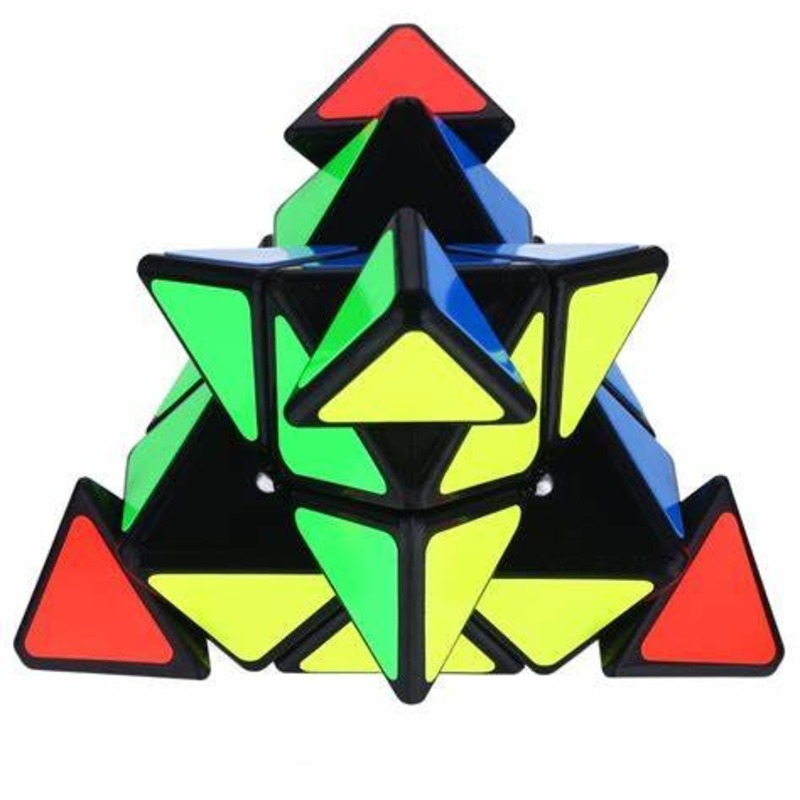
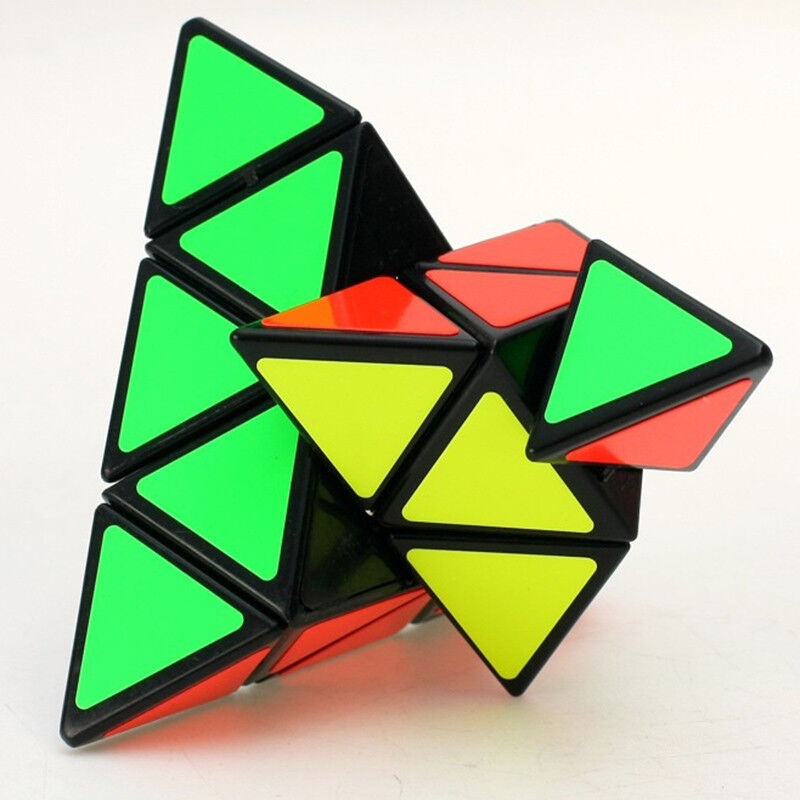
Introduction to the Triangle Rubik’s Cube
The Triangle Rubik’s Cube, also known as the Pyraminx, is a puzzle that can intrigue and challenge. Different from the classic cube, it has a pyramid shape. If you’re used to the square one, this version will test your skills anew. Just like its cubic cousin, it has rotating pieces that scramble its colored faces. Your goal with the Triangle Rubik’s Cube is to twist and turn these pieces. You want to return each side to a solid color. It may sound simple, but solving it is quite the feat! Rest assured, with this guide, you’ll learn how to solve the triangle Rubik’s cube step by step.
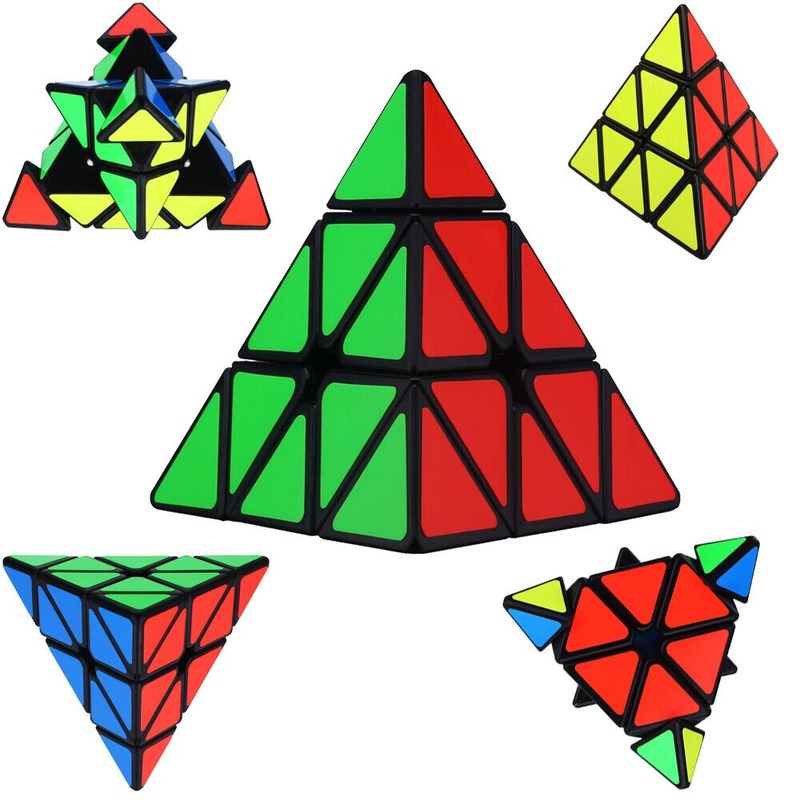
As with any puzzle, familiarizing yourself with its parts is key. The Triangle Rubik’s Cube has centers, edges and tips. Since it’s a tetrahedron, each side has a base that forms a triangle. Each triangle side is made of smaller triangles with distinct colors. When correctly solved, each side of the puzzle should show only one color. To get there, you’ll need a bit of patience and a lot of practice. But don’t worry! We’ll start with the basics and guide you through every step. Let’s embark on this puzzle-solving adventure together!
Essential Terminology and Notation
Before diving into how to solve the Triangle Rubik’s Cube, it’s important to grasp the basic terminology and notation. This will make it easier to follow the solving steps. Each component of the puzzle has a specific name, and moves have corresponding notations.
Components of the Triangle Rubik’s Cube
There are three types of pieces in the Triangle Rubik’s Cube:
- Centers: These are the stationary pieces at the center of each face.
- Edges: The pieces that sit between the centers and can move around the puzzle.
- Tips: The small, turning pieces at each corner of the pyramid.
Move Notations
When solving the cube, we use letters to represent moves:
- R: A clockwise turn of the right side of the cube.
- R’: A counterclockwise turn of the right side.
- L: A clockwise turn of the left side.
- L’: A counterclockwise turn of the left side.
Each turn affects the position and orientation of the pieces. Understanding move notations is crucial. This language of letters and directions, similar to chess notation, is standard. It allows anyone to follow a sequence of moves easily. Remember that a turn is typically a 120-degree rotation of the entire layer, as the pyramid only has three sides at its base.
Grasping this terminology and notation now will help streamline the solving process. Master these, and you’ll be ready to begin tackling the base of the cube!
Understanding the Basic Mechanics
Before learning how to solve the Triangle Rubik’s Cube, it’s essential to understand its mechanics. This knowledge will be the foundation for all the steps that follow. Here, we’ll explore how the puzzle moves and how each action impacts the configuration.
The Triangle Rubik’s Cube consists of a central axis and layers that turn around this axis. Each layer can rotate independently, which allows the pieces to mix in countless ways. Think of it as rotating layers around a fixed core. This core is what keeps the puzzle’s structure stable—even when its appearance is in constant flux.
A crucial mechanic to grasp is that only the corners, or the ‘tips,’ can move freely. They can rotate in place without disturbing any other pieces. On the other hand, the ‘edges’ can only move in relation to the ‘centers.’ When you turn a layer, the centers stay put while the edges shuffle around them.
Pay attention to the way the pieces interact. Notice how a single turn can impact multiple pieces at once. Unlike a square Rubik’s Cube, the triangular design allows for some unique twists and turns. Keep these in mind as they will be key when it comes to solving the puzzle step by step.
Having a strong grasp of these mechanics will make the following solving steps much clearer. Soon, you’ll move from just twisting and turning randomly to making strategic moves that lead to a solved cube.
Step 1: Solving the Base
To solve the Triangle Rubik’s Cube, begin with the base. This is your foundation. Choose one color to start with; many prefer to begin with the most distinct color. This makes it easier to distinguish the pieces for your base layer.
Look for the center piece of your chosen color. Your aim is to align the surrounding edge pieces. These should match in color to the center. Remember, centers don’t move, so align edges to them.
Next, adjust the tips to match the color of your base. Rotate them independently. This won’t affect the rest of your cube.
Now, focus on the edges. Turn the layers to move the edges into their correct positions. You may have to turn the puzzle several times. Realign the edges with the center.
When each edge matches the center and the tips align, your base is complete. This step is simple if you follow the sequence. Do not rush, and don’t skip ahead. A solid base is key for the following steps.
As you work, keep in mind the terminologies and notations learnt earlier. These will help you understand and execute each move precisely. Patience and practice are important. With each attempt, you’ll get faster at completing the base layer.
Step 2: Positioning the Middle-Layer Edges
With the base layer complete, let’s move to the middle-layer edges. Your goal is to place these edges correctly. Do this while matching the colors to the centers. By now, you should have one layer with a uniform color. This is your reference point. The middle layer is next on your list.
First, locate an edge piece in the top layer. Check if it has a color matching the middle layer. If it does, decide which side it needs to join. Use the R, L, R’, and L’ moves you learnt earlier. These moves will help place the edge in the correct position.
If the edge needs to go to the right, follow this sequence:
- Turn the top layer to move the edge over the right side.
- Now, execute an R move.
- Then, twist the top layer in the opposite direction.
- Finish with an R’ move.
Repeat the sequence if necessary.
To place an edge on the left, do the following:
- Start by moving the edge above the left side.
- Make an L move.
- Rotate the top layer in the opposite direction.
- Complete it with an L’ move.
Again, repeat if the edge is not yet in place.
Keep working on all the middle-layer edges. Move them until they’re between their matching centers. It might take a few tries. But, with practice, this step will become quicker. Once every middle-layer edge is positioned correctly, you’re ready for the next challenge.
Step 3: Orienting the Last Layer
After successfully positioning the middle-layer edges, you can now focus on the last layer. In this step, your task is to orient all the remaining pieces so that they show their correct colors on top. This does not mean the pieces are in their final places, but rather that the top color of each piece matches the color of the entire top face.
Here’s how to orient the last layer:
- First, look at the top face of the Triangle Rubik’s Cube and identify any edges that are not oriented correctly.
- Using the move notations, perform sequences that turn these edges without disrupting your solved layers.
- This may involve a series of R, R’, L, and L’ moves. You’ll use these to flip the edges around.
- The aim is to get a uniform color on the top, even if the sides of these pieces don’t match the colors of the middle layer yet.
Orienting the last layer may seem complex at first. Patience and repetition of the moves will lead to progress. You might need to repeat sequences several times. Make sure you master each step before moving on to avoid confusion.
Remember to keep the base layer at the bottom and the middle layer in its place while working on the top. This keeps the already solved parts intact. Soon, you’ll see the top layer displaying one solid color. This is a significant milestone in solving the Triangle Rubik’s Cube!
Step 4: Permuting the Last Layer Pieces
After orienting the last layer, the colors on top now match. But the pieces may not be in the right place. Now, we permute, or properly arrange, the pieces of the last layer.
To do so, focus on the edges first. Check if any edges need to move to a different spot. Use R, L, R’, and L’ moves from the earlier steps. You will often use sequences that rotate multiple pieces at once.
Here’s a simple process to permute the edges:
- Identify which edges need to be rearranged.
- Move the top layer until an unsolved edge is on the right.
- Apply an R’ move, then rotate the top layer away from you.
- Use an R move to bring the edge back in line with the others.
If a piece needs to go to the left instead, just reverse the process.
- Line up the top layer so the unsolved edge is on the left.
- Execute an L’ move, rotate the top layer towards you.
- Follow with an L move to position the edge correctly.
Repeat these moves until all the last layer edges are arranged.
For the corners, your goal is to get them to the right spot first. They don’t need to be oriented correctly just yet. You might need to cycle through the corners. To move a piece to a new corner, twist the top layer to place it correctly.
Once all pieces are in their proper places, you’ve nearly solved the cube. Remember, the key to success is keeping the base and middle layers untouched. This way, you won’t undo the work you’ve already done.
Patience and practice are crucial. Keep trying, and you’ll find the moves that work best for you.
Tips and Tricks for Efficient Solving
As you approach mastering how to solve the Triangle Rubik’s Cube, it’s helpful to know some tips and tricks. These will make your solving process more efficient. Remember, practice makes perfect. But knowing a few shortcuts can help speed things up.
- Start with the most distinct color: Choosing a color that stands out can simplify the first step. It helps in identifying pieces faster.
- Learn the algorithms: Specific sequences of moves solve particular problems. Memorize these algorithms for a smoother solving experience.
- Keep the cube oriented the same way: Fix your starting base at the bottom during the solving process. This avoids confusion.
- Look ahead: While executing one move, try to predict the next step. This minimizes pauses and speeds up the process.
- Use finger tricks: Practice turning layers with quick finger movements. This reduces the time you take between turns.
- Stay consistent: Use the same method each time to build muscle memory. This helps you solve the cube more quickly over time.
- Reduce unnecessary moves: If a step seems too complicated, see if there are ways to cut down on moves.
- Solve in sections: Don’t think about solving the whole cube at once. Focus on one layer or section at a time.
- Keep practicing: Repeating the solving process improves speed and familiarity with the cube.
By integrating these tips into your practice, you will likely see improvements in your solving time. Stay patient and consistent with your efforts. With time, solving the Triangle Rubik’s Cube will become second nature to you.
Common Mistakes to Avoid
When learning how to solve the Triangle Rubik’s Cube, it’s easy to fall into some common traps. Avoid these mistakes to improve your solving technique and efficiency:
- Forcing the pieces: Never force the pieces to turn. This might break the cube or misalign it, which can hinder your progress.
- Skipping steps: Trying to jump ahead can cause more confusion. Always complete each step before moving to the next.
- Ignoring the base layer: The base is your guide. If it’s not right, the rest won’t be either. Make sure it’s correct before you move on.
- Mixing up move notations: Getting R and R’, or L and L’, mixed up can set you back. Be clear on your moves and turn directions.
- Not realigning the cube: After each move, ensure the cube’s layers are aligned. This will avoid extra steps in fixing the alignment later on.
- Rushing through: Speed comes with time and practice. Don’t rush or you’ll make mistakes. Go slow, learn the patterns, and then speed up.
- Losing patience: It can be frustrating to not see immediate success. Stay patient and give yourself time to learn.
- Incorrectly orienting the cube: Keep the base layer constant. Changing its position can disrupt your reference point.
By steering clear of these errors, you’ll enhance your ability to solve the Triangle Rubik’s Cube. Focus on the process, and soon you’ll be solving with ease.
Practice Strategies for Improvement
Improving your skills in solving the Triangle Rubik’s Cube, or Pyraminx, takes practice and a thoughtful approach. Here are some strategies that can help you get better:
- Regular Practice: The more you solve the cube, the better you get. Dedicate time each day to practice.
- Timed Solving: Use a timer to track your solving times. Aim to improve your speed with each session.
- Solve with Distractions: Practice solving the cube in different environments. This can help increase your concentration.
- Challenge Yourself: Once you get comfortable, try solving the cube with one hand, or blindfolded.
- Review and Analyze: After solving, review your moves. Look for areas to optimize your technique.
- Record Solving Sessions: Recording your solves helps identify slow points and areas for improvement.
- Vary Starting Colors: Start with different base colors to become well-rounded in your solving approach.
- Mental Mapping: Visualize solving the cube before making your moves. This can sharpen your cognitive skills.
- Join a Community: Find a group of fellow cube enthusiasts. Share tips and learn from others.
- Stay Updated: Keep up with new solving techniques and updates in the cubing community.
Consistent practice, combined with these strategies, helps build your proficiency in solving the Triangle Rubik’s Cube. Stay patient, stay curious, and enjoy the process of improving your puzzle-solving talents.